-
April 2025 Turning Challenge: Turn an Egg! (click here for details) -
Congratulations to Kelly Shaw winner of the March 2025 Turning Challenge (click here for details) -
Congratulations to Guillaume Fontaine for "Nebules" being selected as Turning of the Week for April 6, 2025 (click here for details) -
Welcome new registering member. Your username must be your real First and Last name (for example: John Doe). "Screen names" and "handles" are not allowed and your registration will be deleted if you don't use your real name. Also, do not use all caps nor all lower case.
You are using an out of date browser. It may not display this or other websites correctly.
You should upgrade or use an alternative browser.
You should upgrade or use an alternative browser.
What’s on your lathe?
- Thread starter Rusty Nesmith
- Start date
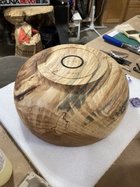
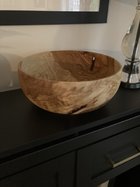
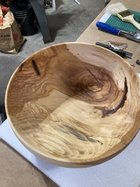
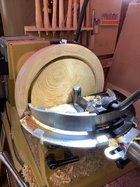
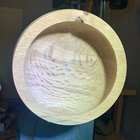
That is an unusual way to cut a burl with the tree that it grew on. The end grain on a full round of cherry is definitely going to develop radial checks as the one did. What is surprising is that one the checks didn't extend out on the non burl rim. One way to deal with checks is to first spray on a light coat of shellac before the CA but it is too late for that now.Black Cherry doesn't grow anywhere near where I live so anytime I get a chance to turn some I take it. This is a 16" shallow bowl I'm working on from a cherry burl "cookie". So it has grain going every which way and a lot of cracks that I'll have to work on. I already screwed up and tried using CA in some of the endgrain so I'll have to fix that somehow.
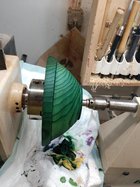
Third turning today of a hickory bowl I turned 2x a few months ago. Didn't like the warping and shape and was ready to throw It out. I took Jim Sprague's advice and attached a glue block on the bottom using hot melt glue I melted in an electric frying pan (bought at a thrift shop). The bowl was originally 15 inches wide and 7 inch deep, was warped at least 3/4 inch out of round. I was left with 3/16" in the end, wow thinnest I have every turned. Some features I filled with coffee grinds and CA for the first time. Reversed after removing glue block (sawed off using handsaw), and finished bottom of bowl with my initials and type of wood noted. Sanded on lathe using Doctors Wood Shop walnut oil and wax solution while sanding and finally oiling bottom when finished. Long day but am happy with the outcome.
Attachments
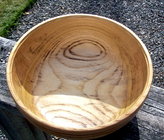
I rarely do bowls large enough to core but decided to make a new salad bowl this morn. Figured instead of covering my floor with shavings, I'd save a core for a smaller bowl. This is end-grain and the bit did not like it but got 'er done. It had 3 good sized limbs growing out of it, hoping for some nice grain patterns when finished. It sat in my shed for about 4 years, was from I believe an ash tree that a storm took out.
Attachments
Sam,
Is that ash?
What dye did you use?
Is that ash?
What dye did you use?
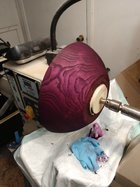
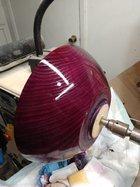
Ash yes. Eggplant is the color. RIT all purpose liquid dye. Same brand as my other post. I thought that one was tangerine, noticed yesterday that it is sunshine orange.Sam,
Is that ash?
What dye did you use?
Here's one coat of arm r seal.
Attachments
More ash, this one a natural edge bowl. Notice the borer tracks all though the cambium layer-the bark was like powdered cork, not a chance it could hold. It also had some horrific punky end-grain tear-out that responded beautifully to shear-scraping over dried shellac. This one also had some deep bark inclusions that made it tricky to finish all the way to the bottom; in fact the bottom 3rd was downright treacherous with voids and rubbery bark inclusions. A few passes with a downward-canted large NRS sweeping to the center at about 1100 rpm did the trick, and there's some amazing color and grain patterns. I'm thinking about deepening all the color and grain swirls with amber shellac or something similar. As for the borers, my whole pile is eat up with them, it seems (especially the ash, ambrosia maple and sweetgum logs I have on a pallet). I'm thinking about just spraying the whole pile with outdoor insecticide.
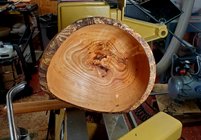
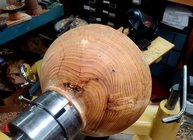


I don't think that would do it . Either tenting with a evaporation solution (professional work) or a powder or solution containing borate is needed. Bora-care or Tim-Bore. I'm thinking about just spraying the whole pile with outdoor insecticide.
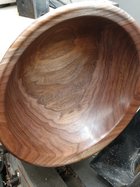
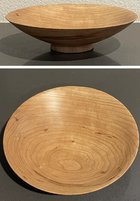
We have a quick trip this weekend to hear a daughter and her band in concert. Staying with one of her neighbors whom we befriended. So I chucked a small piece of walnut and turned a delicate small bowl yesterday as a ‘thank you’ for her hospitality.
(I keep forgetting to take photos while it was actually still ‘on’ the lathe )
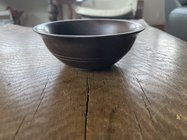
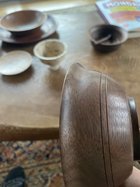
(I keep forgetting to take photos while it was actually still ‘on’ the lathe )


I'm loving all this walnut! Reminds me I've got some great black walnut rough-turns now dry enough to finish.
I like the feel of turning walnut. It’s the buttery softness of it, and it seems to almost always have a predictability to it. That ‘feel’ brings such enjoyment. Like biting into a rich, European chocolate bar!
Where is this monthly giveaway?
You have to friend GotWoodLLC on Facebook and reply to their monthly give away post.
Thanks
Nice haul, Phil! I'm close enough to drive to their warehouse in Donald's, SC down in the middle of nowhere in the Midlands area of South Carolina. I've been there to get wood a few times, and they get in some great stuff; even better if you can pick through their stacks in person! They're just a great couple of guys running a family business. Their kiln-dried, waxed bowl blanks can't be beat when I'm buried at work and need a quick, easy turn.I won this on the monthly give away sponsored by Got Wood! Black limba, cherry, curly maple, and figured maple.
View attachment 55698
I won this on the monthly give away sponsored by Got Wood! Black limba, cherry, curly maple, and figured maple.
Sweet!
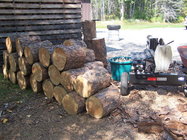
Didn't do much turning for a while, cut down and hauled a couple logs, buck and split for firewood, and now all done and stacked, back to turning some.
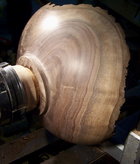
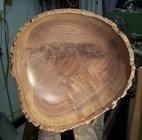
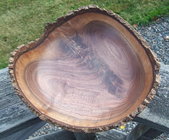
I have eyed this natural edge Black Walnut crotch a few times before finally tackling this piece I rough turned in 2007, dried just fine but not evenly in that the limbs of this crotch are not equal in size.
The piece had a recess and mounting and rotating it showed that the center had moved quite a bit, so I decided to turn a off-center piece that would be a tenon that I then fit into the recess so I would have enough wood all around to return it, (made a short movie and will try to show how much the bowl moved out of center), oops it does not work
Anyway that is what I did and it worked just fine turning the piece.
This was the last bit of the bucked wood, and is now all done.
Here is the piece before returning it.
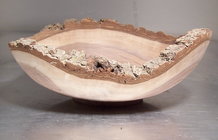
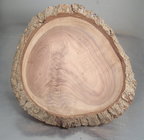
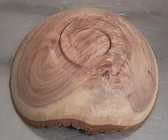
I have eyed this natural edge Black Walnut crotch a few times before finally tackling this piece I rough turned in 2007, dried just fine but not evenly in that the limbs of this crotch are not equal in size.
The piece had a recess and mounting and rotating it showed that the center had moved quite a bit, so I decided to turn a off-center piece that would be a tenon that I then fit into the recess so I would have enough wood all around to return it, (made a short movie and will try to show how much the bowl moved out of center), oops it does not work
Anyway that is what I did and it worked just fine turning the piece.
This was the last bit of the bucked wood, and is now all done.

Here is the piece before returning it.


Last edited:
Very nice! Interesting grain - the interior reminds me of a "strange attractor" from chaos theory...
Cheers.
Barry W. Larson
Calgary, Alberta, Canada eh!
Cheers.
Barry W. Larson
Calgary, Alberta, Canada eh!
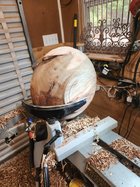
1st time out in the shop since recovering from Covid. Worked with a difficult chunk of pecan. Riddled with bark inclusions and post beetle holes, I ended up turning away more than I wanted to. The big chunk in the 1st photo ended up flying off the lathe and would have hit me if I wasn't standing to the side.
I moved it to the kiln to dry but give this one 1 chance in 5 of making it to the finish process. I would be a shame to waste such pretty grain but it is what it is.
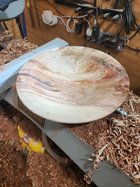
I moved it to the kiln to dry but give this one 1 chance in 5 of making it to the finish process. I would be a shame to waste such pretty grain but it is what it is.


Hi Sam:Walnut, 11.5 x 4.5 TransTint "bordeaux" on the outside and not scratches on the inside but Howard's butcher block conditioner that hasn't soaked in yet.
I wasn't sure how I'd like the dye on walnut but it's growing on me.
From what I can see of the dye, I think the colour looks pretty neat.. Please show us more when you are finished. I usually just think to colour walnut with a walnut stain to even it out, but here you have me thinking about stepping outside that box...
Cheers.
Barry W. Larson
Calgary, Alberta, Canada eh!
It does have some beautiful figure. Would epoxy be out of the question once it's reasonably dry and stable?1st time out in the shop since recovering from Covid. Worked with a difficult chunk of pecan. Riddled with bark inclusions and post beetle holes, I ended up turning away more than I wanted to. The big chunk in the 1st photo ended up flying off the lathe and would have hit me if I wasn't standing to the side.
I moved it to the kiln to dry but give this one 1 chance in 5 of making it to the finish process. I would be a shame to waste such pretty grain but it is what it is.
View attachment 55728 View attachment 55729
I treated the bark inclusions with thin CA. It looks like this might be a good candidate for CA/coffee ground treatment when the time comes.It does have some beautiful figure. Would epoxy be out of the question once it's reasonably dry and stable?
"Rick solved my skew problem. What more could I ask for?"
My goal for my next class-that's it.
My goal for my next class-that's it.
Nice @Mike Novak ! I particularly like the egg laying on its side. Wonderful form.
I'm not certain about when I rough turned this one, had my youngest son help me with loading the pieces and especially a very large Black Walnut that was like 3 stems 3 feet or so above the ground, and I had my Black Expedition, so it was after 98, but not long after, maybe 2000.Cool thinking about that process Leo. How old was the roughed bowl?
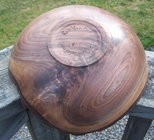
I did remove the tenon and finished the bottom about a week ago, the picture shows the plugged holes, been debating with myself of maybe making a dark ring where the plus are now, then again maybe not, it is part of the bowl's history
Still have to sign it.
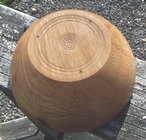
Last edited:

