• Congratulations to Alex Bradley winner of the December 2024 Turning Challenge (click here for details)
  • Congratulations to Kris DeVault for "Tri-Corner Trifecta Bowl" being selected as Turning of the Week for December 30, 2024 (click here for details)
  • Conversations are now Direct Messages (click here for details)
  • Welcome new registering member. Your username must be your real First and Last name (for example: John Doe). "Screen names" and "handles" are not allowed and your registration will be deleted if you don't use your real name. Also, do not use all caps nor all lower case.

What’s on your lathe?

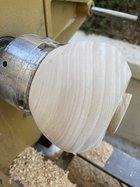
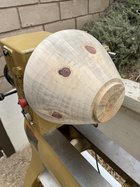
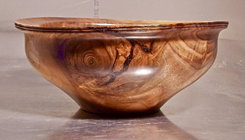
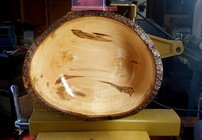
image.jpgSmall piece
from a very unpromising bit of branch that’s somehow been hiding in the shop for years without going into the firewood bin. I initially thought it was wax leaf myrtle, but upon closer inspection it appears to be tan oak. Pith runs right through the center, but only one very superficial crack. There was evidence of bugs just under the bark, but only two holes remain after roughing it down to this shape. Time to go into a ziploc bag for a while to see if any more bugs or cracks appear. If not, it will get hollowed out sometime next fall.
 
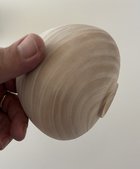
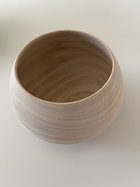
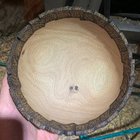
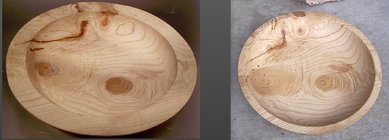
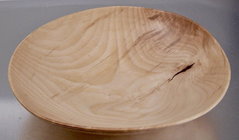
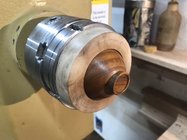
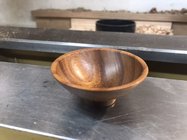
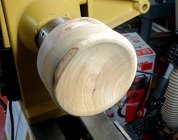
small piece of ash. Had some rot so it ended up being a lot shorter than the blank started. When I went to flip it around to work the base, it just happened that I used the chuck in an expansion mode and it held just fine! Never done that and probably not smart but used tailstock support.

IMG_3840.jpegPicture shows it in the chuck.

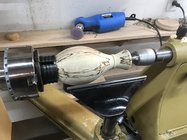
Here’s off lathe.
IMG_3842.jpeg
IMG_3843.jpeg
A little more sanding needed and then oil.
 
View attachment 56903Small piece
from a very unpromising bit of branch that’s somehow been hiding in the shop for years without going into the firewood bin. I initially thought it was wax leaf myrtle, but upon closer inspection it appears to be tan oak. Pith runs right through the center, but only one very superficial crack. There was evidence of bugs just under the bark, but only two holes remain after roughing it down to this shape. Time to go into a ziploc bag for a while to see if any more bugs or cracks appear. If not, it will get hollowed out sometime next fall.
Don't wait to hollow it especially with the pith in it.
 
Don't wait to hollow it especially with the pith in it.
This piece has been inside the shop for at least 10 years. It’s completely dry, so I’m not worried about splitting at this point. I trimmed off 1/8” from each end of the branch and the offcuts didn’t want to break. It’s at 11 percent moisture content, which is as low as it will get here on the coast.
 
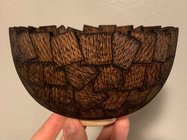
Managed to find a small spear tip, so I don’t have to wait for my other woodburning pens to be repaired. That said, it’s a tiny tip, so it is a bit rowdier than I would like for long lines. But it gets the job done. Spent a few late night hours last night burning my pattern and filling in some of the squares. Burning the inside layer was challenging, but not too bad. Just took a steady hand. Still much more work to do though!

View attachment 56836
View attachment 56837
View attachment 56838
I'm calling it "The Cinnamon Toast Crunch Bowl"
 
Gabriel, hahaha. I can respect that. One of my favorite cereals. Yum!

Here is an update. Finished all of the burning, aside from around the foot, which is the final step. I had planned on painting the squares, but my wife was pretty adamant that I didn’t. So….no paint! Err, maybe a tiny, tiny bit. But that gave me a challenge, because I still wanted the squares to glow. So, back to the woodburner and I’m adding a glowing gradient via shaded burning. Should be cool, hopefully! And, but not painting I get to move on to the next project that much sooner lol.

6EEFE9D0-5B6A-47A8-9022-848063E0D390.jpeg
E92707E6-9A57-4CB7-915F-C3C4D1817CAB.jpeg
 
That would be pretty cool, Don. Oak (generally, and especially red) grows pretty quickly here. I’d love to get my hand on a chunk of that slow growing northern. One of these days.
Stop by any time 😀 You might not appreciate the weather though the lake is getting hard as in freezing over.
 
I'm still going with "Chocolate Shreddies" !
The result is well worth the effort, which I suspect wasn't inconsequential. Well done!

Cheers.
Barry W. Larson
Chocolate Shreddies as a name speaks to me for some reason. I might actually steal that, if you don’t mind. It’s kind of perfect 🙂
 
Stop by any time 😀 You might not appreciate the weather though the lake is getting hard as in freezing over.
I’ll take you up on that some time! 😀 And, that’s a whole different kind of cold. Whew. We just got an official freeze warning for Tuesday/Wednesday. High of 50 still haha.
 
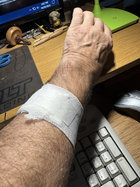
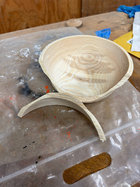
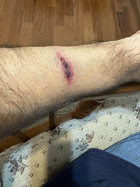
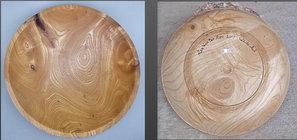
Today I had a 9 inch by 3 1/2 inch piece of Ash on the lathe. I turned the inside and outside and was just trying to clean up the rim when BAM! 3 pieces now! Nice cut on my arm. Glad I stand off to the side most of the time. Still not sure why? I was barely touching the rim. Was trying to round over the edge a little. I hate that it was down to the start sanding part! Glad my hands weren't there though! If I was sanding I probably would have got it in the chest. Tenon is still attached. Just the bowl broke.
IMG_6493.jpg
 
you are far more experienced than I. I was told not to go back to the rim after complete hollowing. Did it on a large piece a couple weeks ago, just barely touched it, after thinking I would be real gentle. Exploded on me. Glad you are ok. IMG_3125.jpegThis is the big one that exploded on me.

There’s just no support for the rim after hollowing and it wobbles a bit, so: BAM when touching even lightly w a gouge.
 
Still not sure why? I was barely touching the rim. Was trying to round over the edge a little. I hate that it was down to the start sanding part!
I'd bet a closer look would show that the cutting edge wanted to follow the path of wood grain. I have done that a few times - just trying to sneak the cutting edge up to nip off a corner, and bam! (I have also cracked a bowl in half with just sandpaper catching in one of those spots where you can't see it but the grain is separating or cracking) I've changed my technique to start the cut BELOW the rim and towards the outside (If bowl was sitting in normal usage orientation, it'd be "upwards" for direction of cut) 🙂 I've been lucky with those as the pieces usually have bounced away from me (and my hands below/behind tool rest) but I have had them ricochet off the back wall and smack me in the face shield...
 
Yes. I'm sure it was something I shouldn't have done! Wish there was a club or school closer by. It's hard learning with YouTube for a teacher. They all make it look so easy! At least I'm smother now and don't have things flying as much as last year!
IMG_6495.jpg
Definitely going to be black and blue tomorrow! No stiches or broken bones so all good.
IMG_6497.jpg
 
Gabriel, hahaha. I can respect that. One of my favorite cereals. Yum!

Here is an update. Finished all of the burning, aside from around the foot, which is the final step. I had planned on painting the squares, but my wife was pretty adamant that I didn’t. So….no paint! Err, maybe a tiny, tiny bit. But that gave me a challenge, because I still wanted the squares to glow. So, back to the woodburner and I’m adding a glowing gradient via shaded burning. Should be cool, hopefully! And, but not painting I get to move on to the next project that much sooner lol.

View attachment 56954
View attachment 56955
Michael,
Nice illusion of relief withou actually carving any!
 
Yes. I'm sure it was something I shouldn't have done! Wish there was a club or school closer by. It's hard learning with YouTube for a teacher. They all make it look so easy! At least I'm smother now and don't have things flying as much as last year!
I realize distances are viewed a bit different in New England areas, but there is a club in Berlin, MA that is 30 miles more or less from your indicated location. 40-45 minutes of drive time once or twice a month doesn't seem so bad to me. Lessons with a mentor should be easy enough to arrange.
 
Leo quite a stash of ash! What do you use on the knots for storing and drying after roughing?
Norm I try to have no knots or splits, BUT ----------
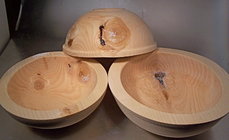
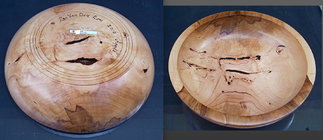
So the pieces do get dried in the brown paper bags, but before that, I will soak the knots with thin CA and get it as full as the knots will take, my thinking is that a knot full with hardened CA will not be able to shrink much, I win most that way, close but not 100%, got a few pictures here that show the how.

I have for a long time used CA on spots that could cause splitting, and the treatment on the knots work good.

White Ash treated knots.jpg

Normally both sides are soaked full with CA.
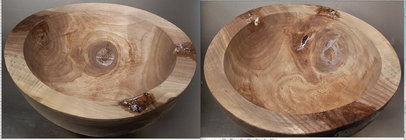
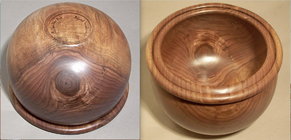
Black Walnut with knots.jpg
Before and after Ash bowlBefore & after knots.jpg

A Black Wanut with a treated large knot.
Walnut with knot.jpg
 
The finish bowl looks awesome. Just wondering if I use CA would it affect or stain the wood when finishing with oil, such as Dr. Woodshop, or Mahonyes walnut oil?the Do you shellac the knot before applying CA? I just used CA on a knot and crack that I filled with coffee granules after roughing. Thanks for the great pics and your great suggestions Leo. One of the reason I joined this forum.
 
Phil, glad the injury wasn't worse. My first suspicion with ash is ring shake. Looking at how the bowl broke, that does not look to be the case here. Next suspect would be cracks that were not visible, which does happen a lot less after you learn what to look for. Always stand out of the line of fire!

robo hippy
Reed the ringshake happens on the Black Ash aka as Swamp Ash or Basket Ash, I have turned quite a bit of Ash and never found ringshake in any White Ash.

It is for the reason that Black Ash will split along the year rings, that it is used o make baskets from that wood, soaked and hammered, it will split readily, here is a video of the making of the Black Ash baskets.

View: https://www.youtube.com/watch?v=UzJ--mhi2l4


Of course there are more videos of
Black Ash basket making, ---------------- Ash are disappearing with the EAB, could also be the end of Black Ash basket making
 
Last edited:
The finish bowl looks awesome. Just wondering if I use CA would it affect or stain the wood when finishing with oil, such as Dr. Woodshop, or Mahonyes walnut oil?the Do you shellac the knot before applying CA? I just used CA on a knot and crack that I filled with coffee granules after roughing. Thanks for the great pics and your great suggestions Leo. One of the reason I joined this forum.
Yes if you have CA on the surface if will have an effect on the finished appearance. Dark spots are a possibility. If using for cracks apply shellac before CA and then it can be sanded off. I have good luck with finish by gluing before second turn and there is plenty of wood to remove the stain usually.
 
Reed the ringshake happens on the Black Ash aka as Swamp Ash or Basket Ash, I have turned quite a bit of Ash and never found ringshake in any White Ash.
Interestingly enough, my very first experience of a bowl flying apart on me due to ring shake was White Ash. (Had it happen with Cherry and Apple as well - before I learned how to spot ring shake before spinning up a piece.)
 
The finish bowl looks awesome. Just wondering if I use CA would it affect or stain the wood when finishing with oil, such as Dr. Woodshop, or Mahonyes walnut oil?the Do you shellac the knot before applying CA? I just used CA on a knot and crack that I filled with coffee granules after roughing. Thanks for the great pics and your great suggestions Leo. One of the reason I joined this forum.
Thank you Norm, I don't know what other people do or use, so no opinion on that.

What I do you pretty wel know, I do add the CA on the green wood when rough turned and then dry the turning.

And I use the PTO finish, nothing else, polish and very seldom use carnauba wax to get higher gloss.

Now I went into my albums here to find some pictures that would show the wood that has CA used on it, you can do what you like, but this works for me.

Took me a while to find turnings that I have used CA on, but I finally did find some that do show it well.

A Apple bowl that had a bad graft and was not all grown together, I filled the gaps with coffee ground and CA.

Apple tree Graft.jpg

Here a Black Walnut bowl with a knot through the wall, used CA to prevent the knot splitting, picture of in and outside.

Black Walnut bowl.jpg

Here a Catalpa turning and the underside of the previously shown White Ash bowl.

Catalpa & Ash turning.jpg

One more, this is an American Beech bowl with a defect that has CA used to stabilize it.

American Beech.jpg

You can see what I get with what I do, notwithstanding other peoples thoughts on this, but yes. the way they use it on their turnings, maybe as a use when the turning is all done and dry ??
 
Last edited:
That'd be great Tom. Give me a shout whenever you're coming through next.
@Phil Hamel , A little medium CA and keep on turnin'

@Rick Urban @Michael Anderson : I spend 3 or 4 days in Ringgold several times a year. Maybe we can hook up on one of my trips.
@Phil Hamel , A little medium CA and keep on turnin'

@Rick Urban @Michael Anderson : I spend 3 or 4 days in Ringgold several times a year. Maybe we can hook up on one of my trips.
Give me a call. We'll see what kind of trouble we 3 can stir up.
 
One of the first bowls I kept for myself and would use at all the food booths was ash. Don't know if it was white or not, but a 3 inch thick board from my local hard wood store. After 3 or 4 years, it developed a crack along the growth rings. After it cracked, the ring shake was visible to me then. Now, I know what to look for. I did get one 30 inch diameter tree once that had the olive brown heart wood, and never saw any ring shake in it. It was one of our Oregon Ash trees.

robo hippy
 
Here's the nearly-complete interior of my 1st large(ish) live edge bowl in ambrosia maple that I green-turned back during the summer. My wife fell in love with all of the ambrosia tracks, stains and freckles-it has a lot even for the species-and claimed it right away. She wanted my primo TruOil finish, so that's what she's getting! I guess I learned most of the hard lessons on the style, and it forced me to get far more disciplined with tool control cutting down into the very uneven wings. Ambrosia Maple Live Edge Interior Almost Done.jpg
I also turned my best replica of the Universal Jam Chuck from WoodCraft magazine to finish the bottom against: Universal Jam Chuck
Universal Jam Chuck.jpg
To make it, I glued together a piece of maple and one of white limba that I had laying around. I just sanded it to 80-grit for a gently-contoured rim, and glued 4mm wetsuit material from Amazon for the padded face. I've got it under clamping pressure now with an appropriate sized nesting bowl and some stout rubber bands around the rim. I hope to try it out this weekend, and hopefully use it for any future uneven rims that won't work in my Longworth chuck (of which I have a number drying out). I don't have a vacum chuck (yet), but I think it's good for me at this stage in my turning development to learn how to chuck odd shapes using creative but still secure methods.

I can report back my results when I finish the bottom if anyone is interested.
 
Will, do, Phil-Whoever wrote the article claims that it is the jam chuck they reach for the most, and I have found woodturners to be almost universally helpful and honest, so I had to try for myself. I'll let you know.
 
Here's the nearly-complete interior of my 1st large(ish) live edge bowl in ambrosia maple that I green-turned back during the summer. My wife fell in love with all of the ambrosia tracks, stains and freckles-it has a lot even for the species-and claimed it right away. She wanted my primo TruOil finish, so that's what she's getting! I guess I learned most of the hard lessons on the style, and it forced me to get far more disciplined with tool control cutting down into the very uneven wings. View attachment 57035
I also turned my best replica of the Universal Jam Chuck from WoodCraft magazine to finish the bottom against: Universal Jam Chuck
View attachment 57036
To make it, I glued together a piece of maple and one of white limba that I had laying around. I just sanded it to 80-grit for a gently-contoured rim, and glued 4mm wetsuit material from Amazon for the padded face. I've got it under clamping pressure now with an appropriate sized nesting bowl and some stout rubber bands around the rim. I hope to try it out this weekend, and hopefully use it for any future uneven rims that won't work in my Longworth chuck (of which I have a number drying out). I don't have a vacum chuck (yet), but I think it's good for me at this stage in my turning development to learn how to chuck odd shapes using creative but still secure methods.

I can report back my results when I finish the bottom if anyone is interested.
Aaron - I use tanned dear hide against mine, works great.
 
Back
Top