-
December 2025 Turning Challenge: Single Tree! (click here for details) -
Congratulations to Bob Henrickson, People's Choice in the November 2025 Turning Challenge (click here for details) -
Congratulations to John Dillon for "Chinquapin Oak" being selected as Turning of the Week for December 22, 2025 (click here for details) -
Welcome new registering member. Your username must be your real First and Last name (for example: John Doe). "Screen names" and "handles" are not allowed and your registration will be deleted if you don't use your real name. Also, do not use all caps nor all lower case.
You are using an out of date browser. It may not display this or other websites correctly.
You should upgrade or use an alternative browser.
You should upgrade or use an alternative browser.
What’s on your lathe?
- Thread starter Rusty Nesmith
- Start date
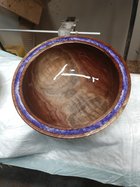
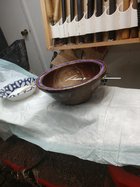
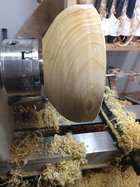
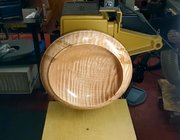
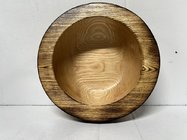
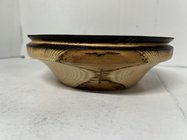
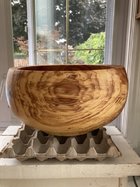
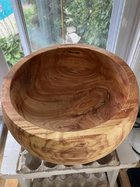
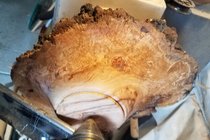
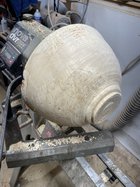
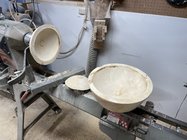
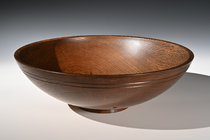
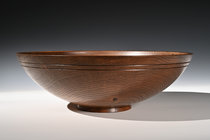
Oak, second turning. First turning done August of ‘21. About 14 inches across. The amount of movement in the Oak is a real challenge. I’m finding with most of these that there is very little room for error. True the outside true the inside and not much left. Final diameter is 13 inches. Walls are 1/4”. It’s bathed in my Danish oil, and India ink.
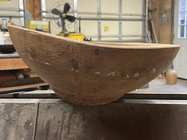
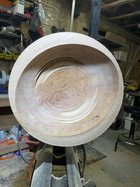
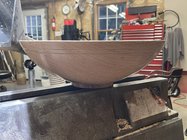
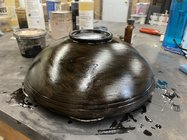


Great form! Pic of the wiped off danish with the ink? Does it work better than a regular stain or you wanted to control the shade?Oak, second turning. First turning done August of ‘21. About 14 inches across. The amount of movement in the Oak is a real challenge. I’m finding with most of these that there is very little room for error. True the outside true the inside and not much left. Final diameter is 13 inches. Walls are 1/4”. It’s bathed in my Danish oil, and India ink.
View attachment 54218View attachment 54219View attachment 54220View attachment 54221
Thanks Aaron. No, not hard wood but hard to turn. It cuts OK but dulls tools fairly quickly and does not tolerate scrapers at all. Really sharp gouge and steep angle sheer cuts can clean up the surface but a large long piece like this really challenges my spindle gouge tool control over the distance. I go over it and over it with fine cuts, step back and look, repeat.Beautiful piece, Randy-It looks a lot like ambrosia maple in the pic. Is it very hard?
"I go over it and over it with fine cuts, step back and look, repeat." That's me at the lathe, on every turn!
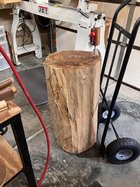
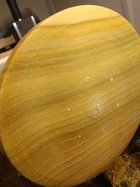
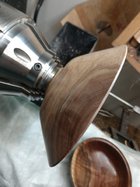
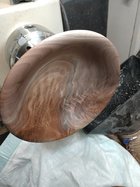
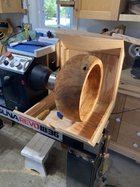
Not technically on my lathe yet but will be soon. Next piece of black willow. 30" long, 15" dia. Started at about 20" dia before lots of chainsaw work yesterday. And yes, I have more logs out back to work through. The manual labor to get a large log from the field to shop floor to even start turning is a lot. Per the log weight chart it's about 150lbs as is now.
Attachments
Great form! Pic of the wiped off danish with the ink? Does it work better than a regular stain or you wanted to control the shade?
Thank you, Sam!
This is my experimenting with both darkening Oak and my thinking/direction that more finish deeper in the wood (not film) will be longer lasting (forever), and will do more to strengthen the wood, bind the fibers. To get both to happen with control is what I’m after.
Based on my own observations and reasoning, not supported by experts or persons of knowledge, I decided;
I want a colorant that will go deep into the surface, so nothing quick drying.
I want the pigment to mix with the oils.
I want to control, as best possible, the depth of the color.
Being able to change the formula, even mid stream suits my experimentations.
This was one soaking, setting for a bit and buffing off. Same thing day two, but less ink, more varnish.
Then a light buffing with 0000 after several days rest.
The ink is in a shellac base, but mixes well with the turpentine, walnut oil and tried and true.
Last edited:
This is stunning, Marc-Near perfect design and execution!View attachment 54225View attachment 54226
Thank you, Sam!
This is my experimenting with both darkening Oak and my thinking/direction that more finish deeper in the wood (not film) will be longer lasting (forever), and will do more to strengthen the wood, bind the fibers. To get both to happen with control is what I’m after.
Based on my own observations and reasoning, not supported by experts or persons of knowledge, I decided;
I want a colorant that will go deep into the surface, so nothing quick drying.
I want the pigment to mix with the oils.
I want to control, as best possible, the depth of the color.
Being able to change the formula, even mid stream suits my experimentations.
This was one soaking, setting for a bit and buffing off. Same thing day two, but less ink, more varnish.
Then a light buffing with 0000 after several days rest.
The ink is in a shellac base, but mixes well with the turpentine, walnut oil and tried and true.
It wasn't a case of I heard the chainsaws and couldn't resist.... It was a driving past and saw the tree service.
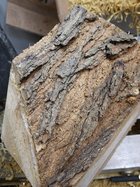
Mystery wood, the workers didn't know what it was. Tree of heaven is my guess or possibly hackberry. There wasn't any leaves to speak of. They were almost done and I've driven past the house a 100 times but don't remember what was there. I got four bowls out of one chunk. And also scored a piece of cedar. It cracked on the rim before I could get the sealer on it. epoxy it is for the win on that one. I didn't take a pic of the cedar.
Mystery wood, the workers didn't know what it was. Tree of heaven is my guess or possibly hackberry. There wasn't any leaves to speak of. They were almost done and I've driven past the house a 100 times but don't remember what was there. I got four bowls out of one chunk. And also scored a piece of cedar. It cracked on the rim before I could get the sealer on it. epoxy it is for the win on that one. I didn't take a pic of the cedar.
Attachments
Last edited:
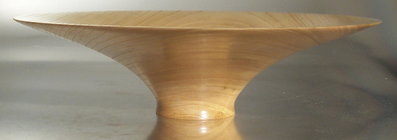
Yes Sam I would call that Ailanthus aka Tree of heaven, let it dry and re-turn it, nice wood, here is one I turned some time ago.It wasn't a case of I heard the chainsaws and couldn't resist.... It was a driving past and saw the tree service.
Mystery wood, the workers didn't know what it was. Tree of heaven is my guess or possibly hackberry. There wasn't any leaves to speak of. They were almost done and I've driven past the house a 100 times but don't remember what was there. I got four bowls out of one chunk. And also scored a piece of cedar. It cracked on the rim before I could get the sealer on it. epoxy it is for the win on that one. I didn't take a pic of the cedar.
Last edited:
Awesome color! What type of ink is it? I have been experimenting with Indian ink.View attachment 54225View attachment 54226
Thank you, Sam!
This is my experimenting with both darkening Oak and my thinking/direction that more finish deeper in the wood (not film) will be longer lasting (forever), and will do more to strengthen the wood, bind the fibers. To get both to happen with control is what I’m after.
Based on my own observations and reasoning, not supported by experts or persons of knowledge, I decided;
I want a colorant that will go deep into the surface, so nothing quick drying.
I want the pigment to mix with the oils.
I want to control, as best possible, the depth of the color.
Being able to change the formula, even mid stream suits my experimentations.
This was one soaking, setting for a bit and buffing off. Same thing day two, but less ink, more varnish.
Then a light buffing with 0000 after several days rest.
The ink is in a shellac base, but mixes well with the turpentine, walnut oil and tried and true.
How big is this bowl? It's odd how coincidents happen. One of my four rough turnings has a similar shape to this and I hadn't consciously made it like this on purpose even though I had seen that earlier post a few days ago about tree of heaven.Yes Sam I would call that Ailanthus aka Tree of heaven, let it dry and turn it, nice wood, here is one I turned some time ago.
View attachment 54244
Thanks, Norm!Awesome color! What type of ink is it? I have been experimenting with Indian ink.
2 parts speedball super black India ink
2 parts turpentine (the good stuff)
1 part tried and true varnish oil
1 part walnut oil
I vary the mix a bit, just depending. More black, less black. Turpentine makes it thinner, also speeds drying of the oils.
So far I’ve used this on Oak and Ash. The Ash gets blacker than the Oak which only gets the browns. I guess straight India ink would make it black, but I wanted to let the patterns, especially the medullary rays shine as much as possible. Also, the ink is shellac base, so quickly seals the surface. I want something to go deeper to penetrate for a more durable finish.
Its all just one big experiment!
Sam this latest one is in the possession of the owner of a large art store, it's been a while, but I do remember it being wider than most, I'd say about 16 or 17 inches.How big is this bowl? It's odd how coincidents happen. One of my four rough turnings has a similar shape to this and I hadn't consciously made it like this on purpose even though I had seen that earlier post a few days ago about tree of heaven.
I have another one sitting here that I just returned, much smaller 9" and just a normal fruit bowl shape, it still needs another coat of finish, and just for a heads up, if using an oil finish, make sure you check it as it likes to bleed back for the larger pores in the early wood.
The one in my earlier post was a bit smaller and did not have the. same foot, I liked that flare out on the foot better.
Sam, waaaayy too shallow for popcorn - this from my popcorn loving spouse! I do like the shape though, you just need a bigger lathe!Ash popcorn bowl. With practice beads. embellishment or traditional? Hows that work when beads are traditional but these weren't made in the traditional way?
Cheers.
Barry W. Larson
Calgary, Alberta, Canada eh!
Jim McLain
Artist
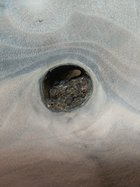
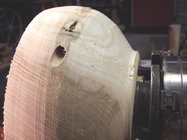
I have 2 pieces going, one has a problem, it is a piece of Black Ash and it sat for a long time, found an large opening, 9 mm Diameter, not sure it is a worm hole but pretty hard to be anything else in how it and where it is located
I plan on turning a fitting dowel that I will drive into it when I get back to it and glue it in, not going to be a show piece I'm afraid .
.
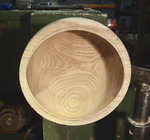
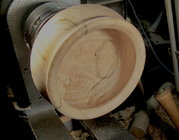
On the midi lathe is a nice figured Maple bowl, still have to do the sanding and turn the foot.
It is difficult to sand the interior as it is small and recessed, I'll have to take my time doing that.
I plan on turning a fitting dowel that I will drive into it when I get back to it and glue it in, not going to be a show piece I'm afraid


On the midi lathe is a nice figured Maple bowl, still have to do the sanding and turn the foot.
It is difficult to sand the interior as it is small and recessed, I'll have to take my time doing that.

12" x 4" doesn't do it? I have a 22" rough bowl that I've been saving till I get some more experience under my belt..Sam, waaaayy too shallow for popcorn - this from my popcorn loving spouse! I do like the shape though, you just need a bigger lathe!
Cheers.
Barry W. Larson
Calgary, Alberta, Canada eh!
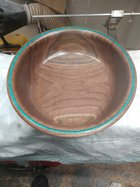
You might be a redneck if you buy your "inlay" at Jo-anne fabrics because your sister has a coupon. (pronounced coopin if you saw that show) use it on a walnut bowl and Like it! I smell a series of them.....Or is that something else I stepped in???? 10" x 3.5" Carribean inlay LOL (sounds better than saying some light blue colored extra fine craft glitter) with one drop of mixol blue in the clear epoxy EEE ultrashine and a minwax wax finish.
Attachments
Last edited:
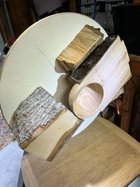
I just finished with the tools on my first larger live edge piece, from a large ambrosia maple log my tree-man neighbor felled yesterday. (He also brought a log of sweet-gum and one of elm). Anyway, I got the walls to between 5/8" and 3/4" before getting some flutter and tool marks that made me hesitant to go for thinner until I dial in my skills a bit more with this style. Chucked very securely in my SC4 100mm jaws with no issues during the turn. I was able to finish the interior below the bottom wings by cranking the speed past the 1st vibration zone to about 1100 to 1200ish (where it was smooth sailing), and sweeping across with my negative rake scraper with a freshly-pulled burr for each pass. It was hanging out off a Robust J-Rest, and so it was a bit nerve-wracking, but it resulted in a nice smooth bottom:
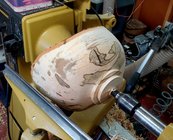
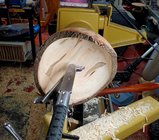
I'm leaving the tenon on, and have it in a couple of paper grocery bags to slow the drying. I put it up at about 16-17% moisture, figure I'll rechuck it to power-sand at 10ish or so. Does this sound like a viable plan to you live-edge experts?


I'm leaving the tenon on, and have it in a couple of paper grocery bags to slow the drying. I put it up at about 16-17% moisture, figure I'll rechuck it to power-sand at 10ish or so. Does this sound like a viable plan to you live-edge experts?
- Joined
- Apr 27, 2004
- Messages
- 9,307
- Likes
- 6,080
- Location
- Lakeland, Florida
- Website
- www.hockenberywoodturning.com
Nice looking bowl.
A bowl like yours can be functional without the bark. It’s more work to take the bark off than keep it but I take it off frequently.
It will be 4-8 months to get to 10% for a 3/4 wall. I agree with you reasoning to stop. You have a keeper!
On NE I try for 3/16” wall or maybe a 1/4 if it’s 15” dia. These are dry enough to sand in 3-4 days.
With one modification that should work. When I want to keep the bark I hold the bowl bark down to keep CA off the wood and run thin CA around the bark inside and out. This does two things: Holds the bark to the wood and keeps the bark from shrinking more than the wood. When the bark shrinks more than the wood you have to sand away a lot of wood to get it even with the bark and this will mess up the nice curve you turned.I'm leaving the tenon on, and have it in a couple of paper grocery bags to slow the drying. I put it up at about 16-17% moisture, figure I'll rechuck it to power-sand at 10ish or so. Does this sound like a viable plan to you live-edge experts?
A bowl like yours can be functional without the bark. It’s more work to take the bark off than keep it but I take it off frequently.
It will be 4-8 months to get to 10% for a 3/4 wall. I agree with you reasoning to stop. You have a keeper!
On NE I try for 3/16” wall or maybe a 1/4 if it’s 15” dia. These are dry enough to sand in 3-4 days.
I was making some plain candy dishes as penance for glitterati and then Karma came and bit me in the butt. Shouldn't have picked at the knot. Looks like some epoxy in the future for tomorrow.
Attachments
I've been meaning to try that myself. Do you take a wire brush to it after burning?Second turning of an ash bowl. Decided to undercut the rim and try a v pattern on the edge.
View attachment 54333
Seen it tried numerous times here so I grabbed the torch for some color.
View attachment 54334
1st Coating of tried and true on and curing.
View attachment 54335
View attachment 54336
I just used sand paper on this one as I only scorched it. Didn't have the guts to try burning the whole thing. Maybe the next one....I've been meaning to try that myself. Do you take a wire brush to it after burning?
@Charles Cadenhead did you ever make another whistle?
@Don Wattenhofer that is a cool, unique project. I like that mounting jig.
@Don Wattenhofer that is a cool, unique project. I like that mounting jig.
Getting back on the lathe with some boxes. @Gabriel Hoff eat your heart out. Kidding, kidding, your boxes are much nicer! 
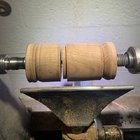
Here is a rough pic of a Claro Walnut box that will hopefully look cool when said and done. Much work left to do off the lathe. Embellishment and all
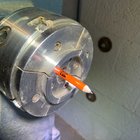
I also needed to sharpen a pencil, but for some reason I can’t find my sharpener. I saw a bunch of funny joke sharpening videos a while ago on Instagram, and never thought they would actually come in handy. Chuck and a skew, great pencil sharpener.
Here is a rough pic of a Claro Walnut box that will hopefully look cool when said and done. Much work left to do off the lathe. Embellishment and all

I also needed to sharpen a pencil, but for some reason I can’t find my sharpener. I saw a bunch of funny joke sharpening videos a while ago on Instagram, and never thought they would actually come in handy. Chuck and a skew, great pencil sharpener.

I ended up drilling out the dowel rod and reshaping another one. This one worked much better.@Charles Cadenhead did you ever make another whistle?
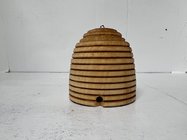
My FiL made beehive ornaments a few years ago, yours looks just like his did. Well done!My sister asked me if I could make bee hive ornaments for one of the clubs she belongs to. I grabbed a chunk of bass wood I had in the shop and made this prototype.
View attachment 54321
Oh my gosh Michael... I am going to have to up my game. Just joking...Getting back on the lathe with some boxes. @Gabriel Hoff eat your heart out. Kidding, kidding, your boxes are much nicer!
Here is a rough pic of a Claro Walnut box that will hopefully look cool when said and done. Much work left to do off the lathe. Embellishment and all
View attachment 54344
I also needed to sharpen a pencil, but for some reason I can’t find my sharpener. I saw a bunch of funny joke sharpening videos a while ago on Instagram, and never thought they would actually come in handy. Chuck and a skew, great pencil sharpener.
View attachment 54345
Hahahahaha. I hadn’t made a box in so long, I had to watch one of John Lucas’ videos to get a refresher.Oh my gosh Michael... I am going to have to up my game. Just joking...
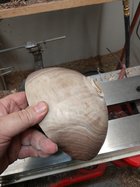
First attempt at a burl. Deciding if I should attempt to take a core before finishing inside.

