Agree about the fix. I hardly ever attempt to salvage something like this--ultimately, I just consider it practice and try to walk away with some reflective learning. Maybe a few curse words too...It’s usually easier and more rewarding to make another rather than fix a big error
You could do another exploding bowl
Calipers are a tool I use. I can still get too thin but not unexpectedly.
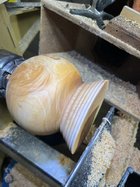
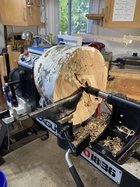
I usually have my calipers at hand too, but on this one I just got careless and stopped checking (read, probably a bit overconfident) after I finished the side/bottom transition. Kept making "one more pass", several times, ultimately sealing the bowl's fate. Lesson learned!
And, thanks @Larry Mercier , it's all part of the journey. I think it's helpful to post the failures as well--I've definitely learned a lot from my own! This is a way we can all be in it together, ha. And, you're right--accepting failure is part of the learning process. I think it does more harm than good when you try to salvage a big mistake (not intended to offend anyone, just my opinion). Someone told me once that with potters the broken vessel pile is necessary, and I kind of think about artisanal firewood as our equivalent. Being able to cull is important.
")


 , just wanted an improvement of the original design
 , anyway that has happened a couple times, and because of the use of a recess the re-adjustment did work out OK some times.
 .
.