• Congratulations to Alex Bradley winner of the December 2024 Turning Challenge (click here for details)
  • Conversations are now Direct Messages (click here for details)
  • Congratulations to Gabriel Hoff for "Spalted Beech Round Bottom Box" being selected as Turning of the Week for January 6, 2024 (click here for details)
  • Welcome new registering member. Your username must be your real First and Last name (for example: John Doe). "Screen names" and "handles" are not allowed and your registration will be deleted if you don't use your real name. Also, do not use all caps nor all lower case.

What’s on your lathe?

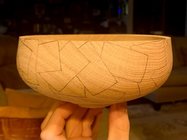
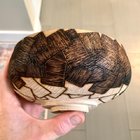
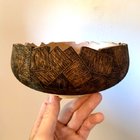
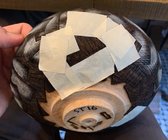
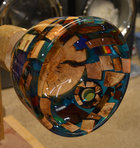
Progress photo of some off-lathe embellishing. I burned a pattern on the exterior of this Black Oak calabash. Now I’m in the process of dry brushing. I painted a light base layer of black acrylic, and now I’m prepping for a color gradient by adding layers of gesso. Tedious, but should be worth it in the end. Fingers crossed!

View attachment 54779
More ideas for inspiration! Your well-spring of creativity is indeed deeper than most - well done! Do you have some other views, or are they still in progress. I look forward to seeing more.
Cheers.
C
Barry W. Larson
Calgary, Alberta, Canada eh!
 
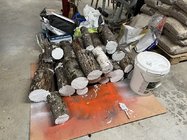
Spent some time processing pecan logs earlier today. Got quite a bit done and gave the Carter Logmill a good workout. Had to quit when I threw a bandsaw tire. Still have a stack of slabs waiting on the saw. Ordering replacements and a new blade.

20230812_124448.jpg
 
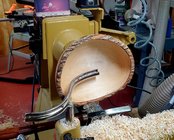
Another live-edge in fresh-cut elm. Very unique and pretty wood-I can't wait til it dries! My arborist neighbor delivers logs to my car-port pallet faster than I can process them (and yes, I know what an awesome problem this is to have for any wood-turner!).
Elm Live-Edge Green-Turned.jpgElm Live-Edge Green-Turned Inside.jpg
I am very pleased that, since I came back from Ellsworth's class a couple of weeks ago, I am gradually getting better with my curves, as well as taming tool-marks and tear-out. My design sense, my grinds, everything is just working better, and it was money and time well-spent!
 
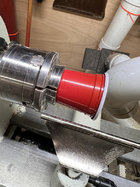
Started with trying to cut a mini solo cup in half so I could make some resin.
IMG_5377.JPG
Don't quite have a set of jaws that can hold the vase to spin it after the resin coating. Is this a bit sketchy?
IMG_5375.JPG

It seems to be holding good enough for final sanding inside and to spin the resin for a few hours. Hopefully this will fix it good enough to repair my over turn goof! Don't try this at home!!
IMG_5376.JPG
 
Ch
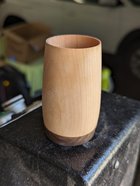
Working on a couple of shot glasses, cups, containers? It's really little and only holds a couple of ounces. First time I tried this, though it's really just a small vase. There's a slight curve but you can't really see it in my photo. It's cherry and walnut.

View attachment 54851
Charles-I am interested in this. Are they intended to be functional? I would think that if they are a true "shot" glass, a splash of bourbon or similar might necessitate an epoxy coating. How are you finishing them?
 
Charles-I am interested in this. Are they intended to be functional? I would think that if they are a true "shot" glass, a splash of bourbon or similar might necessitate an epoxy coating. How are you finishing them?
Yes they will be. Really it's already functional since this one holds liquid (I tested it to see how much water it holds). I'm going to coat the interior with epoxy and then use shellac on the outside. Being cherry I could probably get away without finishing it since I don't think it would affect the flavor but I want to make sure it's water tight.
 
Yes they will be. Really it's already functional since this one holds liquid (I tested it to see how much water it holds). I'm going to coat the interior with epoxy and then use shellac on the outside. Being cherry I could probably get away without finishing it since I don't think it would affect the flavor but I want to make sure it's water tight.
Cool idea-I think another interesting project would be to make a set of whiskey "barrels" at least shaped like a barrel made by a cooper, with burned interiors like a bourbon barrel, but epoxied and not a contributor to flavor like the barrels they are aged in. One could also probably cut shallow channels and inlay copper bands for a more authentic look. If it were really authentic, I guess the wood should be oak. Just thinking out loud. I start with my classes tomorrow, so my chances of starting this project are exactly zero lol.
 
One could also probably cut shallow channels and inlay copper bands for a more authentic look.

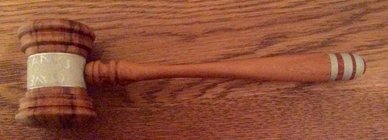
Or a fun treatment is casting pewter into the groove. I wrapped cardboard around the gavel head and the handle end made a spot to pour in the pewter. Then turn the pewter. I did some sandblasting on the pewter.
IMG_1029.jpeg
 
We
Yes they will be. Really it's already functional since this one holds liquid (I tested it to see how much water it holds). I'm going to coat the interior with epoxy and then use shellac on the outside. Being cherry I could probably get away without finishing it since I don't think it would affect the flavor but I want to make sure it's water tight.
Any liquid will damage the shellac, and alcohol will dissolve it completely. Might want to try something else
 
Cool idea-I think another interesting project would be to make a set of whiskey "barrels" at least shaped like a barrel made by a cooper, with burned interiors like a bourbon barrel, but epoxied and not a contributor to flavor like the barrels they are aged in. One could also probably cut shallow channels and inlay copper bands for a more authentic look. If it were really authentic, I guess the wood should be oak. Just thinking out loud. I start with my classes tomorrow, so my chances of starting this project are exactly zero lol.
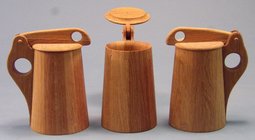
101_1203.JPG
The tankards shown were modeled after one retrieved from the wreck of the MaryRose search and you will find many photos of the ship and artifacts)
and are made entirely out of white oak. The original looked like it was made of pine, had reed or spruce root bands and was probably sealed on the inside with pine tar.
The ones I made consist of 15 staves and a bottom installed in a groove near the bottom. The white oak will not leak due to it's closed cell feature, but if you leave liquid in them for extended time they will expand, crack and leak. The first one that I finished I made some rawhide bands just for looks but then I decided to just go without.
 
Very nice tankards!
Not on my lathe yet but will be when it dries. Painted it with 10 year old leftover white I had kicking around.
IMG_5378.JPG
I also was lucky enough to meet up with my wife's relative who just purchased a band saw mill!! He will rough cut me some maple and ash for helping him fix his tractor!
Forgot to grab a pic of the mill.
 
Another live-edge in fresh-cut elm. Very unique and pretty wood-I can't wait til it dries! My arborist neighbor delivers logs to my car-port pallet faster than I can process them (and yes, I know what an awesome problem this is to have for any wood-turner!).
View attachment 54832View attachment 54833
I am very pleased that, since I came back from Ellsworth's class a couple of weeks ago, I am gradually getting better with my curves, as well as taming tool-marks and tear-out. My design sense, my grinds, everything is just working better, and it was money and time well-spent!
I can't remember if you made your own tool rest or not. If not, where did you get the "s" curve and how long is the post? I really need to get me some of these.
 
No, Sam-That's just a junk-steel Chinese rest from ebay that I got before I knew better. I just picked it up for this turn because it had a pretty good curve for getting inside that bowl. The tool rest you might remember that I "made" was simply adding a 3/8" hardened steel rod to the top of the 14-inch standard cast-iron PowerMatic rest using JB Weld (a modification that is very much worth doing for PM owners IMO, though some like the cast-iron). I have and use the Nova modular curved tool-rest system, but if you're going to invest in a curved rest, Robust has them in many different sizes and configurations, all with the hardened steel rod on top. I have one of their J-rests, and plan to add one of their curved rests at some point. Hard to beat Robust quality.
 
Charles-I am interested in this. Are they intended to be functional? I would think that if they are a true "shot" glass, a splash of bourbon or similar might necessitate an epoxy coating. How are you finishing them?

Cool idea-I think another interesting project would be to make a set of whiskey "barrels" at least shaped like a barrel made by a cooper, with burned interiors like a bourbon barrel, but epoxied and not a contributor to flavor like the barrels they are aged in. One could also probably cut shallow channels and inlay copper bands for a more authentic look. If it were really authentic, I guess the wood should be oak. Just thinking out loud. I start with my classes tomorrow, so my chances of starting this project are exactly zero lol.
I make what I call Shot Barrels, which are white oak shot glasses, shaped like little barrels. I put a finish on the outside. The only finish on the inside is propane 🙂 I char them inside and that is all. I am not a fan of plastic-coated wood.
The finish I use on the outside is a mix of pine resin and walnut oil - this is my derivation of an old wooden boat finish (turpentine, pine resin, linseed oil). It's all natural and safe. Pushing that into the end grain does help with the tiny bit of "weeping" I sometimes get on the bottom of them.
I did a demo for my club in Feb, and it's on YouTube - or you can come to SWAT later this month as I'm demo'ing it there too.
 
Gabon Ebony.

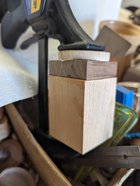
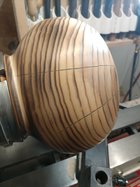
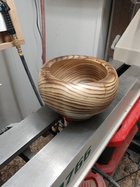
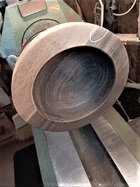
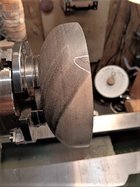
This bowl block had a big crack, and to eliminate it, I had to reduce the height quite a bit. Also, changed the grain orientation from "horseshoe" to "rainbow". I generally feel the horseshoe orientation is preferable, but sometimes I have to flip it for whatever reason. Both orientations are acceptable. The white pencil marks a small crack near the rim that will have to be dealt with on the final turn. Block was 12% MC, and no anchorseal has been applied. It will probably lose a small amount of weight during the seasoning process.

Note: Photo taken with my new Samsung A14 5g phone, and it surprises me that the lighting looks more natural than the photos I've been taking with my Canon S95 camera. I will try to convert all my online photo efforts to the Samsung phone soon......waiting on a tripod adaptor with remote shutter to make that possible.

-o-

20230813_222138.jpg 20230813_222153.jpg

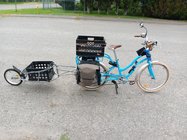
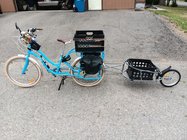
Oh, BTW, this is my new (to me) Yuba cargo bike, and I'm having a great time this summer riding with my two Dachshund dogs. We have some great bicycle trails here in Montana. They don't call me the "Eccentric Old Guy" for nothing! 🙂

20230804_132233.jpg 20230804_132254.jpg
 
I make what I call Shot Barrels, which are white oak shot glasses, shaped like little barrels. I put a finish on the outside. The only finish on the inside is propane 🙂 I char them inside and that is all. I am not a fan of plastic-coated wood.
The finish I use on the outside is a mix of pine resin and walnut oil - this is my derivation of an old wooden boat finish (turpentine, pine resin, linseed oil). It's all natural and safe. Pushing that into the end grain does help with the tiny bit of "weeping" I sometimes get on the bottom of them.
I did a demo for my club in Feb, and it's on YouTube - or you can come to SWAT later this month as I'm demo'ing it there too.
Very informative video! Thanks for that.
 
The tool rest you might remember that I "made" was simply adding a 3/8" hardened steel rod to the top of the 14-inch standard cast-iron PowerMatic rest using JB Weld (a modification that is very much worth doing for PM owners IMO, though some like the cast-iron).
Hi Aaron- What a great idea! I have always been unhappy with my Oneway tool rest. I have to file out nicks... especially as the Oneway rests are powder coated. I assume the JB Weld has held up fine? Any advice you have if I am wanting to do this myself? I know nothing about metal "grades" so would be happy to hear what I should be looking for in the hardened steel category. Thanks,.
 
No, Sam-That's just a junk-steel Chinese rest from ebay that I got before I knew better. I just picked it up for this turn because it had a pretty good curve for getting inside that bowl. The tool rest you might remember that I "made" was simply adding a 3/8" hardened steel rod to the top of the 14-inch standard cast-iron PowerMatic rest using JB Weld (a modification that is very much worth doing for PM owners IMO, though some like the cast-iron). I have and use the Nova modular curved tool-rest system, but if you're going to invest in a curved rest, Robust has them in many different sizes and configurations, all with the hardened steel rod on top. I have one of their J-rests, and plan to add one of their curved rests at some point. Hard to beat Robust quality.
I use a robust pretty much exclusively but I want to try out an "s" curve one. I'm finding that since I'm going deeper on some bowls, depending on the angle of the sides the straight one gets iffy.
With my grizzly I had to order it from robust because they make the post a little longer due to the short banjo.
 
Robust does now make my style of S curved tool rests for bowls. Short curve on one end and longer curve for the inside. They work well for both inside and outside the bowl. It is also angled to about 15 degrees which matches the inside radius of a 12 inch diameter bowl. No one made one I liked, so I had to invent my own....

robo hippy
What criteria would a person use to decide if a 9" - 14" or "s" - "j" tool rest was needed?
 
Hi Aaron- What a great idea! I have always been unhappy with my Oneway tool rest. I have to file out nicks... especially as the Oneway rests are powder coated. I assume the JB Weld has held up fine? Any advice you have if I am wanting to do this myself? I know nothing about metal "grades" so would be happy to hear what I should be looking for in the hardened steel category. Thanks,.
Will-Jimmy at D-Way Tools cuts and sells them in different lengths depending on your rest: https://d-waytools.com/tool-rest-top-bars/

And yes, the hardened steel has taken an awful beating with some of the big out-of-round blanks I have turned, and the JB Weld hasn't budged. The bar remains smooth as glass, and no nicks, ever. I'm not an expert on steel either-just order the 3/8" hardened rod from Jimmy! I just scrub it with mineral spirits on steel wool after turning green, and buff it down with paste wax, and it lets me skate smoothly with my tools, every time. Follow his instructions on the YouTube video, and you're good to go: https://www.youtube.com/watch?v=pMTody-4daQ (But file off the powder coating 1st for adhesion, is what I did on my PM).
 
What criteria would a person use to decide if a 9" - 14" or "s" - "j" tool rest was needed?
Size of the bowls. The 14” Robust J rest works great on NE bowls 17” dia I have done and I would guess larger too.
It also work fine on 7-8” bowls.

Not sure how big a bowl you can do on the smaller J rest. I have a J rest for my 1221 jet but have only used it for 7-8” diameters.
 
Gabon Ebony.

This bowl block had a big crack, and to eliminate it, I had to reduce the height quite a bit. Also, changed the grain orientation from "horseshoe" to "rainbow". I generally feel the horseshoe orientation is preferable, but sometimes I have to flip it for whatever reason. Both orientations are acceptable. The white pencil marks a small crack near the rim that will have to be dealt with on the final turn. Block was 12% MC, and no anchorseal has been applied. It will probably lose a small amount of weight during the seasoning process.

Note: Photo taken with my new Samsung A14 5g phone, and it surprises me that the lighting looks more natural than the photos I've been taking with my Canon S95 camera. I will try to convert all my online photo efforts to the Samsung phone soon......waiting on a tripod adaptor with remote shutter to make that possible.

-o-

View attachment 54873 View attachment 54874

Oh, BTW, this is my new (to me) Yuba cargo bike, and I'm having a great time this summer riding with my two Dachshund dogs. We have some great bicycle trails here in Montana. They don't call me the "Eccentric Old Guy" for nothing! 🙂

View attachment 54876 View attachment 54877
Odie - I think we need a picture with you and the dachshunds on the bike.
 
......waiting on a tripod adaptor with remote shutter to make that possible.

-o-

I've found the tripod adaptor and remote shutter button invaluable since acquiring one.
 
Back
Top