• Congratulations to Alex Bradley winner of the December 2024 Turning Challenge (click here for details)
  • Conversations are now Direct Messages (click here for details)
  • Congratulations to Gabriel Hoff for "Spalted Beech Round Bottom Box" being selected as Turning of the Week for January 6, 2024 (click here for details)
  • Welcome new registering member. Your username must be your real First and Last name (for example: John Doe). "Screen names" and "handles" are not allowed and your registration will be deleted if you don't use your real name. Also, do not use all caps nor all lower case.

What’s on your lathe?

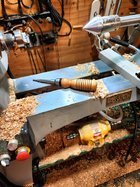
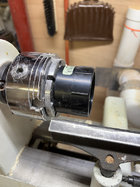
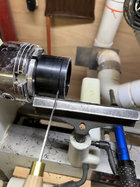
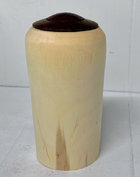
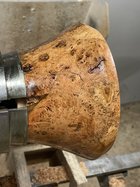
Well, not on my lathe at present. This was made in 1980, 43 years ago. After my stint in the marines, while stopping in for a while at my folks house, I bought a homemade lathe from a farmer. Made of angle iron and an old drill press quill. I got a machine shop to make an adapter to hold a faceplate. This was before woodworking chucks (not that I could afford anyway).
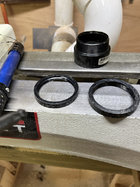
It’s a glue up of ten, or eleven 3/4 walnut pieces. I didnt have calipers and such, so I made templates for the interior and exterior. Turned all with scrapers, and then too much time sanding. Finished with linseed oil.
The fit of the lid isn’t perfect, I’d never read anything about making boxes, so the lid tenon etc. was made up. The wood was dry, so hasn’t moved much at all.

I like looking back, remembering who and what I was so long ago, how things have changed, and how they’ve stayed the same. After all this time, I’m glad to share it!View attachment 54020View attachment 54021View attachment 54022
Marc:
Great piece, and an even better back-story! Always good to take a quick look back to see how far we've come.
Cheers.
Barry W. Larson
Calgary, Alberta, Canada eh!
 
Last edited:
Well, not on my lathe at present. This was made in 1980, 43 years ago. After my stint in the marines, while stopping in for a while at my folks house, I bought a homemade lathe from a farmer. Made of angle iron and an old drill press quill. I got a machine shop to make an adapter to hold a faceplate. This was before woodworking chucks (not that I could afford anyway).
It’s a glue up of ten, or eleven 3/4 walnut pieces. I didnt have calipers and such, so I made templates for the interior and exterior. Turned all with scrapers, and then too much time sanding. Finished with linseed oil.
The fit of the lid isn’t perfect, I’d never read anything about making boxes, so the lid tenon etc. was made up. The wood was dry, so hasn’t moved much at all.

I like looking back, remembering who and what I was so long ago, how things have changed, and how they’ve stayed the same. After all this time, I’m glad to share it!View attachment 54020View attachment 54021View attachment 54022
Beautiful piece Marc, I wish my first pieces were that nice, as I did some turning before I went into the Royal Dutch Navy, I went right back to it after getting out, and the big old engine lathe was still waiting for me to make my art pieces 🙄
 
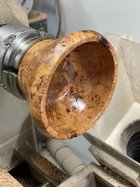
After a couple weeks setting up and riding a new bicycle, riding my Harley, mowing lawns, extra exercise routines.....and generally playing hooky from lathe turning, I finally got around to finishing a Coolibah burl bowl that has been neglected and needed finishing last evening!

-o-

IMG_1926.JPG IMG_1927.JPG
 
Marc:
Great piece, and an even better back-story! Always good to take a quick look back to see how far we've come.
Cheers.
Barry W. Larson
Calgary, Alberta, Canada eh!
Thank you, Barry. It is good to look back and take stock in one’s growth! Interesting too is that although tools, techniques, and understanding of form, etc. has changed greatly, the basics, the eye (if you will) hasn’t all that much.

Between the making of this piece, and what I’m doing now was a 30 year dry spell.
The satisfaction, peace and growth since returning to turning is immeasurable.
 
Beautiful piece Marc, I wish my first pieces were that nice, as I did some turning before I went into the Royal Dutch Navy, I went right back to it after getting out, and the big old engine lathe was still waiting for me to make my art pieces 🙄
Thank you, Leo.
Good for you for getting right back to it! You have quite the body of beautiful work since.
All through my 30 year hiatus from turning I kept the desire and love for the craft. One of the first things I did, once my life settled, was to return to an old love. I intend to stay at it for as long as my body will allow.
 
Thank you, Barry. It is good to look back and take stock in one’s growth! Interesting too is that although tools, techniques, and understanding of form, etc. has changed greatly, the basics, the eye (if you will) hasn’t all that much.

Between the making of this piece, and what I’m doing now was a 30 year dry spell.
The satisfaction, peace and growth since returning to turning is immeasurable.
Marc:
Sounds a little like my own experience. Long lapse (a mere 25 years in my case) before returning to the lathe and round things. I'm amazed at the changes in tools, work holding and even the lathes themselves; many things are much easier now. Of course as you point out the eye still has the most important role to play in the development of the form. I admit though, the things I made back then are nowhere near as nice as the piece you posted! I may well keep that in mind for inspiration in the future!
Cheers.
Barry
 
@Marc Banka thanks for posting. That is a beautiful piece, and a nice flashback story to read. It's clear that you've long had an eye for curves and form. I'm surprised to learn you had a 30 year break. In any case, you didn't skip a beat. Like riding a bicycle, eh? Good stuff!
 
That's an exceptional looking bowl! Care to give a tutorial?

I'd be tickled if I could get half as good a finish even.
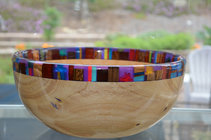
Sam - what would you like to know??? Finish is pretty straightforward - sand to 180, 2-3 coats of Osmo hardwax oil then a finish coat of clear epoxy

have done a number of bowls like this recently - an ash bowl with a segmented looking rim attached with epoxy - on this latest one I didn't try to make it look like a segmented rim but just put colored resin pieces and exotic wood in a random jumble and then filled in the gaps with resin tinted with transparent purple dye
Was it a blank you started out with and covered the whole top then formed the bowl? Or was it a rough turned bowl that you somehow placed the resin around the rim with a dam of some sort?

Or resin on the bottom and then bowl placed upside down in it? <<This one doesn't seem plausible because the exotic wood looks too evenly/well placed.

Sam you guessed it - "a rough turned bowl with a temporary resin damn" - I did not want to hijack this thread so I made a separate post explain the process -


cheers
 
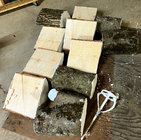
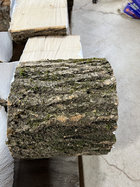
A boatload of English walnut. I got about 30 smallish logs direct from the orchard. Very pale for walnut, but it’s starting to develop the cream color that I’ve seen in a few English walnuts in the past.

Looks like there will be about 400 bowl blanks. About half are 8-14 inches in diameter from the straight sections of the trunks and the other half mostly 5-7 inches with varying amounts of crotch figure. Also a few dozen spindle blanks that will probably become lidded boxes. Planning on having them all roughed out by the weekend. 7B3D06C4-F2D7-4E67-80A0-63FFC34B4862.jpeg
 
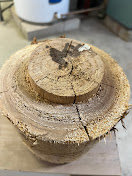
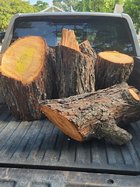
Left before sunrise to pick up a load of pecan today. This wood was taken from the Hays County courthouse, a historic location in Texas and offered to members of the local AAW club. Hays county was named after Captain John Coffee Hays, a Texas Ranger who fought in many engagements in both the Texas-Comanche and Mexican-American wars in the 1800's.

Hays County courthouse.
Hays_courthouse.jpg
20230722_090217.jpg
 
Left before sunrise to pick up a load of pecan today. This wood was taken from the Hays County courthouse, a historic location in Texas and offered to members of the local AAW club. Hays county was named after Captain John Coffee Hays, a Texas Ranger who fought in many engagements in both the Texas-Comanche and Mexican-American wars in the 1800's.

Hays County courthouse.

View attachment 54195
Nice load. Was wondering why they cut all those at an angle and lost you a lot of turning wood.
 
Nice load. Was wondering why they cut all those at an angle and lost you a lot of turning wood.
Not sure who did the cutting, it wasn't a turner. I'm happy to have it either way. There are at least four really nice crotch blanks in the bunch. The limbs aren't large enough for bowls but will make good size spindle blanks. I'll see about getting it cut up tomorrow.
 
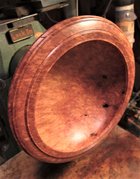
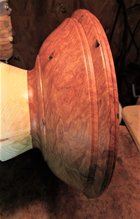
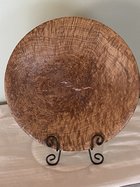
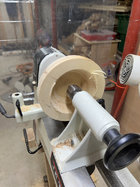
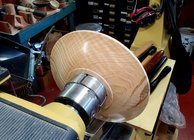
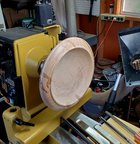
Lately I'm really trying to learn to do shallow bowls/platters. I finished the bottom of this one in curly ambrosia maple, and the figure was so beautiful I decided to go for broke on the finish: 1500-grit, Yorkshire Grit and (so far) 3 coats of TruOil. This one will also get the Beall buffs no question once it cures a bit! I finished turning the inside today, and am sanding through the grits (the pencil marks are for a hump in the curve I need to sand out). As I work towards developing a style, I've put a subtle undercut under the rim and on the inside that, to quote my friend and mentor Tim Tucker, "invites the hand and the eye." I kept testing on the lathe with my hand, and sure enough, this combo just fits naturally into the cradle of the thumb and fingers). I stole this idea from the Tom Wirsing platter video. I'm also sort of going for a fleur-de-lis/flying saucer-ish rim here if that makes any sense, so really working on the curves and beads. I like a sexy rim (yeah, I'm weird). Someday I'll nail the perfect ogee curve too.
Curly Ambrosia Maple Platter Rear.jpgCurly Ambrosia Maple Platter Oblique View in Progress.jpg
 
Back
Top