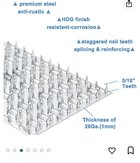
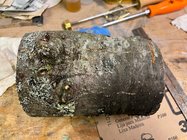
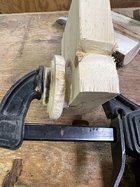
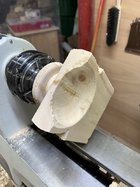
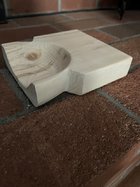
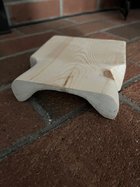
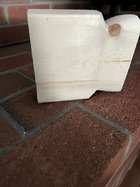
I’d recommend blunting the nails first. I’ve not used this methods for turnings, but I used to for flatwork. That said, the nails almost always left a mark albeit minute.I just use small scraps of plywood with a finish nail driven through them. 3 pieces gives you a 3-point stance so as to not have much in the way of wobble, they are easy and quick (and very cheap) to make as many as you like..... for smaller bowls, a larger scrap with 3 nails driven through it would serve the purpose nicely, I imagine.
-
It's time to cast your vote in the December 2025 Turning Challenge. (click here for details) -
Congratulations to Pat White for "Sicilian Mosaic" being selected as Turning of the Week for December 29, 2025 (click here for details) -
Welcome new registering member. Your username must be your real First and Last name (for example: John Doe). "Screen names" and "handles" are not allowed and your registration will be deleted if you don't use your real name. Also, do not use all caps nor all lower case.
You are using an out of date browser. It may not display this or other websites correctly.
You should upgrade or use an alternative browser.
You should upgrade or use an alternative browser.
What’s on your lathe?
- Thread starter Rusty Nesmith
- Start date
I too use an old bandsaw blade. The size of the foot determines how many are used to give the bowl stability. Also easy to store.I use old bandsaw blades. Cut a piece, maybe 10" (some smaller, some larger), and fold it into a V. Holds your bowl off the table for finishing.
Sam I lay the pencils flat/horizontal, it is a very thin/narrow contact on the bowl, I don't have to set the turning exactly on the pencils as they are long enough tho have the piece sit safely on it.I've read you mention the three pencils before, can I get a description or pic? I was wondering if you just lay them horizontally or have them oriented straight up some way for smallest contact? The inquiring mind wants to know!
Plus I picked up a bunch of 2 foot by 1/4" x 1/4" craft (sticks?) the other day and was thinking of devising something with them to hold a bowl up while it dries. I have some of the puck things from rockler but they are too big to get three of them under a smaller bowl to make a sturdy base.
Usually right side up first, but also like here in the pic.
As I do check at least once for bleed back, any mark will be wiped off, I have been doing this for a long time and never had a problem with it.
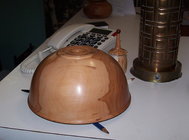
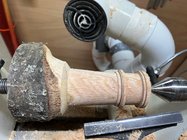
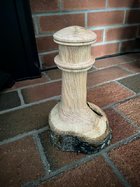
Hey Phil, that’s a pretty cool lighthouse with some crisp lines. I’m about 99.99% sure that is some sort of red oak. Ash has a similar open grain, but doesn’t have rays. Regardless, nice use for a little limb!
Last edited:
First time back on the lathe in almost a month. Just for a minor thing—turning off the tenon and shaping the foot on this Black Cherry calabash. I usually prefer a footless bowl, but I’m this case giving the bowl a little lift will enhance the form. Anyway…glad to be back to turning, albeit just for a short time today. I’m going to finish this bowl and post it to the gallery today or tomorrow.
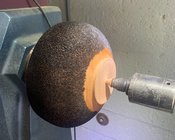

Michael - nice bowl - love the texture - seems like you've been using your time wisely.
As for the foot - I'm a foot guy, so take this a grain of salt - it will enhance this form. It may be the angle, but it looks more like a closed form than a calabash to me, but I'm from a different set of islands. My bowls are very often shallow, open forms that present the contents and require a foot to anchor the bowl to the surface. Otherwise they want to float off and hover around the room. To me, most bowls without a foot look like they're stuck down by their own weight.
As for the foot - I'm a foot guy, so take this a grain of salt - it will enhance this form. It may be the angle, but it looks more like a closed form than a calabash to me, but I'm from a different set of islands. My bowls are very often shallow, open forms that present the contents and require a foot to anchor the bowl to the surface. Otherwise they want to float off and hover around the room. To me, most bowls without a foot look like they're stuck down by their own weight.
Different set of islands, I like that. Thanks for the commentary Jeff. I totally agree with you about the purpose of a foot and how it can enhance certain forms. Especially open forms. I usually include a foot when appropriate—have a whole stack of footed bowls that are just waiting to be finish sanded. I suppose I should have clarified—I tend to like a footless bowl because I prefer to turn calabashes if I’m making a bowl. To me, with those types of bowls, a foot interrupts the continuous curve. I also tend to like the wobbly interactivity of a round-bottomed form. I also connect with keeping it as traditional (in form) as possible. That said, I do also like embellishing/texturing the surface, and there’s certainly a little bit of personal preference at play  .
.
I think the cell phone image somewhat distorts the shape of bowl above. Aside from the added foot, I tried to stick to a traditional shape. I could have come in just a little bit more at the rim though. Here is a profile shot (still taken on my phone though):
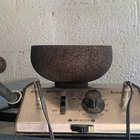
I think the cell phone image somewhat distorts the shape of bowl above. Aside from the added foot, I tried to stick to a traditional shape. I could have come in just a little bit more at the rim though. Here is a profile shot (still taken on my phone though):

Last edited:
Michael, your bowl's shape and texture are excellent. Its nice to read you are back on the lathe. Now, remember to not drop a bowl blank on your repaired foot.
@Michael Anderson how did you create the texture? Nice piece, bring the upper rim in more, for a more continuous curve would improve the form.
@Larry Mercier glad to be somewhat back in action!
@Doug Freeman thanks, and I agree. I did intentionally leave the subtle re-curve at the rim, but if I would have come in a bit more it would be enhanced. For the texture I used a flat, pointed woodburning tip. I burned the surface with an upward stabbing motion, and occasionally dragged it downward to make short fine lines. Here is the tip:
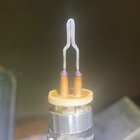
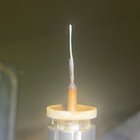
@Doug Freeman thanks, and I agree. I did intentionally leave the subtle re-curve at the rim, but if I would have come in a bit more it would be enhanced. For the texture I used a flat, pointed woodburning tip. I burned the surface with an upward stabbing motion, and occasionally dragged it downward to make short fine lines. Here is the tip:


When you talk Calabash it depends on who you are talking to in Hawaii. Pat Kramer has a much different take on shape than say Kelly Dunn and Kelly Dunn may differ from Andy Cole. I myself am fine with your piece being a Calabash Michael.
@Michael Anderson Nice bowl indeed sir! The texturing is great.
Thanks Bill. Funny you mention that—I almost said something along the lines of “this might be called a Pat Kramer style calabash”.When you talk Calabash it depends on who you are talking to in Hawaii.
Thanks Paul! I had to take a little mental break from the SWT challenge haha@Michael Anderson Nice bowl indeed sir! The texturing is great.
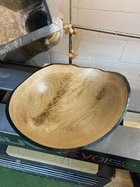
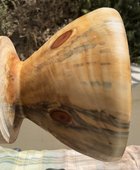
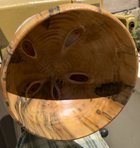
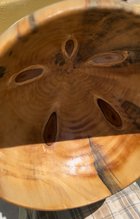
That satisfying feeling when you are sure your train wreck is going to stay that way but it ends up being ok, not great but ok.
Another that ended up being so thin walled that I hope it doesn't get dropped.
It's deeper than it looks maybe 3-3.5 inches if you count the base I left on it.
Another that ended up being so thin walled that I hope it doesn't get dropped.
It's deeper than it looks maybe 3-3.5 inches if you count the base I left on it.
Attachments
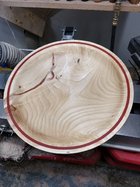
Hey Sam, pretty nice piece. Looks big—what’s the diameter? I really like the red rim. Though, I think the filled cracks would look a heck of a lot better if you would have cleaned them out beforehand with a file/knife. If they were a little bit more carefully filled, the whole piece would be SO good. Cleaning them out beforehand would also mitigate some the air bubbles. Regardless of all that, it’s pretty sweet!
Ya, Like I said this was a train wreck, I could have filled those holes but the way they ended up to me it looks like what a geode looks like so I left it. I could still go back and fill them but I liked it like that. There's quite a few things wrong with the bowl I feel so the holes filled aren't going to help the overall quality in person. It's 13.5 x 4 inches.Hey Sam, pretty nice piece. Looks big—what’s the diameter? I really like the red rim. Though, I think the filled cracks would look a heck of a lot better if you would have cleaned them out beforehand with a file/knife. If they were a little bit more carefully filled, the whole piece would be SO good. Cleaning them out beforehand would also mitigate some the air bubbles. Regardless of all that, it’s pretty sweet!
Last edited:
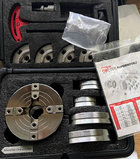
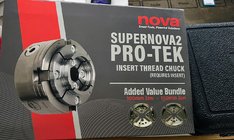
I've had this same Bundle for a few years now. No complaints, it does well for the projects I doWell! It's not a project but it is on my lathe. Should compliment my Record Power SC2 well.
Michael-how are you a staff member and moderator now?!! Pretty cool!Hey Sam, pretty nice piece. Looks big—what’s the diameter? I really like the red rim. Though, I think the filled cracks would look a heck of a lot better if you would have cleaned them out beforehand with a file/knife. If they were a little bit more carefully filled, the whole piece would be SO good. Cleaning them out beforehand would also mitigate some the air bubbles. Regardless of all that, it’s pretty sweet!
Michael-how are you a staff member and moderator now?!! Pretty cool!
I gave a generous donation to AAW…kidding, kidding.
This is just related to the upcoming forum swap. We’re going to create a specific swap forum instead of keeping everything together in one thread. Big things ahead—stay tuned!
- Joined
- Apr 27, 2004
- Messages
- 9,309
- Likes
- 6,081
- Location
- Lakeland, Florida
- Website
- www.hockenberywoodturning.com
“Many a true word hath been spoken in jest.”I gave a generous donation to AAW…
— William Shakespeare
Your time is valuable. AAW only exists through the generous donation of time by members like you.
Thank you.
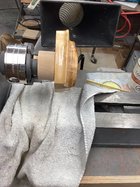
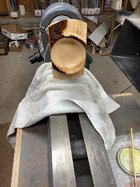
Experimenting today with a small piece of Big Leaf Maple. Wanted to see what it would look like with an un round look on 2 sides and some bark left on. After finishing the bottom on the lathe will use my belt/disk sander on the sides. Is this type of turning worth doing?
Attachments
Russ Braun
TOTW Team
tick tock, lol!!Thanks Bill. Funny you mention that—I almost said something along the lines of “this might be called a Pat Kramer style calabash”.
Thanks Paul! I had to take a little mental break from the SWT challenge haha
Can’t outrun that clock!!tick tock, lol!!
Absolutely beautiful bowl, Vince! Can’t wait to see the final product after you put the additional coats of DO on. Be sure to post it to the gallery so it gets the views it deserves.White oak y with some flame. Once turned 1/4" wall, burnt rim, let it dry then sanded and has one coat of danish oil.
100% yes. Very cool piece there Frank. The bark on the top adds a lot of interesting color and texture contrast. Looks great!Is this type of turning worth doing?
Nice work, Phil! Your hollow base looks like cherry to meThink it came out good enough for me to live in later. Still need to epoxy the plastic threads in.
View attachment 54006
View attachment 54007
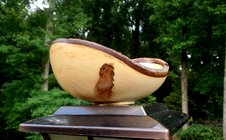
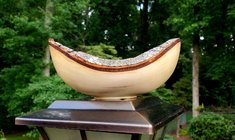
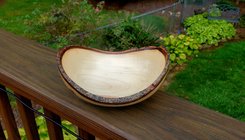
I finished that live edge maple bowl that I took home as an extra blank from last Saturday's "Two Bowls from One Log" class taught by Thom Crothers at our Carolina Mountain Woodturners Turning and Learning Center. As this was my 1st real live-edge, I learned a LOT that I hope to put to use on a much larger weeping cherry blank that is standing beside my lathe waiting for me to work up the nerve. I'm not sure I'm a hundred percent happy with my curves on this one. But I love this style, and the added bonus is that it is forcing me to make immaculate entry cuts, stay laser-focused, and exercise precise tool and bevel control when making the interrupted cuts down into the wings, all skills I am working on. Unlike curly or ambrosia maple, this piece is rather vanilla, so I elected to use TruOil to jazz up the finish a bit. It probably also has about 10 bucks worth of Starbond around the edge in an attempt to hold the bark on. The learning continues...


- Joined
- Feb 28, 2021
- Messages
- 1,778
- Likes
- 1,593
- Location
- Roulette, PA
- Website
- www.reallyruralwoodworks.com
Tip: It helps a great deal for bark to stay on when the tree is harvested while dormant (Up here in the northeast, that's in winter time - after the leaves have fallen and weather turns cold - Cambium layer tightens up the bark to the tree then, so winter cut wood tends to keep bark on a lot better.) So, if you can, try and find out if the woods you pick up were harvested (or fallen) when dormant, those may have better success with doing bark edge pieces....It probably also has about 10 bucks worth of Starbond around the edge in an attempt to hold the bark on. The learning continues...
Nice try for your first attempt! The only thing I see is the bowl is supposed to be a full circle. I tried one and you really have to start with a 2 inch square blank.
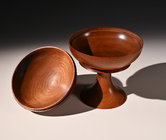
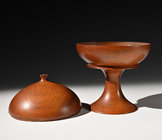
Well, not on my lathe at present. This was made in 1980, 43 years ago. After my stint in the marines, while stopping in for a while at my folks house, I bought a homemade lathe from a farmer. Made of angle iron and an old drill press quill. I got a machine shop to make an adapter to hold a faceplate. This was before woodworking chucks (not that I could afford anyway).
It’s a glue up of ten, or eleven 3/4 walnut pieces. I didnt have calipers and such, so I made templates for the interior and exterior. Turned all with scrapers, and then too much time sanding. Finished with linseed oil.
The fit of the lid isn’t perfect, I’d never read anything about making boxes, so the lid tenon etc. was made up. The wood was dry, so hasn’t moved much at all.
I like looking back, remembering who and what I was so long ago, how things have changed, and how they’ve stayed the same. After all this time, I’m glad to share it!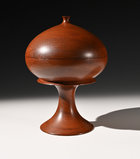


Great piece. Love NIP. I’ve got a bowl on lathe now ready to part and bottom finish.I took the offcut from the Norfolk Island pine and turned it into a bowl. At this point the sanding was mostly done and a coat of oil with a laquer spray. I’ll give it a day to dry then get it turned around on the vacuum chuck and finish the bottom.
View attachment 54010

