-
December 2025 Turning Challenge: Single Tree! (click here for details) -
Congratulations to Bob Henrickson, People's Choice in the November 2025 Turning Challenge (click here for details) -
Congratulations to Guillaume Fontaine for "Old Tea Pot" being selected as Turning of the Week for December 15, 2025 (click here for details) -
Welcome new registering member. Your username must be your real First and Last name (for example: John Doe). "Screen names" and "handles" are not allowed and your registration will be deleted if you don't use your real name. Also, do not use all caps nor all lower case.
You are using an out of date browser. It may not display this or other websites correctly.
You should upgrade or use an alternative browser.
You should upgrade or use an alternative browser.
What’s on your lathe?
- Thread starter Rusty Nesmith
- Start date
Don this is what I think of as spalting....I looked up fungi in "Hoadley's Understanding Wood" came across this text between two illustrations and I quote "As certain white rots develop, dark zone lines form as on this piece of sugar maple above. This type of decay is called spalting. Below, turning of spalted maple, by Mark Lindquist".
This is where I first was introduced to the term and what I think of as spalting, but I realize that the definitions on line seem to categorize all forms of rot under the term SPALTING.
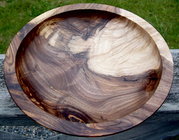
Anyway I have never seen spalting zone lines in walnut and it doesn't appear that they are present in your bowl, but I have seen white rot similar to your bowl in black walnut. Note Understanding Wood was first published in 1980 by Taunton Press.
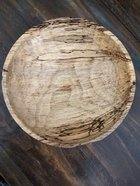
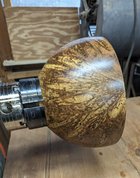
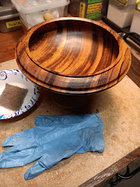
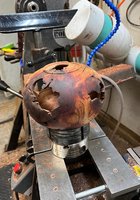
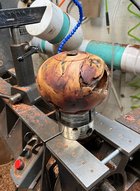
(Very) spalted Red Maple, almost too far gone to turn. Second photo is during wet sanding with Watco, which helped firm up the very soft parts. Thought I wouldn’t like how the DO absorption darkened the wood, but it resulted in a nice flame pattern contrast with the spalted areas.
Attachments
- Joined
- Feb 28, 2021
- Messages
- 1,770
- Likes
- 1,584
- Location
- Roulette, PA
- Website
- www.reallyruralwoodworks.com
From a quick bing search: "Spalting fungi are a group of fungi that cause a change in pigmentation inside wood by feeding on the sugars and starches present in the wood 1. This results in the creation of unique patterns and colors in the wood, which can be used for artistic purposes"Anyway I have never seen spalting zone lines in walnut
Important point being "feeding on sugars in the wood" So woods that produce sugars like Maple and Walnut would be more prone to spalting where that fungi is present. (Yes Walnut gives sugary sap - You can boil it down to make Walnut syrup , just like you can with Maple..)
Just an FYI...
Yes that has the zone lines.
Anyway I have never seen spalting zone lines in walnut and it doesn't appear that they are present in your bowl, but I have seen white rot similar to your bowl in black walnut. Note Understanding Wood was first published in 1980 by Taunton Press.
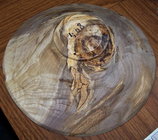
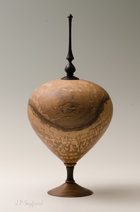
Here is a English Walnut piece that I made a few years ago. It appears to me that there is both the white rot and zone lines present. I was reminded of this piece by the bowls I just posted. I think the top center of those bowl shows some spalting zone lines.
I am fascinated with spalting and have been trying to learn more about it. I've been reading "Spalting Wood" by Sara C. Robinson et.al. Their definition is: "Spalting is a process that occurs on wood when fungi colonize the substrate and extract various nutrients. Colonization, or at the very least secondary metabolites, must occur within the wood in order for the process to count as spalting."
Awesome!
I have zero experience with English walnut, but yes that does look like zone lines.Here is a English Walnut piece that I made a few years ago. It appears to me that there is both the white rot and zone lines present.
A few years back I received 2 black walnut stumps that had been stored in an old barn for about 40 years and of course the sap wood was rotted away while the heart wood remained mostly solid except for checks and splits, but no sign of zone lines. The rot with the zone lines and the white sap wood makes me think the spalt lines developed over a long period of time while the tree remained alive.Spalting in Black Walnut is quite rare in my experience, but I have found this occur in just couple of times, 2 pictures of Black Walnut with salting in it.
I have seen spalting in the sap wood of black walnut. I have never seen it in the heart wood, with the exception of Leo's piece. I would guess that the toxic levels of stuff in the heartwood will inhibit any fungi growth.
robo hippy
robo hippy
Tom Gall
TOTW Team
@Gary Beasley Nice dish, Gary ... but are you sure that is Bubinga? The color and grain texture don't look like Bubinga to me. Of course, it could be the photo or my monitor.
AAW has articles re spalting: https://www.woodturner.org/Woodturn...bsiteKey=c9100f02-c77e-4177-a9bc-7d3eb0216238
Also a 2 part article about the science—I can’t find it now . . .
Also a 2 part article about the science—I can’t find it now . . .
Hard to say. Looked the wood up online and there were samples pictured that looked similar.@Gary Beasley Nice dish, Gary ... but are you sure that is Bubinga? The color and grain texture don't look like Bubinga to me. Of course, it could be the photo or my monitor.
Odie
Panning for Montana gold, with Betsy, the mule!
Odie, what are you using for a jam chuck?Last evening, I finished up the second turn (minus the foot) on a Goncalo Alves bowl, and began roughing out an English Walnut grafted to Claro Walnut bowl. The origin of the latter is CA.
-o-
View attachment 59002 View attachment 59003
Odie
Panning for Montana gold, with Betsy, the mule!
Hey, Charles.......I'm not using a jam chuck......I use a center screw faceplate for this step.....and then transfer the bowl to a Oneway Stronghold chuck to rough out the interior...Odie, what are you using for a jam chuck?
-o-
Gotcha! I thought you were removing the foot in the first picture instead of shaping the outside. When I thought it was a jam chuck I was impressed with how well it was mounted. Jam chucks give me a hard time.Hey, Charles.......I'm not using a jam chuck......I use a center screw faceplate for this step.....and then transfer the bowl to a Oneway Stronghold chuck to rough out the interior...
-o-
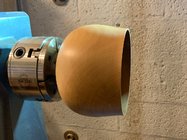
Nice work and nice grainsmall piece of ash. Had some rot so it ended up being a lot shorter than the blank started. When I went to flip it around to work the base, it just happened that I used the chuck in an expansion mode and it held just fine! Never done that and probably not smart but used tailstock support.
View attachment 56913Picture shows it in the chuck.
Here’s off lathe.
View attachment 56914
View attachment 56915
A little more sanding needed and then oil.
Saw the bowl before your name, and my mind said Michael, funny how we can tell who does turn certain shapes in a certain way, like we can tell Odie's work, and yes very nice bowl Michael View attachment 59008
Ditto!
Odie
Panning for Montana gold, with Betsy, the mule!
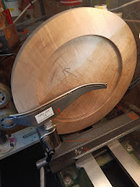
After polishing a couple bowls, and working on others in various stages of completion, I mounted this stabilized curly maple bowl. At 15 3/4" diameter, it's about as big as I can go on my lathe. This is the second turn, after the seasoning process is completed.
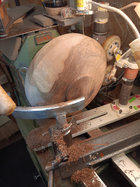
The first thing to do is bring it to round again, and this one did warp a little in the seasoning process. Here's a little tip some of you might be able to use..... I use an artist's ebony pencil to cover the entire surface prior to bringing it to round. Here, I've almost completely brought it to round, except a very tiny bit that still needs to come off. (see the arrow in the picture) This way, I can bring a bowl back to round and take off the bare minimum of wood to accomplish this. At this point, I survey the overall shape, and come up with a tentative "game plan" for what the final shape might evolve to.....
-o-

The 2nd turning of a maple bowl 11” x 5”, that was 1st turned fall of ’21. I love all of that heartwood. Lots to look at with grain patterns and colors. Am finishing the foot, final sanding on the exterior, and hopefully the 1st coat of a finish, today. Still debating finishes. I want maximum contrast, not concerned with how dark it gets as long as the color is rich.
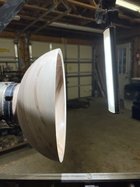
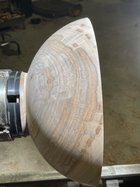
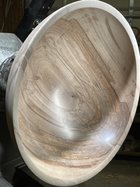


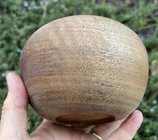
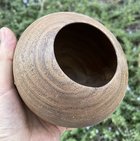 just turned this wet piece of claro walnut, 5 1/2 inch diameter. Should have twice turned it but I was having fun. Overnight it lost 13 grams in weight. I’ve still got the mortise so I might return it when dry. One coat PTO which helped me see scratch marks for sanding—sanding I didn’t need to do if twice turned. Still has a few scratch marks at 9 o’clock in second picture.
Mark, nice big bowlThe 2nd turning of a maple bowl 11” x 5”, that was 1st turned fall of ’21. I love all of that heartwood. Lots to look at with grain patterns and colors. Am finishing the foot, final sanding on the exterior, and hopefully the 1st coat of a finish, today. Still debating finishes. I want maximum contrast, not concerned with how dark it gets as long as the color is rich.
View attachment 59073View attachment 59074View attachment 59075
I am a one trick pony with finishing, have used this for quite a few years, PTO ( Polymerized Tung Oil) yes it will darken the wood slightly, but unlike BLO that keeps on darkening, PTO will not, it is a safe tough finish not affected by normal household chemicals we use.
It was never cheap, but has gotten quite expensive IMO as I paid CA$84-- for a 1 liter can of it from LeeValley, as one does not need a lot, it will last me for a while, normally I just wipe the oil on, let it sit for maybe 20 minutes and the wine it down well.
most times I will wipe one more coat as before, and then let it harden before polishing, works for me.
a little less, I think here: https://www.sutherlandwelles.com/original-formula-interiorgotten quite expensive
Last edited:
Yes Alan, I know about that, however with the low value of the Canadian Dollar, plus shipping/handling and excise duties the outcome for me is no savings, but yes US customers will save on that I would thinka little less, I think here: https://www.sutherlandwelles.com/original-formula-interior
Thank you, Leo. Based on your testimonial and obvious successes, I’ve decided to give polymerized tong oil a try. I like simplicity, durability and good color enhancement, so hoping this will be a good fit.
For this piece (so I could do it now) I went with t&t varnish oil, thinned with turpentine. So far looks good.
For this piece (so I could do it now) I went with t&t varnish oil, thinned with turpentine. So far looks good.
Leo I tried the polymerized tung oil from Lee Valley today on two smaller natural edge bowls today. Really like the finish and color. One was honey locust and the other horse chestnut. Just wondering are there any special notes on application of this tung oil, nothing noted except for fumes and making sure nothing gets on hands or eyes. Sorry for the poor photo quality, was in a hurry.
Attachments
Norm I'll give you this here, ignore the sealer part, you can try it but I found there to be no need for this (you can make it by thinning the oil with a thinner), also you have to keep the air away from the PTO, as it will harden the oil and you can not undo this after it has hardened, as with other oils where some added thinners will do just that, the PTO reacts by exposure to the air into a different material, and that can not be undone.Leo I tried the polymerized tung oil from Lee Valley today on two smaller natural edge bowls today. Really like the finish and color. One was honey locust and the other horse chestnut. Just wondering are there any special notes on application of this tung oil, nothing noted except for fumes and making sure nothing gets on hands or eyes. Sorry for the poor photo quality, was in a hurry.
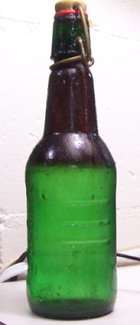
There are stop loss bags to preserve the PTO, but I have always used a re-closable glass (Beer) bottle, I will add just water to keep the bottle full, (Oil floats on water)
Also do not use steel wool, with turnings the wool will break off and steel particles will get imbedded into the wood, causing stains.

Last edited:
Thanks again Leo for the info.
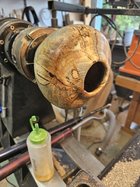
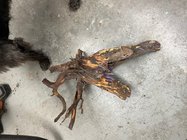
I had a piece of manzanita root on the shelf for several years. I finally decided to see what I could make out of it. This stuff is hard as woodpecker lips and I found a couple rocks imbedded which is not good for bowl gouges. Even without the rocks you might as well keep the grinder going because the tool dulled quickly. I was happy that it held together.
Attachments
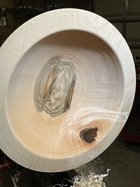
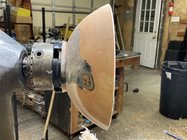
I got some maple last week. Six nice logs, about 16” x 18” which I quickly cut into 12 bowl blanks. A lot more sapwood than I hope for, but as it turns out, is lovely wood.
1st turning of the first of these showed some crazy chatoyance! Hopefully, I’ll be able to keep that branch trunk from causing issues. Green (wet) maple is so fun to turn, like butter!
I find turning green wood gives a great opportunity to refine gouge work, outside cuts with the handle down, flute up for that super slicing push cut. I think it’s still considered a ’push’. Or that interior cut, shaping the walls with the left wing riding. Mistakes usually aren’t ruining!
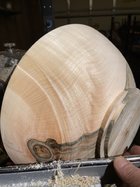


Mark, that knot will shrink if you do not prevent that, I use CA to fill the knot so it will not shrink.I got some maple last week. Six nice logs, about 16” x 18” which I quickly cut into 12 bowl blanks. A lot more sapwood than I hope for, but as it turns out, is lovely wood.
1st turning of the first of these showed some crazy chatoyance! Hopefully, I’ll be able to keep that branch trunk from causing issues. Green (wet) maple is so fun to turn, like butter!
I find turning green wood gives a great opportunity to refine gouge work, outside cuts with the handle down, flute up for that super slicing push cut. I think it’s still considered a ’push’. Or that interior cut, shaping the walls with the left wing riding. Mistakes usually aren’t ruining!
View attachment 59141View attachment 59142View attachment 59143
It would be a shame if that beauty would split because of that, it a is very nice piece od wood.
Wow, gorgeous maple, Marc! I 100% agree about green-turning and practicing finer gouge cuts.I got some maple last week. Six nice logs, about 16” x 18” which I quickly cut into 12 bowl blanks. A lot more sapwood than I hope for, but as it turns out, is lovely wood.
1st turning of the first of these showed some crazy chatoyance! Hopefully, I’ll be able to keep that branch trunk from causing issues. Green (wet) maple is so fun to turn, like butter!
I find turning green wood gives a great opportunity to refine gouge work, outside cuts with the handle down, flute up for that super slicing push cut. I think it’s still considered a ’push’. Or that interior cut, shaping the walls with the left wing riding. Mistakes usually aren’t ruining!
View attachment 59141View attachment 59142View attachment 59143


