-
April 2025 Turning Challenge: Turn an Egg! (click here for details) -
Congratulations to Kelly Shaw winner of the March 2025 Turning Challenge (click here for details) -
Congratulations to Guillaume Fontaine for "Nebules" being selected as Turning of the Week for April 6, 2025 (click here for details) -
Welcome new registering member. Your username must be your real First and Last name (for example: John Doe). "Screen names" and "handles" are not allowed and your registration will be deleted if you don't use your real name. Also, do not use all caps nor all lower case.
You are using an out of date browser. It may not display this or other websites correctly.
You should upgrade or use an alternative browser.
You should upgrade or use an alternative browser.
What’s on your lathe?
- Thread starter Rusty Nesmith
- Start date
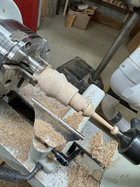
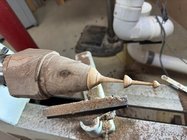
Currently working on inside out turning of snowmen with three sides. Got the idea from the most recent edition of Woodturning FUNdamentals written by our own John Lucas here on the Forum. They aren't too hard, but I am waiting on some supplies from Amazon to finish them off. I will post a couple in the gallery soon, but here is a sneak peak....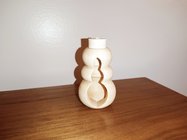

Kevin Jesequel
TOTW Team
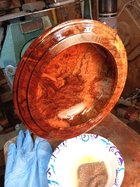
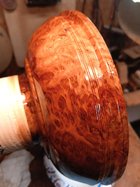
Your “walnut” looks an awful lot like padauk to me.little walnut bowl. Didn’t see the tool marks till oil went on. Back to sanding. Damn it. View attachment 58069
might be, in fact, probably is. Got a bunch of wood from Cook’s but not labeled individually and I’m a newbie. Thanks! Fixed it.
Last edited:
Oregon Claro Walnut burl.
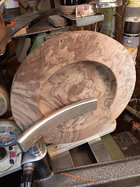
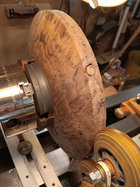
I haven't been taking pics of roughed bowls, but this one looks like it will really "pop" when the D.O. is applied. It was the last thing I did last night prior to closing up shop past Midnight!
It still needs to go through the seasoning process to moisture stabilization, wasteblock applied, and finish turned......and, that will be a few months down the road...
-o-


Last edited:
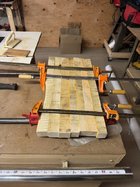
Gabriel, what thickness wood did you use for the glue up. I was going to try some of thoseCurrently working on inside out turning of snowmen with three sides. Got the idea from the most recent edition of Woodturning FUNdamentals written by our own John Lucas here on the Forum. They aren't too hard, but I am waiting on some supplies from Amazon to finish them off. I will post a couple in the gallery soon, but here is a sneak peak....View attachment 58041
Kevin how thick do you leave the bowl? Do you seal it for the year? Beautiful wood.
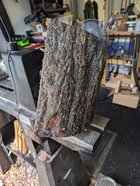
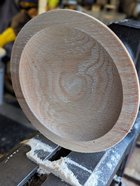
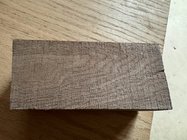
Sure looks likeOak to me
It could be. The arborist who dropped it off told me it was hickory.Sure looks likeOak to me
I just logged in on my computer so I could see a larger view. I agree with Leo. The rays and the porous rings are a dead giveaway for some type of Oak, one of the red varieties specifically. Can't trust those arborists hahaIt could be. The arborist who dropped it off told me it was hickory.
That's cool if it is. I guess I'll find out in 6 months or so when if it cracks or splits. I've had issues with green oak splitting on me.I just logged in on my computer so I could see a larger view. I agree with Leo. The rays and the porous rings are a dead giveaway for some type of Oak, one of the red varieties specifically. Can't trust those arborists haha
Hey Vincent, I used a piece of hard maple that was 7/8" thick. I cut three pieces at a 60° angle on both sides and fit them together temporarily with CA glue while I turned the inside profile. Make sure the thickness of the board is the same as the thickness of the cutting width.Gabriel, what thickness wood did you use for the glue up. I was going to try some of those
Charles it does not need to split, make sure there is no split in now, and then let it dry SLOWLY, stick in brown paper bag and set it away, just give it all the time it needs, I have turned Oak and with slow drying they al came out just fine, no splitting.That's cool if it is. I guess I'll find out in 6 months or so when if it cracks or splits. I've had issues with green oak splitting on me.
Last edited:
That's the plan. It's labeled and in a paper bag drying. I'll check it's MC in 6 months. After doing some image searches I think y'all are right, it sure looks a lot like oak.Charles it does not need to split, make sure there is no split in now, and then let it dry SLOWLY, stick in brown paper bag and set it away, just give it all the time it needs, I have turned Oak and with slow drying they alcove out just fine, no splitting.
I'm a little disappointed that my arborist misinformed me about this log. I like turning pecan but I've never turned hickory and since they're in the same family (genus) I was looking forward to turning it and seeing how it compared to turning pecan. Oak is not my fav because I've had issues with it in the past but it can be really pretty as well as functional so I'm sur I'll get lots of good blanks out of it. My wife is eager to paint a few pieces once they're dried. I think if he had said it was oak I'd feel different about it. At least he didn't mislead me about the camphor stump but then that one is hard to misidentify.That's cool if it is. I guess I'll find out in 6 months or so when if it cracks or splits. I've had issues with green oak splitting on me.
The rough bowl is turned to about an inch in thickness. I apply some paste wax to end grain areas to slow down the drying and store in my unheated garage. When the weight stabilizes in 6 to 9 months, I will take it to a dry kiln for about 6 weeks in the kiln. Then I finish turn the dried bowl.Kevin how thick do you leave the bowl? Do you seal it for the year? Beautiful wood.
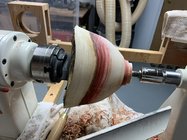
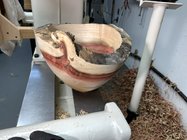
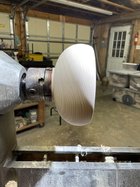
This will be my first attempt at hollowing with the Oneway system. Plan is to hollow to about 3/4 inch thickness and dry for 6 months. Place in a heated box for several weeks and the finish turn. I have some of the threaded brass inserts and will make a lid later. Curious as to what speed you would hollow. Size is about 6 inches diameter and 9 inches long.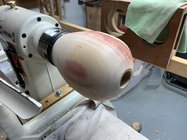

Would be very interested how the bleaching works out Marc. I too would like the whiter lighter colours of some the bowls Ive turned to stay that way. eg. hackberry as an example. Please post your final result when done.The second turning for this Ash calabash form, about 10” diameter. I love the lightness of this bowl, and want to keep it as non-yellow as possible. So, I’ll be making my first attempt at two part wood bleach. Not sure what after that for a protective finish.
View attachment 58123View attachment 58118View attachment 58124
What kind of wood is this Alan? Really nice effect.another end grain spoke wheel pattern NIP bowl, this time about 1/8 inch thick, about 13 inch diameter. One coat of PTO. Might try a CA finish down the road. It’ll stabilize a couple little cracks.View attachment 58021
Doug.....I'm not Alan, but I can help out.What kind of wood is this Alan? Really nice effect.
It's Norfolk Island Pine.....known as NIP
here a link to information on these AAW forums....click:
Search results for query: norfolk island pine
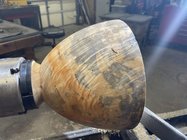
Box elder bowl 10” across by 8. The second turning. Lots of blue staining, the blank was given to me by a friend who hates the stains, has tried strategies to remove them. I tend to embrace what is, and find ways to celebrate whatever nature, including fungus has given me to work with.
The outside had been sanded to 180 then wetted, just to get a feel for what’ll happen with a finish.
I noticed a few minor, tiny cracks at the rim, at the end grain section. After debate, I reinforced them with ca, figuring I still had room to clean up the glue stains, but was wrong. Also, the repair pulled the wood, caused slight out of round, which wasn’t the end of the world as all of the cutting was done as well as the corrective sanding.
To gain maximum contrast for the colors and figure, I contemplated use of dye with the finish. But even though I sanded out almost all of the glue, I worry that I’ll have an unmatch where the glue was. A penetrating finish, danish oil thin with turpentine should make them disappear.
I should be at that point later in the weekend.
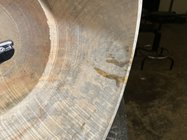


I’ve (finally) learned to spray a little shellac on before the CA repair. I’m told sanding sealer works also. I like the spalting or blue rot or whatever it’s called. Nice form.
Thanks for the reply Odie. I see you are in Montana. What part? I do get to northern Montana (Kalispell) area on occasion.Doug.....I'm not Alan, but I can help out.
It's Norfolk Island Pine.....known as NIP
here a link to information on these AAW forums....click:
Search results for query: norfolk island pine
www.aawforum.org
That's a good tip. I'm going to have to try and remember that and try it next time I need to do a repair.I’ve (finally) learned to spray a little shellac on before the CA repair. I’m told sanding sealer works also. I like the spalting or blue rot or whatever it’s called. Nice form.
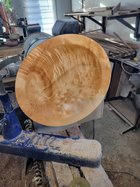
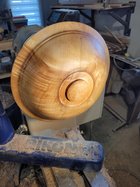
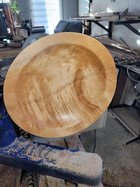
Spent most of the day making a “chips and dip” serving platter with a subtle bump to accept a glass dish in the center for salsa or guacamole or something.
I had a lot of trouble getting it sanded, I think because it’s not totally dry and some of the grain is still soft and flexible in places. Luckily the interesting grain is working hard to make it look nice! Fresh coat of Tried and True Original to make it pop for the picture.
Approx. 12” diameter. Is this what they call Ambrosia Maple? It’s a limb trimmed from our neighbors’ tree.
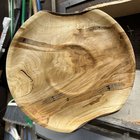

Yes it is . The holes are where the Ambrosia Beetle tunneledSpent most of the day making a “chips and dip” serving platter with a subtle bump to accept a glass dish in the center for salsa or guacamole or something.
I had a lot of trouble getting it sanded, I think because it’s not totally dry and some of the grain is still soft and flexible in places. Luckily the interesting grain is working hard to make it look nice! Fresh coat of Tried and True Original to make it pop for the picture.
Approx. 12” diameter. Is this what they call Ambrosia Maple? It’s a limb trimmed from our neighbors’ tree.
View attachment 58249
Hi Doug...... I live just outside of Missoula.Thanks for the reply Odie. I see you are in Montana. What part? I do get to northern Montana (Kalispell) area on occasion.
-o-
Odie, I have friends in Darby, south of Hamilton. What direction from Missoula are you. Beautiful country thru there.

