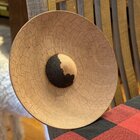
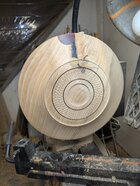
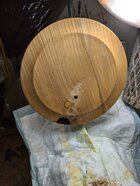
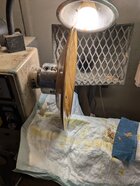
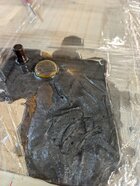
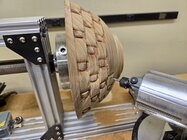
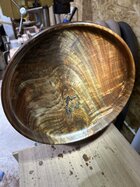
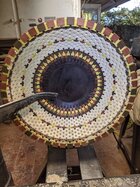
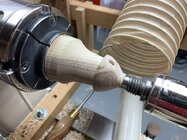
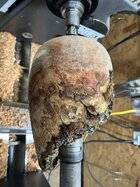
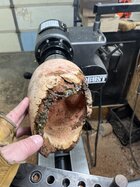
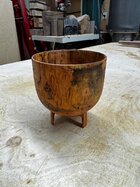
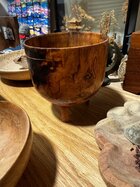
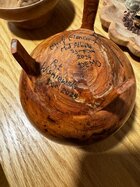
It looks like a UFO bowl!One of a few works in progress. Tis the season where they really start to pile up, yeah? This is the bottom of a Sapele bowl, ~6.5” diameter. The interior of the bowl also has a dome in the middle. Much more to be done though!
View attachment 69594
-
It's time to cast your vote in the June 2025 Turning Challenge. (click here for details) -
Congratulations to John Shannon"Cherry Bowl" being selected as Turning of the Week for June 30 2025 (click here for details) -
Sign up for the 2025 AAW Forum Box Swap by Monday, June 30th (click here for details) -
Welcome new registering member. Your username must be your real First and Last name (for example: John Doe). "Screen names" and "handles" are not allowed and your registration will be deleted if you don't use your real name. Also, do not use all caps nor all lower case.
You are using an out of date browser. It may not display this or other websites correctly.
You should upgrade or use an alternative browser.
You should upgrade or use an alternative browser.
What’s on your lathe?
- Thread starter Rusty Nesmith
- Start date
Looks like a uniform randomness! Can't wait to see your completion of (ritz) crackers!
Big Brother is watching (listening)!! My Dad had one of these in his backyard circa 1992!
Thanks Bernie! It's always a bit challenging to balance order and chaos haha. And now I'm hungry again.Looks like a uniform randomness! Can't wait to see your completion of (ritz) crackers!
Hahaha. We had a massive satellite dish in one house growing up. Like 8' diameter or so. I think my dad ended up converting it into a raised garden bed or something similar.Big Brother is watching (listening)!! My Dad had one of these in his backyard circa 1992!
That stuff is greatYes, I have a spool of pallet wrap to use for that purpose.
Yesterday I had the cherry lidded vessel with it's first application of DO under my fan for about 4 hours and that appeared to eliminate the solvent smell. The connection between the fan and the AC adapter was completed to eliminate the 12VDC dry cell.A recent thread where the problem of finishes not completely curing or the solvents never completely drying in closed in vessels. That is a problem I have experienced many times and I had an idea that may fix that problem.
The experiment is to mount a fan to blow air into the vessel: The key ingredient that I needed is a small fan and being a pack rat I had saved the cooling fans from 3 of my past failed tower computers. The next things are all made of wood as you can see by the pictures. The 12VDC battery will be replaced an old AC adapter that puts out 12VDC at 1.66amps and the fan is rated at 12VDC 0.41 amp.
The nozzle was made on the lathe and the remaining parts on various other machines including my Bridgeport mill.
View attachment 69595View attachment 69596View attachment 69597
The second application of DO was let sit for about 2 hours, wiped down, put under the fan from 8:00 PM 12/6/24 to 10:00 Am 12/7/24 and again the solvent smell appears to be gone.
- Joined
- Nov 27, 2021
- Messages
- 200
- Likes
- 786
- Location
- Silver Spring, MD
- Website
- www.transpirationturning.com
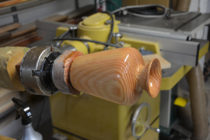
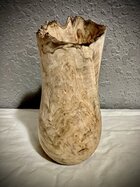
Quick story, but I sold a 16' car trailer and had used a scrap block of maple as a wheel chock. Once the trailer was gone, I tripped over the wheel chock for a couple months when I noticed it had some potential. None the less, this is the second vase from the wheel chock. I'll post a picture when it's done. I've attached an image of the first vase.
Natural Edge Maple vase, 10x4.
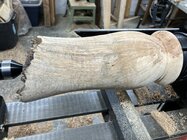
Natural Edge Maple vase, 10x4.

Attachments
Wish me luck! Sugarberry.
View attachment 69570
The shape here is after roughing and getting down below the bark layer.
View attachment 69571
You can't see it, but I almost cut through that bark inclusion on the bottom right. It's no more than 1/16" there. I don't have the setup for pewas. Time for some Weinberg coins!
I'm still trying to save this one. I broke off two tenons barely touching the interior. actually, the last tenon cracked badly but didn't break off. I'll soak it with CA, but I don't have a lot of hope. I'll have to cut off that neck to have a fighting chance of hollowing this piece.
Those discoveries are fun.Quick story, but I sold a 16' car trailer and had used a scrap block of maple as a wheel chock. Once the trailer was gone, I tripped over the wheel chock for a couple months when I noticed it had some potential. None the less, this is the second vase from the wheel chock. I'll post a picture when it's done. I've attached an image of the first vase.
Natural Edge Maple vase, 10x4.
View attachment 69703
I'm looking forward to seeing how that turns out.Second attempt at a woven illusion. Better than the first one, but still quite a bit to figure out.
View attachment 69667
Try a mortise.I'm still trying to save this one. I broke off two tenons barely touching the interior. actually, the last tenon cracked badly but didn't break off. I'll soak it with CA, but I don't have a lot of hope. I'll have to cut off that neck to have a fighting chance of hollowing this piece.
Try a mortise.
It can't hurt. I'm basically stuck at this point.
Maybe you could attach a glue block, and use it to make a solid tenon.It can't hurt. I'm basically stuck at this point.
Maybe you could attach a glue block, and use it to make a solid tenon.
I miss the most obvious things sometimes.
Nah, there are a lot of tunnels in this rabbithole. Makes it easy to miss somethingI miss the most obvious things sometimes.
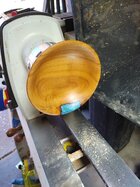
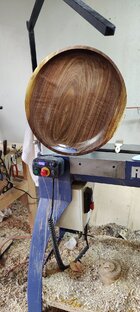
I've learned a lot on this walnut bowl/platter. I rough turned it and set it in the drying box for 6 weeks. Being the pro that I am, I neglected to weigh the piece going into the box. I figured it was dry enough. Nope. Lesson one learned.
It has a small void that I attempted to fill with 5-minute epoxy. This was my first time doing so. It ain't pretty and I need to work on it some more. Also, by this time there's no way to turn off the excess epoxy because the bowl has warped pretty dramatically.
I forget how big this bowl is, but I think 14". This will be my largest bowl to date. It's wet with a coat of shellac sanding sealer in this shot.

If in doubt, weigh and then microwave 2 1/2 minutes. Reweigh. Won’t lose weight if dry.I figured it was dry enough
Cherry burl
If in doubt, weigh and then microwave 2 1/2 minutes. Reweigh. Won’t lose weight if dry.
Prior to this I had weighed everything. I either got lazy or forgot.
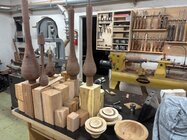
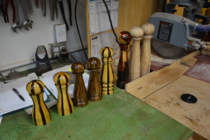
A bunch of roughed out wooden components I’m making up for a local sculptor. Still a ways to go with all of them. Claro walnut branches provided by her, all with pith and accompanying checks included except for the smallest one second from left. Very dry though. The three tall ones will have tenons top and bottom and act as structural supports, while four smaller pieces will be suspended from their skinny ends.
The finished piece will include a large piece of cast glass and some cast bronze as well. I’ll likely post some photos of the finished work and maybe some of the concept sketches, but I want to check with the artist first.
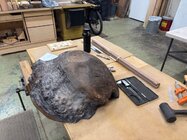
Next step will be mounting this chunk on a faceplate to deepen the carved-out recess on top by a little bit. It’s quite large, full of cracks, and will be very out of balance since the recess is off-center. Just shy of 30 inches, so tomorrow morning I’ll be dropping the bed extension down to its lower mounting position for the first time. Slightly daunting but exciting!
Cherry burl
Where's your burl, Ted?
Where's your burl, Ted?
Attachments
Though I spent the majority of today building drawer boxes for custom dressers - I ended the day by getting back to finishing a piece Mark Hancock had started during the Mid-Atlantic Symposium back in September, which he had placed in the silent auction. The bottom is a bit rough as I did not want to obliterate his signature. Forgot to get a photo while it was still ‘on’ the lathe…
Attachments
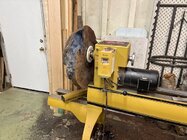
Flattened out the back of this large piece this morning. No drama, but I’m not impressed with Powermatic’s extension post for the tool rest. I could easily flex it at least 1/16” with one hand. Got the job done though, and the back is now flat to within less than 1/64” over the whole surface, minus where the faceplate is screwed on.
I was very pleased with the faceplate. Oneway Versa-Mount. It’s a two piece system designed specifically for large, heavy blanks. Once it was screwed to the wood, I was able to mount the blank unassisted in about 30 seconds. Definitely a step up from standard faceplates or chuck-mounted rings.
Neat shape Michael! Question....Will you fill the pores or leave it to absorb a finish. I always find that if I don't fill them, the finish will cause a white "liming" effect. Or will you use the dust and ca method?
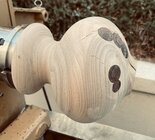
Small Honduran Mahogany calabash that is one part of my pre-holiday swap piece. I should be finished with the piece tonight, and hopefully in the mail Saturday.
View attachment 69823
Thanks Gabriel! Great question. I’m not filling the pores in on this one. I’m finishing with oil/varnish, so I’m not too concerned. If it was a lacquer finish I’d definitely fill via the dust/CA method.Neat shape Michael! Question....Will you fill the pores or leave it to absorb a finish. I always find that if I don't fill them, the finish will cause a white "liming" effect. Or will you use the dust and ca method?
Nice piece, Michael! I like the dark bottoms that end grain bowls always have when they’re finished. Did you leave any extra thickness in the bottom?
Thanks Isaac! I do as well (the dark bottoms).Nice piece, Michael! I like the dark bottoms that end grain bowls always have when they’re finished. Did you leave any extra thickness in the bottom?
I do usually leave the bottoms thicker. Usually around 2x the wall thickness (if thin walls), ish. This one has some unique features though, so I left it extra thick.

