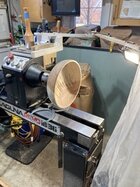
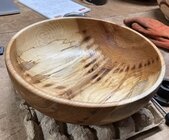
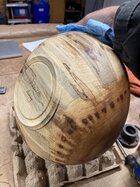
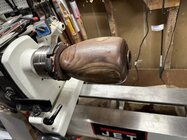
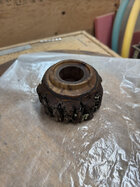
Y’a think?You might have a problem. ;-)
-
April 2025 Turning Challenge: Turn an Egg! (click here for details) -
Congratulations to Kelly Shaw winner of the March 2025 Turning Challenge (click here for details) -
Congratulations to Guillaume Fontaine for "Nebules" being selected as Turning of the Week for April 6, 2025 (click here for details) -
Welcome new registering member. Your username must be your real First and Last name (for example: John Doe). "Screen names" and "handles" are not allowed and your registration will be deleted if you don't use your real name. Also, do not use all caps nor all lower case.
You are using an out of date browser. It may not display this or other websites correctly.
You should upgrade or use an alternative browser.
You should upgrade or use an alternative browser.
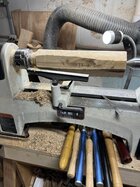
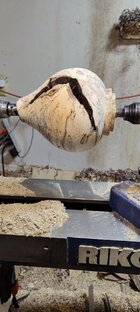
What’s on your lathe?
- Thread starter Rusty Nesmith
- Start date
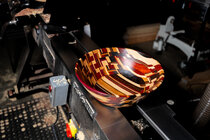
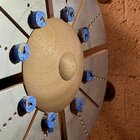
Not really. 3 of them won't fit the new lathe and don't have inserts. They are 1x8 direct thread. Will sell them once the new lathe shows up. Does make a nice photo though!You might have a problem. ;-)
Of course I can use the money from the sale to buy more...hmmmm.
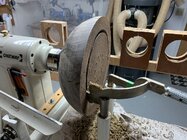
I like it, simple yet elegant. Thanks for sharing.New bowl exchange. Different rim embellishment and a little smaller. Still a few more burn lines at the top to do. Maple 9” overall diameter, 6” bowl diameter and 2” tall.
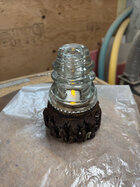
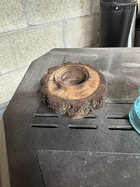
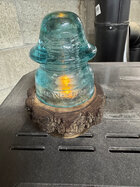
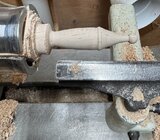
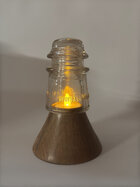
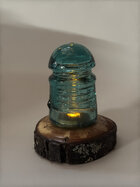
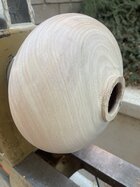
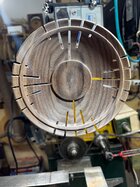
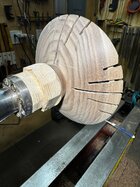
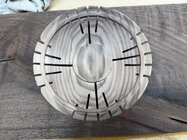
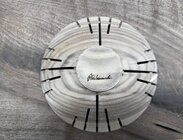
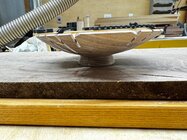
Those are great, especially the first one!Friend of the family asked if I could make a couple displays for her insulator collection.
Made 2 out of walnut. Will see if she prefers one over the other.
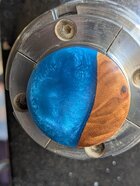
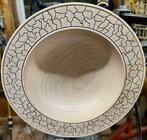
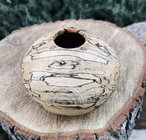
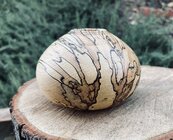
View attachment 69236View attachment 69237View attachment 69238View attachment 69239
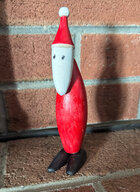
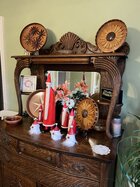
Looks like Spy vs. Spy. Holiday issue.
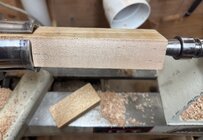
I obtained some curly maple that was 18 to 22% MC. These 3 pieces are going to be rolling pins. But rather than leaving them in the square, I rough turn them to decrease the drying time. In a few weeks, they will be dry enough to put them in my small kiln to bring them to about 10 to 12% and ready for final turning. Can’t wait to see them after oiling and buffing! Oh, and there’s a couple of ambrosia beetle holes to fill.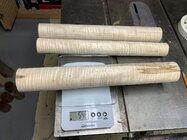

I know this isn’t what Randy meant when he started this thread 4,055 post ago, but I couldn’t resist posting what is “on” my lathe. I have a neighbor I just got to know who has an Alaska mill. He’s had a red oak board on his truck for a few weeks that he milled. I’d never met him before, but walking past his house a week ago I finally caught him outside and said “that’s a beautiful plank you’ve got there.” (How’s that for an opening line?). He answered “You want it?” I leapt at it and went to pick it up yesterday. He also gave me a piece of another board of white oak 30” long by 24” wide by 4” thick. The red oak was 14’ long by 20” wide by 3 1/4” thick. I’ve cut it into rough blanks, cut a few into discs, and just finished coating it all. The red oak has some shallow surface checks, so I don’t have high hopes that it will all be useful, but even if I get 50% usable, I’ll be thrilled. 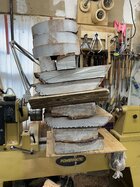
And here’s one platter, 14” in diameter, that I turned green this morning, just because I couldn’t resist. I’m confident it will warp, and likely crack, but as I said, I couldn’t resist.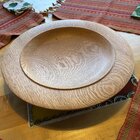

And here’s one platter, 14” in diameter, that I turned green this morning, just because I couldn’t resist. I’m confident it will warp, and likely crack, but as I said, I couldn’t resist.

The piece should be OK if you turned it to a uniform wall thickness and control the initial drying, however from the looks of that form it probably isn't uniform.I know this isn’t what Randy meant when he started this thread 4,055 post ago, but I couldn’t resist posting what is “on” my lathe. I have a neighbor I just got to know who has an Alaska mill. He’s had a red oak board on his truck for a few weeks that he milled. I’d never met him before, but walking past his house a week ago I finally caught him outside and said “that’s a beautiful plank you’ve got there.” (How’s that for an opening line?). He answered “You want it?” I leapt at it and went to pick it up yesterday. He also gave me a piece of another board of white oak 30” long by 24” wide by 4” thick. The red oak was 14’ long by 20” wide by 3 1/4” thick. I’ve cut it into rough blanks, cut a few into discs, and just finished coating it all. The red oak has some shallow surface checks, so I don’t have high hopes that it will all be useful, but even if I get 50% usable, I’ll be thrilled. View attachment 69389
And here’s one platter, 14” in diameter, that I turned green this morning, just because I couldn’t resist. I’m confident it will warp, and likely crack, but as I said, I couldn’t resist. View attachment 69390
No, Don, you’re correct. It’s thicker in the rim than towards the center. I won’t be upset. I’m more curious to see if any of the surface checks I turned away reappear.from the looks of that form it probably isn't uniform.
PS- I just noticed a coincidence - we joined the forum within a day of each other!
Two more insulator display holders.
The first one looked like an angel to me so I turned it as such. Will have them add wings and a hallow.
Second one is apple with bark attached.
View attachment 69393
View attachment 69394
Thanks for the ideas. I have a couple that I picked up hunting that could use a base. Great reminders of fun times with friends.
Bob
I can only dream of turning something like this. A hardwood bowl over 6" dia.! We have 10' diameter cedar, spruce, and hemlock old-growth forests, but that is not the same as a +16" bowl out of a nice hardwood. Enjoy!Working on one of my three “ bring them in the booth bowls”. It is walnut, 16-1/2” and should end up between 6-1/2 to 6-3/4” tall. Will turn the inside this afternoon. I have another walnut to second turn that is a little larger and an ambrosia maple that is 18” before the second turn. Probably go for 3/8” thickness on this one instead of 1/4”. Looks like the grain pattern on the outside bottom will be on the inside bottom.
I had 3 this size at my last show and someone bought two of them and the gallery wanted the other one. I try to keep 2-3 large bowls because it brings people in, then they see the price and then buy a smaller bowl!
View attachment 67830
View attachment 67829
Cherry end grain lidded bowl or some kind of container.
The bowl was turned green in October from the full round ( the pith is in the base), the walls were about 5/16" thick and the 2" tenon on the bottom was drilled out with a 1" multi spur bit to relieve the stress in the end grain. The green turned piece was weighed and put in a brown paper bag then when the weight change lessened it was removed from the bag then finish turned when the weight stopped decreasing. The finish dimensions are about 8" high with the lid, about 4" diameter at the max and at the lid and the wall is about 1/8" thick. The blank for the lid is segmented with 4 segments per layer. the layers were glued up with each joint being side grain to end grain and the result was the outside turning is all shearing cuts. The layers were glued with each layer rotated 45 degrees to the one below.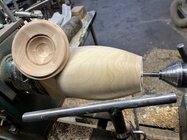
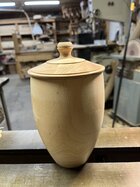
The bowl was turned green in October from the full round ( the pith is in the base), the walls were about 5/16" thick and the 2" tenon on the bottom was drilled out with a 1" multi spur bit to relieve the stress in the end grain. The green turned piece was weighed and put in a brown paper bag then when the weight change lessened it was removed from the bag then finish turned when the weight stopped decreasing. The finish dimensions are about 8" high with the lid, about 4" diameter at the max and at the lid and the wall is about 1/8" thick. The blank for the lid is segmented with 4 segments per layer. the layers were glued up with each joint being side grain to end grain and the result was the outside turning is all shearing cuts. The layers were glued with each layer rotated 45 degrees to the one below.


Lovely vessel Don. I had never thought of drilling out the base to relieve the stress! Great tip! Thanks,.
I only partially drilled it out that is only to the depth of the tenon and that has worked on most of the endgrain pieces that I have tried it on. The other factor that allows the pith to be included is the smaller base and of course slow controlled drying.Lovely vessel Don. I had never thought of drilling out the base to relieve the stress! Great tip! Thanks,.
I look forward to seeing it with some finish!
Yes cherry is kind of bland until it has a finish to enhance the grain and color.I look forward to seeing it with some finish!
I just applied the first Watco DO and that did bring out the richness of the cherry, but the final waxing is at least a week away.I look forward to seeing it with some finish!
I’ll mail them but you need a template! Good luck. Cool form.Wish me luck! Sugarberry.
View attachment 69570
The shape here is after roughing and getting down below the bark layer.
View attachment 69571
You can't see it, but I almost cut through that bark inclusion on the bottom right. It's no more than 1/16" there. I don't have the setup for pewas. Time for some Weinberg coins!
Wish me luck! Sugarberry.
View attachment 69570
The shape here is after roughing and getting down below the bark layer.
View attachment 69571
You can't see it, but I almost cut through that bark inclusion on the bottom right. It's no more than 1/16" there. I don't have the setup for pewas. Time for some Weinberg coins!
Very cool. Can’t wait to see what it looks like finished.
Bob
Wrap the outside with saran wrap to hold it together.Wish me luck! Sugarberry.
View attachment 69570
The shape here is after roughing and getting down below the bark layer.
View attachment 69571
You can't see it, but I almost cut through that bark inclusion on the bottom right. It's no more than 1/16" there. I don't have the setup for pewas. Time for some Weinberg coins!
Yes, I have a spool of pallet wrap to use for that purpose.Wrap the outside with saran wrap to hold it together.
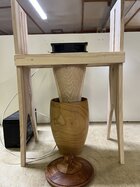
A recent thread where the problem of finishes not completely curing or the solvents never completely drying in closed in vessels. That is a problem I have experienced many times and I had an idea that may fix that problem.
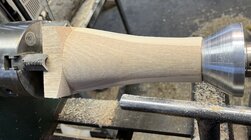
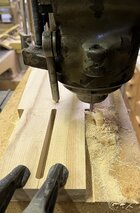
The experiment is to mount a fan to blow air into the vessel: The key ingredient that I needed is a small fan and being a pack rat I had saved the cooling fans from 3 of my past failed tower computers. The next things are all made of wood as you can see by the pictures. The 12VDC battery will be replaced an old AC adapter that puts out 12VDC at 1.66amps and the fan is rated at 12VDC 0.41 amp.
The nozzle was made on the lathe and the remaining parts on various other machines including my Bridgeport mill.


