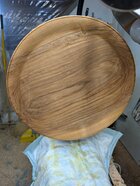
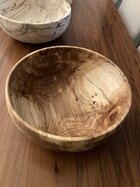
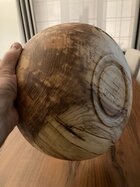
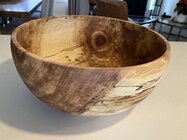
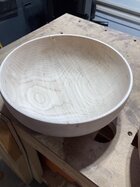
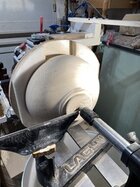
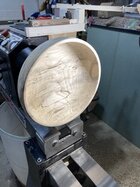
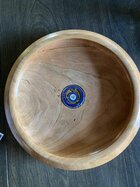
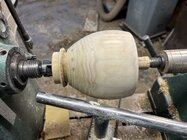
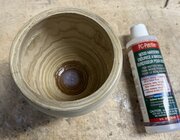
Beautiful form Michael. I have used paste wood grain filler from McFeelys with good success. You can tint it if desired. Brush it on, let it set and then wipe the excess off. Let dry and sand. Does a good job and is much quicker than sawdust and ca. It's just meant for porous grain not actual holes.Thanks Gabriel! Great question. I’m not filling the pores in on this one. I’m finishing with oil/varnish, so I’m not too concerned. If it was a lacquer finish I’d definitely fill via the dust/CA method.
-
December 2025 Turning Challenge: Single Tree! (click here for details) -
Congratulations to Bob Henrickson, People's Choice in the November 2025 Turning Challenge (click here for details) -
Congratulations to Steven Gordon for "Dropped Ice Cream Cone" being selected as Turning of the Week for December 8, 2025 (click here for details) -
Welcome new registering member. Your username must be your real First and Last name (for example: John Doe). "Screen names" and "handles" are not allowed and your registration will be deleted if you don't use your real name. Also, do not use all caps nor all lower case.
You are using an out of date browser. It may not display this or other websites correctly.
You should upgrade or use an alternative browser.
You should upgrade or use an alternative browser.
What’s on your lathe?
- Thread starter Rusty Nesmith
- Start date
Thanks Don! And cool, I’ll have to give McFeelys a try. What do you tint it with?Beautiful form Michael. I have used paste wood grain filler from McFeelys with good success. You can tint it if desired. Brush it on, let it set and then wipe the excess off. Let dry and sand. Does a good job and is much quicker than sawdust and ca. It's just meant for porous grain not actual holes.
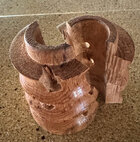
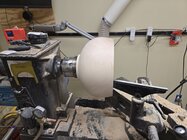
This will be so something that looks like southwest pottery. 13” x something. Base and snout 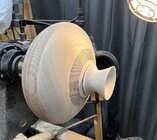 will be will be dyed black with basket illusion bands. I might reshape the snout. I just don’t know. Going to let it sit for a week while I’m gone and see what I think when I get back. Approximately 3/8” thick.
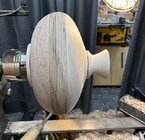
 will be will be dyed black with basket illusion bands. I might reshape the snout. I just don’t know. Going to let it sit for a week while I’m gone and see what I think when I get back. Approximately 3/8” thick.
That hurts whe it happens at the end like that.
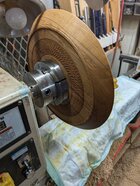
Last week I had a cherry platter come flying out of the Cole jaws and shoot across the shop. It made enough of a racket for my wife to come down to see if I still had all my digits.
Last week I had a cherry platter come flying out of the Cole jaws and shoot across the shop. It made enough of a racket for my wife to come down to see if I still had all my digits.
You can use acrylic paintThanks Don! And cool, I’ll have to give McFeelys a try. What do you tint it with?
I fumbled a piece I had just finished, hit the floor, and it cracked—today. So it’s getting epoxy.Nice haul David!
I had a piece of elm I believe. All done except for drilling a few holes and sanding! Dam drill caught and cork screwed right into the other side splitting it in half!
View attachment 69887
Looks interesting with quality components. Keep us posted.Picked up the new (to me) lathe today. Now to drive it home and get it set up. I hope to be turning on it by the new year.
View attachment 69900
Thanks! It's a refurbed Powermatic 90 with a custom stand so it should be good. It was my MiL's lathe.Looks interesting with quality components. Keep us posted.
- Joined
- Nov 27, 2021
- Messages
- 241
- Likes
- 999
- Location
- Silver Spring, MD
- Website
- www.transpirationturning.com
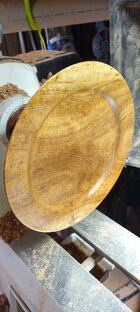
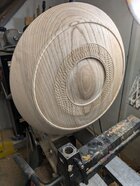
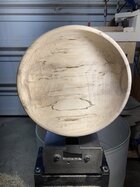
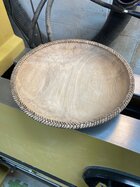
Started out 19 inch but down to around 18 now. Shallow dog dish?
Ash
**Edit**
After some "design changes" it's now 16 inch diameter. I'm happier with the look now then what the top had been (no pic). Wet sanded with Danish oil to 400.
You'll notice that the profile of the wall doesn't match from the outside to the inside. It doesn't match on the 18 century platter I kind of studied before I started this one so I didn't get too hung up about that. The two pics with finish are it's final form.
Attachments
Last edited:
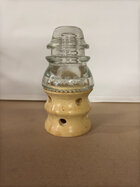
Looks interesting Phil, Post a picture of the completed project.Modified the design and got the piece made. Elm I believe. Lady wants to stuff it with blinking lights.
One more small one to go and this set of projects is complete. Unless I make some for my own insulators.
View attachment 69933
Been a busy week, hickory bowl on Monday. Twice turned, tried and true original one coat at the moment. Hickory log sat for a year outside in the weather, then a year in my crawlspace. Great spalting and interesting grain.
Attachments
On Tuesday, Wednesday turned some maple blanks had drying for the past year and a half that I got from a neighbour, thought it would make a good Xmas gift. Not sure about what finish to use. Like the lighter color, any suggestion appreciated.
Attachments
Hackberry on Thursday and today. Lots of spalting on this log that again sat for one year outside uncovered. Twice turned. Just got the lathe extension for Xmas gift from my wife. Can't wait to turn some big walnut nuggets. Sorry for the photo quality. Been a busy week, lots of sanding but I think after 4 years, I am getting it dialled in.
Attachments
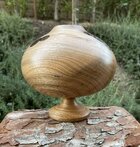
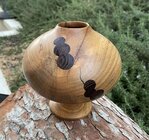
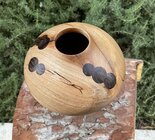
I don't hate it. Starting to like it.I did an ash hollow form on a pedestal. Never done a pedestal. Need opinions. Be brutal if need be. Is it an option worth pursuing?View attachment 69946View attachment 69947View attachment 69948
The idea has potential, but I don’t think you’re there yet. Perhaps the piece would be improved by painting the pedestal black or making a separate pedestal from a dark wood and then attaching it?I did an ash hollow form on a pedestal. Never done a pedestal. Need opinions. Be brutal if need be. Is it an option worth pursuing?
The shape of the hollow form is excellent! It’s my favorite of the ones you’ve posted so far.
I don't hate it. I also think it doesn't add to the shape. If anything it takes your eye away from the hollow form.I did an ash hollow form on a pedestal. Never done a pedestal. Need opinions. Be brutal if need be. Is it an option worth pursuing?
I agree with Phil.
I like the t it takes away from it as your eye is drawn away. I think a small foot would be better.
Bob
I like the t it takes away from it as your eye is drawn away. I think a small foot would be better.
Bob
I like the idea but agree with @Isaac Fisher to make it black.I did an ash hollow form on a pedestal. Never done a pedestal. Need opinions. Be brutal if need be. Is it an option worth pursuing?View attachment 69946View attachment 69947View attachment 69948
I’ll show it to my mentor, likely paint it black, and I can always remove it if voted down. Thanks all!
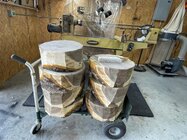
One core down and 6 more to go, 16” and 13”! The Korpro cutter works almost to efficient sometimes causing me to have to stop and clean shavings out no matter how often I pull the cutter out. So I replaced my regular air nozzle with a fine point air nozzle with a hole about the size of a #2 pencil lead. Now every time I pull the cutter out to evacuate shavings I blast it with the compressed air and no longer have to stop to remove shavings. It works 10 times better than a regular nozzle.
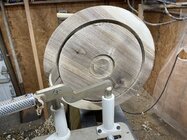

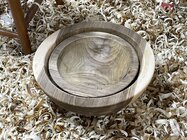


Just remember there’s only one vote that really mattersI’ll show it to my mentor, likely paint it black, and I can always remove it if voted down. Thanks all!
Could you post a pic of the nozzle David? I hope to get my coring system from Oneway this week. Do you turn a tenon for every core as you go?One core down and 6 more to go, 16” and 13”! The Korpro cutter works almost to efficient sometimes causing me to have to stop and clean shavings out no matter how often I pull the cutter out. So I replaced my regular air nozzle with a fine point air nozzle with a hole about the size of a #2 pencil lead. Now every time I pull the cutter out to evacuate shavings I blast it with the compressed air and no longer have to stop to remove shavings. It works 10 times better than a regular nozzle.
View attachment 69977
View attachment 69976
View attachment 69975
Interesting, I really like that. Gotta give it a try.Did a herringbone pattern on a bowl rim.
Norm, I’ll get a picture tomorrow. I’ve used a regular air nozzle in the past but the one with the small hole is so much better.Could you post a pic of the nozzle David? I hope to get my coring system from Oneway this week. Do you turn a tenon for every core as you go?
I use a tenon to hold the min bowl, when I can remember I use a mortise on the front so it’s easier to reverse the core and put a small tenon on the back of it.
I don’t think you need the pedestal, Alan. Looks like it belongs on a different piece IMO. For future pieces, I’d use that extra material to elongate the piece a bit. Not much; maybe half inch to an inch. The longer shape would slow down the speed of the curve near the bottom and help elevate the piece off the table a bit, which is what I suspect was the goal of the pedestal.I did an ash hollow form on a pedestal. Never done a pedestal. Need opinions. Be brutal if need be. Is it an option worth pursuing?View attachment 69946View attachment 69947View attachment 69948
As it stands now, my recommendation is to remove the pedestal completely and let the hollow form stand on its own. The hollow form is a lovely shape and I really like your coin application!
Last edited:

