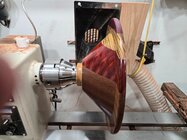
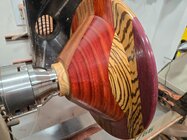
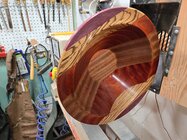
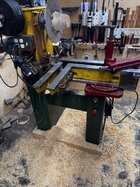
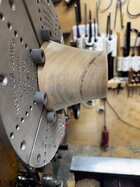
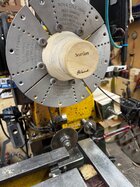
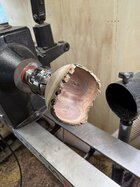
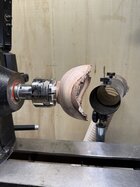
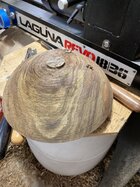
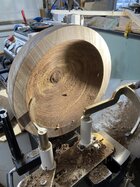
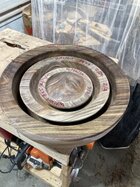
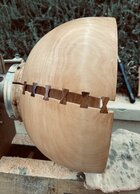
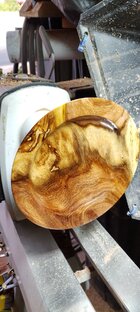
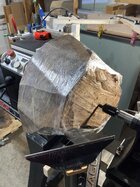
So true! Glad I had my airsense helmet on. Even though it missed me completely.@Phil Hamel your post is a good reminder for us all to remember our face shields And other PPE.
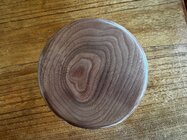
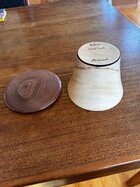
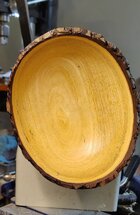
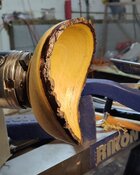
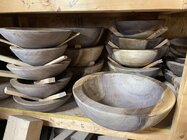
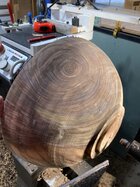
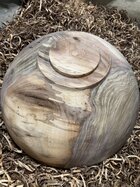
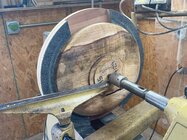
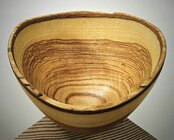
I took 1/2 of this sassafras bowl to the center of the face shield a couple of weeks ago. It sure got my attention.
Bob
-
April 2025 Turning Challenge: Turn an Egg! (click here for details) -
Congratulations to Kelly Shaw winner of the March 2025 Turning Challenge (click here for details) -
Congratulations to Guillaume Fontaine for "Nebules" being selected as Turning of the Week for April 6, 2025 (click here for details) -
Welcome new registering member. Your username must be your real First and Last name (for example: John Doe). "Screen names" and "handles" are not allowed and your registration will be deleted if you don't use your real name. Also, do not use all caps nor all lower case.
You are using an out of date browser. It may not display this or other websites correctly.
You should upgrade or use an alternative browser.
You should upgrade or use an alternative browser.
What’s on your lathe?
- Thread starter Rusty Nesmith
- Start date
A vacuum chuck would work.Working on a live edge bowl from a walnut crotch. Might make it a calabash if I can figure out how to mount it so I can turn a round, symmetrical bottom without needing to grind off a nub and hand sandView attachment 70349
View attachment 70350
Looking great! That crotch pattern is cool in the bottom of the bowl.can figure out how to mount it so I can turn a round, symmetrical bottom without needing to grind off a nub and hand sand
One thing you can do (if you haven’t yet applied finish to the interior) is make a friction chuck that matches the profile of the bottom interior. Use some sort of pad (leather, foam, etc…) while turning away the majority of the bottom. When you’re close to finished (small cone stage) take out the pad and use a few dabs of hot glue to hold the bowl in place and carefully turn away the cone as desired (and my preference would be to add a penny sized dimple). Little bit of alcohol or acetone will take care of the remaining hot glue residue.
Very cool, Alan. Thats a big one! A more secure method than length would be to jam the bowl against a big plywood disc with foam attached to the face. Turn away the bottom as much as possible (or as much as you’re willing), and then cut, sand, etc…Not sure how to turn off the bottom. Need advice. A real long jam chuck?
Got it. Will do and thanks.Very cool, Alan. Thats a big one! A more secure method than length would be to jam the bowl against a big plywood disc with foam attached to the face. Turn away the bottom as much as possible (or as much as you’re willing), and then cut, sand, etc…
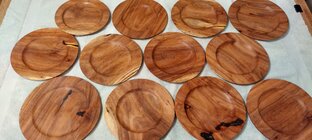
And I finally finished my dozen plate order..Felt like another mesquite bowl/plate? Not sure which it is...
Attachments
Pretty darn good to match shape so well.And I finally finished my dozen plate order..
You have wayyy more patience than I do.And I finally finished my dozen plate order..
Funny thing is Tomaslav and Raffan had just done deep dive plate set videos before I started and I absolutely attribute the consistency to their tips and order of operation recommendations.Pretty darn good to match shape so well.
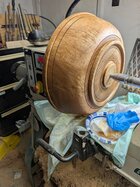
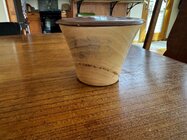
Alan, I made this for second turned bowls and have one very similar to use as a jam chuck, however i also use this one as a jam chuck to remove the tenon. Glen Lucas has a video on how to make one.Biggest I’ve turned yet and doubt I’ll go bigger. 9 inch height and 16 1/2 inch diameter. Pine with koa pewa. Not sure how to turn off the bottom. Need advice. A real long jam chuck?View attachment 70368View attachment 70369
Thanks to you and Michael. I just cut a piece of plywood on the bandsaw, screw chucked it on, put a couple towels over it and put the piece on. Worked great but as I removed wood from the bottom, the crack continued and I had to place 6 more pewa! Now more sanding and oil and then I can move on to something more artistic than a damn big cracked bowl.Alan, I made this for second turned bowls and have one very similar to use as a jam chuck, however i also use this one as a jam chuck to remove the tenon. Glen Lucas has a video on how to make one.
View attachment 70426
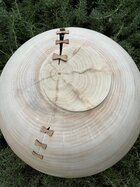

Thanks to you and Michael. I just cut a piece of plywood on the bandsaw, screw chucked it on, put a couple towels over it and put the piece on. Worked great but as I removed wood from the bottom, the crack continued and I had to place 6 more pewa! Now more sanding and oil and then I can move on to something more artistic than a damn big cracked bowl.
View attachment 70431View attachment 70432
I can’t believe that didn’t come apart. It’s Incredible that you were able to keep it together.
I would have been afraid to spin that one up; especially after taking 1/2 a bowl to the faceplate a few weeks ago
Bob
Does this smell as good as the crushed leaves when you turn it?
It does. It's not strong, but it's a spicy root beer smell.
Probably beginner’s luck. Or dumb luck. I placed 6 spaced pewa and then turned the outside, working in 2 inch increments, as when I turned the exterior round, I would lose the pewa in that area. Then I replaced the pewa before turning the interior.I can’t believe that didn’t come apart. It’s Incredible that you were able to keep it together.
I’m afraid to see the dog. Makes my 16.5 inch bowl look small.B.A.D.D. (big a## dog dish)
maple 20 x 7
I had an ash in the front yard that was leaning towards the house. My daughter-in-law wanted to cut down a tree and this ash had been on my list for a couple of years.
As is my tradition, I turned a bowl from the tree ASAP. I wanted to make it thin and see how it warps.
I haven't done ebonizing, paint, etc. But this ash will give me lies of opportunities for that.
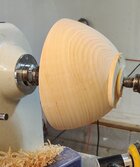
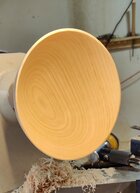
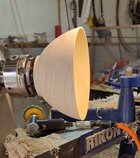
As is my tradition, I turned a bowl from the tree ASAP. I wanted to make it thin and see how it warps.
I haven't done ebonizing, paint, etc. But this ash will give me lies of opportunities for that.


I had an ash in the front yard that was leaning towards the house. My daughter-in-law wanted to cut down a tree and this ash had been on my list for a couple of years.
As is my tradition, I turned a bowl from the tree ASAP. I wanted to make it thin and see how it warps.
I haven't done ebonizing, paint, etc. But this ash will give me lies of opportunities for that.
View attachment 70443View attachment 70444View attachment 70445
Beautiful bowl. I love the color and grain structure.
Bob
I'm playing the long game with my sassafras tree though I'm betting it's going to win because it's only as big around as my thumb right now.It does. It's not strong, but it's a spicy root beer smell.
If you ever get to the Nashville area, I have lots of it on the ground and a handful of dead standing trees.I'm playing the long game with my sassafras tree though I'm betting it's going to win because it's only as big around as my thumb right now.
Here’s that last one I posted, now completed
Been difficult finding time in the shop with holidays and taking my 95 yr old neighbor to the hospital to visit his soon-to-be 93 yr old bride.
Neighbor I got the wood from calls it Sour Gum, though I always knew it as Black Gum or Tupelo, or Nyssa sylvatica.
Been difficult finding time in the shop with holidays and taking my 95 yr old neighbor to the hospital to visit his soon-to-be 93 yr old bride.
Neighbor I got the wood from calls it Sour Gum, though I always knew it as Black Gum or Tupelo, or Nyssa sylvatica.
Attachments
- Joined
- Nov 27, 2021
- Messages
- 163
- Likes
- 673
- Location
- Silver Spring, MD
- Website
- www.transpirationturning.com
That’s a nice looking bowl. I’ve got a persimmon at another property I need to go check out.We cut down a persimmon last week, too. This is my first time turning persimmon other than some small stuff. I got lots of sharpening practice. I haven't measured it yet. Maybe 8".
View attachment 70490View attachment 70491
What are you using to pierce with? Looking good!I’ve been turning and coring some green walnut and needed a break. So, I’m trying my first true piercing and hoping I don’t screw it up. Will also be adding some pyro and texture if I get past this stage!!
View attachment 70493
View attachment 70492
I am using the Dremel with a spiral cutter for wood and ceramic tileWhat are you using to pierce with? Looking good!
Last edited:
I am looking to update my cutting tips, where did you get your Corpro cutter?Another full day learning how to core. Second large walnut blank on the lathe.
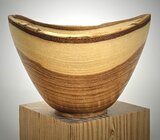
A small ash (I think it was ash, it's been 20 years since I had any locust) bark edge bowl. 4.5" at the top, 1.5" at the bottom, 3" tall at the upper part of the rim. Even the sap and heart colors gave me 1/3 and 2/3 coverage. 3 light coats of Tried & True Danish oil, followed by one coat of T&T Original (oil and wax).


Branches to Bowls out of Alberta, ordered an extra replacement cutter cost around $25 , Bernie. The holder is what expensive around $300. Cuts like butter. It should for that price.I am looking to update my cutting tips, where did you get your Corpro cutter?
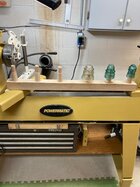
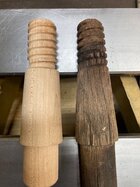
Made this glass insulator display rack for my brother. Other picture is the original pattern for the mounts. I cut the threads on my metal lathe (4 tpi). Ground a bit to match the thread shape. Ended up using hard maple for the threaded mount, hickory tore out too much. I had to go slow and only advance the cutter .005" per cut or had trouble with tear out. I ended up using furniture paste wax for cutting lube. Question for anyone who's done something like this before - would making my cutter negative rake work better? I did the wood turning on my wood lathe.
Attachments
Any time I've cut threads into wood (not on the lathe), I've seen the best results after saturating the intended piece in oil overnight. That usually produces beautifully crisp threads where dry stock crumbles very easy. Good thinking on the paste wax but think more penetration.Made this glass insulator display rack for my brother. Other picture is the original pattern for the mounts. I cut the threads on my metal lathe (4 tpi). Ground a bit to match the thread shape. Ended up using hard maple for the threaded mount, hickory tore out too much. I had to go slow and only advance the cutter .005" per cut or had trouble with tear out. I ended up using furniture paste wax for cutting lube. Question for anyone who's done something like this before - would making my cutter negative rake work better? I did the wood turning on my wood lathe.

