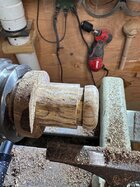
I'll give that a try, linseed oil?Any time I've cut threads into wood (not on the lathe), I've seen the best results after saturating the intended piece in oil overnight. That usually produces beautifully crisp threads where dry stock crumbles very easy. Good thinking on the paste wax but think more penetration.
-
December 2025 Turning Challenge: Single Tree! (click here for details) -
Congratulations to Bob Henrickson, People's Choice in the November 2025 Turning Challenge (click here for details) -
Congratulations to Guillaume Fontaine for "Old Tea Pot" being selected as Turning of the Week for December 15, 2025 (click here for details) -
Welcome new registering member. Your username must be your real First and Last name (for example: John Doe). "Screen names" and "handles" are not allowed and your registration will be deleted if you don't use your real name. Also, do not use all caps nor all lower case.
You are using an out of date browser. It may not display this or other websites correctly.
You should upgrade or use an alternative browser.
You should upgrade or use an alternative browser.
What’s on your lathe?
- Thread starter Rusty Nesmith
- Start date
I use watco Danish oil for this actually. I've tried a few different options including blo, tung oil and polymerized tung oil (that was the runner up to the watco). and still like the watco Danish oil best.I'll give that a try, linseed oil?
Unfortunately I’ve been to two Woodcrafts and one Rocklers this weekend and they don’t have much in the way of bits. A few Kutzall bits is all. Nothing for piercing. Good luck , looking good.I am using the Dremel with a spiral cutter for wood and ceramic tile, and drilling a clearance hole for entry. I bought some carving bits for the Dremel but I think the HF is a little thick to use them. I plan to look at my wood supply store and see what is available. Just going for it and hoping for the best

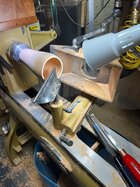
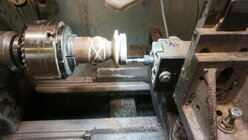
Cutting threads on wood with a metal lathe is as simple as mounting a router on the top slide then it is the same procedure as cutting threads in metal. The photo is what I have been using for close to 30 years, before that I had added a lead screw to a Delta 12" lathe and connected to the main spindle with a 2 to 1 step down driving a 4 TPI lead screw with the result being a 2 TPI bench screw. The thread shown is a standard 60 degree thread but I have duplicated a broom handle and various acme threads all requiring a specially ground bit.Made this glass insulator display rack for my brother. Other picture is the original pattern for the mounts. I cut the threads on my metal lathe (4 tpi). Ground a bit to match the thread shape. Ended up using hard maple for the threaded mount, hickory tore out too much. I had to go slow and only advance the cutter .005" per cut or had trouble with tear out. I ended up using furniture paste wax for cutting lube. Question for anyone who's done something like this before - would making my cutter negative rake work better? I did the wood turning on my wood lathe.
Last edited:
- Joined
- Feb 6, 2010
- Messages
- 3,459
- Likes
- 2,526
- Location
- Brandon, MS
- Website
- threeringswoodshop.square.site
Thanks for info NormBranches to Bowls out of Alberta, ordered an extra replacement cutter cost around $25 , Bernie. The holder is what expensive around $300. Cuts like butter. It should for that price.
Thanks for the pictures Don, this looks like another rabbit hole. I just used a 1/4" square bit ground to the correct shape and did a scraping cut same as you would on metal. Your way would eliminate any tearout.Cutting threads on wood with a metal lathe is as simple as mounting a router on the top slide then it is the same procedure as cutting threads in metal. The photo is what I have been using for close to 30 years, before that I had added a lead screw to a Delta 12" lathe and connected to the main spindle with a 2 to 1 step down driving a 4 TPI lead screw with the result being a 2 TPI bench screw. The thread shown is a standard 60 degree thread but I have duplicated a broom handle and various acme threads all requiring a specially ground bit.View attachment 70543
You could say rabbit hole I have been buried in it since 1988 when I got a request to produce a 2.5-2 bench vice thread but by the time I figured out how to do it the requester had bought a steel set.Thanks for the pictures Don, this looks like another rabbit hole. I just used a 1/4" square bit ground to the correct shape and did a scraping cut same as you would on metal. Your way would eliminate any tearout.
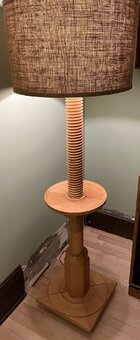
The next problem was what to use it for so I came up with an idea for a floor lamp with an adjustable height shelf which my son still has in use. Notice the lesson I learned about large 4 piece glue ups.
Last edited:
You could say rabbit hole I have been buried in it since 1988 when I got a request to produce a 2.5-2 bench vice thread but by the time I figured out how to do it the requester had bought a steel set.
The next problem was what to use it for so I came up with an idea for a floor lamp with an adjustable height shelf which my son still has in use. Notice the lesson I learned about large 4 piece glue ups. View attachment 70553
That’s really cool.
Bob
I agree with Bob, very cool and unfortunately, there's no way (that I know of) to make that base 'miter' joint stable outside of using manufactured material and veneer. Regardless, very cool lamp.
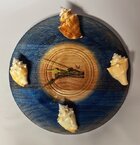
What would the laser look like burning through the dye? Would it even show up?Glued up some maple slabs and turned a clock for my friends shell collection.
Beach seen wouldn't go any bigger on my laser!
View attachment 70567
Neat looking lamp.You could say rabbit hole I have been buried in it since 1988 when I got a request to produce a 2.5-2 bench vice thread but by the time I figured out how to do it the requester had bought a steel set.
The next problem was what to use it for so I came up with an idea for a floor lamp with an adjustable height shelf which my son still has in use. Notice the lesson I learned about large 4 piece glue ups.
View attachment 70553
Depending on the wood it actually works pretty good. I usually do my signature and logo thru the finish after it's all complete. Laser is only black though so won't show as good on dark colors.What would the laser look like burning through the dye? Would it even show up?
Nice lamp!You could say rabbit hole I have been buried in it since 1988 when I got a request to produce a 2.5-2 bench vice thread but by the time I figured out how to do it the requester had bought a steel set.
The next problem was what to use it for so I came up with an idea for a floor lamp with an adjustable height shelf which my son still has in use. Notice the lesson I learned about large 4 piece glue ups.
View attachment 70553
I sand with 180, then do a coat of black tea to amp up the tannin, followed by a coat of iron acetate solution. Once it’s dry I sand to 320, then do another round of tea and iron acetate. When that’s dry, I sand to 400 and then hollow it out.
Did you make the iron acetate or buy it?
I make it. Super easy. Dissolve a little 0000 steel wool in some white vinegar for about a week, strain the solution through some cheese cloth and voila, you’ve got your iron acetate solution.Did you make the iron acetate or buy it?
Been on the lathe for several days just removed to put first coat of DO on.. I was inspired by @Ted Pelfrey piece he sent Michael Anderson for what I think was the Christmas swap. Mine is no where near as good but it is a start. First time piercing and way too much pyro . The top bead is to big but it is all a learning experience. Still have more work to do on it before it’s finished.
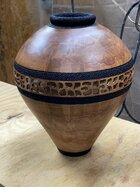

If you think that’s too much pyro then your gonna love the texture! LolBeen on the lathe for several days just removed to put first coat of DO on.. I was inspired by @Ted Pelfrey piece he sent Michael Anderson for what I think was the Christmas swap. Mine is no where near as good but it is a start. First time piercing and way too much pyro. The top bead is to big but it is all a learning experience. Still have more work to do on it before it’s finished.
View attachment 70593
Are you going to fill the insect channels, and if so what are you going to use?Canela mandioqueira - Ruizterania albiflora
A shallow bowl, 11" x 2.5".
I’m curious if you use/ do something different in Brazil. I’m always interested in regional differences in wood working. Besides, my sister in law is from Manaus.
Bob
I don't always fill them, it depends.Are you going to fill the insect channels, and if so what are you going to use?
I’m curious if you use/ do something different in Brazil. I’m always interested in regional differences in wood working. Besides, my sister in law is from Manaus.
Bob
This piece is for an art show this weekend, hopefully people will be looking for wares, so I will fill them on this piece.
I will use CA with sanding dust from the wood.
Sometimes I use epoxi, sometimes only carnaúba wax.
I believe we use pretty much the same stuff for finishing, as far as oils and waxes go, as people in the US, but I am not sure.
FM
Last edited:
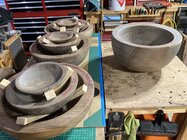
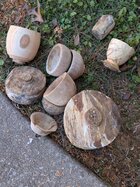
Happy new year! Out with the old and in with the new. I was cleaning up my shop and went through a box of some my green turned bowls. This is the burn pile. I made so many mistakes with these blanks but I don't free bad about throwing them out (feels kinda of freeing). I know how I messed up and I wouldn't make those mistakes now (I hope).
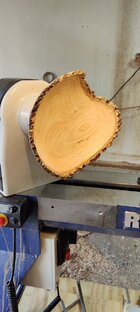
This is another green turned bowl that I'm working on. It's pear without any of the rot, I dried it differently and it shows.
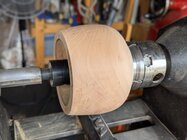

This is another green turned bowl that I'm working on. It's pear without any of the rot, I dried it differently and it shows.

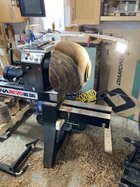
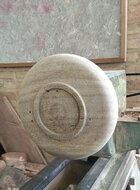
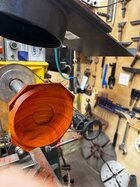
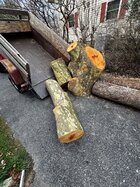
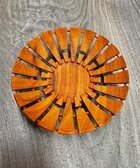
A small Padauk bowl on the lathe, but the day was interrupted to head up the street where a sycamore was being taken down. Scored two lengths and a huge central crotch piece - really too cold out but I’ll try to get the ends sealed up until I can properly process it…
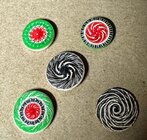
Update: Added a photo of that shallow bowl after some incising on the index wheel… now to sand and polish it!
Update: Added a photo of that shallow bowl after some incising on the index wheel… now to sand and polish it!
Attachments
Last edited:
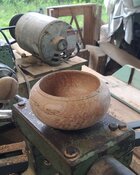
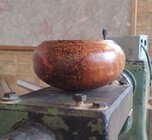
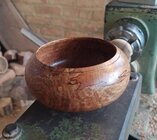
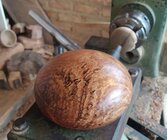
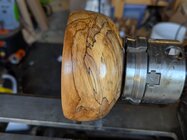
Ready for finishing!Spalted ceylon cinnamon, cinnamomum verum.
Small footless bowl.
5" x 2.5"
Attachments
Amazing wood!Ready for finishing!
- Joined
- Jul 18, 2018
- Messages
- 1,336
- Likes
- 2,884
- Location
- Baltimore, MD
- Website
- loujacobswoodturning.com
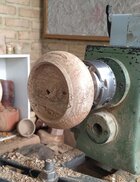
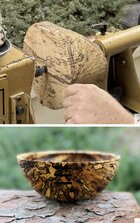
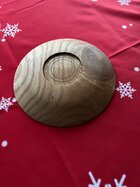
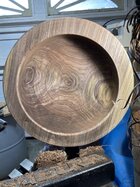
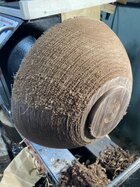
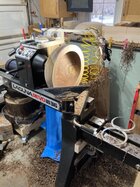
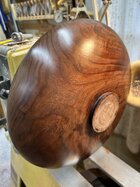 I recently met a man in my neighborhood who used to be an arborist. I got to talking with him and when he found out I was a turner he gifted me several pieces of wood from his stash. All are bone dry and have been in storage for at least 15 years. This walnut bowl is 14” in diameter and about 3 1/2” deep. I’ve never turned anything this dry and hard. It is dulling my gouges at an amazing rate, but should be worth it when it is finished.
Finished.Ready for finishing!
Some tear-ups on the softer, spalted, parts of the end grain, but I liked the final result.
This is my first bowl with no base.
Attachments
Going to try the blackened look with the steel wool in vinegar
How long does the mixture have to stand before using it ?
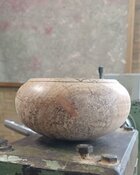
Well it now has a become a plate do the being so dried out that every time I tried to true it it spit pieces out from the edge! Oh lord good god!
How long does the mixture have to stand before using it ?
Well it now has a become a plate do the being so dried out that every time I tried to true it it spit pieces out from the edge! Oh lord good god!
Attachments
Last edited:
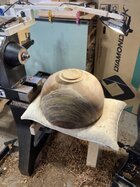
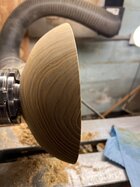
First rough walnut bowls cut this year! Just trying to determine the most efficient way to go about coring as far as a process goes. This was a small one compared to last few I have worked on. 16 x 5 x 1.75 thick. Got 3 bowls out of it. A lot less waste in shavings.
Attachments
That shallow bowl is very precise Pat!A small Padauk bowl on the lathe, but the day was interrupted to head up the street where a sycamore was being taken down. Scored two lengths and a huge central crotch piece - really too cold out but I’ll try to get the ends sealed up until I can properly process it…
Update: Added a photo of that shallow bowl after some incising on the index wheel… now to sand and polish it!
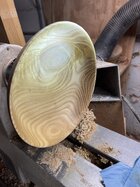
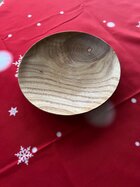
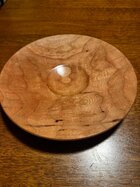
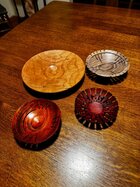
Thanks. This evening I turned a simple cherry platter, but forgot to take a photo while it was on the lathe… Darkened that Padauk bowl with teak oil, which gave it a red color; might have to call it ‘Diablo’ with the black streaksThat shallow bowl is very precise Pat!
Attachments
I love the color of that. Nice work.Thanks. This evening I turned a simple cherry platter, but forgot to take a photo while it was on the lathe… Darkened that Padauk bowl with teak oil, which gave it a red color; might have to call it ‘Diablo’ with the black streaks

