• We just finished a fairly major forum upgrade. If you are having problems using the forums, please clear your browser cache and that should clear up any issues. Otherwise post in the Help Thread or email us at forum_moderator@aawforum.org. Happy Holidays!
  • It's time to cast your vote in the December 2024 Turning Challenge. (click here for details)
  • Congratulations to Vincent Luciani for "Flower Pot" being selected as Turning of the Week for December 23, 2024 (click here for details)
  • Welcome new registering member. Your username must be your real First and Last name (for example: John Doe). "Screen names" and "handles" are not allowed and your registration will be deleted if you don't use your real name. Also, do not use all caps nor all lower case.

What’s on your lathe?

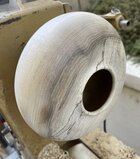
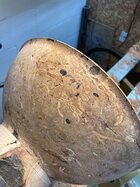
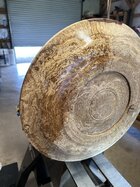
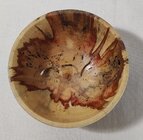
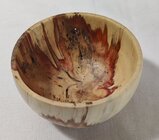
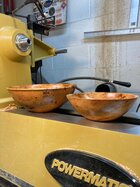
Pulled a red cedar off the shelf to second turn and embellish the rim. Now that I’m looking at it I’m not sure if I want to embellish it. Then I told myself that’s what I’m supposed to be practicing now, embellishments! However, I will now look at it a day or two and then decide 😁
8-3/4” x 5”, was wanting to pyro and/or black the rim from the outside of the bead to the outer edge of the rim.
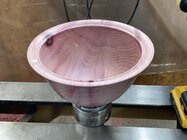
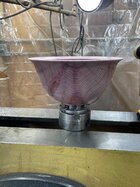
1726341496325.jpeg
1726341451592.jpeg
1726341414325.jpeg
 
Now that I’m looking at it I’m not sure if I want to embellish it.
To embellish or not to embellish, that is the question. I feel your struggle. From my experience, I’ve never once regretted not embellishing a beautiful form with nice wood, but I definitely have regretted messing with something when I should have left it alone. But, taking that plunge is what it’s all about. And there’s always the phrase to remember, “the next piece is the best piece”, haha.
 
Pulled a red cedar off the shelf to second turn and embellish the rim. Now that I’m looking at it I’m not sure if I want to embellish it. Then I told myself that’s what I’m supposed to be practicing now, embellishments! However, I will now look at it a day or two and then decide 😁
8-3/4” x 5”, was wanting to pyro and/or black the rim from the outside of the bead to the outer edge of the rim.
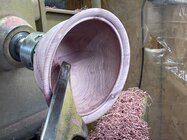
View attachment 66672
View attachment 66671
View attachment 66670
David-That piece is darn near perfect-one of the prettiest pieces in this thread IMO! Just one man's opinion, but if I nailed the flowing form and grain alignment/figure on a beautiful piece of cedar like this, I would sand it and let it be. Heck, I didn't even put any finish on my last cedar bowl because I wanted the lovely scent to be prominent for as long as possible. That'll be 2 cents, please! 😉
 
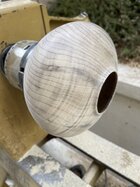
First attempt at an open flute fruit bowl. This was a less than desirable blank with some cracks in it so I figured good for practice. Thanks to @Pat Wisniewski for advice. I made the wall thickness 1/4" and the inner support bead is 1/4" wide x 1/8" thick. Suprizingly it's fairly sturdy.
Vincent,
That looks great! I have found that most of these designs are surprisingly sturdy, as you mention.
 
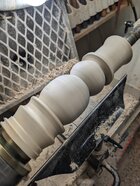
Sing it! 🎶In the meadow we can build a _______! 🎶 (and unfinished)

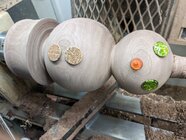
2nd one I'm just playing around with the epoxy cabochons. They're 1.25 to give an idea of size to Mondo snowman.
 

Attachments

  • PXL_20240915_004435265.jpg
    PXL_20240915_004435265.jpg
    400.4 KB · Views: 20
  • PXL_20240915_175257898.jpg
    PXL_20240915_175257898.jpg
    445.1 KB · Views: 14
Last edited:
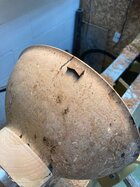
This is my first experience with burl, so I have a couple questions. First, should I put a couple pewa on the crack or just leave it as is? I filled it with ca and coffee grounds, the crack goes to the inside not just the surface you see. Second what do most of you do with the worm holes? Fill them or let them as is, I hate to dig the frass out because some holes go the whole way through the wall and I'm intending this bowl to be a utility unit for candy, popcorn or whatever. I'm probably going to use tung oil to finish it. Bowl is 10" diameter x 3" deep x 5/16" wall thickness the wood is black cherry.
 

Attachments

  • IMG_2509 Pewa or Not.jpg
    IMG_2509 Pewa or Not.jpg
    511.1 KB · Views: 34
  • IMG_2510 Worm Holes.jpg
    IMG_2510 Worm Holes.jpg
    522.4 KB · Views: 35
Pulled a red cedar off the shelf to second turn and embellish the rim. Now that I’m looking at it I’m not sure if I want to embellish it. Then I told myself that’s what I’m supposed to be practicing now, embellishments! However, I will now look at it a day or two and then decide 😁
8-3/4” x 5”, was wanting to pyro and/or black the rim from the outside of the bead to the outer edge of the rim.

View attachment 66672
View attachment 66671
View attachment 66670
Embellish it grows on trees!
 
This is my first experience with burl, so I have a couple questions. First, should I put a couple pewa on the crack or just leave it as is? I filled it with ca and coffee grounds, the crack goes to the inside not just the surface you see. Second what do most of you do with the worm holes? Fill them or let them as is, I hate to dig the frass out because some holes go the whole way through the wall and I'm intending this bowl to be a utility unit for candy, popcorn or whatever. I'm probably going to use tung oil to finish it. Bowl is 10" diameter x 3" deep x 5/16" wall thickness the wood is black cherry.
chances are good as the bowl gets used and the wood moves (heat , humidity, moisture changes) the frass is going to fall out... I for one am not particularly interested in beating bug sh*t.... so if I was doing a bowl intended for utility and found it full of wormholes and/or frass, I'd clean it out and fill , or else re-purpose the bowl as something more decorative and finish it in lacquer...
 
This is my first experience with burl, so I have a couple questions. First, should I put a couple pewa on the crack or just leave it as is? I filled it with ca and coffee grounds, the crack goes to the inside not just the surface you see.
I'd probably leave it. Looks like there's some voids/pits in the epoxy, so maybe give it another coat of epoxy or CA to fill em.

Second what do most of you do with the worm holes? Fill them or let them as is, I hate to dig the frass out because some holes go the whole way through the wall and I'm intending this bowl to be a utility unit for candy, popcorn or whatever.
I don't ever want someone to call me up and say "hey there's sawdust all over the shelf where I keep this bowl"
So I clean out all the frass. I hate doing it, but sometimes it "makes" the piece. I actually find it easier when the holes go all the way thru - once you break thru its easier to clean the walls somehow.
Candy, popcorn, nuts, whole fruit, etc is ok in a wormy bowl. Unless you got huge mutant worms, that stuff won't fall thru.
Wet vegetables, salad with dressing, etc... not so good. (Also popcorn with squirts of that stuff the theatre calls "butter")
 
This is my first experience with burl, so I have a couple questions. First, should I put a couple pewa on the crack or just leave it as is? I filled it with ca and coffee grounds, the crack goes to the inside not just the surface you see. Second what do most of you do with the worm holes? Fill them or let them as is, I hate to dig the frass out because some holes go the whole way through the wall and I'm intending this bowl to be a utility unit for candy, popcorn or whatever. I'm probably going to use tung oil to finish it. Bowl is 10" diameter x 3" deep x 5/16" wall thickness the wood is black cherry.
Leaving frass is leaving poop. Get it out and fill with epoxy. And I’d stabilize that crack. I did both those things this week with this piece:
IMG_8172.jpegIMG_8173.jpegIMG_8174.jpeg
 
This is my first experience with burl, so I have a couple questions. First, should I put a couple pewa on the crack or just leave it as is? I filled it with ca and coffee grounds, the crack goes to the inside not just the surface you see. Second what do most of you do with the worm holes? Fill them or let them as is, I hate to dig the frass out because some holes go the whole way through the wall and I'm intending this bowl to be a utility unit for candy, popcorn or whatever. I'm probably going to use tung oil to finish it. Bowl is 10" diameter x 3" deep x 5/16" wall thickness the wood is black cherry.

Blasphemy, I know, but I don't like pewas. I don't see anything in that bowl that needs a pewa. However, I don't have the years of experience that others do.
 
This is my first experience with burl, so I have a couple questions. First, should I put a couple pewa on the crack or just leave it as is? I filled it with ca and coffee grounds, the crack goes to the inside not just the surface you see. Second what do most of you do with the worm holes? Fill them or let them as is, I hate to dig the frass out because some holes go the whole way through the wall and I'm intending this bowl to be a utility unit for candy, popcorn or whatever. I'm probably going to use tung oil to finish it. Bowl is 10" diameter x 3" deep x 5/16" wall thickness the wood is black cherry.
I never use the pewas, If it has a crack in it, I cut it out, cut around it, or turn it into fire wood.... As for the frass, it is a LOT of work to pick it all out, and you need a bunch of dental picks to do that. If there was a fine jet water stream, that would work, or pressure wash it before you start. I do tend to chase them with the thin CA glue. It will penetrate all the way into the frass, and solidify it as well as kill any left over grubs.

robo hippy
 
This is my first experience with burl, so I have a couple questions. First, should I put a couple pewa on the crack or just leave it as is? I filled it with ca and coffee grounds, the crack goes to the inside not just the surface you see. Second what do most of you do with the worm holes? Fill them or let them as is, I hate to dig the frass out because some holes go the whole way through the wall and I'm intending this bowl to be a utility unit for candy, popcorn or whatever. I'm probably going to use tung oil to finish it. Bowl is 10" diameter x 3" deep x 5/16" wall thickness the wood is black cherry.
The worm holes with the worm fras packed in tight can be soaked with thin CA and become almost like solid wood and barely discernible from the surrounding wood. The cracks I am with the ROBO I don't like the look of pewas and would work around them. The open voids can be filled with epoxy putty or powdered stone such as turquoise or a combination of putty and powdered stone. The voids can also be drilled and plugged with the same species or a contrasting wood.
 
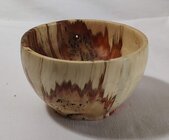
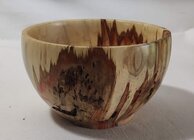
I wanted to do an endgrain bowl with some boxelder. Or maybe it started as a hollow form, I can't recall. Unfortunately, the very base of the tree is pretty rotten, both rot and bugs. I realized pretty quickly that I wouldn't be sanding out all of the tearout. So I just rolled with it. I wouldn't put this bowl up against my best, but it sort of turned out.

IMG_20240916_142239.jpgIMG_20240916_142310.jpg
IMG_20240916_142340.jpgIMG_20240916_142409.jpg
 
Why did it split?
This burl was cut over a year ago according to the person I got it from, but I think it was longer than that because it's very dry. It had a big crack going through the middle so I split it in half and the two pieces had small cracks in them. If I would have tried to eliminate all the defects of cracks and worm holes I would have ended up with a blank about 6" diameter. The bowl pictured is 10" diameter x 3" high. I did put a couple pewa in it but agree with others that I should have left it as is. I dug out all the frass and put coffee grounds/ca glue in and sanded it. If I was to do this project again I would take @Brian Gustin advice and clean out frass, turn it, and not fill the worm holes and call it a decoration. It took me all day today to deal with the worm holes, cracks, and pewa. I'll post a picture when I get a coat of finish on it. I didn't find any bugs or remnants of them. It was a good learning experience.
 
Pulled a red cedar off the shelf to second turn and embellish the rim. Now that I’m looking at it I’m not sure if I want to embellish it. Then I told myself that’s what I’m supposed to be practicing now, embellishments! However, I will now look at it a day or two and then decide 😁
8-3/4” x 5”, was wanting to pyro and/or black the rim from the outside of the bead to the outer edge of the rim.

View attachment 66672
View attachment 66671
View attachment 66670
Real nice shape, one of my favourites!
 
Alan, you do know that is California Bay Laurel, aka Pepper Tree don't you? I figure it is marketing, easier to sell to the California tourists when they are up here in Oregon. Best stuff grows on N California and S Oregon coast.

robo hippy
I absolutely did not know that. I’m surprised. Thanks.

From Cook Woods: Also known as Bay Laurel, California Olive, Pepper wood, or Spice tree, this versatile hardwood grows only in Oregon and Northernmost California.
 
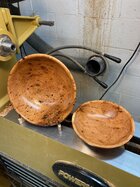
Here's the partially finished result of the burl questions. I put the pewa on the crack since it went the whole way through the finished thickness. I dug out the frass and filled the holes with coffee grounds/ca glue. I didn't worry about filling every little crack since there were so many. It will work as a utility bowl for anything not liquid. the small one is cored from the larger one. There's one coat of pto on them. I cut some more of it up and started a salt shaker/pepper mill combo unit. Will make some wine bottle stoppers from the small left over pieces. This was a good learning experience. Thanks to everyone for the advice.
 

Attachments

  • IMG_2513 Cherry burl inside.jpg
    IMG_2513 Cherry burl inside.jpg
    697.3 KB · Views: 42
  • IMG_2514 Cherry burl outside.jpg
    IMG_2514 Cherry burl outside.jpg
    493.6 KB · Views: 42
Here's the partially finished result of the burl questions. I put the pewa on the crack since it went the whole way through the finished thickness. I dug out the frass and filled the holes with coffee grounds/ca glue. I didn't worry about filling every little crack since there were so many. It will work as a utility bowl for anything not liquid. the small one is cored from the larger one. There's one coat of pto on them. I cut some more of it up and started a salt shaker/pepper mill combo unit. Will make some wine bottle stoppers from the small left over pieces. This was a good learning experience. Thanks to everyone for the advice.
Very nice work! How do you keep the Powermatic that clean😁
 
Back
Top