• Beware of Counterfeit Woodturning Tools (click here for details)
  • Johnathan Silwones is starting a new AAW chapter, Southern Alleghenies Woodturners, in Johnstown, PA. (click here for details)
  • Congratulations to Chad Eames for "Twisted Walnut Vessel"being selected as Turning of the Week for September 2, 2024 (click here for details)
  • Welcome new registering member. Your username must be your real First and Last name (for example: John Doe). "Screen names" and "handles" are not allowed and your registration will be deleted if you don't use your real name. Also, do not use all caps nor all lower case.

What’s on your lathe?

Joined
Jul 19, 2018
Messages
1,778
Likes
2,388
Location
Ponsford, MN
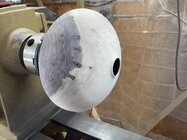
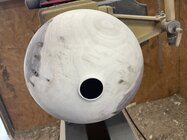
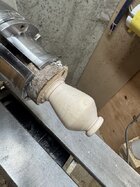
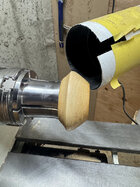
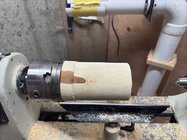
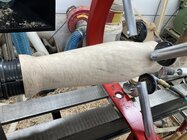
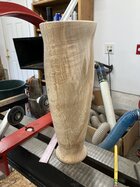
Picked up a load of black walnut today a had to try an end grain hollow form. 11” x 7” current weight 1.6 pounds. Soaked the pith in thin CA and sealed the inside and outside. Fingers crossed the pith doesn’t crack. I need to make a fixture and finish the bottom

View attachment 64883

View attachment 64882
View attachment 64881
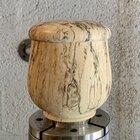
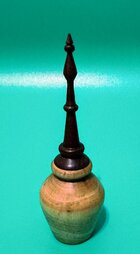
You have the bottom down to a small diameter and of course the top is cut out so if you have reasonably uniform wall thickness there shouldn't be any problems. I have done hundreds similar to that with out ever putting anything extra on the pith and rarely have any problems. You could save yourself some grief when it is dry by using a paper bag instead of that sealer which you will need to remove more wood entirely to get rid of. The walnut lidded urn that is my avatar came from a large crotch and that has 3 piths coming through the sides. Here is the back side.
24001Urn2.jpg
 
Joined
Nov 22, 2023
Messages
199
Likes
1,880
Location
Morganton, NC
You have the bottom down to a small diameter and of course the top is cut out so if you have reasonably uniform wall thickness there shouldn't be any problems. I have done hundreds similar to that with out ever putting anything extra on the pith and rarely have any problems. You could save yourself some grief when it is dry by using a paper bag instead of that sealer which you will need to remove more wood entirely to get rid of. The walnut lidded urn that is my avatar came from a large crotch and that has 3 piths coming through the sides. Here is the back side.
View attachment 64888
Wall thickness is uniform thickness. This is just my seventh hollow form and didn’t want to take any chances but may try the bag next time. The walls were fairly dry after the sanding and thin enough I could see light through the sapwood area.
Also, great looking hollow form, what finish did you use?
 
Joined
Aug 16, 2022
Messages
329
Likes
763
Location
Butler, PA
Picked up a load of black walnut today a had to try an end grain hollow form. 11” x 7” current weight 1.6 pounds. Soaked the pith in thin CA and sealed the inside and outside. Fingers crossed the pith doesn’t crack. I need to make a fixture and finish the bottom

View attachment 64883

View attachment 64882
View attachment 64881
Let us know how the ca glue worked on the pith for cracking. I just did the same thing last Thursday on black cherry and will wait and see. I thought about drilling out the pith and putting in a plug after it dries. How do others deal with this?
 

hockenbery

Forum MVP
Beta Tester
TOTW Team
Joined
Apr 27, 2004
Messages
8,859
Likes
5,301
Location
Lakeland, Florida
Website
www.hockenberywoodturning.com
Let us know how the ca glue worked on the pith for cracking. I just did the same thing last Thursday on black cherry and will wait and see. I thought about drilling out the pith and putting in a plug after it dries. How do others deal with this?

For wood not crack around the pith, the wood has to be able to push the inside ring outward like the collapsable camp cups.
Turned thin with a curve facilitates this.

A flat thick bottom is a challenge and much more likely to crack than a thin curved bottom which will usually not crack.
 
Joined
Jun 2, 2021
Messages
211
Likes
438
Location
Kingsville, ON
David how long did you let your turnings dry before finishing? I generally let them sit in a bag for about 3-5 days and then sand by hand and finish. I find cracking usually occurs when I have left any areas too thick and depending on the species. I have the Trent Bosch hollowing system only thing I am finding is it would be nice to have a cutter like Lyle Jamesons adjustable hollowing tool that is bent sells for $70.00 American. I have been trying to get as small a hole as possible on the top of my hollow forms. Here is my first try, the one on the left approx. 6" square, .75 inch hole. The one to the right is 1.5 inch hole approx 11" in height. Just finished them last week.

 

Attachments

  • IMG_6030 Medium.jpeg
    IMG_6030 Medium.jpeg
    81.7 KB · Views: 15
  • IMG_6035 Medium.jpeg
    IMG_6035 Medium.jpeg
    47.7 KB · Views: 15
Joined
Jul 19, 2018
Messages
1,778
Likes
2,388
Location
Ponsford, MN
For wood not crack around the pith, the wood has to be able to push the inside ring outward like the collapsable camp cups.
Turned thin with a curve facilitates this.
That is definitely true of cherry so it is difficult but possible to do a form like DW has done. Walnut and ash is very forgiving as long as the flat area is relatively small. Below is an example of a bulging pith in the base of the goblet note the base is undercut to less then 1/16".
G203.JPG
 
Joined
Jun 14, 2024
Messages
6
Likes
417
Location
Beavercreek Ohio
DSCN0831 - Copy.JPGDSCN0832 - Copy.JPG

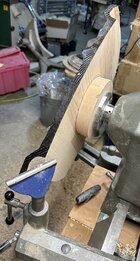
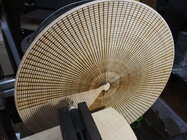
Here is another basket illusion platter I am starting. It is 120 lines. I recently purchased the EZ Weave Basket Illusion Kit from Chefware Kits. I made a platform and cradle to hold the woodburner and it saves a lot of time over marking the lines with a pencil. Before I bought this jig, I used my index wheel and only had the option of 48 or 96 lines.
 
Joined
Nov 22, 2023
Messages
199
Likes
1,880
Location
Morganton, NC
Let us know how the ca glue worked on the pith for cracking. I just did the same thing last Thursday on black cherry and will wait and see. I thought about drilling out the pith and putting in a plug after it dries. How do others deal with this?
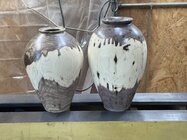
I just checked both vases and no hint of a crack. This is the 3rd day for the tall one and second day on the other.
I’ll be sure and let you know. I’ll check everyday to see if any cracking happens and try to fix it at that time. Both these are thin and the bottom is just thick enough to allow me to put back on the lathe and finish the bottom.
 
Last edited:
Joined
Nov 22, 2023
Messages
199
Likes
1,880
Location
Morganton, NC
David how long did you let your turnings dry before finishing? I generally let them sit in a bag for about 3-5 days and then sand by hand and finish. I find cracking usually occurs when I have left any areas too thick and depending on the species. I have the Trent Bosch hollowing system only thing I am finding is it would be nice to have a cutter like Lyle Jamesons adjustable hollowing tool that is bent sells for $70.00 American. I have been trying to get as small a hole as possible on the top of my hollow forms. Here is my first try, the one on the left approx. 6" square, .75 inch hole. The one to the right is 1.5 inch hole approx 11" in height. Just finished them last week.
I’m new to hollow forms and end grain turning. On my natural edge bowls I usually let them dry for a couple months. The hollow forms are much thinner and are fairly dry once I finish sanding. I am experimenting with hole size, like the small hole on some but I like to size the hole to what I think looks good for each piece. These two are 11-1/2” and 10” tall and I sized the hole to what I think looks good for this style and will try at least one with a small hole and compare.
I will let the hollow forms dry for at least a week or two unless I can tell by a weight or feel that it is dry enough to finish. I sanded these to 320 and put a coat of sealer on them instead of Danish oil both inside and out. Now it’s a waiting game😁.
I really like the Jamieson system and getting better with using it.
 
Joined
Jul 19, 2018
Messages
1,778
Likes
2,388
Location
Ponsford, MN
These two are 11-1/2” and 10” tall and I sized the hole to what I think looks good for this style and will try at least one with a small hole and compare
Good answer as far as what size hole looks good. Personally I hate those big bulbos turnings with the small hole that is out of proportion to the piece.
 
Joined
Jul 28, 2010
Messages
3
Likes
3
Location
Provo Utah
Black locust toothpick box. I finally got one that turned out long enough to hold toothpicks. The threads aren't the best, but they turn nice, hold, and stop where they're supposed to. I've been dabbling with hand chased threads.
Just curious as to what brand of chasers you use?
 
Joined
Aug 14, 2007
Messages
5,611
Likes
2,962
Location
Eugene, OR
Joined
Nov 22, 2023
Messages
199
Likes
1,880
Location
Morganton, NC
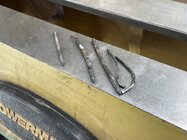
I got a tree from a 'barn yard' once. That was enough..... Found a 1/4 inch spike in it, along with other stuff....

robo hippy
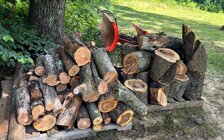
I don’t usually do yard trees very often. I think this person bought a new hammer and was trying it out😂, they were all in one spot!
My metal detector can find metal in a tree easy, I just forgot to check this one!!
 
Back
Top