-
April 2025 Turning Challenge: Turn an Egg! (click here for details) -
Congratulations to Kelly Shaw winner of the March 2025 Turning Challenge (click here for details) -
Congratulations to Guillaume Fontaine for "Nebules" being selected as Turning of the Week for April 6, 2025 (click here for details) -
Welcome new registering member. Your username must be your real First and Last name (for example: John Doe). "Screen names" and "handles" are not allowed and your registration will be deleted if you don't use your real name. Also, do not use all caps nor all lower case.
You are using an out of date browser. It may not display this or other websites correctly.
You should upgrade or use an alternative browser.
You should upgrade or use an alternative browser.
What’s on your lathe?
- Thread starter Rusty Nesmith
- Start date
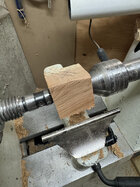
Normally, I’d say give it a go, but that crack looks pretty deep. Not sure you’ll have much left to work with once you turn it away. You could add a few pewa, but do you want to invest the time? If you have better stock on hand, might be best to move on IMO ¯\_(ツ)_/¯An ugly chunk of Acacia Melanoxylon, knots, cracks/splits, the sap wood has dry rot by the look of it. Throw it out you think?
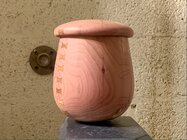
The color is really cool! Your making me want to turn! (Have a bad flu so lathe has been shut down for 8 days now!)Finished up an Eastern Red Cedar covered calabash last night. 13 Koa pewa total. 6" tall and 4.75" wide.
View attachment 63994
Odie can I ask what media do you use on you glue block?
Hi Michael.......I'm not exactly sure what you're asking, but if it's the glue you enquired about, it's Titebond III.
-o-
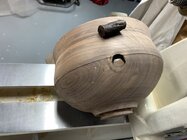
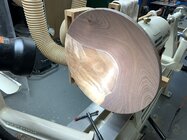
I was working w Claro also yesterday, thin hollow form. My joy turned to sadness. Got to remember to keep the outside bigger than the inside.Working with some walnut tonight. This claro is a joy to turn. View attachment 63992
Attachments
Thanks! I finished with lacquer alone to preserve as much of the color as possible. Of course, it will fade eventually, but that’s okay.The color is really cool! Your making me want to turn! (Have a bad flu so lathe has been shut down for 8 days now!)
Rough about the flu!! I sympathize with the lathe withdrawal. I hope you’re better and able to turn again soon.
I think he means what wood. It looks like pine to me….Hi Michael.......I'm not exactly sure what you're asking, but if it's the glue you enquired about, it's Titebond III.
-o-
I always use Titebond III, too. Tried epoxy, but the shear strength is pretty low and it failed on me a couple of times. Worth the wait for the Titebond to setHi Michael.......I'm not exactly sure what you're asking, but if it's the glue you enquired about, it's Titebond III.
-o-
I need to come up to Chattanooga for a pewa lesson!Finished up an Eastern Red Cedar covered calabash last night. 13 Koa pewa total. 6" tall and 4.75" wide.
View attachment 63994
All can be learned from: https://www.aawforum.org/community/threads/pewa-butterfly-installation.22359/I need to come up to Chattanooga for a pewa lesson!
Michael did a great tutorial.
All shellac’d up. I’ll let it cure overnight and buff in the morning.Working with some walnut tonight. This claro is a joy to turn. View attachment 63992
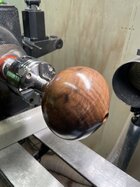
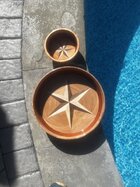
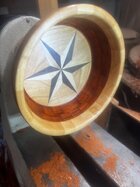
Great save! Looks intentionalAfter a little f up on my part making the dip bowl back into two pieces
An addition of another ring to unitize what I dint mess up
Wala!
Hope you like it!
Yep, I shop for the best grade of premium stud 2x4's that are available.....and sort them out for as few defects as possible.I think he means what wood. It looks like pine to me….
Titebond has been my "go-to" for about.....forever!. Never tried epoxy.I always use Titebond III, too. Tried epoxy, but the shear strength is pretty low and it failed on me a couple of times. Worth the wait for the Titebond to set
Jaramiah......Your post indicates you might be bonding your wasteblocks to the bowl, and want to start turning it shortly thereafter. The time element means very little to me, since it's usually over a week between attaching the wasteblock, and when it goes to the lathe.....(it's all a systematic method I developed that saves me time in the long run.)
I'm wondering though......how long after you attach your wasteblock do you start turning it on your lathe?
-o-
What’s the difference between the various ones woodworking-wise?Titebond III
Usually within a day or two of turning. Occasionally, I’ll add the block, then get distracted by something else, but that’s rare these days. I do my initial roughing between centers. I only attach the block once I’m sure about grain orientation, top/bottom, etc. and ready to go all in.I'm wondering though......how long after you attach your wasteblock do you start turning it on your lathe?
-o-
Technically, it’s about water compatibility. I just buy III because it’s the most durable. Never know when you might want to turn an ice cream scoop handle.What’s the difference between the various ones woodworking-wise?
What’s the difference between the various ones woodworking-wise?
Having used all three of the Titebond variations, I'm seeing no detectable difference for this purpose. I could go back to the original Titebond, but never have. The difference in price is negligible, since I use so little Titebond for attaching the wasteblock.
-o-
Usually within a day or two of turning. Occasionally, I’ll add the block, then get distracted by something else, but that’s rare these days. I do my initial roughing between centers. I only attach the block once I’m sure about grain orientation, top/bottom, etc. and ready to go all in.
That's probably a good plan.
The only difference in my plan-of-action, is I do the initial rough turning using a faceplate for the exterior, and then use a chuck for bulk removal of the interior. Very often, the wood still has significant moisture content, and the roughed bowl then goes through my seasoning process after the roughing stage.
-o-
Odie, what is the reason for switching to a waste block for the final turn? And what method do you use to get a flat surface to attach it to? Asking out of curiosity. Thanks!That's probably a good plan.
The only difference in my plan-of-action, is I do the initial rough turning using a faceplate for the exterior, and then use a chuck for bulk removal of the interior. Very often, the wood still has significant moisture content, and the roughed bowl then goes through my seasoning process after the roughing stage.
-o-
Maple slick handle for a Warnock 2" slick probably made between 1860 and 1909. Finished with ferric nitrate for colour, and marine wiping varnish; still glossy here, will get rubbed down to a lower sheen when it has hardened for a few weeks.

Here it is against a maple newel post from the mid-19th century; the ferric nitrate + heat adds a century in an hour.


Here it is against a maple newel post from the mid-19th century; the ferric nitrate + heat adds a century in an hour.

Rough bowls are marked for identifying the 3rd jaw of my chuck. After seasoning, it's returned to the chuck using the identifying mark, and a flat surface is turned on the rim of the bowl. Then it's flipped and held by Oneway Jumbo jaws. From there it's easy to turn a flat surface for applying a wasteblock. An alternative method is to mount a 12" disc to my drill press and create the flat surface that way. I've never been a fan of using a chuck for the second turn, because doing fine cuts and sanding close to the chuck is too dangerous and problematic....IMHO. Using a wasteblock eliminates the hazzard.Odie, what is the reason for switching to a waste block for the final turn? And what method do you use to get a flat surface to attach it to? Asking out of curiosity. Thanks!
-o-
.
Haha, yeah buddy any time!I need to come up to Chattanooga for a pewa lesson!
Is this a fair summary?Rough bowls are marked for identifying the 3rd jaw of my chuck. After seasoning, it's returned to the chuck using the identifying mark, and a flat surface is turned on the rim of the bowl. Then it's flipped and held by Oneway Jumbo jaws. From there it's easy to turn a flat surface for applying a wasteblock. An alternative method is to mount a 12" disc to my drill press and create the flat surface that way. I've never been a fan of using a chuck for the second turn, because doing fine cuts and sanding close to the chuck is too dangerous and problematic....IMHO. Using a wasteblock eliminates the hazzard.
-o-
.
Faceplate to rough turn exterior and create tenon, reverse in chuck to hollow, then season/dry. Back in chuck to flatten rim, then Cole jaws to rework/flatten bottom and tenon, And then add waste block to do final turn.
Is that the sequence?
Questions then are: when replaced in chuck after seasoning, isn’t tenon warped causing wobble? Isn’t it better to rework tenon first? Also, how do you assure bowl is perfectly oriented on waste block so there is minimal wobble before final turn?
I think a lot of us are impressed by your artistry and precision and want to learn more re your techniques.
- Joined
- Nov 27, 2021
- Messages
- 168
- Likes
- 677
- Location
- Silver Spring, MD
- Website
- www.transpirationturning.com
Many hours later, I have a laser engraving job I'm not all that happy with. The segments connecting the insect mandalas ended up being a bit busy with a lot already going on in the mandalas. They were supposed to look like wings.
Attachments
Thanks Odie! I appreciate the explanation and opportunity to learn from you!Rough bowls are marked for identifying the 3rd jaw of my chuck. After seasoning, it's returned to the chuck using the identifying mark, and a flat surface is turned on the rim of the bowl. Then it's flipped and held by Oneway Jumbo jaws. From there it's easy to turn a flat surface for applying a wasteblock. An alternative method is to mount a 12" disc to my drill press and create the flat surface that way. I've never been a fan of using a chuck for the second turn, because doing fine cuts and sanding close to the chuck is too dangerous and problematic....IMHO. Using a wasteblock eliminates the hazzard.
-o-
.
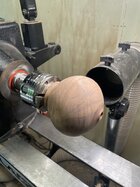
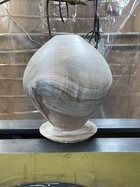
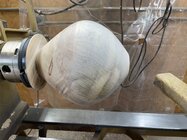
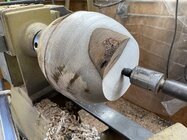
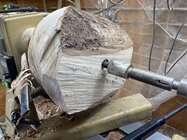
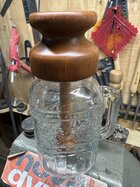
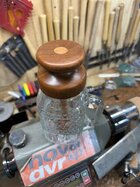
Interesting shape. I like how a bowl stands on its own without finial, just personal preference. How goes the hollowing? Are you using camera or laser? Lessons learned so far?My fourth hollow form, cherry, once I make the foot it should be 9-1/2 tall x 8” wide. Debating turning a finial for the top once it’s dry.
View attachment 64045
View attachment 64044
View attachment 64043
View attachment 64042
Is this a fair summary?
Faceplate to rough turn exterior and create tenon, reverse in chuck to hollow, then season/dry. Back in chuck to flatten rim, then Cole jaws to rework/flatten bottom and tenon, And then add waste block to do final turn.
Is that the sequence?
Questions then are: when replaced in chuck after seasoning, isn’t tenon warped causing wobble? Isn’t it better to rework tenon first? Also, how do you assure bowl is perfectly oriented on waste block so there is minimal wobble before final turn?
I think a lot of us are impressed by your artistry and precision and want to learn more re your techniques.
Yes, Alan.....you've got the sequence order correct. I'll add that when you flatten the rim, you also need to turn either the outside or inside of the rim to perfectly round so the grippers of the jumbo jaws have a good secure gripping surface. As you can imagine, the top of the rim needs to be perfectly flat, so that it perfectly mates with the surface of the jumbo jaws (or, in the alternative method, the table top of the drill press.)
You are also correct to assume that many times the seasoning process will create a significant amount of warp. No, I usually do not re-work the tenon, with the exception of times when there is "extreme" warp. It's a judgement call, and everyone has to make these decisions......And, as with everything else, the more you do it, the better you get at deciding how to approach the bowl of the moment. Anyway, when you do have to deal with the warp, and decide to go with the existing tenon, it will mean the surface will "rock" in the jaws of the chuck. There is really no way to get an absolute perfect mate when this is the case, so you may have to "fudge" the alignment of the markings that indicate the jaw you've previously marked. What I do is to tip the bowl in the chuck about equal distance, one side to the other, in order to compensate for the warped condition. Sometimes this isn't absolutely perfect, but most times it's close enough to bring the rim of the bowl to round and flat without excessive loss of wood in the process. You just never can tell how much warp one side will have, when comparing to the other side.....so in these cases, your best guesswork comes into play here.
-o-
Last edited:
Hollowing is going good, improving with each one. This shape will look better once I remove the tenon and it sits on the small bottom. I’m experimenting with shapes right now to learn what the system will do.Interesting shape. I like how a bowl stands on its own without finial, just personal preference. How goes the hollowing? Are you using camera or laser? Lessons learned so far?
I’m using the laser with the Jamieson system. Lessons learned, you must take your time, setting up the cutter correctly, and it’s not like turning a bowl
After blowing through the side wall of a couple bowls in a row trying to get too thin, I needed a confidence booster and to turn something not quite so thin. So this little maple hollow form is about 1/4 inch thick. Working on getting inside smooth and wall thickness even and of course my nemesis—sanding.
Attachments
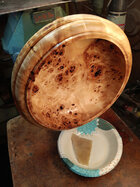
Great piece. EspeciallyBlack Heart Mango Platter
love the rim. Super!

