-
January 2026 Turning Challenge: Turned and Bent! (click here for details) -
Congratulations to Phil Hamel, People's Choice in the December 2025 Turning Challenge (click here for details) -
Congratulations to David Wyke for "Maple Platter #567" being selected as Turning of the Week for January 5, 2026 (click here for details) -
Welcome new registering member. Your username must be your real First and Last name (for example: John Doe). "Screen names" and "handles" are not allowed and your registration will be deleted if you don't use your real name. Also, do not use all caps nor all lower case.
You are using an out of date browser. It may not display this or other websites correctly.
You should upgrade or use an alternative browser.
You should upgrade or use an alternative browser.
What’s on your lathe?
- Thread starter Rusty Nesmith
- Start date
That came out nice!
Nice bowls, where are the knee deep curls?
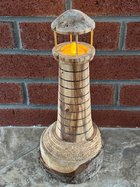
might leave base rustic but would sand that end grain tear out up near top near candle. Nice job.
Thanks!might leave base rustic but would sand that end grain tear out up near top near candle. Nice job.
It's to punky up there. I tried strengthening it with several coats of varnish but it just crumbles. I actually shortened it three times as it kept falling apart. Maybe if I let it dry by the woodstove a couple days it will firm up.
- Joined
- Feb 28, 2021
- Messages
- 1,782
- Likes
- 1,595
- Location
- Roulette, PA
- Website
- www.reallyruralwoodworks.com
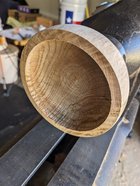
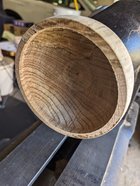
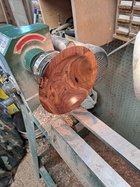
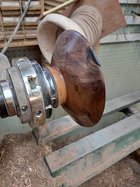
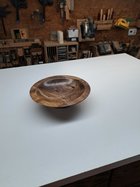
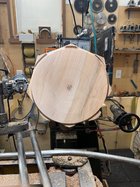
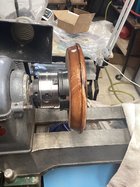
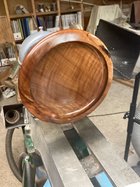
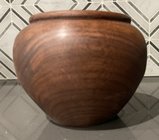
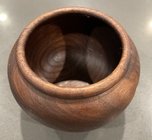
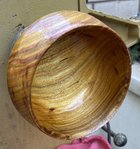
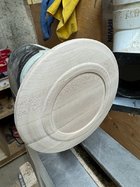
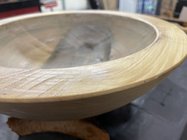
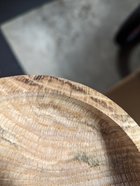
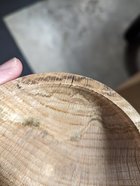
Here's my contribution - I'll preface the photos with the comment that This is a prime example of what I mean when I say "I let the wood decide what it wants to be" - This project started back in early 2022 when it was roughed out green to an 8 inch diameter x 3 inch deep bowl ... While truing it up, I found a minor surface check , and then uncovered a knot or bark inclusion right in the middle near the rim, so by the time I got those defects *mostly* cleaned up I was left with roughly the shape as shown.. (the rim of this is a bit less than the original rough thickness, and a bit of the knot/inclusion is showing on the rim -2nd photo) - So I just refined the curves, added a bit of Ogee and then adjusted to get an even wall thickness while deciding to leave a wide rim. Mounted it in my new Cole jaw set and hollowed out the foot and added a bit of detail on the bottom - Sanded 120-220-320 and finished off with Ack's paste & carnauba wax.
Attachments
Nice bowls. Oak is a favorite. Your sharp corners encourage cracks. There are known as stress risers. I usually cut mine sharp, as you have, but chamfer them. It makes a difference
Not Charles but good to know. Do you chamfer in toward the center at 45 degrees?chamfer them. It makes a difference
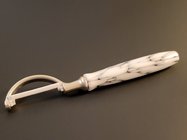
Working on the home to-do list this weekend. Polyester resin blank and ceramic kit from Woodcraft. The kit said to drill a 1/4 inch hole but it was too small. Broke the blade trying to dry fit it. Had to sand the hole to make it wide enough and it seems to still be a tight enough fit to not need to glue it. I guess this won't get checked off of the to-do list yet.
Jim McLain
Artist
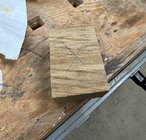
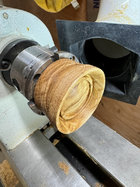
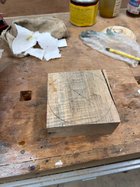
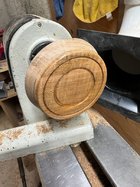
Piece of hard maple on the lathe last evening right about 10 PM when I quit for the evening.
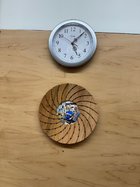
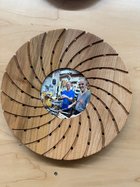
Made it into a picture frame today. 12”x1”, Osmo wood wax finish. It’s the first photo hung in the new “Rogue’s Gallery” in my shop. That’s my mentor, Harvey Fein and me in his shop in northern New Jersey.
Made it into a picture frame today. 12”x1”, Osmo wood wax finish. It’s the first photo hung in the new “Rogue’s Gallery” in my shop. That’s my mentor, Harvey Fein and me in his shop in northern New Jersey.
Attachments
Thank you! Guess I need to throw them back on the lathe really quick.Nice bowls. Oak is a favorite. Your sharp corners encourage cracks. There are known as stress risers. I usually cut mine sharp, as you have, but chamfer them. It makes a difference
Alan and @Charles Cadenhead , Regarding the sharp corners, it’s quite easy and quick for a tiny tear to start, it’s just a bit of wood there. The stresses of drying will cause that tiny crack to run. If unchecked it can ruin an otherwise great star to a bowl.Not Charles but good to know. Do you chamfer in toward the center at 45 degrees?
Strongest is a completely round form, weakest is a knife edge. Choose your risk and reward. A rounded 1st turning means there is a lot to remove at 2nd turning to achieved a nice form, and the sharp square, closer to your desired final shape invites cracks.
Ive opted for about an 1/8 inch radius to soften the edge. A 45 degree chamfer, and then soften the edges left from chamfering.
This is a 14 inch bowl 1st turned last night
Mark, you were right about those checks on the rim. These two bowls were turned last week and have been in a paper bag ever since and they still cracked. I returned the edges as you recommended and put them back in a bag. I hope that helps....Alan and @Charles Cadenhead , Regarding the sharp corners, it’s quite easy and quick for a tiny tear to start, it’s just a bit of wood there. The stresses of drying will cause that tiny crack to run. If unchecked it can ruin an otherwise great star to a bowl.
Strongest is a completely round form, weakest is a knife edge. Choose your risk and reward. A rounded 1st turning means there is a lot to remove at 2nd turning to achieved a nice form, and the sharp square, closer to your desired final shape invites cracks.
Ive opted for about an 1/8 inch radius to soften the edge. A 45 degree chamfer, and then soften the edges left from chamfering.
This is a 14 inch bowl 1st turned last nightView attachment 59682
Oak is a different creature. I love it even though it requires more care than most woods, or maybe because of that. I tend to be a sucker for challenges. My thoughts about oak;Mark, you were right about those checks on the rim. These two bowls were turned last week and have been in a paper bag ever since and they still cracked. I returned the edges as you recommended and put them back in a bag. I hope that helps....
View attachment 59697View attachment 59698
For a very strong, heavy wood, it’s surprisingly weak between fibers. It can’t handle much tensile load there. Splitting oak for firewood is great fun because of this.
Also it seems to move rather quickly as it dries. Far too quickly considering the weak bonds between fibers. So, slow drying is essential. A paper bag just isn’t going to work, nor will a box with shavings. Anchorseal the entire bowl. Use it liberally, then apply strips of paper towel over the rim, about an inch, inch and a half down each side (inside and outside), and liberally coat with more anchorseal. Then you need to put it away, out of draughts and breezes, and leave it. It’s the slow way, but it works.
When working the wet Oak, never let it air out on the lathe. Keep it wrapped in plastic anytime you’re not turning.
A bowl that has a rim to rim curve is stronger than a flat bottom with more vertical walls.
Pith down is stronger than pith up.
Last point is to have fun!
I love oak, though much of what I turn is dry white oak. Mostly for spindles. I'm familiar with splitting freshly cut oak since I also make Windsor chairs, although there all the shaping work is done with drawknife and spokeshave. That is great fun.Oak is a different creature. I love it even though it requires more care than most woods, or maybe because of that. I tend to be a sucker for challenges. My thoughts about oak;
For a very strong, heavy wood, it’s surprisingly weak between fibers. It can’t handle much tensile load there. Splitting oak for firewood is great fun because of this.
Also it seems to move rather quickly as it dries. Far too quickly considering the weak bonds between fibers. So, slow drying is essential. A paper bag just isn’t going to work, nor will a box with shavings. Anchorseal the entire bowl. Use it liberally, then apply strips of paper towel over the rim, about an inch, inch and a half down each side (inside and outside), and liberally coat with more anchorseal. Then you need to put it away, out of draughts and breezes, and leave it. It’s the slow way, but it works.
Pith down is stronger than pith up.
Last point is to have fun!
Tom Gall
TOTW Team
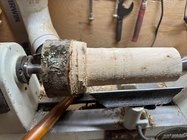
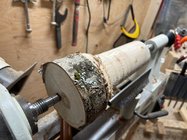
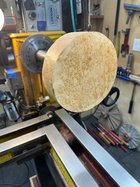
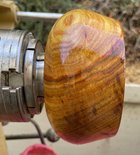
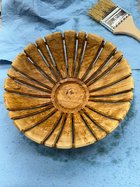
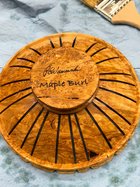
Nice burl! Unless the other side (headstock) is even nicer than this side (shown) I would reverse it. Especially if making a bowl - you don't want to turn away all that figure. But, I assume you already know that so the other side must be spectacular !Maple burl from “Got Wood’s” giveaway finally on the top of the pile. It’s on the lathe… now to figure out what to make
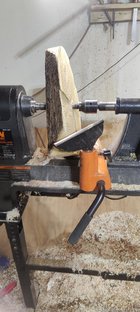
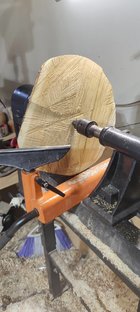
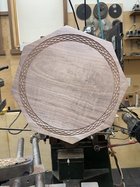
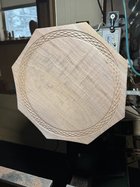
This is the start of a wall mount for an old desk lamp. I started with a 9" X 6" X 1 3/4" piece of red oak, then laid out the ellipse on it, band sawed the form, used the oscillating belt sander to finish to the layout lines, a router to apply to edge detail and finally did the mounting details for one of the horizontal spindles. The board on the faceplate has a hole dead center with a construction screw into the hole and the opposite end is just screwed down to the board. The other spindle mount will be turned after I dismount the work piece and attach the undone mount with the center screw etc.
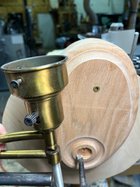
Note: the use of a boring head to make the mortise for positioning the horizontal spindle (see the recent thread on boring heads).

Note: the use of a boring head to make the mortise for positioning the horizontal spindle (see the recent thread on boring heads).
- Joined
- Apr 27, 2004
- Messages
- 9,309
- Likes
- 6,082
- Location
- Lakeland, Florida
- Website
- www.hockenberywoodturning.com
That’s tough. Very beautiful funnel though. I would imagine everyone here is a member of that club. Myself, multiple times haha.ruined a pretty piece of bocote
Turning a bunch of tiny little calabashes for a project. Small turnings are fun, and give you opportunities to work with wood you might not otherwise. Case in point, here is a small Barberry calabash. Barberry has such an intense color, almost fluorescent when freshly cut. This mellows quickly, but sheesh when fresh it makes Osage Orange look dull. Wild stuff. Fine grained and dreamy to turn, but you won’t find many large pieces. This bowl is a hair under 7/8” diameter.
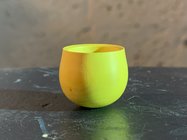

Last edited:
Wow Michael that is awesome. I have never seen that wood before.
Tom Gall said:
“Nice burl! Unless the other side (headstock) is even nicer than this side (shown) I would reverse it. Especially if making a bowl - you don't want to turn away all that figure. But, I assume you already know that so the other side must be spectacular !”
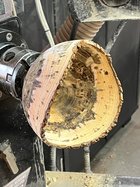
Actually the other side had a major crack, and included bark, so I had little choice.
Attachments
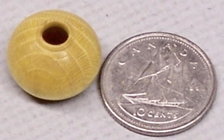
Michael you had to remind me of that Barberry wood, special to me as this plant was being eradicated, (or tried to) by the agricultural department, even though it was/is an endemic species.
Reason was that it could be host to a grain rust problem according them.
I was trying to identify it when I found this shrub, and it was not supposed to exist anymore, I took some cuttings and had those grow at my property and one other place, a pretty plant with small flowers and red berries.
I did turn a few small pieces from it, and yes an intense yellow, stayed like that for a while, but like most all woods the color did change after a couple years.
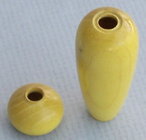
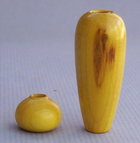
Still part of a miniature collection of special wood turnings I have, in either woods or boxes like the acorn boxes or the ones with inlays in the lids, anyway you can find the Barberry HF on the mini tray picture, color changed as you can see.
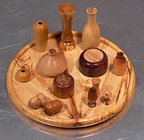


@Leo Van Der Loo gorgeous miniatures, thanks for sharing. I might have to turn a tiny little hollowform now too. One of the things I found interesting about Barberry was the rays, almost like Macadmia. Have a cool yellow-white color, which you can see well in your first photo.
Also kind of funny, I almost made a joke about this one being a type of wood that even Leo might not have turned. But when I thought about, I figured you probably had. That’s a very nice story to go along with your Barberry experience.
Also kind of funny, I almost made a joke about this one being a type of wood that even Leo might not have turned. But when I thought about, I figured you probably had.
Never saw or turned Macadamia wood Michael, just looked it up and yes that is super special wood, does not grow here that is for sure, but that Honey Suckle HF wood (top right) is petty special to me as well.@Leo Van Der Loo gorgeous miniatures, thanks for sharing. I might have to turn a tiny little hollowform now too. One of the things I found interesting about Barberry was the rays, almost like Macadmia. Have a cool yellow-white color, which you can see well in your first photo.
Also kind of funny, I almost made a joke about this one being a type of wood that even Leo might not have turned. But when I thought about, I figured you probably had.That’s a very nice story to go along with your Barberry experience.
I noticed that one Leo, wry cool as well. The little spots are funky. Mini-bird eyes or tiny little burls. Looks like a nice coloration. Did it turn well?
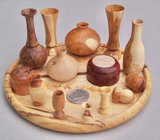
What type of wood is that bulbous HF (to the right of the little Barberry)?
What type of wood is that bulbous HF (to the right of the little Barberry)?
I often do, now always will. I was going for a thin wall and tried to make good better. Been kicking myself since.use calipers
The Honey Suckle turns nicely, the problem with that wood is splitting, that wood has almost always splits in it, even while still growing.I noticed that one Leo, wry cool as well. The little spots are funky. Mini-bird eyes or tiny little burls. Looks like a nice coloration. Did it turn well?
What type of wood is that bulbous HF (to the right of the little Barberry)?
Not sure about the light coloured bubble, I think it could be Norway Maple or the European Maple, I also turned some spalted Oak and mini Yew hf shown here, that is Japanese Yew.
Last edited:
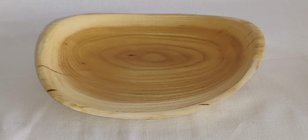
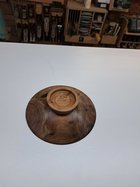
A bowl only a mother could love. I saw this piece of red mulberry as a challenge. After turning the bottom, I took it off the lathe to glue a small crack. Then the cold snap hit and I couldn't finish it for a week. When I looked at it again, it had developed two more cracks (one pretty large). I decided to finish it anyway.
