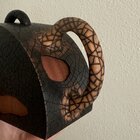
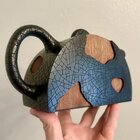
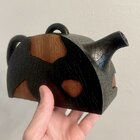
• Beware of Counterfeit Woodturning Tools (click here for details)
  • Johnathan Silwones is starting a new AAW chapter, Southern Alleghenies Woodturners, in Johnstown, PA. (click here for details)
  • Congratulations to Tom Hale & Rebecca DeGroot for "Walking Mushroom" being selected as Turning of the Week for September 30, 2024 (click here for details)
  • Congratulations to 2024 AAW Member Exhibition Common Roots forum member finalists (click here for details)
  • Welcome new registering member. Your username must be your real First and Last name (for example: John Doe). "Screen names" and "handles" are not allowed and your registration will be deleted if you don't use your real name. Also, do not use all caps nor all lower case.

Wooden Teapot Project

Michael Anderson

Super Moderator
Staff member
TOTW Team
Joined
Aug 22, 2022
Messages
1,588
Likes
4,894
Location
Chattanooga, TN
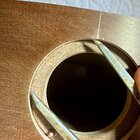
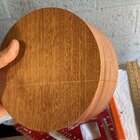
Time to cut the body! This step has been looming over me for a while, as it's the last stressful part of the project (stressful in the sense that a total disaster could occur). First I needed to lay out my cuts in a way that left my lid exactly at the top--somewhat of a challenge with a round-body object. Dividers to the rescue! Because I took the time to make sure I had perfectly equal halves and also centered my glue line on the exterior, I had a starting point. I needed to mark 90 degrees from my glue line, so I used my dividers to get close, and then made two pencil marks the same distance from the glue line. Then, I marked a line in the middle of my pencil marks, and used a square to draw a line that connected both sides of the teapot. ind of a weird thing to explain, so hopefully the following image clarifies my strategy. The photo shows dividers on the glue line and my first mark. the next step was to put one side of the dividers on the glue line opposite the lid and mark with a pencil where the other point landed.
IMG_9396.jpg

Following this, I measured 110mm down from the top--this is past the center point, so will allow the body of my teapot to curve under a bit. I then used my dividers and my middle pencil line to draw boundaries for my cut line. I opened my dividers so that one point touched the pencil line, and the other point touch a spot on the edge 110mm down from center. I marked this point with a pencil, and then repeated this three more times (with the dividers set at the same measurement). Then it was just a matter of connect the dots with a straight edge. All of these steps gave me a cut line that wrapped around the body, and once cut would establish the lid perfectly on top.
IMG_9397.jpg

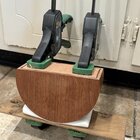
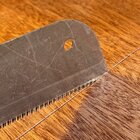
Time to cut. I don't have a band saw, this is way too big for my scroll saw, and I couldn't be bother to clean off my table saw (that's a half joke--I wasn't too keen on trying to cut this cleanly with my cheap table saw). I decided the best course of action would be to use my flush cut saw. It has a narrow kerf and fine teeth. Also, the nose is slightly angled and lacks teeth, so as long as you move slowly you can get a clean, straight, and square cut. Here is a shot with the nose recessed into the cut line--you should be able to imagine how this helps saw on track.
IMG_9399.jpg

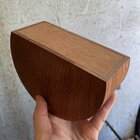
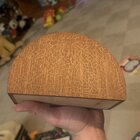
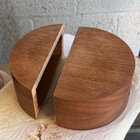
After some sawing, I finally made it through, with just a little bit of cleanup required. Here is the glory shot of the teapot sections separate:
IMG_9401.jpg

The smaller section is waste (or something for a future project, of course), and the larger piece is the teapot body.
 
Last edited:

Michael Anderson

Super Moderator
Staff member
TOTW Team
Joined
Aug 22, 2022
Messages
1,588
Likes
4,894
Location
Chattanooga, TN
To clean up the cut edge, I used the oscillating belt attachment on my spindle sander. I covered both flat side of the teapot with painter's tape to protect the surface, and then slowly sanded, flipping the body over frequently.

IMG_9403.jpg

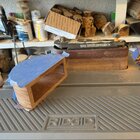
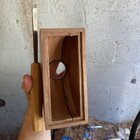
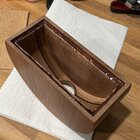
After a few minutes the bottom was fairly clean but had a tiny bit of wobble, so I spent a minute or so sanding the bottom against a flat surface covered with sandpaper. Clean! I then marked a line around the bottom of the teapot, as well as on the interior. This line indicates the waste line for a rabbet I needed to cut away for a bottom. This would have been a relatively quick task if I had a router table. Sadly, I do not, so I used a couple of carving bits to hog away most of the material (a Kutzall dovetail burr mentioned above, as well as a fluted cylinder with flat top). Following these, I used a skewed carving chisel to clean up the edges.

IMG_9409.jpg

I refined the border a bit more after the photo, and lightly sanded to smooth everything out. Not perfect, but good enough for this purpose. I then cut a piece of 3/16" plywood to fit the recess. I wanted to use plywood to ensure that the bottom wouldn't move seasonally.

IMG_9412.jpg
 

Michael Anderson

Super Moderator
Staff member
TOTW Team
Joined
Aug 22, 2022
Messages
1,588
Likes
4,894
Location
Chattanooga, TN
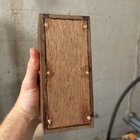
I decided to use epoxy (JB Weld 5-minute) to attach the bottom to the rest of the teapot. This is a good gap filler, and will provide a stronger and more permanent hold than anything else. I'm also planning to drill and insert some dowels for additional support. I mixed up some epoxy and spread it liberally on the surface of the rabbet.

IMG_9413.jpg

After I inserted the bottom, I used a toothpick to run a small bead of epoxy around the junction so that any gaps would be filled. I added a couple of clamps (took a bit of finagling), and the following photo shows the current state of the body. After the epoxy cures, I will add the dowels mentioned above, sand the bottom flush, and then go through the sanding/CA protocol is Used for the rest of the teapot body.

IMG_9415.jpg

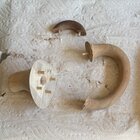
Aside from the body work, I also drilled holes and added 1/8" dowels to the lid handle, body handle, and spout. The dowels are glued with titebond 2. Prior to this I also spent some time refining the shape/surface of the handle and the spout.

IMG_9416.jpg

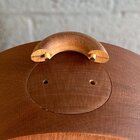
You can also see that I decided to cut the lid handle down a bit. I didn't like how much the hand protruded from the lid, so I went with something a bit closer to the traditional form. After I cut the lid handle and drilled the dowel holes, I inserted some temporary dowels with and used a sharpie to color the end black. I then pressed the black dowel ends onto the lid. This leaves reference marks for where to drill.

IMG_9391.jpg
 
Joined
Apr 30, 2022
Messages
649
Likes
3,081
Location
Beavercreek, OH
Website
www.ovwg.org
Time to cut the body! This step has been looming over me for a while, as it's the last stressful part of the project (stressful in the sense that a total disaster could occur). First I needed to lay out my cuts in a way that left my lid exactly at the top--somewhat of a challenge with a round-body object. Dividers to the rescue! Because I took the time to make sure I had perfectly equal halves and also centered my glue line on the exterior, I had a starting point. I needed to mark 90 degrees from my glue line, so I used my dividers to get close, and then made two pencil marks the same distance from the glue line. Then, I marked a line in the middle of my pencil marks, and used a square to draw a line that connected both sides of the teapot. ind of a weird thing to explain, so hopefully the following image clarifies my strategy. The photo shows dividers on the glue line and my first mark. the next step was to put one side of the dividers on the glue line opposite the lid and mark with a pencil where the other point landed.

View attachment 66887

Following this, I measured 110mm down from the top--this is past the center point, so will allow the body of my teapot to curve under a bit. I then used my dividers and my middle pencil line to draw boundaries for my cut line. I opened my dividers so that one point touched the pencil line, and the other point touch a spot on the edge 100mm down from center. I marked this point with a pencil, and then repeated this three more times (with the dividers set at the same measurement). Then it was just a matter of connect the dots with a straight edge. All of these steps gave me a cut line that wrapped around the body, and once cut would establish the lid perfectly on top.

View attachment 66888

Time to cut. I don't have a band saw, this is way too big for my scroll saw, and I couldn't be bother to clean off my table saw (that's a half joke--I wasn't too keen on trying to cut this cleanly with my cheap table saw). I decided the best course of action would be to use my flush cut saw. It has a narrow kerf and fine teeth. Also, the nose is slightly angled and lacks teeth, so as long as you move slowly you can get a clean, straight, and square cut. Here is a shot with the nose recessed into the cut line--you should be able to imagine how this helps saw on track.

View attachment 66889

After some sawing, I finally made it through, with just a little bit of cleanup required. Here is the glory shot of the teapot sections separate:

View attachment 66890

The smaller section is waste (or something for a future project, of course), and the larger piece is the teapot body.
A hand saw?! Wow, pretty impressive. You seem to make exceptional work with minimal tools! Although once you get a bandsaw you will wonder why you never had one!
 

Michael Anderson

Super Moderator
Staff member
TOTW Team
Joined
Aug 22, 2022
Messages
1,588
Likes
4,894
Location
Chattanooga, TN
A hand saw?! Wow, pretty impressive. You seem to make exceptional work with minimal tools! Although once you get a bandsaw you will wonder why you never had one!
Thanks Gabriel!! Some of the flat woodworking skills paid off after all, hahaha. Band saw has definitely been on my list for a while; alas, I’m a wonderful procrastinator! Soon though. 😃
 

Michael Anderson

Super Moderator
Staff member
TOTW Team
Joined
Aug 22, 2022
Messages
1,588
Likes
4,894
Location
Chattanooga, TN
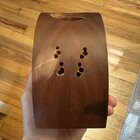
Last night I was able to finish the bottom of the teapot. This is a shot of bottom after the epoxy had cured. You can see that I also added 6 dowels for extra support. The dowels are 1/8" diameter, and likely maple or birch. These are the same that I am using to attach the handles and spout. I glued them in place with titebond 2, and then used a flush cut saw to trim close to the surface.

IMG_9418.jpg

I then sanded the bottom flat-ish with my oscillating belt sander mentioned before. I say flat-ish because the sander puts just a tiny bit more pressure on the edges than the center when you have a solid surface. This is visible in the following photo.

IMG_9421.jpg

So, after the belt sander, I sanded on a flat surface. Yesterday was my luck day at my turning club's meeting. I won some cool wood in the raffle, a woodcraft gift card, as well as the bring-back box (I received a piece someone made, and will make one for someone else to receive at the next meeting). The gift card was great, as it took a chunk of money off of something I had been wanting to buy for a while--a granite surface plate! Dead flat (within something like 0.0001 mm/m), and much better than my previous "flat enough" piece of wood. Ha. I laid a piece of 180g sandpaper on the surface plate, sanded, wiped the bottom of the teapot body (dust included) with thin CA, let the CA cure, sanded again, and repeated the whole process.

IMG_9423.jpg

Here is a shot of the bottom of the teapot body finished:

IMG_9426.jpg
 

Michael Anderson

Super Moderator
Staff member
TOTW Team
Joined
Aug 22, 2022
Messages
1,588
Likes
4,894
Location
Chattanooga, TN
Awesome thread, Michael! Looking forward to the next installment. Quick question: Why 5-minute epoxy over Titebond III to attach the bottom?
Thanks Jaramiah! I'm sitting in the Denver airport, waiting to catch a midnight flight home. Itching to get back to work!

The reason I used epoxy is that it is a good gap filler. My panel and carved rabbet were pretty close, but not exact. The epoxy got me the rest of the way there. Also, I am going to be doing some pyro and carving, and the epoxy should keep a more natural surface at the junction than titebond. If my joint was super tight all around, I probably would have gone with titebond.
 

Michael Anderson

Super Moderator
Staff member
TOTW Team
Joined
Aug 22, 2022
Messages
1,588
Likes
4,894
Location
Chattanooga, TN
Hi everyone! I got back home from Colorado yesterday, and manage to do some work on the teapot. --Side note, if you every have the chance to go to the Rocky Mountain Woodturning Symposium, do it. Trent Bosch and crew put on an amazing event.-- Prior to heading out of town I had drilled holes for the main handle and the spout (following the same method as above). Unfortunately, I had to finesse the fit a bit. The handle holes weren't too far off, but I did accidentally drill through the wall completely and had to create a new bottom to each hole with some CA glue and a tape dam on the interior (so the future epoxy won't fall through). No biggie:

IMG_9433.jpg

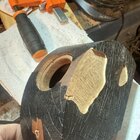
The spout holes, however, needed quite a bit of repositioning. I had positioned the spout a bit too high and off center, so the holes (that won't be visible at all) sort of look like a butcher job. I also accidentally scratched the surface when I was widening one of the holes a bit. D'oh! Fortunately, that can be masked, so not biggie. Part of this follow along is showing the good and bad, and the ugly, and this is about as ugly as it gets:

IMG_9518.jpg

In the image above, the final holes are the four-hole set that is the furthest down and toward my thumb (left side of photo). Again, none of the extra holes matter, as they won't be visible at all. The small holes in the photo were the original, and were fairly clean, but as I studied the teapot mocked up, I knew I needed to fix. You can see the change in the photos below. The first is the initial placement of the spout, and the second is the final placement--subtle change in position, but a dramatic improvement. You can see in the first photo that the top of the spout comes up to about the 1/2 to top 1/3 of the handle. This just didn't look right, so I lowered it by about a centimeter. Now I'm pleased. You can also see some of the surface embellishment, which I will describe in the next post. Here is the initial spout placement:

IMG_9516.jpg

Here is the final placement:

IMG_9517.jpg

Like most things, subtle differences can make or break a piece.
 
Last edited:
Michael Anderson

Super Moderator
Staff member
TOTW Team
Joined
Aug 22, 2022
Messages
1,588
Likes
4,894
Location
Chattanooga, TN
My plan for embellishment is to make the teapot look a bit like there is a ceramic shell that is breaking apart to reveal the true wooden nature of the object. It is a lot of work, but I think (err, hope?) it will look cool in the end. I first studied a lot of photos of crazing ceramaic objects to help me replicate the effect. Crazing is when a ceramic glaze starts to crack due to tension. The pattern is a bit different than something like an egg shell cracking, so photos were helpful. This example in particular is what I based my pattern on.

I started by drawing a pattern on one side of the teapot. I focused on one side at a time so that I wouldn't smudge the pencil lines. The following photo shows my pencil drawing (it looks carved, but that is just an artifact of the graphite reflecting light).

IMG_9447.jpg

Following the pencil drawing, I added areas that will be carved, and/or routed, away. For this side I added these after the fact, but for the other sides I laid them out prior to drawing the pattern. After the drawing was complete, I started burning the pattern with a woodburner on medium heat and a sharp skew tip. You can see in the photo that I first burn the longest, most continuous lines, and then move on to the "filler" lines. Side note: it takes a lot of extra time to draw the pattern prior to burning, but it gives me the best chance to create the most realistic pattern (as well as revise/fix as needed). Once the line is burned, there's not much you can do.

IMG_9506.jpg

Here is a shot of the entire side completed. Note, the other side is visible in the previous post where I discuss spout placement.

IMG_9508.jpg

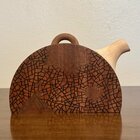
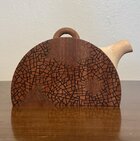
After burning both sides, I did the same thing (draw and burn) to the bottom of the teapot. I also left a space for my name, year, and title. I decided to name this tea pot "Ban Wa Renaissance" which alludes to 1) taking a traditional ceramic form and recreating it in wood, 2) the intention of the embellishment as shedding the old to reveal the new, and 3) the excitement (and benefits) you get when trying something new.

IMG_9514.jpg

Stay tuned for the next steps!
 
Joined
Mar 28, 2024
Messages
104
Likes
1,068
Location
Roswell, GA
My plan for embellishment is to make the teapot look a bit like there is a ceramic shell that is breaking apart to reveal the true wooden nature of the object. It is a lot of work, but I think (err, hope?) it will look cool in the end. I first studied a lot of photos of crazing ceramaic objects to help me replicate the effect. Crazing is when a ceramic glaze starts to crack due to tension. The pattern is a bit different than something like an egg shell cracking, so photos were helpful. This example in particular is what I based my pattern on.

I started by drawing a pattern on one side of the teapot. I focused on one side at a time so that I wouldn't smudge the pencil lines. The following photo shows my pencil drawing (it looks carved, but that is just an artifact of the graphite reflecting light).

View attachment 67183

Following the pencil drawing, I added areas that will be carved, and/or routed, away. For this side I added these after the fact, but for the other sides I laid them out prior to drawing the pattern. After the drawing was complete, I started burning the pattern with a woodburner on medium heat and a sharp skew tip. You can see in the photo that I first burn the longest, most continuous lines, and then move on to the "filler" lines. Side note: it takes a lot of extra time to draw the pattern prior to burning, but it gives me the best chance to create the most realistic pattern (as well as revise/fix as needed). Once the line is burned, there's not much you can do.

View attachment 67184

Here is a shot of the entire side completed. Note, the other side is visible in the previous post where I discuss spout placement.

View attachment 67185

After burning both sides, I did the same thing (draw and burn) to the bottom of the teapot. I also left a space for my name, year, and title. I decided to name this tea pot "Ban Wa Renaissance" which alludes to 1) taking a traditional ceramic form and recreating it in wood, 2) the intention of the embellishment as shedding the old to reveal the new, and 3) the excitement (and benefits) you get when trying something new.

View attachment 67186

Stay tuned for the next steps!
Love this contrast in tone. Pleasant surprise for anyone who decides to look underneath.
 

Michael Anderson

Super Moderator
Staff member
TOTW Team
Joined
Aug 22, 2022
Messages
1,588
Likes
4,894
Location
Chattanooga, TN
Love this contrast in tone. Pleasant surprise for anyone who decides to look underneath.
Thanks Jaramiah! I fear you’ll be disappointed though, as much of the surface is going to dyed/painted. Won’t even be able to tell that these are different woods (also why I wasn’t worried about using different wood for the handle/spout). Sorry buddy! 😂
 

Michael Anderson

Super Moderator
Staff member
TOTW Team
Joined
Aug 22, 2022
Messages
1,588
Likes
4,894
Location
Chattanooga, TN
I made some solid progress on the tea pot yesterday and this morning. I finished up all of the pyrography on the body, lid, and the lid handle.

IMG_9523.jpg

The lid handle was a bit tricky, as clearance underneath was minimal. So, it was a lot of back and forth to make sure I was lining everything up correctly. It is also a bit challenging to burn straight-ish lines on such a small curved surface, especially when the pyro skew tip is close to your fingers. Slow and careful wins the race. The following is a shot of the handle attached to the lid (but not glued yet). You can also see why I went through the trouble of adding dowels--in addition to the strength/security they provide when the handle is glued, they allow me to maintain registration as I continuously remove and re-insert. Takes out the guesswork.

IMG_9532.jpg

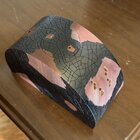
Following the pyrography, I began adding my black base coat (India ink). Before I added the India ink, I took some time to relax the edges a bit with 600g sandpaper. I still wanted to keep everything crisp, but lightly sanding off the edge helps the India ink and future paint stick ore permanently. If the edge was sharp, the ink/paint comes off easily and you'll be left with odd bare spots. I also lightly sanded the glue seams down the middle of the body and on the bottom where the floor panel meets the rest of the body. When burning the lines, the glue tends to bubble up slightly. Sanding the seams helps to mask the appearance of separate pieces. Following sanding, I went over the entire surface of the teapot with a red scotchbrite pad. This helps to smooth out the pyroed surface, as well as remove any overburn reside (wood oils and CA glue) that might interfere with the color (and/or be ugly and obvious in the end). Given the goal is to sort of mimic a ceramic surface, I want everything to be as smooth as possible. Here is a shot of the teapot with a coat of India ink applied:
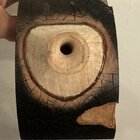
IMG_9535.jpg

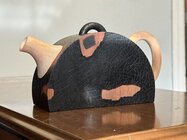
Obviously, there are bare spots left. I did not apply any ink where I will be gluing the other components (spout and handles). I also did not apply ink to the surface where I will be routing/carving away. Eventually, I will go over this surface with a fine scotchbrite pad and add another layer of India ink to smooth it out. Then, I'll add color. There are a few more steps before I can start adding color though. Here is a sneak peek of the teapot with the spout and handles temporarily in place.

IMG_9534.jpg

It's starting to come together! The next step is to route/carve away the bare spots to "reveal" the wood. Then, I will finish refining, pyro, attach, and blend the junctions of the spout and large handle. Then, I'll add India ink to the spout and handle, go over the entire surface with a fine scotchbrite pad, add another layer of India ink, and then start adding color. Then I'll apply the finish, and then I'll be done. Can you see the light? :)
 
Joined
Apr 30, 2022
Messages
649
Likes
3,081
Location
Beavercreek, OH
Website
www.ovwg.org
I made some solid progress on the tea pot yesterday and this morning. I finished up all of the pyrography on the body, lid, and the lid handle.

View attachment 67257

The lid handle was a bit tricky, as clearance underneath was minimal. So, it was a lot of back and forth to make sure I was lining everything up correctly. It is also a bit challenging to burn straight-ish lines on such a small curved surface, especially when the pyro skew tip is close to your fingers. Slow and careful wins the race. The following is a shot of the handle attached to the lid (but not glued yet). You can also see why I went through the trouble of adding dowels--in addition to the strength/security they provide when the handle is glued, they allow me to maintain registration as I continuously remove and re-insert. Takes out the guesswork.

View attachment 67258

Following the pyrography, I began adding my black base coat (India ink). Before I added the India ink, I took some time to relax the edges a bit with 600g sandpaper. I still wanted to keep everything crisp, but lightly sanding off the edge helps the India ink and future paint stick ore permanently. If the edge was sharp, the ink/paint comes off easily and you'll be left with odd bare spots. I also lightly sanded the glue seams down the middle of the body and on the bottom where the floor panel meets the rest of the body. When burning the lines, the glue tends to bubble up slightly. Sanding the seams helps to mask the appearance of separate pieces. Following sanding, I went over the entire surface of the teapot with a red scotchbrite pad. This helps to smooth out the pyroed surface, as well as remove any overburn reside (wood oils and CA glue) that might interfere with the color (and/or be ugly and obvious in the end). Given the goal is to sort of mimic a ceramic surface, I want everything to be as smooth as possible. Here is a shot of the teapot with a coat of India ink applied:
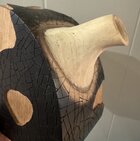
View attachment 67259

Obviously, there are bare spots left. I did not apply any ink where I will be gluing the other components (spout and handles). I also did not apply ink to the surface where I will be routing/carving away. Eventually, I will go over this surface with a fine scotchbrite pad and add another layer of India ink to smooth it out. Then, I'll add color. There are a few more steps before I can start adding color though. Here is a sneak peek of the teapot with the spout and handles temporarily in place.

View attachment 67260

It's starting to come together! The next step is to route/carve away the bare spots to "reveal" the wood. Then, I will finish refining, pyro, attach, and blend the junctions of the spout and large handle. Then, I'll add India ink to the spout and handle, go over the entire surface with a fine scotchbrite pad, add another layer of India ink, and then start adding color. Then I'll apply the finish, and then I'll be done. Can you see the light? :)
It's one of those projects where you look back and say "Wow how did I do all that to get to this point"!! But it was all worth it!
 

Michael Anderson

Super Moderator
Staff member
TOTW Team
Joined
Aug 22, 2022
Messages
1,588
Likes
4,894
Location
Chattanooga, TN
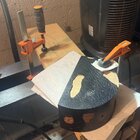
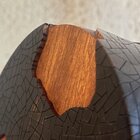
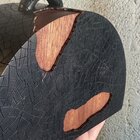
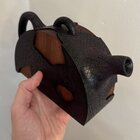
Alright, when I said that cutting the teapot apart was the last stressful procedure...that was a lie. Routing out the recess was the last stressful part that remained. Stressful in the sense that something disastrous could go wrong. Fortunately, no major issues occurred, but there were a couple of minor things that need/needed fixing, as well as a fun problem-solving situation. I first used a palm router and 1/8" spiral downcut bit to remove material from the areas I had indicated before (in the photos above, some of the non-inked areas). You can see in the following photo my clamping setup. I tend to use the ways of my lathe for a lot of things, and I suspect I'm not alone. Partly because a lot of other surfaces are covered in junk...lol. I clamped a board to the ways, and then clamped my teapot body to the board with protective paper towels between surfaces. I routed 3/32" deep, an arbitrary depth that looked good to me.

IMG_9539.jpg

One of the minor issue was that as I got close to the edge on one of my areas, the router base wasn't in a huge amount of surface contact with the teapot and I accidentally dropped an edge. This resulted in routing a slight divot:
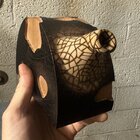
IMG_9540.jpg

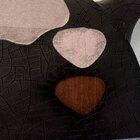
In the photo above, it looks much worse than it was. Shadow lines... To fix, I increased the depth a hair, and re-routed the surface. When I got close to the edge, I stopped, and then finished stock removal with a sharp chisel. You can see the result in the following photo. I also routed away material from the top curve (next post), and that fixed 90% of the issue. Once sanding is complete, all will be well.

IMG_9541.jpg

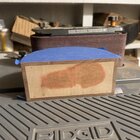
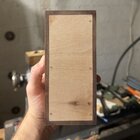
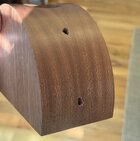
Routing the flats was relatively simple, but routing the curved body required some problem-solving. Initially, I was planning to carve away the material, via drilling reference holes at a specific depth and then carving. However, given the surface is largely endgrain, I didn't want to run the risk of burning the wood (it will be visible in the end). Also, sanding didn't seem appealing. So, instead of carving, I came up with a way to use my router. Routing a curved surface with a flat-base router, especially a convex surface is unreliable at best, and sketch at worst. I decided to make a temporary base that matched the profile of my teapot. I started by cutting a small piece of wood, and then I used the same procedure as I did for shaping the mating surface of the spout and handles: I started with a spindle sander to rough the contour, and then refined the curve by using the teapot body (cutoff) as a sanding block. I also used a support piece to ensure I was holding the piece of wood at 90 degrees to the spindle sander. After the curve was made, I marked the center on the flat side, and used my drill press and a 1-1/2" Forstner bit to drill a hole that was slight larger than my router's clearance hole. I then lightly sanded the curved surface to 400g, and applied some paste wax to make the surface low friction.

IMG_9544.jpg
 

Michael Anderson

Super Moderator
Staff member
TOTW Team
Joined
Aug 22, 2022
Messages
1,588
Likes
4,894
Location
Chattanooga, TN
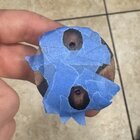
To attach the curved block to my router base, I used the ole reliable blue tape and CA glue trick. I first applied some painter's tape to the base of my router and the flat surface of my curved block. To the router's tape I added a bead of CA glue (I used medium CA, but thick works just as well).

IMG_9545.jpg

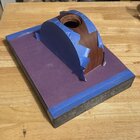
To the block's tape I sprayed some activator. Then, I brought the two surfaces together--bam, instant solid and temporary router base that matches the curve of my teapot body.

IMG_9546.jpg

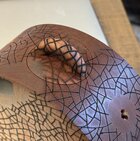
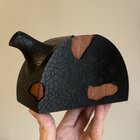
This was a much better solution than carving. It was a bit of work on the front end, but paid dividends with clean cuts and perfect contours. Here is a shot of the top of the teapot showing the lid. I did this in two sections, and used tape to secure the lid in place. You can also see that there is a tiny hole that I need to fix. This is the hole that I drilled to accept the pin. Unfortunately, given the depth I drilled previously, this was an unavoidable issue. I'll fix it well enough, but it will probably be slightly visible in the end. Not perfect, but that's okay.

IMG_9548.jpg

I used a similar clamping setup as above, but added an extra block so that I could clamp the teapot horizontally instead of vertically. Here is a shot of the setup.

IMG_9549.jpg

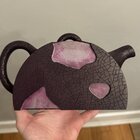
The next step is to sand the recesses. Then I'll work on finishing and attaching the spout and handles. Onward!
 
Back
Top