• Beware of Counterfeit Woodturning Tools (click here for details)
  • Johnathan Silwones is starting a new AAW chapter, Southern Alleghenies Woodturners, in Johnstown, PA. (click here for details)
  • Congratulations to William Rogers for "Ambrosia Maple Platter" being selected as Turning of the Week for September 16, 2024 (click here for details)
  • Welcome new registering member. Your username must be your real First and Last name (for example: John Doe). "Screen names" and "handles" are not allowed and your registration will be deleted if you don't use your real name. Also, do not use all caps nor all lower case.

Wooden Teapot Project

Michael Anderson

Super Moderator
Staff member
TOTW Team
Joined
Aug 22, 2022
Messages
1,565
Likes
4,830
Location
Chattanooga, TN
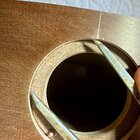
Time to cut the body! This step has been looming over me for a while, as it's the last stressful part of the project (stressful in the sense that a total disaster could occur). First I needed to lay out my cuts in a way that left my lid exactly at the top--somewhat of a challenge with a round-body object. Dividers to the rescue! Because I took the time to make sure I had perfectly equal halves and also centered my glue line on the exterior, I had a starting point. I needed to mark 90 degrees from my glue line, so I used my dividers to get close, and then made two pencil marks the same distance from the glue line. Then, I marked a line in the middle of my pencil marks, and used a square to draw a line that connected both sides of the teapot. ind of a weird thing to explain, so hopefully the following image clarifies my strategy. The photo shows dividers on the glue line and my first mark. the next step was to put one side of the dividers on the glue line opposite the lid and mark with a pencil where the other point landed.
IMG_9396.jpg

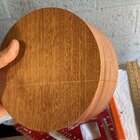
Following this, I measured 110mm down from the top--this is past the center point, so will allow the body of my teapot to curve under a bit. I then used my dividers and my middle pencil line to draw boundaries for my cut line. I opened my dividers so that one point touched the pencil line, and the other point touch a spot on the edge 100mm down from center. I marked this point with a pencil, and then repeated this three more times (with the dividers set at the same measurement). Then it was just a matter of connect the dots with a straight edge. All of these steps gave me a cut line that wrapped around the body, and once cut would establish the lid perfectly on top.
IMG_9397.jpg

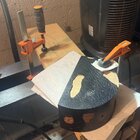
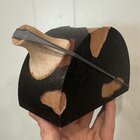
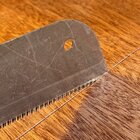
Time to cut. I don't have a band saw, this is way too big for my scroll saw, and I couldn't be bother to clean off my table saw (that's a half joke--I wasn't too keen on trying to cut this cleanly with my cheap table saw). I decided the best course of action would be to use my flush cut saw. It has a narrow kerf and fine teeth. Also, the nose is slightly angled and lacks teeth, so as long as you move slowly you can get a clean, straight, and square cut. Here is a shot with the nose recessed into the cut line--you should be able to imagine how this helps saw on track.
IMG_9399.jpg

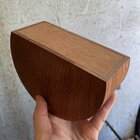
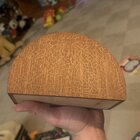
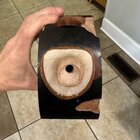
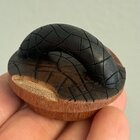
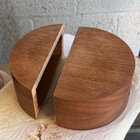
After some sawing, I finally made it through, with just a little bit of cleanup required. Here is the glory shot of the teapot sections separate:
IMG_9401.jpg

The smaller section is waste (or something for a future project, of course), and the larger piece is the teapot body.
 

Michael Anderson

Super Moderator
Staff member
TOTW Team
Joined
Aug 22, 2022
Messages
1,565
Likes
4,830
Location
Chattanooga, TN
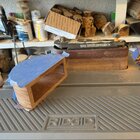
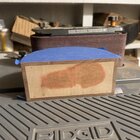
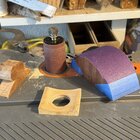
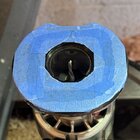
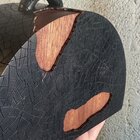
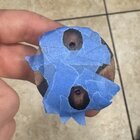
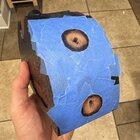
To clean up the cut edge, I used the oscillating belt attachment on my spindle sander. I covered both flat side of the teapot with painter's tape to protect the surface, and then slowly sanded, flipping the body over frequently.

IMG_9403.jpg

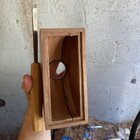
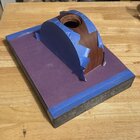
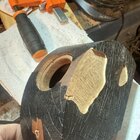
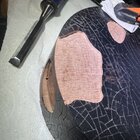
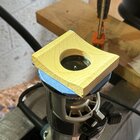
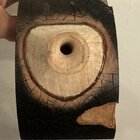
After a few minutes the bottom was fairly clean but had a tiny bit of wobble, so I spent a minute or so sanding the bottom against a flat surface covered with sandpaper. Clean! I then marked a line around the bottom of the teapot, as well as on the interior. This line indicates the waste line for a rabbet I needed to cut away for a bottom. This would have been a relatively quick task if I had a router table. Sadly, I do not, so I used a couple of carving bits to hog away most of the material (a Kutzall dovetail burr mentioned above, as well as a fluted cylinder with flat top). Following these, I used a skewed carving chisel to clean up the edges.

IMG_9409.jpg

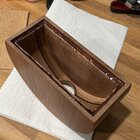
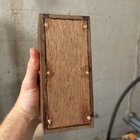
I refined the border a bit more after the photo, and lightly sanded to smooth everything out. Not perfect, but good enough for this purpose. I then cut a piece of 3/16" plywood to fit the recess. I wanted to use plywood to ensure that the bottom wouldn't move seasonally.

IMG_9412.jpg
 

Michael Anderson

Super Moderator
Staff member
TOTW Team
Joined
Aug 22, 2022
Messages
1,565
Likes
4,830
Location
Chattanooga, TN
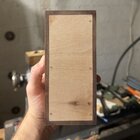
I decided to use epoxy (JB Weld 5-minute) to attach the bottom to the rest of the teapot. This is a good gap filler, and will provide a stronger and more permanent hold than anything else. I'm also planning to drill and insert some dowels for additional support. I mixed up some epoxy and spread it liberally on the surface of the rabbet.

IMG_9413.jpg

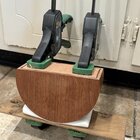
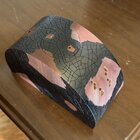
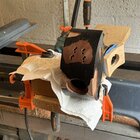
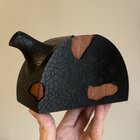
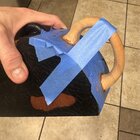
After I inserted the bottom, I used a toothpick to run a small bead of epoxy around the junction so that any gaps would be filled. I added a couple of clamps (took a bit of finagling), and the following photo shows the current state of the body. After the epoxy cures, I will add the dowels mentioned above, sand the bottom flush, and then go through the sanding/CA protocol is Used for the rest of the teapot body.

IMG_9415.jpg

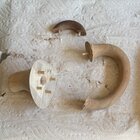
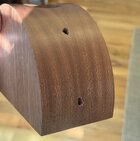
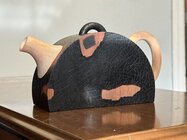
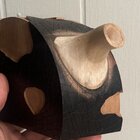
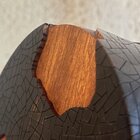
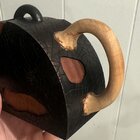
Aside from the body work, I also drilled holes and added 1/8" dowels to the lid handle, body handle, and spout. The dowels are glued with titebond 2. Prior to this I also spent some time refining the shape/surface of the handle and the spout.

IMG_9416.jpg

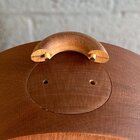
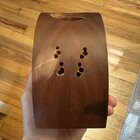
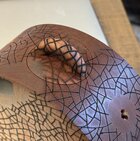
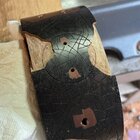
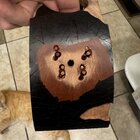
You can also see that I decided to cut the lid handle down a bit. I didn't like how much the hand protruded from the lid, so I went with something a bit closer to the traditional form. After I cut the lid handle and drilled the dowel holes, I inserted some temporary dowels with and used a sharpie to color the end black. I then pressed the black dowel ends onto the lid. This leaves reference marks for where to drill.

IMG_9391.jpg
 
Joined
Apr 30, 2022
Messages
627
Likes
2,999
Location
Beavercreek, OH
Website
www.ovwg.org
Time to cut the body! This step has been looming over me for a while, as it's the last stressful part of the project (stressful in the sense that a total disaster could occur). First I needed to lay out my cuts in a way that left my lid exactly at the top--somewhat of a challenge with a round-body object. Dividers to the rescue! Because I took the time to make sure I had perfectly equal halves and also centered my glue line on the exterior, I had a starting point. I needed to mark 90 degrees from my glue line, so I used my dividers to get close, and then made two pencil marks the same distance from the glue line. Then, I marked a line in the middle of my pencil marks, and used a square to draw a line that connected both sides of the teapot. ind of a weird thing to explain, so hopefully the following image clarifies my strategy. The photo shows dividers on the glue line and my first mark. the next step was to put one side of the dividers on the glue line opposite the lid and mark with a pencil where the other point landed.

View attachment 66887

Following this, I measured 110mm down from the top--this is past the center point, so will allow the body of my teapot to curve under a bit. I then used my dividers and my middle pencil line to draw boundaries for my cut line. I opened my dividers so that one point touched the pencil line, and the other point touch a spot on the edge 100mm down from center. I marked this point with a pencil, and then repeated this three more times (with the dividers set at the same measurement). Then it was just a matter of connect the dots with a straight edge. All of these steps gave me a cut line that wrapped around the body, and once cut would establish the lid perfectly on top.

View attachment 66888

Time to cut. I don't have a band saw, this is way too big for my scroll saw, and I couldn't be bother to clean off my table saw (that's a half joke--I wasn't too keen on trying to cut this cleanly with my cheap table saw). I decided the best course of action would be to use my flush cut saw. It has a narrow kerf and fine teeth. Also, the nose is slightly angled and lacks teeth, so as long as you move slowly you can get a clean, straight, and square cut. Here is a shot with the nose recessed into the cut line--you should be able to imagine how this helps saw on track.

View attachment 66889

After some sawing, I finally made it through, with just a little bit of cleanup required. Here is the glory shot of the teapot sections separate:

View attachment 66890

The smaller section is waste (or something for a future project, of course), and the larger piece is the teapot body.
A hand saw?! Wow, pretty impressive. You seem to make exceptional work with minimal tools! Although once you get a bandsaw you will wonder why you never had one!
 

Michael Anderson

Super Moderator
Staff member
TOTW Team
Joined
Aug 22, 2022
Messages
1,565
Likes
4,830
Location
Chattanooga, TN
A hand saw?! Wow, pretty impressive. You seem to make exceptional work with minimal tools! Although once you get a bandsaw you will wonder why you never had one!
Thanks Gabriel!! Some of the flat woodworking skills paid off after all, hahaha. Band saw has definitely been on my list for a while; alas, Iā€™m a wonderful procrastinator! Soon though. šŸ˜ƒ
 
Back
Top