Hi everyone,
I started a new project yesterday, and figured it might be fun to share the process. Follow along!
The River Art Gallery in Chattanooga is hosting a Tea Pot Exhibit during the months of November and December. I am contributing one or two teapots (if I can finish the second in time). I've never made a teapot before, but it's been on my to-do list for a while. A couple of months ago, Malcolm Zander posted this photo of his incredible Pearl Grey #2 Teapot on the World of Woodturners forum:
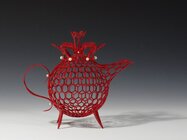
Though I have no intention of making one in this style, nor could I achieve his level of piercing precision, it was beautiful enough that it inspired me to cross teapot off of my list.
Yesterday, I mulled around ideas for a while, and then hit the lathe running with a piece of green Bradford Pear. I roughed out a shape, and then changed it, and then changed it again, until I was left with something that looks okay. That will be my second teapot I contribute to the exhibit, if I manage to finish it in time. The reason I mention that one, is that through the process of changing the form, and changing it again, I decided that I should probably do a better job with planning. A teapot has a variety of components, and isn't quite suited for winging it (at least not as much as other objects). So, last night after I put the kids to sleep I spent a lot of time looking at wooden, ceramic, metal teapot shapes, and eventually stumbled upon the following chart of traditional Chinese tea pots. I follow a number of traditional Chinese and Japanese ceramic teapot makers on Instagram, and generally like the shapes and designs they achieve, so that was the start of finding this chart:

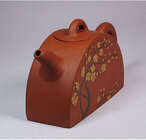
For this teapot, I decided to go for a variation of the Ban Wa shape (2nd column, 7th row). I chose this partly for the unique look, partly for the form that will support my planned embellishments, and partly because it has some fun problem solving involved. Note: this is a new form for me, so the process you see in this thread may or may not be the most efficient. But, we'll (hopefully) be successful in the end! The next step was to find/buy some lumber. I have some flat stock drying, but don't have a long timeline (object photos must be submitted to the gallery by 1 October), so I went out after work this morning to buy some lumber. I settled on a piece of 8/4 Sapele from Woodcraft.
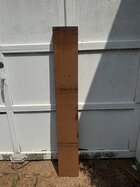
Not cheap, but I should have quite a bit left over to use for some project 10 years down the road . I chose Sapele because it has fine interlocking grain (this will help with the handle and spout, as well as some of the embellishment), and has a nice rich color when finished. My teapot should be around 3.5" wide when finished, so the 8/4 dimension is perfect.
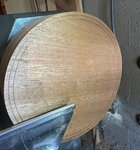
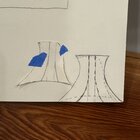
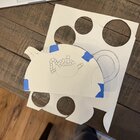
After I brought the wood home, I used a compass to mark out an appropriately sized circle on the board (85mm radius), and then marked the same size circle on a sheet of stiff paper. This will be my template and reference. Following that, I determined the appropriate height for my teapot body. The Ban Wa shape seems to be a bit taller than the radius of the circle, so I played around with a couple of options (folded my paper) until I found something that looked pleasing (settled on 107mm height):
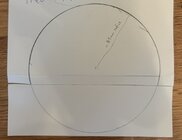
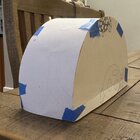
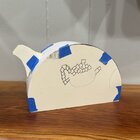
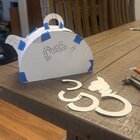
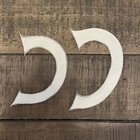
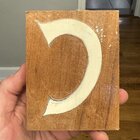
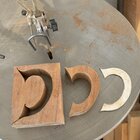
The above image already includes my cuts, because I decided to do the follow along after the next step. This entailed cutting out my partial circle, and then tracing the shape and cutting out a mate. I then cut out a couple of strips of paper, 3" and 3.5" wide, to check proportions (settled on 3.5" wide), and assembled my paper teapot body (sans floor). Ignore the doodles:
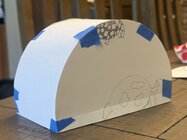
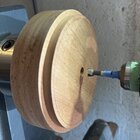
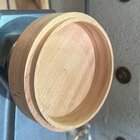
The next step is to create this on the lathe. Stay tuned!
I started a new project yesterday, and figured it might be fun to share the process. Follow along!
The River Art Gallery in Chattanooga is hosting a Tea Pot Exhibit during the months of November and December. I am contributing one or two teapots (if I can finish the second in time). I've never made a teapot before, but it's been on my to-do list for a while. A couple of months ago, Malcolm Zander posted this photo of his incredible Pearl Grey #2 Teapot on the World of Woodturners forum:

Though I have no intention of making one in this style, nor could I achieve his level of piercing precision, it was beautiful enough that it inspired me to cross teapot off of my list.
Yesterday, I mulled around ideas for a while, and then hit the lathe running with a piece of green Bradford Pear. I roughed out a shape, and then changed it, and then changed it again, until I was left with something that looks okay. That will be my second teapot I contribute to the exhibit, if I manage to finish it in time. The reason I mention that one, is that through the process of changing the form, and changing it again, I decided that I should probably do a better job with planning. A teapot has a variety of components, and isn't quite suited for winging it (at least not as much as other objects). So, last night after I put the kids to sleep I spent a lot of time looking at wooden, ceramic, metal teapot shapes, and eventually stumbled upon the following chart of traditional Chinese tea pots. I follow a number of traditional Chinese and Japanese ceramic teapot makers on Instagram, and generally like the shapes and designs they achieve, so that was the start of finding this chart:

For this teapot, I decided to go for a variation of the Ban Wa shape (2nd column, 7th row). I chose this partly for the unique look, partly for the form that will support my planned embellishments, and partly because it has some fun problem solving involved. Note: this is a new form for me, so the process you see in this thread may or may not be the most efficient. But, we'll (hopefully) be successful in the end! The next step was to find/buy some lumber. I have some flat stock drying, but don't have a long timeline (object photos must be submitted to the gallery by 1 October), so I went out after work this morning to buy some lumber. I settled on a piece of 8/4 Sapele from Woodcraft.

Not cheap, but I should have quite a bit left over to use for some project 10 years down the road
After I brought the wood home, I used a compass to mark out an appropriately sized circle on the board (85mm radius), and then marked the same size circle on a sheet of stiff paper. This will be my template and reference. Following that, I determined the appropriate height for my teapot body. The Ban Wa shape seems to be a bit taller than the radius of the circle, so I played around with a couple of options (folded my paper) until I found something that looked pleasing (settled on 107mm height):

The above image already includes my cuts, because I decided to do the follow along after the next step. This entailed cutting out my partial circle, and then tracing the shape and cutting out a mate. I then cut out a couple of strips of paper, 3" and 3.5" wide, to check proportions (settled on 3.5" wide), and assembled my paper teapot body (sans floor). Ignore the doodles:

The next step is to create this on the lathe. Stay tuned!
Last edited:

