-
January 2026 Turning Challenge: Turned and Bent! (click here for details) -
Congratulations to Phil Hamel, People's Choice in the December 2025 Turning Challenge (click here for details) -
Congratulations to David Wyke for "Maple Platter #567" being selected as Turning of the Week for January 5, 2026 (click here for details) -
Welcome new registering member. Your username must be your real First and Last name (for example: John Doe). "Screen names" and "handles" are not allowed and your registration will be deleted if you don't use your real name. Also, do not use all caps nor all lower case.
You are using an out of date browser. It may not display this or other websites correctly.
You should upgrade or use an alternative browser.
You should upgrade or use an alternative browser.
What’s on your lathe?
- Thread starter Rusty Nesmith
- Start date
Thanks for this. This should give me a good start, and will be a great way to practice with staves. The stave jig will be especially useful, and should increase precision.@Mike Novak bird house is great. If you are doing staves you might take a look at this article from the journal.
By Susan Schauer. Susan was
It was just reprinted in an AAW mailing recently but I can’t find it
I’ve done quite a few of these. I use 9 staves long enough for 2 houses join them with biscuits then cut the glue up in half and turn.
The roof I cut the rings with a parting tool at an angle so they can be glued in a cone an turned (like a bowl from a board)
View attachment 53368View attachment 53370View attachment 53371
Cheers.
Barry
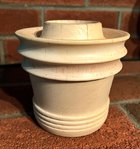
Thank you, Neil. Part of my calculus was to have enough height in the foot to allow for leveling, since this is once turned.Marc
So very nice to see a well designed and made foot!
Thanks for sharing.
.
Thanks. I will try this once I get my table saw set up.@Mike Novak bird house is great. If you are doing staves you might take a look at this article from the journal.
By Susan Schauer. Susan was
It was just reprinted in an AAW mailing recently but I can’t find it
I’ve done quite a few of these. I use 9 staves long enough for 2 houses join them with biscuits then cut the glue up in half and turn.
The roof I cut the rings with a parting tool at an angle so they can be glued in a cone an turned (like a bowl from a board)
View attachment 53368View attachment 53370View attachment 53371
@Barry Larson , be sure to post yours!
Marc, with the green bowls I turn, they are done moving in about 5 days. Keeping it well oiled is a good idea.
As for the "Honey' Locust, there is the wild type, which have tractor tire puncturing thorns on them. There is also a 'domesticated' version, some times called a 'Moraine' locust which does not have the thorns. Lovely wood. I think the seed pods are identical, and the wild life love them. I did hear that the gooey stuff inside the pods can be used to make beer.
robo hippy
One lobotomized boxelder candy dish. Hey, at least it's not black walnut like I usually turn.
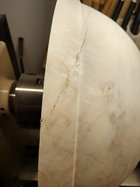
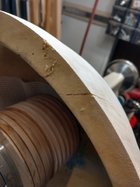
I glued these cracks but in the end decided it wouldn't look good anyway. So, one of the biggest bowls I'd ever finish turned became a lot shallower. Now I need to hunt down some coffee grounds because the hole you see I filled with sawdust outside was hiding under the wood turned away inside and it's darker. Always something.
I glued these cracks but in the end decided it wouldn't look good anyway. So, one of the biggest bowls I'd ever finish turned became a lot shallower. Now I need to hunt down some coffee grounds because the hole you see I filled with sawdust outside was hiding under the wood turned away inside and it's darker. Always something.
Attachments
Last edited:
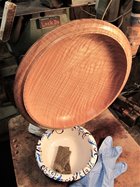
A while back I posted a walnut bowl rough turned in 2011 that I had to true up the dovetail tenon and did the initial finish on the outside. Today I got back to it and it has it's first coat of Watco Danish Oil.
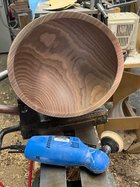
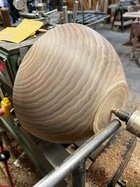
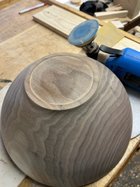
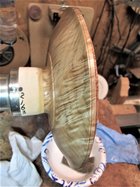
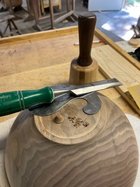 The bowl is 11" diameter X 5" high the inside of the lip is under cut as Mike Mahony does. The base was finished with the bowl mounted and driven by a friction chuck (second picture) and off the lathe the cone shaped nubbin was chiseled off, scraped with a card scraper and lightly sanded.


 The bowl is 11" diameter X 5" high the inside of the lip is under cut as Mike Mahony does. The base was finished with the bowl mounted and driven by a friction chuck (second picture) and off the lathe the cone shaped nubbin was chiseled off, scraped with a card scraper and lightly sanded.
Odie
Panning for Montana gold, with Betsy, the mule!
Don, that walnut sure looks nice with the DO applied.
Odie, wild curl on that shallow maple bowl bowl!
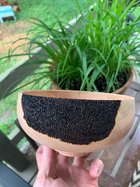
I had minor foot surgery last week, so am unable to turn for a couple of weeks. That said, I set aside a couple of pieces that I want to do some tedious embellishment on. This is a Black Cherry calabash that I’m applying some fine pyro texture to. I’m about 2 hours into a 7ish hour process. (not doing it in one sitting!) this photo represents a bit more than an hour’s concentrated effort.

Last edited:
Russ Braun
TOTW Team
A finial tree, go figure!!This would make an awesome live edge if only you get past the thorns.
Norm, I did one video on hood for sanding bowls. I took a 55 gallon food grade drum, which is white, cut about 1/3 of it off, and put some plexiglass on the open end. It gets everything. The more enclosed the piece is, the more dust you collect.
robo hippy
robo hippy
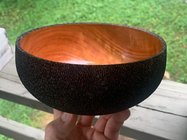
Still unable to stand at the lathe, Dr.s orders, so you all have to deal with my “what’s off my lathe” progress shots. That’s a half-joke  I finished the pyro texturing on the Black Cherry calabash of the rim and as much of the exterior as I can before finish turning the foot. I’m planning to wirebrush the texture, so I oiled the interior to help prevent the carbon from getting into the grain. I’ll let the hemp oil cure for a couple of weeks before wirebrushing. Should work out alright. Here is a shot of the interior freshly oiled. cherry is just ahhh

Last edited:
Hmmmm: something else to aspire to emulate...Still unable to stand at the lathe, Dr.s orders, so you all have to deal with my “what’s off my lathe” progress shots. That’s a half-jokeI finished the pyro texturing on the Black Cherry calabash of the rim and as much of the exterior as I can before finish turning the foot. I’m planning to wirebrush the texture, so I oiled the interior to help prevent the carbon from getting into the grain. I’ll let the hemp oil cure for a couple of weeks before wirebrushing. Should work out alright. Here is a shot of the interior freshly oiled. cherry is just ahhh
View attachment 53465
Nicely done. Be sure to post a picture of the final result after the wirebrushing.
Cheers.
Barry W. Larson
Calgary, Alberta, Canada eh!
Thanks Barry! I’ll definitely post a photo of the final result.Hmmmm: something else to aspire to emulate...
Nicely done. Be sure to post a picture of the final result after the wirebrushing.
- Joined
- Feb 6, 2010
- Messages
- 3,470
- Likes
- 2,554
- Location
- Brandon, MS
- Website
- threeringswoodshop.square.site
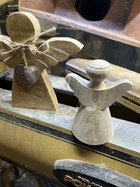
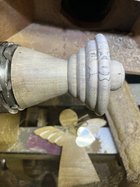
Are the wings some kind of double axis turn or a bandsaw? Maybe something simple because some stuff I look at and I'm like "how is that done?" and then I find out the obvious and it's a duhhh moment for me!Been busy last two days. New Angel design.
View attachment 53470
This is the second hollow form from this small Sweetgum log.
View attachment 53471
Odie
Panning for Montana gold, with Betsy, the mule!
Last Saturday I took a class on turning mini-hats, taught by David Kratzer in the OVWG Learning Center. As part of the learning process, I've been turning at home. This one actually was finished a couple days ago and is currently drying in a bending jig. ~7 1/2" diameter. Gabriel Hoff posted the hat he turned in the same class in the gallery a few days ago.
Attachments
- Joined
- Feb 6, 2010
- Messages
- 3,470
- Likes
- 2,554
- Location
- Brandon, MS
- Website
- threeringswoodshop.square.site
That’s a really cool process for your angels Gerald
@R Henrickson nice hat Bob! Do you happen to have a photo of your bending jig?
You're killin me.... Now I need a band saw......Turned like a bowl and band sawn to shspe
View attachment 53482
- Joined
- Feb 6, 2010
- Messages
- 3,470
- Likes
- 2,554
- Location
- Brandon, MS
- Website
- threeringswoodshop.square.site
Just wait until you want a planerYou're killin me.... Now I need a band saw......
Already have a small planer rarely used and a jointer that needs restored because I leave it in the breezeway.Just wait until you want a planer
But it's always something else. The planer is my new tool I'm trying to justify purchasing.Already have a small planer rarely used and a jointer that needs restored because I leave it in the breezeway.
Hey Bob! Looks great! Practice always helps...Last Saturday I took a class on turning mini-hats, taught by David Kratzer in the OVWG Learning Center. As part of the learning process, I've been turning at home. This one actually was finished a couple days ago and is currently drying in a bending jig. ~7 1/2" diameter. Gabriel Hoff posted the hat he turned in the same class in the gallery a few days ago.
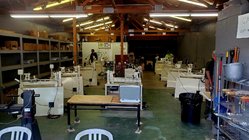
So I went to an Open Turning at the Learning Turning (or is it Turning Learning?) Center of our Carolina Mountain Woodturners in Arden, NC. I've been a member almost since this madness started during the shutdown, but never did any club activities because they are up in the mountains (which I'm from and love any excuse to get back to). Anyway, I met some nice people like Ron, Laurie (who runs a tight shop, which I respect), Ann Ogg and a couple of others, and was really impressed by the whole setup. Those little OneWay 12/24's are a pretty spiffy little lathe, and orders of magnitude better than the Laguna 12/16 I started on. Turning in an open-air shop in the mountains with some real turners around to give some great feedback-priceless. I love this messy hobby; the people in it are just the best.
The first pic is me building coats of TruOil after my usual sanding and finishing regimen these days. My grail quest this summer is the perfect curve, and the body control that it obviously requires to execute. I'm even practicing Tai-Chi from YouTube videos some morning to work on more fluid movements.
mornings to work on fluid movements. Bear with me, gentlemen.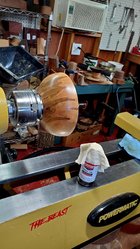


THIS IS "WHAT WAS" ON MY LATHE
Took it off the lathe and set it on my stool while while making some adjustments to the lathe. The next thing that happened was that it jumped off the stool and landed poorly on the floor. The accent ring cracked in two places. I attempted CPR with CA, but it just looked horrible.
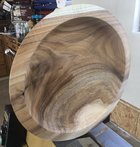
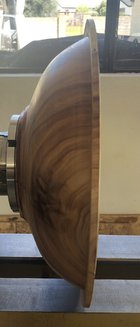
THIS IS "WHAT IS" ON MY LATHE
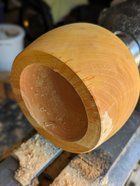
Remounted and turned off the accent edge and have a savable bowl. Wood is Black Acacia.
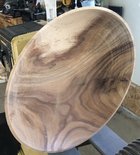
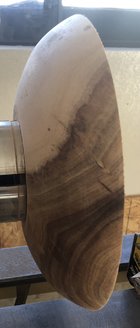
Took it off the lathe and set it on my stool while while making some adjustments to the lathe. The next thing that happened was that it jumped off the stool and landed poorly on the floor. The accent ring cracked in two places. I attempted CPR with CA, but it just looked horrible.


THIS IS "WHAT IS" ON MY LATHE
Remounted and turned off the accent edge and have a savable bowl. Wood is Black Acacia.


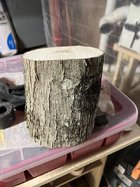
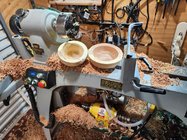
Cut up one of the large sycamore blanks and rough turned a couple of small bowls. Now drying in the kiln. The wood is very wet, mid 40% range. Ran into some more of that funky punky in the smaller of the two. Give it one chance in 5 to make it to second turning.
Attachments
After seeing this pic, I’m 99.99% sure it’s Bradford Pear. That specific shade of orange/brown upon green turning is unmistakable.Roughing turning.... lets call it pear. It's so wet.
I agree with Michael-Looks like BP. I love turning it!

