Great thanks!They are universal left or right so far as I know.
-
January 2026 Turning Challenge: Turned and Bent! (click here for details) -
Congratulations to Phil Hamel, People's Choice in the December 2025 Turning Challenge (click here for details) -
Congratulations to David Wyke for "Maple Platter #567" being selected as Turning of the Week for January 5, 2026 (click here for details) -
Welcome new registering member. Your username must be your real First and Last name (for example: John Doe). "Screen names" and "handles" are not allowed and your registration will be deleted if you don't use your real name. Also, do not use all caps nor all lower case.
You are using an out of date browser. It may not display this or other websites correctly.
You should upgrade or use an alternative browser.
You should upgrade or use an alternative browser.
Photo of your workstation
- Thread starter John Hicks
- Start date
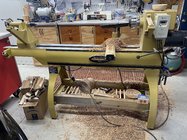
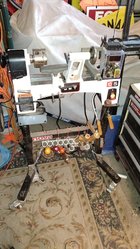
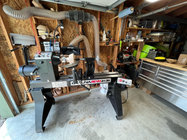
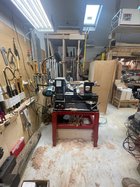
My space is shared in the back of my garage. I my first leave, the Jet 1014 and my grinder station sit on the bench behind the Powermatic. The Jill’s dad is on casters and I can move it to wherever I want it to be. It’s very handy in a non-dedicated space. The best part is I built it with my dad, it was a great project.
Attachments
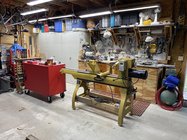
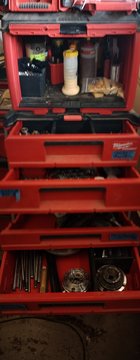
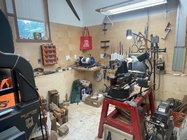
I really liked the motor and speed control of a nova 1214, but the tailstock was so sloppy I moved the motor to my first lathe, a jet 1015. Since I got both used I didn't worry too much about value retention and moved the controller to a bigger enclosure and added a hall effect sensor for RPM. It's still an awesome spindle and pen lathe so I think it was a good move.This is my mess this morning. My 2 lathes, sharpening, and packout tower I use for turning.
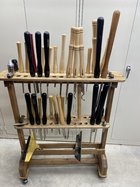
The robust and SB bolster systems have really helped me reduce the number of handles I have to make room for under the mini.. and they're awesome.
Attachments
@Michael: Creative!
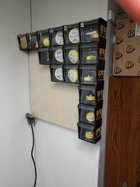
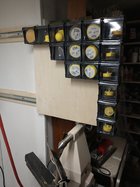
I finally got off my butt and got the project started. Originally I was only going to do 16 boxes. Standing in the store 16 seemed like plenty. Now not so much. That's why I left room to add the rest.They are universal left or right so far as I know.
Thanks for the idea!
Attachments
Lots of lovely shops, interesting ideas and things to strive for.
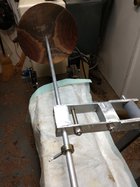
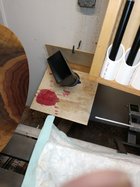
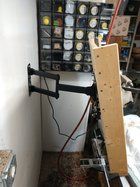
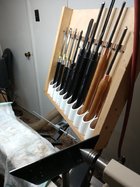
Very clever!I made a new rack for my tools and accessories.
Put it on 24” full extension drawer slides so that I can move it away from the chuck area when turning.
View attachment 49009
View attachment 49010
View attachment 49011
Nice vintage General wood lathe!
Thanks!Very clever!
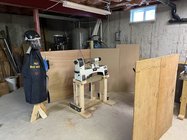
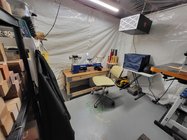
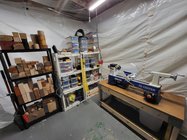
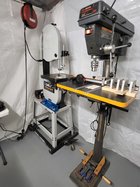
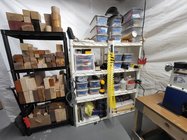
This is my 9x6' "tent" I set up in my basement. Ceiling is covered with 4 mil plastic, walls are pop up canopy walls hanging on PVC rods through screw eyes in the floor joists.
I have room inside for lathe, bandsaw, drill press, shelving for accessories and supplies and a sharpening station (under the blue cover).
Lot of fun per square foot...
I have room inside for lathe, bandsaw, drill press, shelving for accessories and supplies and a sharpening station (under the blue cover).
Lot of fun per square foot...
Attachments
Here is my shop. I’m still not happy with it, but it’s getting better.
I will probably move the grinder and just use that alcove for storage, with a shower curtain to keep chips out. It’s too crowded at end of lathe for sharpening.
I’m going to make a second chisel rack, and probably a board to hold chucks. Plus a wall mount for tool rests.
Once I’m happy I will need to do something more permanent than extension cords.
Any suggestions are welcome.
Attachments
36 boxes doesn't seem like enough either...I finally got off my butt and got the project started. Originally I was only going to do 16 boxes. Standing in the store 16 seemed like plenty. Now not so much. That's why I left room to add the rest.
Thanks for the idea!
Odie
Panning for Montana gold, with Betsy, the mule!
36 boxes doesn't seem like enough either...
Then 42 won't be enough....
Then 48 won't be enough....
Then 54 won't be enough....
....etc....
Get used to it friends!
-----odie-----
I figured out a place for my tools for a while anyway until I think of the next arrangement to try.
The dust funnel hangs there until I sand then I move it over to sit on the ways. I might try something similar to the gouge rack but it's getting crowded back there. The last picture is my version of a bowl bottom thickness gauge. It tucks out of the way when not in use. Grinder is over my right shoulder 4-5 steps away.
The dust funnel hangs there until I sand then I move it over to sit on the ways. I might try something similar to the gouge rack but it's getting crowded back there. The last picture is my version of a bowl bottom thickness gauge. It tucks out of the way when not in use. Grinder is over my right shoulder 4-5 steps away.
Attachments
My space is shared in the back of my garage. I my first leave, the Jet 1014 and my grinder station sit on the bench behind the Powermatic. The Jill’s dad is on casters and I can move it to wherever I want it to be. It’s very handy in a non-dedicated space. The best part is I built it with my dad, it was a great project.
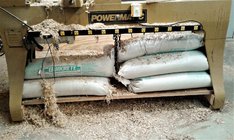
Like the idea for the shelf under the powermatic done with dowels -- presumably to allow unwanted debris to flow through while allowing wanted debris to remain? Is the 120 receptacle wired into the lathe, or is it stand alone? Your shop is quite neat without visible dust collection - is there a system not pictured or are you just Gretzky with a broom?
I put a long power strip across the front of my lathe bed. (permanent 2-sided tape) So incredibly handy when you want to plug in an extra light, power sanding, router, etc., it's right where you need it. I wired it to a line in on the VFD, so when I flip the wall switch to turn on the lathe, my work light comes on. (and helps remind me to shut it down when I leave)Like the idea for the shelf under the powermatic done with dowels -- presumably to allow unwanted debris to flow through while allowing wanted debris to remain? Is the 120 receptacle wired into the lathe, or is it stand alone? Your shop is quite neat without visible dust collection - is there a system not pictured or are you just Gretzky with a broom?
Attachments
Odie
Panning for Montana gold, with Betsy, the mule!
is there a system not pictured or are you just Gretzky with a broom?
"Gretzky with a broom"....Ha.....I like that......and that describes me perfectly! No dust collection here.....I do it like your grandpa did back in the day. Matter of fact, I do just about everything like your Grandpa did, back in the day!
-----odie-----
My entire workspace is 8' x 10'. The good part is that everything is within arm's reach whether I like it or not! I included a pic of the lathe area and the storage directly behind me while turning. The one unusual thing is the oven and George Forman grill on top of the tool chest. Used for recycling plastic.
Attachments
Efficient use of space is what it is. What's your vacuum set up? Is that an angel wing I see on one of the chucks? If so how do you like it?My entire workspace is 8' x 10'. The good part is that everything is within arm's reach whether I like it or not! I included a pic of the lathe area and the storage directly behind me while turning. The one unusual thing is the oven and George Forman grill on top of the tool chest. Used for recycling plastic.
This is a link to the vacuum pump. It is quiet, oilless, and has worked well so far. One vacuum chuck is wood, tapped to the right thread for my lathe and pvc. The other is similar but mounted on a faceplate. That is my version of an angel wing cut from neoprene. It works but I need to put some pressure around it with my fingers to get a seal. Once the seal kicks in, it works like a charm. I am planning on trying to make a wing from a silicone pad.Efficient use of space is what it is. What's your vacuum set up? Is that an angel wing I see on one of the chucks? If so how do you like it?
My entire workspace is 8' x 10'. The good part is that everything is within arm's reach whether I like it or not! I included a pic of the lathe area and the storage directly behind me while turning. The one unusual thing is the oven and George Forman grill on top of the tool chest. Used for recycling plastic.
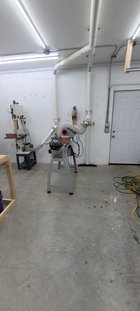
I’d love to hear more about your dust collector. Looks like 6” in-line fan with 4” hoses and a 2 1/2” dust deputy. How’s it working?
The inline greenhouse fan is about 400cfm and takes about 10 seconds to wind up to speed. That is good enough since I only have one intake in a small space. The little dust deputy really restricts air volume too much, but it is what I already had from a different setup. I plan to get the 4/5" dust deputy to increase air flow. It is only to take dust out of the air. I'm a broom person for shavings clean-up. I have not worried about an upgrade much since I wear the Versaflo hood when sanding, turning dry wood, or finishing. When weather isn't bad, I just open up the rolling shed door next to the lathe and the whole space is open to the outdoors.I’d love to hear more about your dust collector. Looks like 6” in-line fan with 4” hoses and a 2 1/2” dust deputy. How’s it working?
@Michael Brown if I'm seeing correctly, it looks like you have custom handles with your SB bolster tools. If so, did you fabricate the tool receivers in your handles, or is/was there a source for those?The robust and SB bolster systems have really helped me reduce the number of handles I have to make room for under the mini.. and they're awesome.
- Joined
- Nov 24, 2019
- Messages
- 42
- Likes
- 745
- Location
- Dresher, Pennsylvania
- Website
- www.rareearthbowls.com
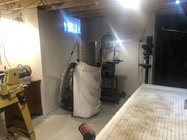
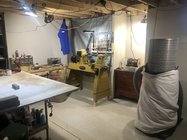
I'm jealous of all you guys with windows, garage doors or other sources of natural light; I'm in my dungeon.
View attachment 55125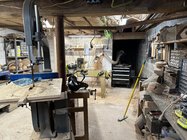
View attachment 55125

I'm reminded of an old house I visited where the extensive basement had been turned into a shared artist's studio space. *everything* had been painted white, walls, ceiling, support pillars, the floor. It utterly transformed what would easily have been a weird dark space into one filled with light, just from fairly normal artificial lighting – nothing crazy needed in the lighting department.I'm jealous of all you guys with windows, garage doors or other sources of natural light; I'm in my dungeon.
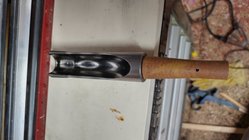
You caught me. I did indeed embark on fabrication. The spec of the bolster and collet system allow for adaptation. I purchased receivers from woodworkers emporium until they were out of stock. Then I resorted to making my own. I found that Ashley Harwood makes collets for 1/2, 5/8 and 3/4. I turned hexagon brass 1.125" flats into clones of the collets for 3/8" and 1/4"@Michael Brown if I'm seeing correctly, it looks like you have custom handles with your SB bolster tools. If so, did you fabricate the tool receivers in your handles, or is/was there a source for those?
I experimented with garolite too.
Attachments
@John Whitley here is the garolite 1-1/4" SRG collet I made from necessity
Attachments
That’s really neat looking. I’d love to see a video of it in action.@John Whitley here is the garolite 1-1/4" SRG collet I made from necessity
Pick any stock photo of the aftermath of a serious tornado.How about a photo of your main turning workstation? It's nice to see what folks came up with for storage, accessibility.
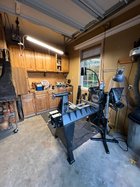
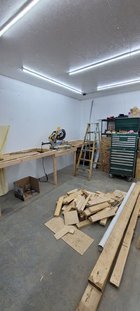
Recently finished moving all my turning stuff over to a dedicated area. New heavy duty shelves for blanks and material, found a screaming deal in more cabinets than I need.
Still need to figure out more and better lighting, and get a slab of countertop for the cabinets. Pegboard will go on the wall and I need to figure out something for immediate stuff by the headstock. But overall I’m pretty happy with the layout.
Odie
Panning for Montana gold, with Betsy, the mule!
.....found a screaming deal in more cabinets than I need.
Ha,ha.....don't kid yourself, Aaron!
It won't be long, and you'll be wondering where all that extra storage space went!
.....but.....
Things really get interesting the day you realize every square inch of shop space is already taken.....and at that point, you conclude your only option from here on out......is to make better use of the finite storage space you have!
-o-
Looks good! Love that window...View attachment 57412
Recently finished moving all my turning stuff over to a dedicated area. New heavy duty shelves for blanks and material, found a screaming deal in more cabinets than I need.
Still need to figure out more and better lighting, and get a slab of countertop for the cabinets. Pegboard will go on the wall and I need to figure out something for immediate stuff by the headstock. But overall I’m pretty happy with the layout.
- Joined
- Dec 23, 2015
- Messages
- 65
- Likes
- 173
- Location
- Ringgold, Georgia
- Website
- www.rickurbanwoodturner.com
@odie So very true! Its easy to see that you, like I and many others, have been there and done that.It won't be long, and you'll be wondering where all that extra storage space went!
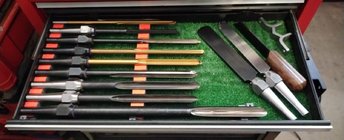
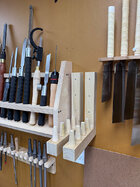
Here’s a new addition to the turning area. A good number of my tools that use handles and bolsters from Stuart Batty and Ashley Harwood’s respective systems. Empty handles had been taking up slots in my primary tool rack, so I decided to move them to their own storage. I made handle holders from wood turned to the bolster’s taper dimensions, then seated them in poplar 2x2 half-lap brackets:
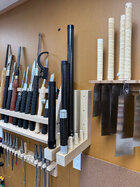


I didn't see this until now, after John Whitley's post revived the thread.
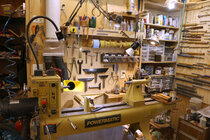
I did post some of these shop photos in other threads but here turning-related pics in one place:
Primary lathe and some tools
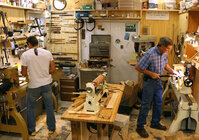
Turning "nook" with a couple of students.
Just out of the frame is the bandsaw, the most useful tool complement to the lathe.
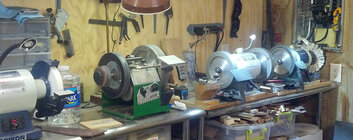
Sharpening stuff across the shop from the turning nook. Old photo.
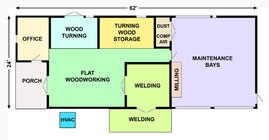
Shop design, shows where the woodturning happens. The design transformed magically over time
into way more turning wood storage space and way less maintenance area.
I tell visitors I built the shop with my bare hands but I lie - I used tools.
(Well, I did hire a friend with a crane to put up the roof trusses, a guy to pour&surface the concrete, and a garage door guy.)
The build took me several years, working almost every day, 2012-2017 if I count the time I spent clearing/prepping the site,
post&beam framing, concrete slab forming & rebar, underground wiring, etc.
My all-time favorite shop tool: the central HVAC. Life is good.
I think I had more energy back then.
If I can find some more, I'd like to build an addition with a bathroom and small kitchen.
JKJ
I did post some of these shop photos in other threads but here turning-related pics in one place:
Primary lathe and some tools

Turning "nook" with a couple of students.
Just out of the frame is the bandsaw, the most useful tool complement to the lathe.

Sharpening stuff across the shop from the turning nook. Old photo.

Shop design, shows where the woodturning happens. The design transformed magically over time
into way more turning wood storage space and way less maintenance area.

I tell visitors I built the shop with my bare hands but I lie - I used tools.
(Well, I did hire a friend with a crane to put up the roof trusses, a guy to pour&surface the concrete, and a garage door guy.)
The build took me several years, working almost every day, 2012-2017 if I count the time I spent clearing/prepping the site,
post&beam framing, concrete slab forming & rebar, underground wiring, etc.
My all-time favorite shop tool: the central HVAC. Life is good.
I think I had more energy back then.
If I can find some more, I'd like to build an addition with a bathroom and small kitchen.
JKJ

