• January Turning Challenge: Thin-Stemmed Something! (click here for details)
  • Conversations are now Direct Messages (click here for details)
  • Congratulations to Scott Gordon for "Orb Ligneus" being selected as Turning of the Week for January 20, 2025 (click here for details)
  • Welcome new registering member. Your username must be your real First and Last name (for example: John Doe). "Screen names" and "handles" are not allowed and your registration will be deleted if you don't use your real name. Also, do not use all caps nor all lower case.

Photo of your workstation

And the all important comfy chair!! It made such a difference when I got one.

Yep......and, sometimes I fall asleep in mine! 🙂

Pretty hard to do, but I'm one who can fall asleep just about anywhere. If I were one of the seven dwarfs, I'd probably most resemble Sleepy! 🙂


-----odie-----
 
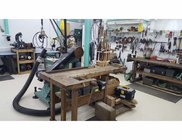
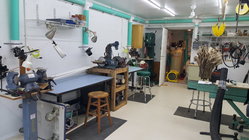
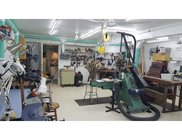
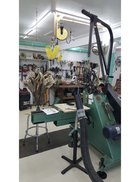
This has been sort of pieced together over the years. I'll admit, I'm a little envious of the people that know exactly how they want stuff and build it new.

With me, and I suspect you too, Darryl.......my current shop was originally set up about 25 years ago, and is in a constant state of change. I am in a constant state of change, and so are my methods.....so, it comes with the territory!

Some of those pristine shops are not much more than props for show, anyway......kind of like some people who have all the gear to hunt or fish, but have no clue what they are doing!.......🙂

-----odie-----
 
I love to see a working shop. Things where the layout may not be approved by a tidy engineer, but usefull.
 
@Tom Gall Tom, you might be right! The bowling ball jig connection rings a bell. I think I got to that thread from something @hughie posted about his ball hitch carving jig. Funny little pathway
Michael, I originally got my idea from a couple posts elsewhere, where someone used a couple pipe flanges and an old tow 2" ball, where for th elife of me I can't remember. Then Kelton brought his version of it. That design really didn't suit my requirements, so I set out to make one that met my set of requirements, and it has proved most successful.
 
My bowl ball carving station idea came from a 98 year old guy named Vitz Hansen. he was most generous with his knowledge. With a ball that big, you can mount about anything on it and articulate it in any position. I have been using mine for about 20 years. A number of balls have come and gone. l even use it in the paint room. Vitz was very happy to pass it along. Use it with his and my blessing.
jerry
 
That is very interesting, Jerry. Thanks for sharing. Vitz Hansen must have been a clever guy. I appreciate the blessing—one day I will build a bowling ball rig 🙂
 
Last edited:
That is very interesting, Jerry. Thanks for sharing. Vitz Hansen must have been a clever guy. I appreciate the blessing—one day I will build a bowling ball rig 🙂
Not to digress from the subject too much but Vits was a very interesting guy. He was of German heritage. His parents migrated to the U.S. when he was a young man and they became citizens. Not an easy task at that time. He served in the U.S. Navy during WW2 on a battle ship. He apprenticed as a carver as a youth in Germany. His work was literally astonishing. When he passed, I was given his carving ball setup. It helps to know where things come from, I think.
jerry
 
You’re preaching to the choir, sir. I think it’s important to know the history of the tools, techniques. The craft. Keeps us all connected through the generations. Aside from the inspiration I get from the gallery here, my favorite thing about this forum is the chance to have conversations like this—we’re all bettered because of it. Very helpful indeed.

I enjoyed your info about Vitz. How special that you received his carving ball. Do you happen to have any photographs of his work? My googling has failed me so far.
 
Last edited:
You’re preaching to the choir, sir. I think it’s important to know the history of the tools, techniques. The craft. Keeps us all connected through the generations. Aside from the inspiration I get from the gallery here, my favorite thing about this forum is the chance to have conversations like this—we’re all bettered because of it. Very helpful indeed.

I enjoyed your info about Vitz. How special that you received his carving ball. Do you happen to have any photographs of his work? My googling has failed me so far.
I do not. Hi family sold everything in a sale and I did not hear about it until too late. I think I got the ball setup because no one knew what it was. His carving shop overlooked a beautiful lake with a huge picture window, and plenty of light.he also made all of the furniture in his home. the quality was unreal. He used very few power tools. He got me interested in hand carving. I am not good at it but it certainly comes in handy to add a little finesse to a piece. my time spent with him was enlightening and special. He had first hand knowledge about how special our freedom is.
 
Sounds like the dream location for a shop. That’s too bad about the sale, but likely and hopefully many people are enjoying his pieces. And, his legacy certainly lives on through the folks he impacted.
 
Most people design and construct a shop environment that says: "this is all I'll ever need".....but in retrospect......if your passion for turning grows to the point where it's much more than a hobby, then no matter how well you think you've designed and built your shop.....it will continually change to the point where you'll be amazed at how you ever got from where you were.....to where you are!

I've been compiling shop photos for most of this century, and continue to be shocked at where I was.....compared to where I am now. I thought I had everything covered back then.......boy, was I wrong! 🙂

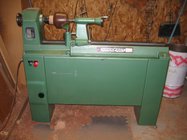
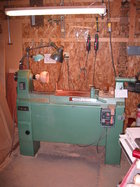
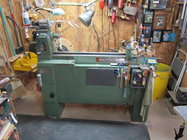
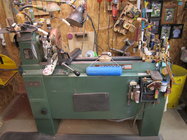
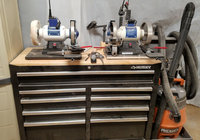
These four photos show the Woodfast lathe from the time I was still changing belts for speed changes around 2005 (+/-), to last month......I never had much vision of the future.....and, probably still don't! 🙄

-----odie-----
 

Attachments

  • Woodfast lathe.jpg
    Woodfast lathe.jpg
    111.8 KB · Views: 72
  • Image066.JPG
    Image066.JPG
    429.3 KB · Views: 70
  • IMG_4155.JPG
    IMG_4155.JPG
    145.5 KB · Views: 74
  • IMG_1171.JPG
    IMG_1171.JPG
    648.8 KB · Views: 73
Last edited:
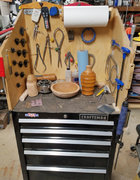
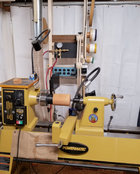
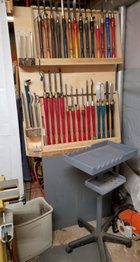
My "shop" is an area cleared in the middle of a large garage filled with 35+ years of accumulated clutter. The photos are the winter configuration, with the area surrounded by draped plastic in an attempt to reduce the area that I try to heat. Doesn't make much difference and my wife says it looks like the lair of a serial killer. The photos are taken from the area I'd be standing when turning, starting from the grinding bench behind me and going clockwise. And yes, I'm a tool junkie.

GrindingBench.jpgCart.jpgLatheRack.jpgToolRack.jpg
 
My "shop" is an area cleared in the middle of a large garage filled with 35+ years of accumulated clutter. The photos are the winter configuration, with the area surrounded by draped plastic in an attempt to reduce the area that I try to heat. Doesn't make much difference and my wife says it looks like the lair of a serial killer. The photos are taken from the area I'd be standing when turning, starting from the grinding bench behind me and going clockwise. And yes, I'm a tool junkie.

View attachment 49113View attachment 49114View attachment 49116View attachment 49117

Ric......that little rolling cart in the 4th pic looks real handy! Did you make that from a desk chair?

1672777694329.png

-----odie-----
 
Ric......that little rolling cart in the 4th pic looks real handy! Did you make that from a desk chair?

View attachment 49120

-----odie-----
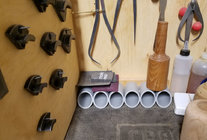
You're close Odie. I bought a replacement office chair base from Amazon, then put a taper on a piece of PVC pipe to fit it and built the shelf and top piece. I started with a Rikon mini lathe and needed some place safe to set tools down. I've never liked leaving them to roll around on (and off of) the ways, and didn't have room to put something on the lathe itself. Now that I've got a 3520C I've got more room, but still don't like leaving tools where they can roll. Too many close calls. I usually have the little cart to my right and use either that or my main cart in photo #2 to set tools down. You can't see it in the photo but the big cart has several short pieces of PVC placed flat in the back left corner where I can insert the business end of tools to protect the cutting edges. Like so:

CartDetail.jpg
 
I was turning some real wet box elder yesterday and sprayed my wall real well. My garage is sheetrocked and rough mudded and so the moisture has hit that and turned the dried mud back into wet mud. I'm thinking I need to get something on the wall to protect so I went back through this thread to see if anyone has addressed that with sheetrock walls but didn't necessarily see it. I turn towards a wall thats maybe two or three feet in front of the lathe. In the interest of spending money on tools rather than "decoration" I'd guess my best bet is a sheet of 1/4" ply for the splash zone.

Any ideas on dealing with spraying water from wet blanks?
You might want to look at some thin plastic sheet from a plastic supply house. Would allow it to be wiped down and have a nice, tidy appearance.
Thinking about something like this:
 
Last edited:
You might want to look at some thin plastic sheet from a plastic supply house. Would allow it to be wiped down and have a nice, tidy appearance.
Thinking about something like this:
A nice, tidy appearance in my work space is a conflict of terms!
 
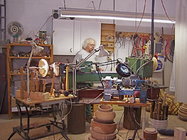
How about a photo of your main turning workstation? It's nice to see what folks came up with for storage, accessibility.
Here are some photos of our wookart studio in the condo complex. Hope these help, KenD
 

Attachments

  • finished 2.jpg
    finished 2.jpg
    389.4 KB · Views: 114
  • Wood Art Awork Station.jpg
    Wood Art Awork Station.jpg
    343 KB · Views: 113
  • finished 9.jpg
    finished 9.jpg
    368.9 KB · Views: 109
  • finished 7.jpg
    finished 7.jpg
    363.7 KB · Views: 112
You might want to look at some thin plastic sheet from a plastic supply house. Would allow it to be wiped down and have a nice, tidy appearance.
Thinking about something like this:
David, whenever I know that I'm going to have some splattering of any liquid when I'm turning, I have these two light stands set apart, draping over them using old bedsheets that I let dry out until the next time I need them. KenD
 
Like David, I figured that since I want to limit spraying liquid, I'd use something made for that and put up a couple of plain shower curtains. That worked so well that I put up a flexible track and 3 more curtains that enclose the sides and behind me, to confine the shavings to a smaller area when turning green wood. Cost was about $50 total and makes cleanup a whole lot easier.
 
I hang blue tarps around my lathe when I'm turning green wood. Still want to put something on the wall behind the lathe though.
Also useful when I'm cutting up blanks indoors with the electric chainsaw.
 
In my previous shop the walls were plywood and one strip was dark from the spray of the wet wood, the fluorescence tube above the lathe would sometime drip and had to be cleaned occasionally.

In my new shop here, I used the lessons learned and installed the lathe away from the wall, so I stand between the wall and the lathe with all the turning tools and chucks not in use stored right behind my back.

Any spray is flung onto a shower curtain hung out to catch it, though I now turn mostly dried rough turned pieces and some small dry pieces of stored wood with the occasional smaller local sourced wood.

I find this so much easier with lots of room for the shavings and all tools, chucks, sandpaper & mandrels right at hand and stored behind me and away from the flying curls, I'm glad I have the room to have it this way, works well for me.

my shop.jpg
 
I just let the chips fly, then sweep them through the underside of the lathe, right next to the garage door.I put a sheet on anything that might rust from wet wood. Only takes a second or two
 
In my previous shop the walls were plywood and one strip was dark from the spray of the wet wood, the fluorescence tube above the lathe would sometime drip and had to be cleaned occasionally.

In my new shop here, I used the lessons learned and installed the lathe away from the wall, so I stand between the wall and the lathe with all the turning tools and chucks not in use stored right behind my back.

Any spray is flung onto a shower curtain hung out to catch it, though I now turn mostly dried rough turned pieces and some small dry pieces of stored wood with the occasional smaller local sourced wood.

I find this so much easier with lots of room for the shavings and all tools, chucks, sandpaper & mandrels right at hand and stored behind me and away from the flying curls, I'm glad I have the room to have it this way, works well for me.

View attachment 49177
This makes so much sense, Leo, that I am baffled as to why it never occurred to me. My present shop is not as spacious as my previous one. By rotating my lathe 180 degrees and putting a wall to my back, I can gain a huge amount of much needed wall space. May be time to rethink my layout. Thanks for sharing!
 
Back
Top