• Congratulations to Alex Bradley winner of the December 2024 Turning Challenge (click here for details)
  • Conversations are now Direct Messages (click here for details)
  • Congratulations to Gabriel Hoff for "Spalted Beech Round Bottom Box" being selected as Turning of the Week for January 6, 2024 (click here for details)
  • Welcome new registering member. Your username must be your real First and Last name (for example: John Doe). "Screen names" and "handles" are not allowed and your registration will be deleted if you don't use your real name. Also, do not use all caps nor all lower case.

How I make my Heart Bowls

Joined
Nov 22, 2023
Messages
334
Likes
2,986
Location
Morganton, NC
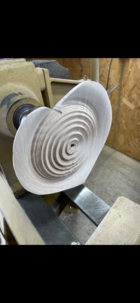
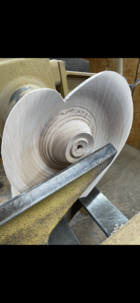
I’ve had several people ask me to post my process on how I make my heart bowls.
I had thought about submitting this to AAW for a magazine article several months ago but just don’t have time at this point to do that.

Quick Background: Three years ago I was turning in my shop and knowing my wife loves hearts I started thinking about turning her a heart bowl. I didn’t want to turn a bowl and then bandsaw the heart out of it so I had to come up with a way to get a uniform shape and I wanted the minimum steps possible to achieve this. Having a fairly extensive background in drafting and design I came up with this sitting at my table saw with a compass, graph paper and scissors😁.

1. Determine the size heart you want to make, with me this was determined by the size of the wood I had to work with. I get free drops of 8/4-10/4 walnut, cherry, oak, and maple from a local company.
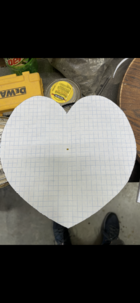
2. Once you determine the size draw a circle on paper, I use graph paper, the size of the heart. The CENTER POINT of the circle is very important as you will see later.
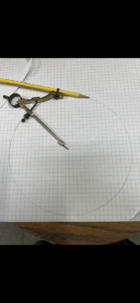
1729729205634.png
3. Draw half a heart in one side of the circle and fold the paper on the centerline of the circle and cut the shape out.
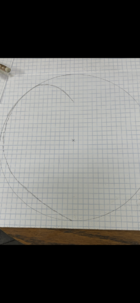
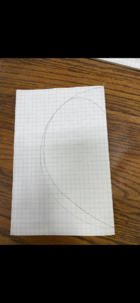
1729729399365.png
1729729355119.png

1729729290456.png
 
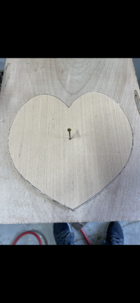
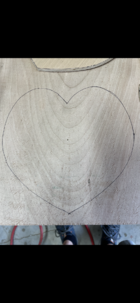
4. The center hole on the circle can be used to hold the heart in place with a small nail on your pattern board and trace the heart out. Be sure the center hole is transferred to the pattern.
THE CENTER HOLE MUST BE USED AS THE MOUNTING POINT. I use a worm screw but you can, depending on the thickness of your wood use a forstner bit and drill a small depth for the initial mounting.
1729729745652.png

1729729700825.png
 
5. The center hole will look as though it is not centered but just remember it was the center of the circle. I drill all my worm screw holes at one time and usually make 8-15 hearts at one time.
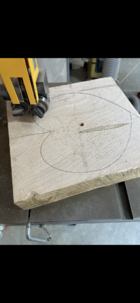
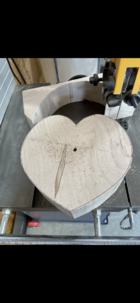
6. I then take all of the blocks to the bandsaw and 3 cuts is all it takes to bandsaw the shape. Don’t worry if you get a little off on your bandsaw cut, just try to stay on the outside of the line.

1729730424177.png

1729730383154.png
1729730341362.png
 
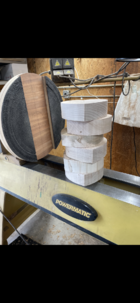
7. I mount on a worm screw and turn all the backs at one time. You can use a mortise if you so choose. The second important thing is DO NOT touch the outside shape of the heart with bowl gouge or any other tool. This will be addressed in the final process.
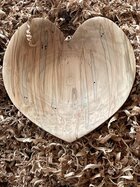
I start the cut similar to an ogee curve so I never touch the outside shape of the heart. I leave the edge of the heart usually 1/8” -1/4” depending on how flat the face is and how much I will need to take off to get it flat when it is reversed.

I use a tenon sometimes but also use a mortise 75% of the time on the bottom, again this is determined by the thickness of the blank and the mood I’m in that day😁.

1729731128279.png
1729731080494.png
 
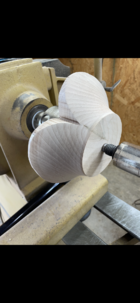
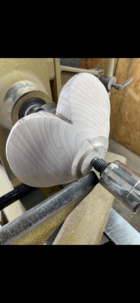
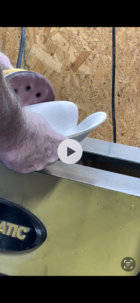
9. This is where you can even out the shape and take the bandsaw lines out. I leave the heart on the lathe and use a random orbital sander to smooth out the edge of the heart. I rotate the piece by hand and depending on the bandsaw marks use 180or 220 grit. The top part of the heart where the lobs come together is sanded by hand.
10. Once sanded on the lather I remove the heart, set it on the lathe bed, use my fingers to feel the shape and visually look to see if it is uniform. If not I touch by hand sanding or using the random orbital.
Once satisfied I take 220 or 320 to knock down the sharp edges.

1729732130881.png
1729732077724.png
 
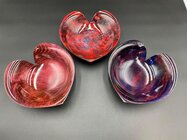
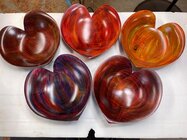
10. The end result. I leave some natural but I use wood dye on most. I have no process for the dye, I just have 6-7 colors out on the table and slap it on until I think it looks good😂. I will sometime use a sealer over the dye before the lacquer and sometime just use lacquer with no sealer. I determine this by the species of wood.
I let customers know if they place the heart bowl next to a window the sun will eventually fade the dye.
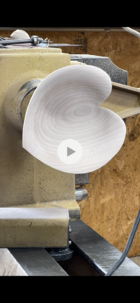
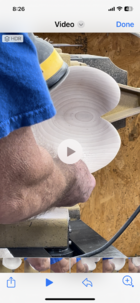
I apologize for the quality of some of the photos. They were on an old phone and I was unable to transfer them or the videos so I had to take snapshots of them.

1729732799381.jpeg
1729732740391.jpeg
1729732714840.jpeg
 
11. I have shared this process with a dozen or more turners. If they have an issue it is always with the center hole not being used or turning the outer edge of the heart shape which should not be touched until the final process and with a sander only.
You can make any size heart bowl with this process. One thing to remember is the indention of the top lobs will be determined by the thickness of the wood. If you bring the lobs in to far down on thinner wood the top of the heart shape will end up in the bottom of your bowl.
I have sold many of these, gave away, and donated. So, have fun making them they are great sellers at shows. I have several people asking for them now so even though I was in a funk and not wanting to make anymore you guys have revitalized me and now I plan to make a few more soon😂.
If you have any questions I’ll be happy to answer them and help in any way possible.
If I think of something I left out I will edit the post!
AND, IF YOU MAKE ONE POST IT ON THIS THREAD, so I can see them!!
 
Last edited:
Very nice!! I want to make one. Maybe as a surprise for our 55th anniversary next year.

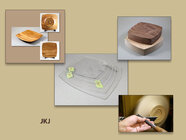
It looks like you work much the same way I do. For these, what I call my Small Squarish Dished Platters, ...

SSDP_comp.jpg

... I draw the outline of the blanks with a template using a fine black sharpie, roughly cut out on the bandsaw, then sand the edges to the line using a stationary disk sander (not entirely necessary, but that's what I do.) I then hold the top in a screw chuck, turn a recess in the base for a chuck, then shape, smooth, sand, and even apply finish to the bottom. I leave a decorated recess in the base. Then turn the thing over, hold by the base recess, and turn the top, then smooth the rim as desired.. My blanks are from 6/4 to 10/4 thickness, mostly 8/4.

One small suggestion for those who might make several of the heart shapes: consider making a plastic template.
I used to use paper and poster board templates to trace the pattern of my shapes on the wood, then one day went to clear templates cut from thin plexiglas.

These clear templates had some "clear" (ha!) advantages: in addition to being sturdy, I can slide and turn the template around over the plank and easily see and avoid any defects, and see how to get the best advantage from the figure of that piece of wood. When I did demos on these, I took the plastic templates and people traced them onto poster board to take home. For a few special friends, I made and sent them plastic templates!

The templates have a hole in the center to fit a slender awl to mark the exact center point for turning.

Regardless, thank you for the idea and the good instructions. now burned into my brain. Your method of circle/sketch/fold is great. I better make some practice pieces before I make the gift for My Lovely Bride.

Good show!

JKJ
 
Last edited:
Very nice!! I want to make one. Maybe as a surprise for our 55th anniversary next year.

It looks like you work much the same way I do. For these, what I call my Small Squarish Dished Platters, ...

View attachment 68082

... I draw the outline of the blanks with a template using a fine black sharpie, roughly cut out on the bandsaw, then sand the edges smooth to the line using a stationary disk sander (not entirely necessary, but that's what I do.) I then hold the top in a screw chuck, turn a recess in the base for a chuck, then shape, smooth, sand, and even apply finish to the bottom. I leave a decorated recess in the base. Then turn the thing over, hold by the base recess, and turn the top, then smooth the rim as desired.. My blanks are from 6/4 to 10/4 thickness, mostly 8/4.

One small suggestion for those who might make several of these: consider making a plastic template.
I used to use paper and poster board templates to trace the pattern on the wood, then one day went to clear templates cut from thin plexiglas.

These clear templates had some "clear" (ha!) advantages: in addition to being sturdy, I can slide and turn the template around over the plank and easily see and avoid any defects, and see how to get the best advantage from the figure of that piece of wood. When I did demos on these, I took the plastic templates and people traced them onto poster board to take home. For a few special friends, I made and sent them plastic templates!

The templates have a hole in the center to fit a slender awl to mark the exact center point for turning.

Regardless, thank you for the idea and the good instructions. now burned into my brain. Your method of circle/sketch/fold is great. I better make some practice pieces before I make the gift for My Lovely Bride.

Good show!

JKJ
Those are very nice, I may need to try one. I just used a piece of Lauan for a pattern since I had plenty of scrap.
 
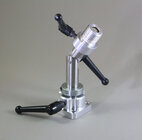
Oh, I forgot: while the piece is still in the screw chuck or the scroll chuck, I find it easier to do the edges and final smoothing if I take it off the lathe - my old back doesn't have to bend over so much! I use this carving and finishing post from Best Wood Tools. You can fasten a chuck, mandrel, or dedicated screw chuck to the threads and easily adjust the axial angle and rotation.

carving_stand_IMG_7422.jpg

Also, for these, I found that if I made the foot a little bigger and turned the ogee on the bottom, at least the way I shaped things., the top would naturally work out to be be deeper. Conversely, a narrower foot lead to a shallower dish in the top (That happens if shaping the top such that the edge is even all the way around.

JKJ
 
Oh, I forgot: while the piece is still in the screw chuck or the scroll chuck, I find it easier to do the edges and final smoothing if I take it off the lathe - my old back doesn't have to bend over so much! I use this carving and finishing post from Best Wood Tools. You can fasten a chuck, mandrel, or dedicated screw chuck to the threads and easily adjust the axial angle and rotation.

View attachment 68090

Also, for these, I found that if I made the foot a little bigger and turned the ogee on the bottom, at least the way I shaped things., the top would naturally work out to be be deeper. Conversely, a narrower foot lead to a shallower dish in the top (That happens if shaping the top such that the edge is even all the way around.

JKJ
I need me one of those😁
 
or turning the outer edge of the heart shape which should not be touched until the final process and with a sander only.

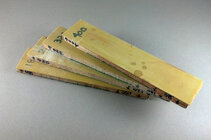
That's a good point. I tend to do edges with sanding sticks I make by gluing strips of sandpaper to thin strips of wood or plywood. I lock the rotation of the piece at any angle (easy with the BWT post) so I can use the sanding stick with two hands. (Ugg, these are ugly! time to make some more!) I make the strips in both 1" and 2" widths since my Klingspor gold sandpaper rolls come in those widths.)

sanding_blocks.jpg

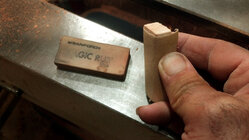
Since I rarely power sand, another thing I find helpful for the surface and near the edges is what I call a "soft sanding block". Wrap a small piece of sandpaper around a "magic rub" eraser. It's flexible and conforms to the compound curvatures of the wood.

sanding_soft_block.jpg


JKJ
 
I need me one of those😁

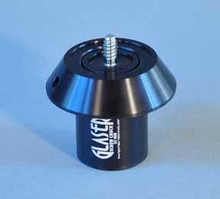
Well, while on the topic of what you "need", take a look at the Hitech Glaser Screw chuck:


Jerry Glaser designed this LONG time ago and I bought one. Jerry had passed away by the time I wanted a spare and the Hitech people apparently bought the rights and were going to revive them. They took f.o.r.e.v.e.r to bring out the copy and I bought one immediately. (I bought it from Alan Lacer)

Having used both Jerry's and the wormwood screws that come with most chucks, I can solemnly swear on my King James Bible there is no comparison. The wormwood screws work but they, especially some, are incredibly crude compared to the Glaser. Some are better than others, but some look like crude castings instead of precision machined and ultra sharp hardened threads. Simply drill a 1/4" hole in the wood and screw in the chuck by hand. The Glaser is made in two pieces, the outer one can be removed or replaced in several ways allowing for three different diameters to support the needs of different projects.

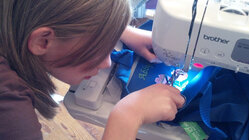
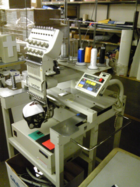
If you ever find your way over this way (I'm just north of Knoxville), come by the shop and you can compare and try one. They are not cheap, but hey, are we worth it? I had three and sold one but won't have less than two. If I had one and lost it I'd give up woodturning tomorrow and take up [gasp] TV watching. Or embroidery. (I actually have an embroidery machine - I may be the only 74 year old guy on my street with one and I'm not afraid to use it. 🙂)

Especially nice when a kid want's to make something - this girl made a present for her friend! Her first try! (with a little guidance.)

AJ_embroidery_2012-07-05_16-25-58_190.jpg

AJ_embroidery_2012-07-05_16-56-50_753.jpg

JKJ
 
Thanks for this idea. I brought one into the house and was immediately asked to produce a bunch more as holiday items. Of course I didn't carefully follow your excellent instructions, so messed up the first one:
View attachment 68597

The subsequent ones worked much better:

View attachment 68598
Excellent job! Really easy once you do a couple. They are so good I may never share a process again😂,,,too much competition now😂
 
Well, while on the topic of what you "need", take a look at the Hitech Glaser Screw chuck:


Jerry Glaser designed this LONG time ago and I bought one. Jerry had passed away by the time I wanted a spare and the Hitech people apparently bought the rights and were going to revive them. They took f.o.r.e.v.e.r to bring out the copy and I bought one immediately. (I bought it from Alan Lacer)

Having used both Jerry's and the wormwood screws that come with most chucks, I can solemnly swear on my King James Bible there is no comparison. The wormwood screws work but they, especially some, are incredibly crude compared to the Glaser. Some are better than others, but some look like crude castings instead of precision machined and ultra sharp hardened threads. Simply drill a 1/4" hole in the wood and screw in the chuck by hand. The Glaser is made in two pieces, the outer one can be removed or replaced in several ways allowing for three different diameters to support the needs of different projects.

If you ever find your way over this way (I'm just north of Knoxville), come by the shop and you can compare and try one. They are not cheap, but hey, are we worth it? I had three and sold one but won't have less than two. If I had one and lost it I'd give up woodturning tomorrow and take up [gasp] TV watching. Or embroidery. (I actually have an embroidery machine - I may be the only 74 year old guy on my street with one and I'm not afraid to use it. 🙂)

Especially nice when a kid want's to make something - this girl made a present for her friend! Her first try! (with a little guidance.)

View attachment 68096

View attachment 68097

JKJ
didn't know Glaser Tools were still in business...thanks for the link
 
11. I have shared this process with a dozen or more turners. If they have an issue it is always with the center hole not being used or turning the outer edge of the heart shape which should not be touched until the final process and with a sander only.
You can make any size heart bowl with this process. One thing to remember is the indention of the top lobs will be determined by the thickness of the wood. If you bring the lobs in to far down on thinner wood the top of the heart shape will end up in the bottom of your bowl.
I have sold many of these, gave away, and donated. So, have fun making them they are great sellers at shows. I have several people asking for them now so even though I was in a funk and not wanting to make anymore you guys have revitalized me and now I plan to make a few more soon😂.
If you have any questions I’ll be happy to answer them and help in any way possible.
If I think of something I left out I will edit the post!
AND, IF YOU MAKE ONE POST IT ON THIS THREAD, so I can see them!!
Thank you for a great tutorial!!
 
didn't know Glaser Tools were still in business...thanks for the link

Apparently HiTech acquired the design and rights to make the Glaser screw chucks. This was a long time ago and they were terribly slow about production. I already had bought one from Jerry before he passed but wanted a second one as a spare. I understand HiTech is sometimes difficult to purchase things from, perhaps not returning calls.

However, Alan Lacer carries the screw chuck and usually has them in stock. His price is lower, and he's quite responsive.

I recently purchased another 1-1/4x8 from him as a spare (or in case a student just has to have one immediately or to loan out. I like to keep two on hand but don't really need three!)
As of last week I believe he was out of stock on the smaller size, 1"x8tpi, after I bought the last one to send to a friend. If someone needs that smaller thread size, give him a call - maybe he'll get more before too long.

I also got one of his diamond slip stones to evaluate after reading about it on this forum. My initial impressions after using it on just a couple of gouges - I think it will be most useful. It's a little coarser grit than a conical diamond hone I use a lot inside the flute on gouges, but it works well.

Alan is wonderful to deal with - things I ordered were sent out the same day.

JKJ
 
Back
Top