• Beware of Counterfeit Woodturning Tools (click here for details)
  • Johnathan Silwones is starting a new AAW chapter, Southern Alleghenies Woodturners, in Johnstown, PA. (click here for details)
  • Congratulations to Jim Hills for "Journey II" being selected as Turning of the Week for May 6th, 2024 (click here for details)
  • Welcome new registering member. Your username must be your real First and Last name (for example: John Doe). "Screen names" and "handles" are not allowed and your registration will be deleted if you don't use your real name. Also, do not use all caps nor all lower case.

Embellished Bradford Pear Calabash

Michael Anderson

Super Moderator
Staff member
TOTW Team
Joined
Aug 22, 2022
Messages
1,388
Likes
4,038
Location
Chattanooga, TN
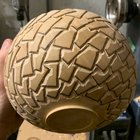
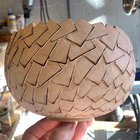
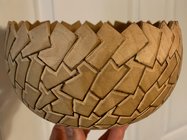
A little bit more progress on the carving. I went around the first row and refined the border/should between the overlapped sections with a couple of carving chisels and a knife. I then started refining the contours for some of the rectangles. I used a round cylinder cutter for the initial power carving, and then a ball nose but for the shading. The ball nose bit is nice in that the tip doesn’t cut, which allows you to ride the shoulder of the rectangles when blending the cuts.

0C205BC8-5870-4350-8844-B274C2BEB2F7.jpeg
3AE2047F-7B71-43BD-A621-1C521CB9E311.jpeg
 

Michael Anderson

Super Moderator
Staff member
TOTW Team
Joined
Aug 22, 2022
Messages
1,388
Likes
4,038
Location
Chattanooga, TN
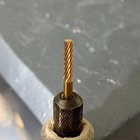
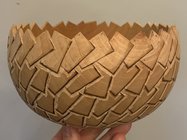
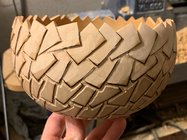
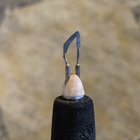
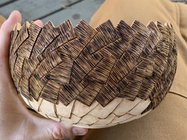
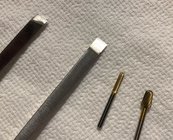
Didn't get a chance for much progress the last few days. That said, I did manage to begin refining the overlapping rectangles. This is a slow process, and another instance of "can't really erase mistakes". I used a safe end 1/8" cylinder bit to keep the edges crisp on the overlaps. I will go behind some of the tight sections with a chisel to further refine. I also rough shaped most of the top row, and refined some of the contours with riffler files. Assembly line is the most efficient, but sometimes it benefits the mind to take a short break and work on some other parts of the project. Anyway, a bunch more work left--here is a shot of the bit, and the current state of the bowl. I'm not sure how well this comes though in photograph, but the exterior is quite a bit more 3D than the previous progress shot.

IMG_6864.JPG
IMG_6866.JPG
IMG_6865.JPG
 
Last edited:
Joined
Dec 23, 2015
Messages
62
Likes
170
Location
Ringgold, Georgia
Website
www.rickurbanwoodturner.com
Didn't get a chance for much progress the last few days. That said, I did manage to begin refining the overlapping rectangles. This is a slow process, and another instance of "can't really erase mistakes". I used a safe end 1/8" cylinder bit to keep the edges crisp on the overlaps. I will go behind some of the tight sections with a chisel to further refine. I also rough shaped most of the top row, and refined some of the contours with riffler files. Assembly line is the most efficient, but sometimes it benefits the mind to take a short break and work on some other parts of the project. Anyway, a bunch more work left--here is a shot of the bit, and the current state of the bowl. I'm not sure how well this comes though in photograph, but the exterior is quite a bit more 3D than the previous progress shot.

View attachment 57815
@Michael Anderson 1. What is your source for this particular bit?
 
Joined
Nov 18, 2012
Messages
664
Likes
1,884
Location
Torrance, CA
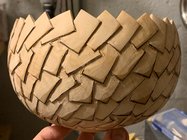
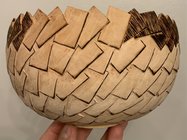
Done refining the rim. This is (part of) where the magic happens. The carving knife does the bulk of the work, which is getting you to the borders of the rectangles. A flat riffler file and a thin carving chisel clean up the knife marks and refine the angles.

View attachment 57647

When carving, the difficulty is in keeping a consistent angle. Closed form bowls generally benefit from a downward sloping rim; likewise, the borders of the rectangles should be appropriately downturned. It is challenging to get everything just right with the knife alone. That’s where the riffler file comes in. It allows you to take away enough “dust” so that everything looks consistent. This takes time, a lot of time. But it is time well spent. If the border looks sloppy (or if the rectangles have funky angles), the whole vessel will look sloppy. That said, the reality is that the rim will not be absolutely perfect; however, that is okay. In any case, minor inconsistencies can be fixed with the later pyrography. The carving chisel is critical for cleaning the borders between rectangles. Here is a photo of the cleaned up rim. Note, the wide angle cell phone camera somewhat distorts the image.

View attachment 57646
Coming into the party late after vacation! Woohoo! This is a terrific rim you’ve developed Michael. I love that your rectangles are offset from the indentations. Creating the outside corners in their own place aside from your rim cuts sure makes for an outstanding effect! Big win right out of the gate!
 
Joined
Nov 18, 2012
Messages
664
Likes
1,884
Location
Torrance, CA
Managed to do a little bit of bowl work last night. I started to carve some of the rectangles, and then got paranoid about messing up. So, I took a step back and used a pencil to (roughly) shade in the areas that I need to focus on first. Originally, I was going to begin with carving chisels/gouges, but I think I will start the relief carving with a rotary tool. Then I’ll use hand tools to refine everything. Then I’ll finish with files and sandpaper to smooth the curves.

View attachment 57687
Makes sense to keep track of things!
 
Joined
Nov 18, 2012
Messages
664
Likes
1,884
Location
Torrance, CA
Haha, thanks Paul. I have to try and go against my nature and not F it up. Kidding, sort of... This is actually the first time I've relief carved one of these geometric bowls. Why not do it in public display? Lol
Showing and following the process is a great way to learn. That includes exposing the challenges!! We live in a world where a picture appears of a fantastic piece. The last thing I think about when Tom Hale produces an amazing form is the trials he endured creating it. A follow along brings these into focus and helps us understand we aren’t the only challenged ones in creating pieces!!
 
Joined
Nov 18, 2012
Messages
664
Likes
1,884
Location
Torrance, CA
Thanks a lot Paul! Starting this section there’s a little bit of the “I’ve made a huge mistake” thoughts. Ha! Kidding, kidding… Just a matter of trusting the plan.
Patience! It’s hard to love things at this stage! On the other hand, hope is strong….that’s a great place to be stuck in…the journey is the satisfaction for me; soak it up!!
 
Joined
Nov 18, 2012
Messages
664
Likes
1,884
Location
Torrance, CA
Didn't get a chance for much progress the last few days. That said, I did manage to begin refining the overlapping rectangles. This is a slow process, and another instance of "can't really erase mistakes". I used a safe end 1/8" cylinder bit to keep the edges crisp on the overlaps. I will go behind some of the tight sections with a chisel to further refine. I also rough shaped most of the top row, and refined some of the contours with riffler files. Assembly line is the most efficient, but sometimes it benefits the mind to take a short break and work on some other parts of the project. Anyway, a bunch more work left--here is a shot of the bit, and the current state of the bowl. I'm not sure how well this comes though in photograph, but the exterior is quite a bit more 3D than the previous progress shot.

View attachment 57815
View attachment 57816
View attachment 57817
For me, techniques evolve as I go. Spreading that evolution out through the piece masks the changes better than top to bottom.
 

Michael Anderson

Super Moderator
Staff member
TOTW Team
Joined
Aug 22, 2022
Messages
1,388
Likes
4,038
Location
Chattanooga, TN
For me, techniques evolve as I go. Spreading that evolution out through the piece masks the changes better than top to bottom.
Thanks for the responses Russ. A lot of wisdom coming at me! You're right about follow-ups being a good way to expose the challenges. I always enjoy seeing progress reports. Keeps me guessing at "what's next"!

For sure, re. masking the changes better than top to bottom too. I have to keep myself focused when trying new things too. My mind is always on the next project--how can I make this better, intensify the effect, or whatever. Fun and restless!
 

Michael Anderson

Super Moderator
Staff member
TOTW Team
Joined
Aug 22, 2022
Messages
1,388
Likes
4,038
Location
Chattanooga, TN
I managed to sneak in a few hours of work after my kids went to sleep. I started by filing and sanding around half of the top rectangles just to see how everything was looking so far.

A9E12A69-044F-4916-87BE-F5336A8ED797.jpeg

Then, I switched over to the safe end cylinder bit in the previous post and started really defining the borders and overlaps. This sets everything up so that you can start adding a lot of relief.

E35D0BBF-544C-4C76-BCC6-1DA8F66EBF04.jpeg
031DEEE2-DD15-44AD-B635-B63688F86564.jpeg

Following this, I switched my bit to a ball nose bit (pictured in a previous post), and started carving away material. This is where the relief really begins to take shape. The exterior is starting to feel very nice in the hands.

A731C8AA-9F18-41F1-B047-6EEC7CC11F72.jpeg

The next step will be to continue carving away material in the two remaining rows. Then, I will go over the bowl and refine the borders/overlaps as needed with carving chisels. After that, I will smooth the contours with riffler files, and then begin sanding. Following the sanding, I will start the next phase of the pyrography work. The bowl still looks rough, but is slowly getting there. A lot of work left to do!
 
Last edited:
Joined
Jun 30, 2008
Messages
172
Likes
212
Location
Chatham, Ont.
I managed to sneak in a few hours of work after my kids went to sleep. I started by filing and sanding around half of the top rectangles just to see how everything was looking so far.

View attachment 57998

Then, I switched over to the safe end cylinder bit in the previous post and started really defining the borders and overlaps. This sets everything up so that you can start adding a lot of relief.

View attachment 57999
View attachment 58000

Following this, I switched my bit to a ball nose bit (pictured in a previous post), and started carving away material. This is where the relief really begins to take shape. The exterior is starting to feel very nice in the hands.

View attachment 58001

The next step will be to continue carving away material in the two remaining rows. Then, I will go over the bowl and refine the borders/overlaps as needed with carving chisels. After that, I will smooth the contours with riffler files, and then begin sanding. Following the sanding, I will start the next phase of the pyrography work. The bowl still looks rough, but is slowly getting there. A lot of work left to do!
That looks like a lot of "cracker" time, coming along nicely.:D
 
Joined
Nov 28, 2023
Messages
43
Likes
23
Location
Royal Oak, MI
I worked in some carving time while my children were napping. Initially, I began rough carving individual rectangles, but decided again on an assembly line approach.

View attachment 57702

I used a rotary burr to relieve the overlapped border of each rectangle. This was tedious, but a bit less stressful than the previous pyrography. On an aside, I was carving outside and I think the temperature dropped 10 degrees. Chilly! The next step will be to work on refining the border/depth between each rectangle, and then I will carve away more material and blend the contours. This will take a while. Some more type 2 fun, but wildly satisfying.

View attachment 57703
View attachment 57704
View attachment 57705
Very Nice. Lots of work on this.
Thanks for sharing.

C.A.G.
 

Michael Anderson

Super Moderator
Staff member
TOTW Team
Joined
Aug 22, 2022
Messages
1,388
Likes
4,038
Location
Chattanooga, TN
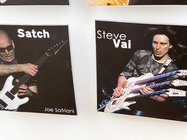
The south of Spain, then Lisbon. It was fun for sure! I was shocked to see this at the Flamenco Guitar museum!! Nice to see them embracing modernism!!
Oh yeah, that sounds like a great trip!!! I’m sure there were a ton of cool things to see. Steve Vai has insane skills—that is pretty dang cool they have a poster of him with that triple.
 

Michael Anderson

Super Moderator
Staff member
TOTW Team
Joined
Aug 22, 2022
Messages
1,388
Likes
4,038
Location
Chattanooga, TN
it must have been my lucky day, because both of my kids took long naps at the same time. Yay! :p So I eschewed all other responsibilities and went to the shop for a couple of hours. Lol. I finished carving the majority of the remaining rectangles.

D5D57D9A-DE42-48C5-8492-442D6903B997.jpeg

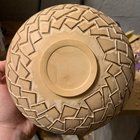
After I carved the rectangles, I removed material from where the rectangles meet the blank section on the bottom of the bowl. For this I used a ball nose burr and held it almost vertical so that very little cutter surface contacted the wood. This allows you to sort of erase wood very finely. It was slightly nerve racking in a couple of places, as I didn’t want to mark the foot. Steady your wrist! This still needs a little bit of cleanup, but it’s mostly there.

EF58F668-5705-412E-BA01-9C7BA809372A.jpeg

I will likely go behind and spot power carve as needed, but most of the remaining carving work will be via chisels, files, and sandpaper. I will only go to 180g for most of the exterior.

I also wanted to get a preview of some of the upcoming pyro work. I burned some rectangles into biscuits using a couple of spear tips. Here is a glimpse:

3BD11A62-B227-401D-98DC-4E9112E3F39E.jpeg
 
Last edited:
Joined
Nov 18, 2012
Messages
664
Likes
1,884
Location
Torrance, CA
When we discussed the evolution of processes, you can vaguely see that in the biscuit carving. The rim starts very rectangular and evolves to slightly more freeform as it approaches the base. This just accentuates the hand done feel of the piece! I love the look being developed, it’s very cleaver Michael!
 

Michael Anderson

Super Moderator
Staff member
TOTW Team
Joined
Aug 22, 2022
Messages
1,388
Likes
4,038
Location
Chattanooga, TN
When we discussed the evolution of processes, you can vaguely see that in the biscuit carving. The rim starts very rectangular and evolves to slightly more freeform as it approaches the base. This just accentuates the hand done feel of the piece! I love the look being developed, it’s very cleaver Michael!

Funny you should mention that—good eye for design! That is something I didn’t really talk about in the layout process. I wanted to give the effect that the rectangles are fading away as you approach the foot. After the first three layers or so I started the increase the amount of overlap between the rectangles. Adding on to this, the curve gets quite a bit “faster” as you move toward the foot. This causes much more “bending” of the rectangles compared to the rim. And because there is more complexity in the overlaps, I had to add more relief depth, which works great with the slightly thicker bottom I left. Even though the rectangles still conform to the template, you get the illusion of a lot of change. Once the burning and painting are added, I’m hoping this will set up a pretty good gradient effect. It’s pretty fun to think about. Thanks for bringing it up Russ!!!
 
Joined
Oct 13, 2021
Messages
36
Likes
30
Location
East Syracuse, NY
Following the lead of @Russ Braun and @Vincent Vogel, I am going to document the process of making an embellished calabash. . . . I will also include the thoughts behind my design process.

Thanks for posting Michael! Great project and I love the detail that is included in the description. I really like this new section of the forum
 

Michael Anderson

Super Moderator
Staff member
TOTW Team
Joined
Aug 22, 2022
Messages
1,388
Likes
4,038
Location
Chattanooga, TN
I managed to squeeze in several hours of work over the last couple of days. Nothing too interesting or dramatic. It has mostly been fine filing the rectangles with rifflers, refining the borders/overlaps with chisels and a carving knife, and sanding with 180g. I still have a good amount of sanding to do though. To break up the monotony, I burned several more rectangles. This was also to get a preview of what the row overlap looks like. Here are some progress shots.

IMG_6923.JPG
IMG_6927.JPG
IMG_6926.JPG
 
Last edited:

Michael Anderson

Super Moderator
Staff member
TOTW Team
Joined
Aug 22, 2022
Messages
1,388
Likes
4,038
Location
Chattanooga, TN
Work last week ended up being crazy, so I wasn’t able to work on the bowl, aside from some intermittent sanding. This morning my children blessed me with peaceful sleep, so I woke up a couple of hours before sunrise and worked on burning the rectangles. I still have many to go, but I made some good headway.

IMG_6940.JPG
IMG_6942.JPG

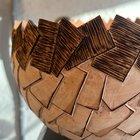
I mainly focused on burning lines into the face of the rectangles; however, eventually I will burn all of the edges with a very fine skew tip. This enhances the relief and effect of the overlaps. You can see some of the upper rectangles in the second photo that have already been burned.
 
Last edited:

Michael Anderson

Super Moderator
Staff member
TOTW Team
Joined
Aug 22, 2022
Messages
1,388
Likes
4,038
Location
Chattanooga, TN
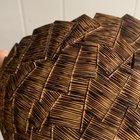
This morning I worked on completing most of the burning. Well, at least everything except for the edge treatment of each rectangle. Saving that tedious task for tonight and tomorrow. For the faces of all rectangles, as well as the rim, and the bottom of the bowl, I used the following large round skew tip:

IMG_6964.JPG

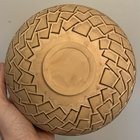
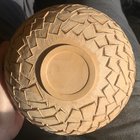
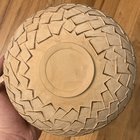
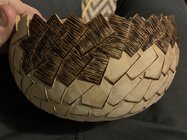
This tip is a bit less delicate than the normal skew, so you can work at slightly higher heat and pressure without worrying about bending/breaking. For the edges of the rectangles I use a finer (pointed) skew tip. When I'm burning the rectangles I try to keep the lines fairly close, but not close enough to cause dramatic burned areas. That said, it happens sometimes, but lends to the hand-burned look. No worries. Here is a progress shot of the profile of the bowl, and a shot of the bottom of the bowl. Obviously, the bottom is prior to working the border and interior of the foot.

IMG_6948.JPG
IMG_6949.JPG

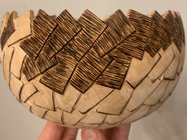
For the rim, I used short strokes and tried to keep them as close as possible. This generates a dark rim that really contrasts the interior. The challenge with this is angling the tip slight away from the interior as you burn so you 1) don't mar the interior much, and 2) don't create too dramatic of a hatched profile. Here is a shot of the completed rim:

IMG_6953.JPG
 

Michael Anderson

Super Moderator
Staff member
TOTW Team
Joined
Aug 22, 2022
Messages
1,388
Likes
4,038
Location
Chattanooga, TN
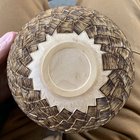
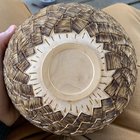
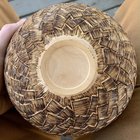
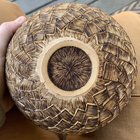
On the bottom of the bowl I'm preserving an unburnt band on the perimeter of the foot for a few reasons. First, I don't want to foot resting on burnt wood. Even though the charred section will be stabilized via lacquer, it's a bit more fragile than unburnt wood, especially with an aggressive hatching pattern. Second, this gives a nice contrast to the burn wood on the exterior (a surprise pop of natural color). Third, it gives me a nice place to sign my name.

I began working the area around surrounding the foot. I wanted to ensure the burned texture appears to radiate from the center of the bowl, so the first step was laying out some guidelines. I burned a small line going north to south, rotated the bowl slightly, and repeated this until I made it all the way around the foot. Then, it's just a matter of burning more lines in between the guidelines. The edge of the foot will also be burnt, so stray burn marks are not important (as long as they don't mark the band too much).

IMG_6950.JPG
IMG_6951.JPG

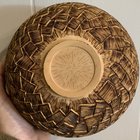
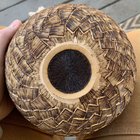
After this, I moved to the interior of the foot. Like before, the first step is to lay out some guidelines. For this section I used some dividers to find the center of the circle, and used a pencil to draw a bunch of guidelines. Because this is where all of the lines converge, the layout is a bit more precise here. The pencil allows me to erase mistakes if needed. That said, the lines don't have to be absolutely perfect. This will be pretty heavily burned such that stray lines won't show up in the end. After drawing the pencil guidelines, I started burning some long lines.

IMG_6954.JPG
IMG_6955.JPG
 

Michael Anderson

Super Moderator
Staff member
TOTW Team
Joined
Aug 22, 2022
Messages
1,388
Likes
4,038
Location
Chattanooga, TN
These long lines in the interior of the foot are essentially more guidelines, that allow you to burn shorter lines while maintaining the same angle. I filled in the interior with a bunch of long burned lines, and then went around again and burned a bunch of shorter lines to give a crisp texture and a dark and uniform color.

IMG_6956.JPG
IMG_6957.JPG

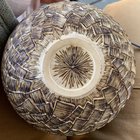
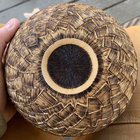
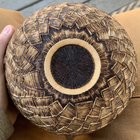
After the interior of the foot was finished, I went back to the area surrounding the foot. I burned from the foot outward, so that there is an overlap of the burned lines. Once the entire area was covered, it was just a matter of burning in short lines to fill in the texture and color to match the interior of the foot. This is very time consuming, but is also very satisfying.

IMG_6958.JPG
IMG_6959.JPG
 
Back
Top