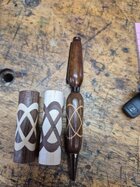
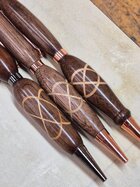
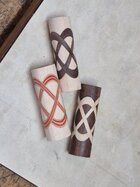
If your kerf is wider at the bottom than at the top it may be due to the blade being out of alignment to the miter slot. It is important to check the alignment with the blade both vertical and tilted. If you are not familiar with the procedure check out this video.
View: https://www.youtube.com/watch?v=tNfvtStKkFA
This is important whether you are doing through cuts are partial cuts. Another thing, I don’t think 1/8” is enough to prevent flexing (depending on the wood species). If the kerf is only slightly less than the insert thickness you may be wedging the cut open. As far as using clamps rather than fingers that should be better. Do you have sandpaper on the front of your fence? That really helps with preventing shifting.
Thanks for the vid. When I first bought the saw, a simple Ridgid job site fold away one, I watched a bunch of videos and tuned the saw up before its first use. One of those things was to adjust the alignment of the blade to the miter slots. I marked a tooth, used my square (exactly as in the video), and just touched the tooth (no deflection), rotated that tooth back and touched. It WAS out of alignment, very slightly, and I adjusted it until it was as perfect as I could get without a dial indicator. I checked that alignment before starting this project, and also just the other day as part of building a new more advanced crosscut sled. Its still as perfect as I can make it. Now, I only tested with the blade at 90 degrees...so I guess it is possible its out at an angle....but, I don't know how you would normally deal with that. I can't be constantly re-adjusting the blade for every angle.... With these little projects I'm using 3 or 4 different angles for each one...
Speaking as a longtime cabinetmaker, the idea of making two cuts with an undersized blade to get consistent width kerfs makes my head hurt. A drunken sawblade (shimmed to make a wider kerf) can work, but it is a pain to set up precisely without a pair of tapered washers. I would simply use a 1/8" kerf blade and size the material to fit the resulting groove. In my shop I would run the filler material through my drum sander. In a town the size of Aurora I am sure one could easily find someone with a drum or widebelt sander to do the job. Lacking access to a thickness sander I would use a thickness planer with an auxiliary bed or rip the material on the tablesaw using featherboards for consistency.
Fundamentally I agree with you. Just going through a dry season in my life right now, so expenditures are basically impossible. I've been trying to make do with what I have, and I'm certainly lacking in some of the tools department. The nearby Woodcraft does have machines of all kinds, but they charge $65/hr to use them, and minimum of an hour. A couple of my neighbors do woodworking of various kinds, but neither have a drum sander or thickness planer. Tablesaws, bandsaws, miter saws and lathes, though, are aplenty around here. I think one has an oscillating sander, but that wouldn't work for the use case.
Using the table saw to cut to thickness will work, but as I mentioned previously, I had a bunch of 1/8" thick material that I'd originally bought for another purpose, and need to use it for something. Otherwise, I'd cut 3/32" thick inserts from lumber. (Well, and in the future, I guess that's what I'll be doing as well.)


