• We just finished moving the forums to a new hosting server. It looks like everything is functioning correctly but if you find a problem please report it in the Forum Technical Support Forum (click here) or email us at forum_moderator AT aawforum.org. Thanks!
  • Beware of Counterfeit Woodturning Tools (click here for details)
  • Johnathan Silwones is starting a new AAW chapter, Southern Alleghenies Woodturners, in Johnstown, PA. (click here for details)
  • Congratulations to Dave Roberts for "2 Hats" being selected as Turning of the Week for April 22, 2024 (click here for details)
  • Welcome new registering member. Your username must be your real First and Last name (for example: John Doe). "Screen names" and "handles" are not allowed and your registration will be deleted if you don't use your real name. Also, do not use all caps nor all lower case.

‘Steering’ on the bevel?

Joined
Sep 2, 2022
Messages
301
Likes
231
Location
Victoria, BC
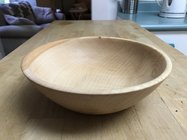
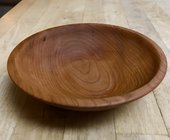
I turned this tonight and tried really hard to be smooth and pick up the cut by easing into where I left off. Kept my gouge very sharp and it seemed to have helped.
I struggled a bit starting off the rim and had a tool mark below the rim that I can't seem to get rid of.
I’m not sure if steering on the bevel is actually a term. I have understood that you basically want to cut an interior path parallel the exterior shape.
Am I correct in thinking that I control the depth of cut by rocking on the bevel?
8BA718B1-01A4-48F7-A1AC-D1FE0AAA43B2.jpeg
 
Last edited:
Joined
Jan 8, 2021
Messages
322
Likes
421
Location
Wrentham, MA
I've not heard that term before, it looks like a case where the bevel was not pointed exactly as desired, then the gouge was shifted to adjust the path. It's taken a while and lots of practice to learn where the bevel is pointing going into cuts. Still screw it up plenty of times, despite practicing it on all my roughing cuts. Spacial awareness of which part of the bevel is rubbing on which part of the bowl is not simple.

I've shut my lathe off after making one of those poor cuts, and then try to reposition the gouge in order to see where it was really hitting, and use that information to try to train my eye to find the correct angle. The good news is that it will come.

The quote Reed uses is something like rub the bevel so lightly the wood does not feel it. Easyish to say, harder to do. Light touch helps.
 
Joined
Oct 6, 2022
Messages
352
Likes
937
Location
Brenham, Texas
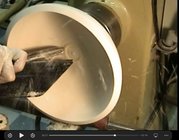
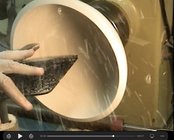
The bevel points in the direction of cut. Opening or closing the gouge controls part of how aggressive the cut is. Take a look at this video. It's long but about 28 minutes in the presenter explains how this works.

View: https://www.youtube.com/watch?v=D_P8Fm5-aVs
 

hockenbery

Forum MVP
Beta Tester
TOTW Team
Joined
Apr 27, 2004
Messages
8,642
Likes
4,983
Location
Lakeland, Florida
Website
www.hockenberywoodturning.com
struggled a bit starting off the rim and had a tool mark below the rim that I can't seem to get rid of.
The entry need to be made with light cuts
One thing that can help beginners a lot on this portion of the bowl is to use a 1/4” bowl gouge ( 3/8 bar) for the first inch.
Traditional grind 45 degree bevel works well. A Michelson grind works well
This smaller tool is slightly sharper and forces a lighter cut.

In the demo video in this thread I show the technique I use. I get a nice smooth acceptable surface with the Ellsworth gouge.
The I show getting a smoother surface with the 1/4” bowl gouge. Just fast forward to 23:10


Am I correct in thinking that I control the depth of cut by rocking on the bevel?
That is one way to describe it the gouge basically wants to cut in straight lines parallel to the bevel the handle position points the bevel deeper or shallower
 
Last edited:

Michael Anderson

Super Moderator
Staff member
TOTW Team
Joined
Aug 22, 2022
Messages
1,360
Likes
3,923
Location
Chattanooga, TN
Is that cherry? What a rich color.

Something that has helped me to get smoother cuts is to round off the heel on the grinder. This prevents a sharp heel from burnishing/compressing the fibers behind your cut, and makes it a bit easier to roll the tool smoothly (while still riding the bevel) when going from the rim to the exterior.
 
Last edited:
Joined
Feb 26, 2019
Messages
1,825
Likes
1,423
Location
Lebanon, Missouri
Yes, steering the bevel is a good way to put it. Use the hips, not hands, wrists, or arms. Stuart Batty uses his right arm to hollow bowls - but he’s Stuart Batty! Although mere mortals can get good at it also.

Something else to consider - bevel length, edge to heel. Hold the bevel of your full length bevel tool against a flat surface. Move the handle and see how much the edge moves in relation to the handle. Imagine that bevel length going from 3/8” (6/16) to 1/16”. You now have to move the handle 6x farther to move the cutting edge the same amount. A narrow bevel provides more resolution to the steering efforts. You can move the handle more and not get as much “oversteer”.
 
Joined
Feb 28, 2021
Messages
1,226
Likes
1,076
Location
Roulette, PA
Website
www.reallyruralwoodworks.com
Yes, steering the bevel is a good way to put it. Use the hips, not hands, wrists, or arms. Stuart Batty uses his right arm to hollow bowls - but he’s Stuart Batty!
Yup, but did you also notice how frickin' LONG his tool handles are?
- Have to have the long handles for better leverage when you're going Batty style - I tried it once, but woefully short 14 inch tool handle (stock handle on a cheap gouge, since hammered off and replaced with my own turned handle) resulted in a great deal of the wood kicking me out constantly.

As for original post: Yeah steering the bevel is done, as Doug says, by tucking the handle (as much as possible) snug in to your side, and then move your whole body (the turner's dance!) to control the movement of the gouge. It takes some practice to master that (and then more practice to master switching to left from right, which sometimes ya just GOTTA do for a better cut on some area or other). Left hand resting on top of gouge, keeping it firmly on the tool rest, does not even HINT at controlling movement of gouge (if you can master it properly you can control your bowl gouge through most any cut with only one hand holding gouge snug to your body)

Starting on the rim is the tricky cut , however one thing I taught myself is if I can get the gouge started from the outside in across the face, you can swing your hips around to point the bevel straight in to the bowl , resulting in a sharp curve into the start of the rim. (I do that for roughing in the bowl) and if you want a crisp rim, getting the gouge started can be made easier if you take a parting too, scraper, or shear scrape with gouge and make a tiny notch in the inside of the rim to the depth of your next cut, that gives you just enough of a ledge to set your bevel on so you can focus on aiming the bevel where you want it to go before committing to the cut.
 

odie

TOTW Team
Joined
Dec 22, 2006
Messages
7,116
Likes
9,842
Location
Panning for Montana gold, with Betsy, the mule!
@David Wrate .....Just a head's up here..... :)

Did you know you can resize the photo in the original post by clicking on it, and then grabbing one of the corners with your curser. You can then make that big photo any size you want.....

-----odie-----
 
Joined
Sep 2, 2022
Messages
301
Likes
231
Location
Victoria, BC
Is that cherry? What a rich color.

Something that has helped me to get smoother cuts is to round off the heel on the grinder. This prevents a sharp heel from burnishing/compressing the fibers behind your cut, and makes it a bit easier to roll the tool smoothly (while still riding the bevel) when going from the rim to the exterior.
Yes, it was mystery wood that I had in my shop but when I put Tried and True on it it looked exactly like wood that I knew was cherry.
Thanks for the tip on taking off the heel.
 
Joined
Sep 2, 2022
Messages
301
Likes
231
Location
Victoria, BC
Yes, steering the bevel is a good way to put it. Use the hips, not hands, wrists, or arms. Stuart Batty uses his right arm to hollow bowls - but he’s Stuart Batty! Although mere mortals can get good at it also.

Something else to consider - bevel length, edge to heel. Hold the bevel of your full length bevel tool against a flat surface. Move the handle and see how much the edge moves in relation to the handle. Imagine that bevel length going from 3/8” (6/16) to 1/16”. You now have to move the handle 6x farther to move the cutting edge the same amount. A narrow bevel provides more resolution to the steering efforts. You can move the handle more and not get as much “oversteer”.
Thanks Doug this make total sense to me.
 
Joined
Sep 2, 2022
Messages
301
Likes
231
Location
Victoria, BC
if you want a crisp rim, getting the gouge started can be made easier if you take a parting too, scraper, or shear scrape with gouge and make a tiny notch in the inside of the rim to the depth of your next cut, that gives you just enough of a ledge to set your bevel on so you can focus on aiming the bevel where you want it to go before committing to the cut.
I think I saw this done once so I know what you mean. Makes complete sense.
 
Joined
Aug 14, 2007
Messages
5,491
Likes
2,841
Location
Eugene, OR
I need to do an updated video for bowl turning..... When some one has ripples down the inside of the bowl and asks what is wrong, I tell them their steering wheel is loose. All movement comes from holding your tool handle hand firmly, and the other hand just rests on the shaft of the gouge. First day in Thai Chi class, which was many years after I started turning, and it was like, hey, this is exactly what I do when I stand at the lathe. "Hold the sword (tool in our case) as you would a bird. Too tight and you kill it. Too loose and it flies away." Many beginning turners will have a white knuckle grip with both hands. That causes a lot of those ripples, and you end up using your shaft hand as a fulcrum rather than rubbing the bevel. Rounding the heel of your bevel can be huge for eliminating those concentric rings you can get on the inside of the bowl or any concave surface. A sharp heel will bruise the wood to the extent that you can sand through to the outside of the bowl and those marks are still there. I round over the heel pretty much every time I sharpen. Some set up their sharpening jigs so they actually have 2 bevels, which does work, but I prefer the rounded version. A sharp heel can actually drive the gouge forward. A good shear scrape could have cleaned that mark up. It might have taken a couple of passes. I do make that final entry cut with the flutes more up, like 1 o'clock rather than noon, or the very catch prone 11 o'clock position.

robo hippy
 
Joined
Sep 2, 2022
Messages
301
Likes
231
Location
Victoria, BC
I need to do an updated video for bowl turning..... When some one has ripples down the inside of the bowl and asks what is wrong, I tell them their steering wheel is loose. All movement comes from holding your tool handle hand firmly, and the other hand just rests on the shaft of the gouge. First day in Thai Chi class, which was many years after I started turning, and it was like, hey, this is exactly what I do when I stand at the lathe. "Hold the sword (tool in our case) as you would a bird. Too tight and you kill it. Too loose and it flies away." Many beginning turners will have a white knuckle grip with both hands. That causes a lot of those ripples, and you end up using your shaft hand as a fulcrum rather than rubbing the bevel. Rounding the heel of your bevel can be huge for eliminating those concentric rings you can get on the inside of the bowl or any concave surface. A sharp heel will bruise the wood to the extent that you can sand through to the outside of the bowl and those marks are still there. I round over the heel pretty much every time I sharpen. Some set up their sharpening jigs so they actually have 2 bevels, which does work, but I prefer the rounded version. A sharp heel can actually drive the gouge forward. A good shear scrape could have cleaned that mark up. It might have taken a couple of passes. I do make that final entry cut with the flutes more up, like 1 o'clock rather than noon, or the very catch prone 11 o'clock position.

robo hippy
Thanks Reed, that's very helpful. I am definitely going to take of some of the heel of my gouge.
I think I am gripping my tools a bit on the white knuckle side of things and there's definitely a fulcrum thing going on.
 
Joined
May 4, 2010
Messages
2,449
Likes
1,877
Location
Bozeman, MT
One thought I have as I imagine I am watching you turn your bowl, is that it's hard to enter the cut when you are a beginner. On this bowl, I have the impression that you went 'straight in' for about a half inch, maybe 3/4", and then started to follow the outside curve (which you did quite well). That half inch is longer than Al Hockenbery by about 7/16 of an inch.

Suggestions:
1. It's hard to enter the cut if the surface of the bowl is rough. Facing off (smoothing) the surface face of the blank is generally the first step in hollowing the inside. When you get to the last hollowing cuts, you should have what will be the remaining rim of the bowl finished smooth.

2. In order to enter the cut, as you apparently know, you need to have the bevel pointing parallel with the lathe axis. If you have any angle to it, you'll get a skate. One method that works well as you are learning to turn is to make a little notch or shelf where you will start the next cut. You do this with a parting tool, as Brian describes, but on your last cut, that will leave a rougher corner than this method: by turning the gouge with the flute toward the outside, and moving it from inside to outside, with just a 1/16" of the edge cutting the wood, cut that little notch. Either way, you make it, that gives you a 1/16"X1/16" or so stable, safe, skate free place to start your next cut, at nearly any angle you choose. The outer edge of the notch keeps your gouge from skating.

Eventually, you will become skilled enough to start your cut by moving the bevel straight in for that 1/16" and then repositioning at the desired angle. Essentially, you are cutting that notch and starting your hollowing cut all in one step.

3. As you're hollowing, from the center of the bowl outwards toward the rim, make your last 3 cuts at calculated depths and curves. That is, at intentional distances from where your bowl side or rim thickness will end up. The 3rd to last cut is at a depth to leave you with an easy 2nd to last cut plus a shallow final cut, and it should be very close to the final inside shape. Then the 2nd to last cut is an easily controlled, comfortable depth, and done to make exactly the shape you want. The Last Cut is thin or shallow, so you have really good control and you avoid or remove tear out. Because you have already established the final shape, the Last Cut can remove a consistent thickness of wood, without you having to steer to correct something. Easy Peasy.

This bowl shows you have learned how to create a nice curve--it's not a dog bowl! As your second, or so, bowl, it's a terrific success. You're improving at a fast pace. Keep it up.

(If anything above is not clearly expressed, I apologize, and you are welcome to ask for clarification, if you think I'm onto something useful)
 
Joined
Sep 2, 2022
Messages
301
Likes
231
Location
Victoria, BC
One thought I have as I imagine I am watching you turn your bowl, is that it's hard to enter the cut when you are a beginner. On this bowl, I have the impression that you went 'straight in' for about a half inch, maybe 3/4", and then started to follow the outside curve (which you did quite well). That half inch is longer than Al Hockenbery by about 7/16 of an inch.

Suggestions:
1. It's hard to enter the cut if the surface of the bowl is rough. Facing off (smoothing) the surface face of the blank is generally the first step in hollowing the inside. When you get to the last hollowing cuts, you should have what will be the remaining rim of the bowl finished smooth.

2. In order to enter the cut, as you apparently know, you need to have the bevel pointing parallel with the lathe axis. If you have any angle to it, you'll get a skate. One method that works well as you are learning to turn is to make a little notch or shelf where you will start the next cut. You do this with a parting tool, as Brian describes, but on your last cut, that will leave a rougher corner than this method: by turning the gouge with the flute toward the outside, and moving it from inside to outside, with just a 1/16" of the edge cutting the wood, cut that little notch. Either way, you make it, that gives you a 1/16"X1/16" or so stable, safe, skate free place to start your next cut, at nearly any angle you choose. The outer edge of the notch keeps your gouge from skating.

Eventually, you will become skilled enough to start your cut by moving the bevel straight in for that 1/16" and then repositioning at the desired angle. Essentially, you are cutting that notch and starting your hollowing cut all in one step.

3. As you're hollowing, from the center of the bowl outwards toward the rim, make your last 3 cuts at calculated depths and curves. That is, at intentional distances from where your bowl side or rim thickness will end up. The 3rd to last cut is at a depth to leave you with an easy 2nd to last cut plus a shallow final cut, and it should be very close to the final inside shape. Then the 2nd to last cut is an easily controlled, comfortable depth, and done to make exactly the shape you want. The Last Cut is thin or shallow, so you have really good control and you avoid or remove tear out. Because you have already established the final shape, the Last Cut can remove a consistent thickness of wood, without you having to steer to correct something. Easy Peasy.

This bowl shows you have learned how to create a nice curve--it's not a dog bowl! As your second, or so, bowl, it's a terrific success. You're improving at a fast pace. Keep it up.

(If anything above is not clearly expressed, I apologize, and you are welcome to ask for clarification, if you think I'm onto something useful)
Thanks Dean that's tremendously helpful. One bit of clarification: when you say "by turning the gouge with the flute toward the outside, and moving it from inside to outside, with just a 1/16" of the edge cutting the wood, cut that little notch." I read this to mean the flute is open to the left or 9 o'clock position and I'm going toward the rim as compared to going toward the centre. Am I interpreting that right?
 
Joined
May 4, 2010
Messages
2,449
Likes
1,877
Location
Bozeman, MT
Thanks Dean that's tremendously helpful. One bit of clarification: when you say "by turning the gouge with the flute toward the outside, and moving it from inside to outside, with just a 1/16" of the edge cutting the wood, cut that little notch." I read this to mean the flute is open to the left or 9 o'clock position and I'm going toward the rim as compared to going toward the centre. Am I interpreting that right?
When we say "open" with regards to a flute, that means it's pointed at the ceiling. But, yes, the flute would be pointing outwards, at 9 o'clock, the opposite direction from hollowing.

You can do this with all of your hollowing cuts, so there's plenty of opportunity to practice before you get to the Last Cut.
 
Joined
Sep 2, 2022
Messages
301
Likes
231
Location
Victoria, BC
The entry need to be made with light cuts
One thing that can help beginners a lot on this portion of the bowl is to use a 1/4” bowl gouge ( 3/8 bar) for the first inch.
Traditional grind 45 degree bevel works well. A Michelson grind works well
This smaller tool is slightly sharper and forces a lighter cut.

In the demo video in this thread I show the technique I use. I get a nice smooth acceptable surface with the Ellsworth gouge.
The I show getting a smoother surface with the 1/4” bowl gouge. Just fast forward to 23:10


That is one way to describe it the gouge basically wants to cut in straight lines parallel to the bevel the handle position points the bevel deeper or shallower
Thanks Al, that's an excellent video.
Is the better finish from the 1/4" gouge a result of its smaller depth of cut?
Also at the 30 minute mark you are using the gouge in a completely open position. I always understood that this was a risky, catch-prone position.
Al Hockenbery - Mounting and turning a dried bowl [sCZWsHB4vlM - 1328x747 - 30m06s].png
 
Last edited:

hockenbery

Forum MVP
Beta Tester
TOTW Team
Joined
Apr 27, 2004
Messages
8,642
Likes
4,983
Location
Lakeland, Florida
Website
www.hockenberywoodturning.com
Is the better finish from the 1/4" gouge a result of its smaller depth of cut?
This is a technique Jimmy Clewes teaches.
The smaller gouge is ground 45 degree bevel. I think there are serversl benefits.
Smaller tool does force us to make smaller cuts. It is sharper. A subtle difference the 45 degree bevel gives the turner a slightly better sight line that is closer in line to the tool than a 60 degree bevel.


Also at the 30 minute mark you are using the gouge in a completely open position. I always understood that this was a risky, catch-prone position.

This is a time for do as I say not as I do.
This is the bevel ringing cut you should be mastering 3D78D02D-07D0-499F-94A9-1913097AAE1E.jpeg
Flute at about 1 thirty or 2 o’clock

I learned the “risky” cut (aka shear cut) in a class with Liam O’Neil in 1994. It’s a hard cut to learn on your own.
In class we practiced rolling into the cut.
If you take a class from Ellsworth, Bosch, or Lopez They will teach you this cut, you may have to ask.
This is a cut where a loose grip on the tool is essential 2C4D8E8D-6D34-4AC4-A578-617B40A73E27.jpeg
Cutting with the leading edge of the wing has advantages - high shear angle on a 40-45 degree bevel, almost no bevel drag,can ride the bevel to the bottom of an open bowl…..
I am in a club with about 80 members probably 5 of us do this cut.
 
Joined
Feb 28, 2021
Messages
1,226
Likes
1,076
Location
Roulette, PA
Website
www.reallyruralwoodworks.com
Thanks Dean that's tremendously helpful. One bit of clarification: when you say "by turning the gouge with the flute toward the outside, and moving it from inside to outside, with just a 1/16" of the edge cutting the wood, cut that little notch." I read this to mean the flute is open to the left or 9 o'clock position and I'm going toward the rim as compared to going toward the centre. Am I interpreting that right?
It is very similar to a shear scrape technique (I use it quite a bit with my ellsworth grind) - you've basically got the flute closed towards the bowl..

to get an idea of it at your desk, pretend your pen is a gouge, draw a stripe down the length, hold pen in right hand, point tip directly away from you, twist pen to turn stripe to point to your left (9 o'clock), then roll it just slightly (less than a 1-minute tick) back towards 9:01, and putting your left hand on top of the pen, lightly press it down on edge of desk (anchoring tool to tool rest) , heel of left hand on desk/ tool rest, curl in fingers towards your palm will pull the pen/tool very gently into the project...

If you hold gouge level, you'd be making a tiny cut with the very tip, if you moved handle lower (raising the tip and wing above center to about a 45 degree angle ) with a very soft, deft touch you'd be achieving a shear scrape and get very fine angel hair shavings - works nicely to touch up little ridges and bumps, but not something really recommended for the INSIDE of bowls - It needs a very delicate touch and vibration free bowl. (Though I do it a lot with no trouble, but then I paid my dues already dealing with catches resulting from it, so I use that technique with quite a bit of confidence.)
 
Joined
Aug 14, 2007
Messages
5,491
Likes
2,841
Location
Eugene, OR
I have seen many people hold their swept back gouges level, with flutes at 9 o'clock, pulling up the inside of a bowl, and call that a shear scrape. It is not. At best, it is a negative rake scraper. Shear means at an angle to the rotation. If you drop the handle, then it is a shear scrape. With a gouge, you could only do this near the rim on the inside of a bowl.

The one hand push cut on the inside of a bowl is an essential skill to learn for having a smooth wall on the inside of the bowl. I remember hearing some one comment that David Ellsworth took their gouge and 'with 2 fingers on the handle, he was running it around on the inside of my bowl like a sports car'. One of the biggest learning advances I made was learning to rest my other hand on the gouge and let the handle hand do ALL of the work.

The outside of a bowl is far easier to turn than the inside.....

robo hippy
 
Joined
Sep 2, 2022
Messages
301
Likes
231
Location
Victoria, BC
I have seen many people hold their swept back gouges level, with flutes at 9 o'clock, pulling up the inside of a bowl, and call that a shear scrape. It is not. At best, it is a negative rake scraper. Shear means at an angle to the rotation. If you drop the handle, then it is a shear scrape. With a gouge, you could only do this near the rim on the inside of a bowl.

The one hand push cut on the inside of a bowl is an essential skill to learn for having a smooth wall on the inside of the bowl. I remember hearing some one comment that David Ellsworth took their gouge and 'with 2 fingers on the handle, he was running it around on the inside of my bowl like a sports car'. One of the biggest learning advances I made was learning to rest my other hand on the gouge and let the handle hand do ALL of the work.

The outside of a bowl is far easier to turn than the inside.....

robo hippy
I think part of my steep learning curve is that I am pushing/pulling the gouge with my tool rest hand and need to learn how to control using the handle instead.
 
Joined
May 2, 2020
Messages
15
Likes
10
Location
Florissant, CO
As I am a beginner on bowls as well, I sometimes change tools. I have picked up a couple different bowl gouges and depending on the shape I am trying to achieve I stru. Sometimes changing the tool helps me, but there are times when I know I am not setting my tool u correctly, not moving my body, something…..

keep it up, it seems like you are really good at visualizing, I think that helps.
 
Joined
Sep 2, 2022
Messages
301
Likes
231
Location
Victoria, BC
As I am a beginner on bowls as well, I sometimes change tools. I have picked up a couple different bowl gouges and depending on the shape I am trying to achieve I stru. Sometimes changing the tool helps me, but there are times when I know I am not setting my tool u correctly, not moving my body, something…..

keep it up, it seems like you are really good at visualizing, I think that helps.
And you keep it up too Garry! :)
I only have one bowl gouge at the moment; a 1/2" ground to an Ellsworth profile. I'll likely invest in another one or two to experiment with different grinds and sizes.
 
Joined
May 4, 2010
Messages
2,449
Likes
1,877
Location
Bozeman, MT
David, Pen State Industries sells a set of 3 bowl gouges for $70. They sharpen and work just fine.
Pat

And you keep it up too Garry! :)
I only have one bowl gouge at the moment; a 1/2" ground to an Ellsworth profile. I'll likely invest in another one or two to experiment with different grinds and sizes.
At this stage of the game, it's not the arrow, it's the archer. My advice would be, if you have one properly ground gouge, learn to use it well. When you're convinced you have gotten the best result you can achieve with it, then experimenting with different gouges makes sense.

The expert turners whose skill amazes us got there by turning thousands of bowls and carefully analyzing what was happening, not by discovering the One Perfect Grind.
 
Joined
Sep 2, 2022
Messages
301
Likes
231
Location
Victoria, BC
At this stage of the game, it's not the arrow, it's the archer. My advice would be, if you have one properly ground gouge, learn to use it well. When you're convinced you have gotten the best result you can achieve with it, then experimenting with different gouges makes sense.

The expert turners whose skill amazes us got there by turning thousands of bowls and carefully analyzing what was happening, not by discovering the One Perfect Grind.
This archer needs to keep shooting :)
 

hockenbery

Forum MVP
Beta Tester
TOTW Team
Joined
Apr 27, 2004
Messages
8,642
Likes
4,983
Location
Lakeland, Florida
Website
www.hockenberywoodturning.com
only have one bowl gouge at the moment; a 1/2" ground to an Ellsworth profile. I'll likely invest in another one or two to experiment with different grinds and sizes.
I second dean’s advice. You may wish to add a 1/4” bowl gouge ( 3/8 bar). But as far as experimenting with other grinds…
You will be better served with learning to use the gouge you have well. The same thing applies to forms. Work on one basic style bowl until you get good at it then try others. The fewer new things coming at you the better you get at the familiar things.

Dean phrased it quite well.
At this stage of the game, it's not the arrow, it's the archer. My advice would be, if you have one properly ground gouge, learn to use it well. When you're convinced you have gotten the best result you can achieve with it, then experimenting with different gouges makes sense.

If you learn all the advanced cuts with the Ellsworth you may not need another grind. The Michelson grind would be worth learning at some point. Maybe a year or 6 months.
 
Joined
Sep 2, 2022
Messages
301
Likes
231
Location
Victoria, BC
I second dean’s advice. You may wish to add a 1/4” bowl gouge ( 3/8 bar). But as far as experimenting with other grinds…
You will be better served with learning to use the gouge you have well. The same thing applies to forms. Work on one basic style bowl until you get good at it then try others. The fewer new things coming at you the better you get at the familiar things.

Dean phrased it quite well.


If you learn all the advanced cuts with the Ellsworth you may not need another grind. The Michelson grind would be worth learning at some point. Maybe a year or 6 months.
Thanks Al and Dean @Dean Center, your advice is well taken.
 
Back
Top