-
December 2025 Turning Challenge: Single Tree! (click here for details) -
Congratulations to Bob Henrickson, People's Choice in the November 2025 Turning Challenge (click here for details) -
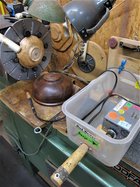
Congratulations to Guillaume Fontaine for "Old Tea Pot" being selected as Turning of the Week for December 15, 2025 (click here for details) -
Welcome new registering member. Your username must be your real First and Last name (for example: John Doe). "Screen names" and "handles" are not allowed and your registration will be deleted if you don't use your real name. Also, do not use all caps nor all lower case.
You are using an out of date browser. It may not display this or other websites correctly.
You should upgrade or use an alternative browser.
You should upgrade or use an alternative browser.
What’s on your lathe?
- Thread starter Rusty Nesmith
- Start date
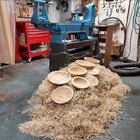
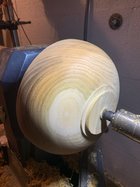
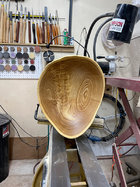
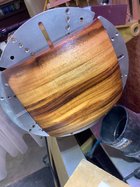
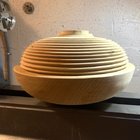
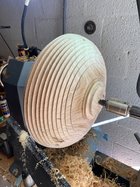
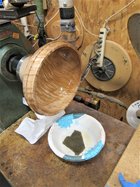
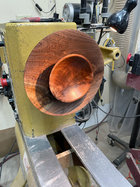
Fruits of yesterday’s labor. Top one is finished, but just needs to dry and get sanded later. Hopefully some cool warpage. Bottom one is a big rough out that I’ll second turn at some point in the future. Bottom bowl is just over 16” diameter. It was my first time turning bowls this large—a lot more work than I’m used to, haha.

Odie
Panning for Montana gold, with Betsy, the mule!
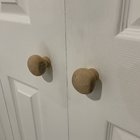
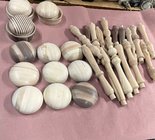
A matched pair of pulls for bi-fold doors, made from salvaged cedar fence posts. They're not pretty (and they're not finished--not sure if I'll put a finish on them), but being my 2nd & 3rd "completed" turnings ever, and being such an improvement on the original pulls, I'm satisfied.
At least there was no blood involved.

At least there was no blood involved.
William Rogers, can you post the measurements for the wig stands, Thanks
- Joined
- Feb 28, 2021
- Messages
- 1,775
- Likes
- 1,587
- Location
- Roulette, PA
- Website
- www.reallyruralwoodworks.com
Hi Vincent - If you are an AAW Member, I do believe you can go in to the Publications archives - there's at least one nice article in there about turning wig stands (with dimensions, etc) but I don't remember whether it was the FUNdamentals or the American Woodturner magazine (but I do believe it was within the last 5 or 10 years)
- (AAW member site- Resources->publications->American Woodturner or Woodturning FUNdamentals - back issues all the way back to Vol. 1 No. 1)
- (AAW member site- Resources->publications->American Woodturner or Woodturning FUNdamentals - back issues all the way back to Vol. 1 No. 1)
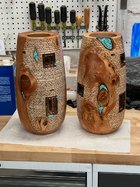
Beautiful wood, like the detailsAustralian brown Mallee burl.....(click 2x to inspect the details)
View attachment 50146 View attachment 50147
-----odie-----
MIchael,Fruits of yesterday’s labor. Top one is finished, but just needs to dry and get sanded later. Hopefully some cool warpage. Bottom one is a big rough out that I’ll second turn at some point in the future. Bottom bowl is just over 16” diameter. It was my first time turning bowls this large—a lot more work than I’m used to, haha.
View attachment 50773
You're pretty good at this, so use your judgment, but are you SURE you want to sand it? You'll lose some crispness in the process.
Hey Dean, thanks for the compliment! Most of the sanding is just for the interior of the bowl. The ridges are pretty clean, so it’s just a matter of knocking down the fibers with 320g. I’ll use a piece of wood as a sandpaper backer to keep everything crisp. You’re totally right though—I’d prefer not to touch them at all!MIchael,
You're pretty good at this, so use your judgment, but are you SURE you want to sand it? You'll lose some crispness in the process.
Good luck! I’m excited to see the final piece.My first time attempting something like this.
Odie
Panning for Montana gold, with Betsy, the mule!
I like your foot form design
Odie
Panning for Montana gold, with Betsy, the mule!
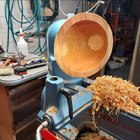
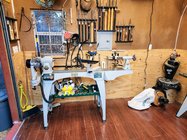
Working on upgrading my dust collection. I ordered a bolt on filter for my ancient Dust Right DC blower and moved it out of the loft. I'll reinstall the system along with the Oneida Super Dust Deputy 2nd stage on the main floor/wall when it arrives. Meanwhile no DC currently in operation. It was getting just a little too sporting to haul 30 gallons of chips down a ladder on my shoulder. If anyone has a good method to secure the 2nd stage to the wall so it doesn't tip, I'm all ears.
This move was made possible by choosing to store my ShopSmilth and accessories elsewhere. Once that started, I noticed lots of other flatwork tooling that I'm no longer using and stored that as well. Shop has become turning studio. Moving forward, any flatwork that comes up will be hand tool oriented.
I added a 20" extension to the RP Coronet increasing weight to about #500. Now a 16/44 or 39" outboard monster. Also rearranged the vacuum pump and Guinevere so that they are easier to access.

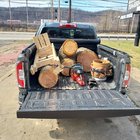
Try a natural edge bowl where the base is near the pith then the sapwood should be exposed continually at the natural edge with or without the bark..I roughed out a really beautiful piece of Black Locust last night. I like the small sapwood accent; unfortunately, I don’t think it will survive the second turning.
View attachment 50881
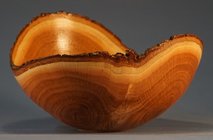
@Don Wattenhofer that's a really beautiful bowl. I have a few crotch and otherwise pieces that I'm saving for that--this was just the first roughout of a nice black locust haul from the other day.
@Monty Ivy didn't you have a PM there at some point? And that made me chuckle--shop is becoming a turning studio. I think mine is evolving to that. My tablesaw just functions as a table, and I can't remember the last time I used my miter saw haha. I also like that wrought iron window protector. I was going to ask which tool you name Guinevere, but then I saw the yellow, haha.
@Monty Ivy didn't you have a PM there at some point? And that made me chuckle--shop is becoming a turning studio. I think mine is evolving to that. My tablesaw just functions as a table, and I can't remember the last time I used my miter saw haha. I also like that wrought iron window protector. I was going to ask which tool you name Guinevere, but then I saw the yellow, haha.
Monty, check out what Oneida carries. They have small systems that are in a metal frame so no tip worries, and a very small footprint. like the size of that barrel.
robo hippy
robo hippy
I did some pretty extensive research before deciding this route. Based on constraints (110v chief among them), buying a new system doesn't go very far. That leaves about 3 offerings all at or above $2k. CFM is a little better here and there but nothing that could make a big enough difference to get me to turn loose of that much cash. The one I have works well enough for my uses and the upgraded filter should help to improve air quality.Monty, check out what Oneida carries. They have small systems that are in a metal frame so no tip worries, and a very small footprint. like the size of that barrel.
robo hippy
@Monty Ivy didn't you have a PM there at some point? And that made me chuckle--shop is becoming a turning studio. I think mine is evolving to that. My tablesaw just functions as a table, and I can't remember the last time I used my miter saw haha. I also like that wrought iron window protector. I was going to ask which tool you name Guinevere, but then I saw the yellow, haha.
I sold the PM about a month ago. Did pretty well on the sale. Enough offset that the new RP only cost me around $600
@Monty Ivy I see you have your channel for lights and dust mounted on the wall instead of the lathe. I've been thinking of this as I'm leery of the mount cracking the cast iron of the lathe bed.
How is this working for you? Do you run the 4" hose from the top? Looks like it would be awkward coming from below.
How is this working for you? Do you run the 4" hose from the top? Looks like it would be awkward coming from below.
@Monty Ivy I see you have your channel for lights and dust mounted on the wall instead of the lathe. I've been thinking of this as I'm leery of the mount cracking the cast iron of the lathe bed.
How is this working for you? Do you run the 4" hose from the top? Looks like it would be awkward coming from below.
Clamping the channel to the lathe didn't work very well at all. Wouldn't stay on there reliably on my old lathe. Haven't tried it on the new one and I'm trying not to scratch the paint!
I'm not having any trouble with the DC arm as configured. I added a Dust Right tool port to the rear of the hood. This let's the Dust Right quick change nozzle to slide on and lock in place via a tapered fit. Works kind of like a morse taper. I've found that the weight of the nozzle and hose tend to help hold it in place. If it becomes a problem I could always add a J hook to take most of the weight off.
In my tiny shop each machine get's one of those tool ports and I just move the hose when I need to use it. They also offer a Floor Sweep attachment that works great.
Jim McLain
Artist
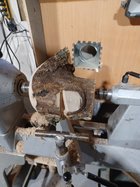
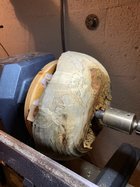
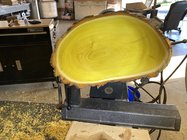
10" x 8 3/4" x 3/16". Think this one will clean up & finish nicely in a couple weeks. Got this load from a tree trimmer dump site so you never know how the tree was taken down. Sometimes they just cut a few feet off at a time and the piece just falls and hits the street or sidewalk and has a tendency to crack on one side or the other but this load seems pretty solid. Gonna have to go back and get another load.
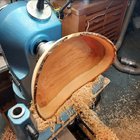
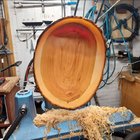


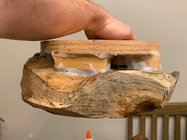
If possible, how about a side view "peek-see" into your wood disk. Did you hot glue spacers in place?
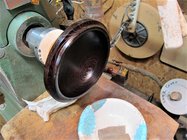
Hi Dave, yep. I cut/whittled some pieces of wood to size and then superglued to the plywood backer. Then used hot glue to bind the blank to the construction (and reinforce the spacers). Here’s a pic that is a bit more clear. Call it the suspension test before it went on the lathe.
Edit: here’s the platter, rubbed with DNA to show the grain. I sanded with 180, but it is still a little green to fully finish. Will let dry slowly and then finish later.
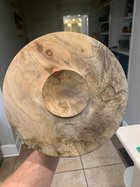

Edit: here’s the platter, rubbed with DNA to show the grain. I sanded with 180, but it is still a little green to fully finish. Will let dry slowly and then finish later.

Last edited:
Cool.......thanks
Nice looking piece Michael.
Thanks a lot Rusty!

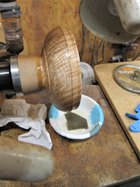
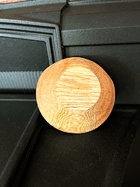
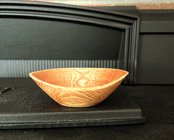
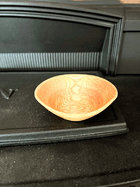
![20230211_111219[1].jpg 20230211_111219[1].jpg](https://www.aawforum.org/community/data/attachments/48/48030-1f981937fb1e1826bc10e1d47730f6fa.jpg?hash=H5gZN_seGC)
![20230212_080809[1].jpg 20230212_080809[1].jpg](https://www.aawforum.org/community/data/attachments/48/48031-ad384d18e878e168d16e24d8a8a112e0.jpg?hash=rThNGOh44W)
