-
April 2025 Turning Challenge: Turn an Egg! (click here for details) -
Congratulations to Kelly Shaw winner of the March 2025 Turning Challenge (click here for details) -
Congratulations to Ellen Starr for "Lotus Temple" being selected as Turning of the Week for 21 April, 2025 (click here for details) -
Welcome new registering member. Your username must be your real First and Last name (for example: John Doe). "Screen names" and "handles" are not allowed and your registration will be deleted if you don't use your real name. Also, do not use all caps nor all lower case.
You are using an out of date browser. It may not display this or other websites correctly.
You should upgrade or use an alternative browser.
You should upgrade or use an alternative browser.
What’s on your lathe?
- Thread starter Rusty Nesmith
- Start date
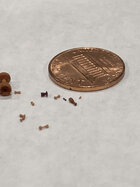
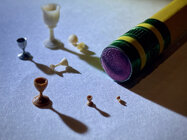
5 goblets a “bowl” and a “plate” made out of the same toothpick.
Nice, clever!
One idea: Commercial toothpicks are often made from birch, for several reasons. I find it easier to make clean cuts on tiny things if I use a harder, finer-grained wood. I often use ebony or cocobolo, but they won't look like they are from a toothpick!
If you are set on turning from toothpicks, maybe turn a few toothpicks from a wood such as boxwood, pau marfim, or hard maple. Then the tiny detail and finishes could be cleaner.
John Lucas has made some extremely small goblets. I think he made special tools to help turn them.
JKJ
Sounds like a great challenge and project! Seems like the oak might provide it's own challenges!This is the beginning of a cooperative piece that I am making with my daughter for our club’s March challenge. It is inspired by a recent posting in the photo Gallery by Dave Landers, https://www.aawforum.org/community/media/tri-corner-goblet.25143/
My daughter will be doing the stem portion because I have been told my finials look like pawns on a chess Board. The base may or may not be included in the stem. That will be my daughter’s choice. I may be responsible for the base.
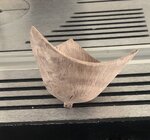
I thought I was getting off easy doing the tri corner goblet portion. However, it was my first attempt at turning a tri corner and it is not easy. (At least for me.) The points of the goblet are about 2 1/4 inches apart. The wood is Oak. Left over from a recent platter.
View attachment 72550View attachment 72551
I assume you started with with a cube of wood. That's the easiest way I know to make 3-corner things.
Our club had a tri-corner challenge a few years but I don't remember anyone making a goblet. I'd like to try one.
For that I challenge made a 3-corner "thing" from a maple cube, then made another smaller one from e. indian rosewood and joined them so the thing could stand on three feet. Maybe that would be an idea for a goblet base if two tri-corner pieces were joined with a stem.
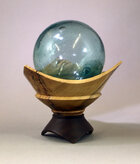
(A kind gentleman brought me an antique glass fishing float from one of his far east trips and I thought they looked interesting together.)
JKJ
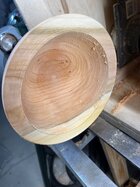
This is one of six cherry bowls I have first turned. I have never turned such very wet wood before, but what a great experience. There was a stream of water running down the flute as I turned. I was surprised how much the weight changed in the first couple of days, but I must stop checking and let nature work. The bowls are in grocery bags with some dry shavings.
Attachments
John, You are correct about Oak providing its own challenges. I started with a scrap piece of Oak to use as a practice piece because I had never tried turning a tri-corner before. Watched a bunch of YouTube videos. I got real lucky and it did not blow apart. Walls are 5/64 (.078) at the points. I like the grain. Used very sharp tools to keep the tips from getting knocked off.Sounds like a great challenge and project! Seems like the oak might provide it's own challenges!
I assume you started with with a cube of wood. That's the easiest way I know to make 3-corner things.
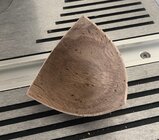
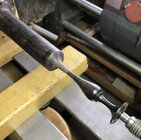
My daughter now has her portion of the challenge on the lathe. She plans on taking it down another 6 inches where we will fashion a base together. Things are at a stand still until she has a day off from work to finish the stem portion. This is African Black Wood. She says thin is better, however, I have serious concerns about just how thin she is planning on going with the stem over the next 6 inches.
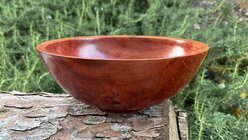
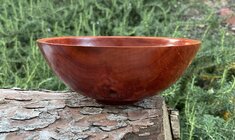
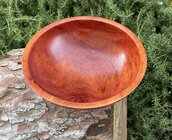
Beautiful piece of wood and excellent shape!Second turned today View attachment 72824View attachment 72825View attachment 72826a piece of iron bark eucalyptus. Bought the rough turned bowl at last woodturner meeting. Really like how this wood turns and looks after one coat of Mahoney’s. About 9 inch diameter. Probably need better pictures since there’s some visible dust when I magnify them.
love the design. Very cool.
...the stem portion. This is African Black Wood. She says thin is better, however, I have serious concerns about just how thin she is planning on going with the stem over the next 6 inches.
I often turn African Blackwood, sometimes thin. It's quite strong so even if thin it should support OK. I might be a little concerned about how the two would look together it the stem is thin, but it's hard to imagine the visual balance without seeing them together, From what's on the lathe so far, it looks like she has a good eye for form so I suspect it will be great!
BTW, I think the outcome of the tri-corner experiment must have been more skill than luck! That figure should look spectacular with finish. And the unfigured Blackwood should nicely complement the figured oak without conflict.
Ooo, I just had a thought - if you two decide NOT to add an oak base below the blackwood, it might be interesting to make a little oak lid to fit a bit down inside the goblet bowl and a short Blackwood finial on top, a bit of an echo of the stem.
Can't wait to see the final piece!
I like turning ebony too - a gentleman from Atlanta once brought me a bundle of Gaboon Ebony, 1"x1", some 40" long! I like to make these wands, especially from hard, fine grained woods like Blackwood, Ebony, Cocobolo, etc.
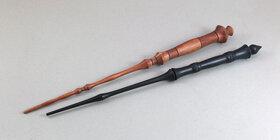
Cedar and Ebony
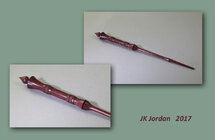
Purpleheart
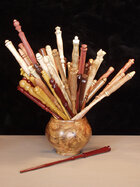
Hey, has she made any wands or possibly have an interest? I posted a document about how I turn these (and other thin spindles) in the Tutorials and Tips section here.
JKJ
I knew the results would be poor because it is birch, I wanted to see if it was even possible to get the features even if there was a bad surface. I have some other woods, such as Persian ironwood and mountain mahogany sapwood that would look nearly white, and are extremely hard and fine-grained. However, I wanted to see if I could turn a toothpick from the store, which I had on hand.Nice, clever!
One idea: Commercial toothpicks are often made from birch, for several reasons. I find it easier to make clean cuts on tiny things if I use a harder, finer-grained wood. I often use ebony or cocobolo, but they won't look like they are from a toothpick!
If you are set on turning from toothpicks, maybe turn a few toothpicks from a wood such as boxwood, pau marfim, or hard maple. Then the tiny detail and finishes could be cleaner.
John Lucas has made some extremely small goblets. I think he made special tools to help turn them.
JKJ
I have turned quite a bit of miniature, maybe I will post soon some pictures.
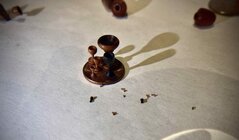
When I turned miniatures like these...
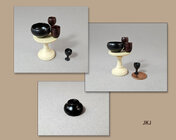
... two people told me I could sell tiny turned things, if made to the right scale, to doll house collector fanatics and make a fortune.
Said these people would buy all kinds of things, well-made little tables, bowls, platters, goblets, chopsticks, pepper mills, kitchenware (rolling pins, etc), 3/4-legged stools, round mirrors or picture frames, light fixtures, lamp stands, bed posts, wig stands, jewelry boxes...
But if I started making things for money, it might feel like a job.
JKJ
This is mind bending. And to think you use no magnification! I have no idea how this is done and would love to see a video or tutorial. You are gifted.Some miniatures I have turned. Not amazing proportions or quality, but this was a while ago. View attachment 72854View attachment 72855View attachment 72856
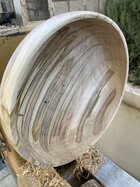
In progress, a 9+ inch diameter fruit bowl made of ambrosia maple, first time I’ve turned it. Some tear out despite sharp tools. Probably should have turned up the rpm.
That tearout is frightening! Curious - is the wood dry? Does it feel soft when pressed with a thumbnail?
I've occasionally had wood that just seemed sensitive to tearout. Once I had to brush on a thinned coat of shellac to soak into the fibers and dry before I could get a clean cut.
What kind of tools are you using, conventional bowl gouges, sharpened and stropped to "shaving sharp"? Try other tools, grinds? (I often turn bowls with sharp Hunter Hercules tool, the smaller one with a #1 cutter.) Does it respond better to a sharp, well-prepared NRS?
I assume you've tried extremely light "whisper" cuts. What speed? (I tend to turn fairly fast unless the piece is large and unbalanced or the integrity is suspect)
Is the tearout the same if you turn in reverse?
Do you have 2nd set of eyes nearby who might take a look at the wood, speed, tools, technique and maybe try a cut or two?
JKJ
I've occasionally had wood that just seemed sensitive to tearout. Once I had to brush on a thinned coat of shellac to soak into the fibers and dry before I could get a clean cut.
That's what I do. Soak it with shellac and make fine finishing cuts with a sharp gouge.
Dry, not punky, 1/2 inch Ellsworth gouge sharpened on 220 grit CBN, didn’t take light cuts, didn’t run in reverse, ran at 800 rpm, didn’t try NRS, don’t have other eyes. No trouble with piece turned prior to this-and, yes, resharpened.That tearout is frightening!
Softer maples do tend to tear out more than other woods. I prefer a shear scrape for the final pass. When I turn big leaf maple, I can count on starting with 80 grit.In progress, a 9+ inch diameter fruit bowl made of ambrosia maple, first time I’ve turned it. Some tear out despite sharp tools. Probably should have turned up the rpm. View attachment 72866
robo hippy
Softer maples do tend to tear out more than other woods. I prefer a shear scrape for the final pass. When I turn big leaf maple, I can count on starting with 80 grit.
robo hippy
Funny you mention this today, robo.
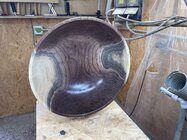
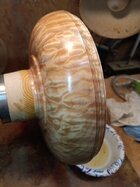
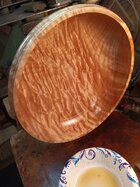
I worked on this quilted Big Leaf Maple bowl last evening, and it was absolutely the toughest piece of wood I've had on my lathe in a long time.....even though there have been other quilted BLM bowls in the past. On the exterior, since there are fine details, I wanted to keep from having to do any power sanding in order to preserve as much geometric integrity as possible. I was successful, but I did have to resort to 120gt starting grit by hand. I haven't had to go that coarse in years, but just gotta do what has to be done to get the results I require.
This just happens to be the most outstanding quilted BLM figure I've seen in a long long while, and probably had something to do with how difficult getting a clean cut prior to sanding it was. I was shear scraping with manually raised burrs in order to get the best possible surface prior to sanding.
=o=
View attachment 72893 View attachment 72894
Odie:
Might have been tough to turn, but the results look like it was worth it. A mighty pretty piece!
Barry W. Larson
Calgary, Alberta, Canada eh!
That is one gorgeous chunk of wood! Well done!Funny you mention this today, robo.
I worked on this quilted Big Leaf Maple bowl last evening, and it was absolutely the toughest piece of wood I've had on my lathe in a long time.....even though there have been other quilted BLM bowls in the past. On the exterior, since there are fine details, I wanted to keep from having to do any power sanding in order to preserve as much geometric integrity as possible. I was successful, but I did have to resort to 120gt starting grit by hand. I haven't had to go that coarse in years, but just gotta do what has to be done to get the results I require.
This just happens to be the most outstanding quilted BLM figure I've seen in a long long while, and probably had something to do with how difficult getting a clean cut prior to sanding it was. I was shear scraping with manually raised burrs in order to get the best possible surface prior to sanding.
=o=
View attachment 72893 View attachment 72894
- Joined
- Nov 27, 2021
- Messages
- 171
- Likes
- 698
- Location
- Silver Spring, MD
- Website
- www.transpirationturning.com
That is some crazy quilting. You must be feeling better because you have sure turned it up recently!Funny you mention this today, robo.
I worked on this quilted Big Leaf Maple bowl last evening, and it was absolutely the toughest piece of wood I've had on my lathe in a long time.....even though there have been other quilted BLM bowls in the past. On the exterior, since there are fine details, I wanted to keep from having to do any power sanding in order to preserve as much geometric integrity as possible. I was successful, but I did have to resort to 120gt starting grit by hand. I haven't had to go that coarse in years, but just gotta do what has to be done to get the results I require.
This just happens to be the most outstanding quilted BLM figure I've seen in a long long while, and probably had something to do with how difficult getting a clean cut prior to sanding it was. I was shear scraping with manually raised burrs in order to get the best possible surface prior to sanding.
=o=
View attachment 72893 View attachment 72894
WOW! That is a beautiful piece!Funny you mention this today, robo.
I worked on this quilted Big Leaf Maple bowl last evening, and it was absolutely the toughest piece of wood I've had on my lathe in a long time.....even though there have been other quilted BLM bowls in the past. On the exterior, since there are fine details, I wanted to keep from having to do any power sanding in order to preserve as much geometric integrity as possible. I was successful, but I did have to resort to 120gt starting grit by hand. I haven't had to go that coarse in years, but just gotta do what has to be done to get the results I require.
This just happens to be the most outstanding quilted BLM figure I've seen in a long long while, and probably had something to do with how difficult getting a clean cut prior to sanding it was. I was shear scraping with manually raised burrs in order to get the best possible surface prior to sanding.
=o=
View attachment 72893 View attachment 72894
Yes, thanks Alan.....That is some crazy quilting. You must be feeling better because you have sure turned it up recently!
I'm pretty much back to my old pace, but not getting any younger!
=o=
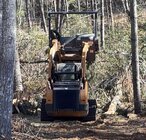
I haven’t been able to turn in over a week due to being involved in hurricane clean up. Finally was able to get someone with a mulching machine to clear some paths to get to down trees.
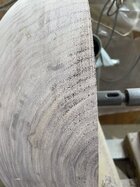
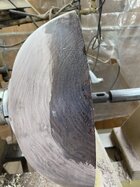
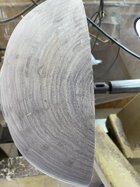
Told my wife I was getting the jitters from not being able to turn so when I dropped my granddaughter off at PreK I had a hour or so and put a second turn walnut on the lathe, have o finish it tonight, 17” x 6”.
I had some torn grain even with a very sharp gouge and shear scrape. This sometimes happens with walnut end grain and the ambrosia part of maples. If I can’t shear scrape it out I will soaks a little walnut oil on the area to soften the fibers and then shear scrape. Always get good results with this. If the wood is soft I’ll use some shellac but if it’s hard I use walnut oil.


Last edited:
That is one beautiful piece of wood!!Funny you mention this today, robo.
I worked on this quilted Big Leaf Maple bowl last evening, and it was absolutely the toughest piece of wood I've had on my lathe in a long time.....even though there have been other quilted BLM bowls in the past. On the exterior, since there are fine details, I wanted to keep from having to do any power sanding in order to preserve as much geometric integrity as possible. I was successful, but I did have to resort to 120gt starting grit by hand. I haven't had to go that coarse in years, but just gotta do what has to be done to get the results I require.
This just happens to be the most outstanding quilted BLM figure I've seen in a long long while, and probably had something to do with how difficult getting a clean cut prior to sanding it was. I was shear scraping with manually raised burrs in order to get the best possible surface prior to sanding.
=o=
View attachment 72893 View attachment 72894
Tom Gall
TOTW Team
I'm wiping the drool off my chin right now ..... gorgeous figure!This just happens to be the most outstanding quilted BLM figure I've seen in a long long while
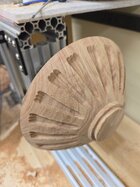
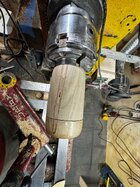
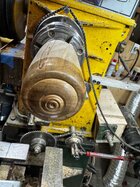
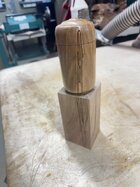
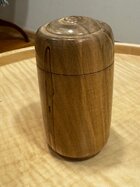
Working on a little box for a collaboration project organized by Marie Anderson. The idea is that two turners get paired up, and each sends the other a piece "from the shelf". Something in progress, or that has been sitting around waiting to be finished. When you get the in-progress piece from your partner, you finish turn, embellish, whatever, however you like, and then send it back for your partner to keep. There are quite a few folks participating (this is the second round--American Woodturner published an article written by Marie about the first round [attached if interested in reading]). I'm paired with a turner in California. She sent me hard Maple blank that had a tenon and a corner turned away, so pretty much a blank slate. I decided to make a small urchin box (a la Neil Turner, but with different embellishments). There was just barely enough material to work with, but it's going swimmingly. Here are some progress shots, the first showing my starting point.
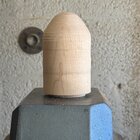
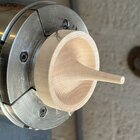
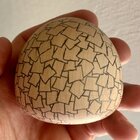
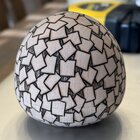
Onward!


Onward!
Reached my limit with attachment on the previous post, so the article is attached here instead.[attached if interested in reading]
Attachments
Here is the finished club challenge collaborative project tri-Goblet inspired by a recent posting in the photo Gallery by Dave Landers, https://www.aawforum.org/community/media/tri-corner-goblet.25143/ Finished this afternoon.
I did the tri-cornered goblet. My daughter did the stem. We both worked on the base designing and turning together.
Oak and African Black Wood. Finished with Watco Danish Oil.
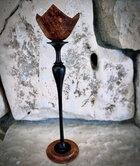
I did the tri-cornered goblet. My daughter did the stem. We both worked on the base designing and turning together.
Oak and African Black Wood. Finished with Watco Danish Oil.

Jay:
That looks pretty special. You did a great job on the gobblet and your daughter made a wonderful stem to go with the gobblet. Can you fill me in on a few of the details on how you turned the gobblet? The tri-cornered design makes it really special - what I'm trying to say I need a bit of detail so I can copy

 !
!
Cheers.
Barry W. Larson
Calgary, Alberta, Canada eh!
That looks pretty special. You did a great job on the gobblet and your daughter made a wonderful stem to go with the gobblet. Can you fill me in on a few of the details on how you turned the gobblet? The tri-cornered design makes it really special - what I'm trying to say I need a bit of detail so I can copy
Cheers.
Barry W. Larson
Calgary, Alberta, Canada eh!
Barry, Here is a google search for tri-cornered bowls:
There are a bunch of videos. Just go small with your cube and you have the makings of a small goblet.
My daughter likes Cindy Drozda finials so start with her for the stems.
I don't recommend Oak. I had a bunch of cut offs that were supposed to be practice pieces. I got lucky with the first piece and the grain was beautiful.
Barry, Here is a google search for tri-cornered bowls:
There are a bunch of videos. Just go small with your cube and you have the makings of a small goblet.
My daughter likes Cindy Drozda finials so start with her for the stems.
I don't recommend Oak. I had a bunch of cut offs that were supposed to be practice pieces. I got lucky with the first piece and the grain was beautiful.
Thanks Jay.
Barry W. Larson
Calgary, Alberta, Canada eh!
Here is the finished club challenge…
I did the tri-cornered goblet. My daughter did the stem. We both worked on the base designing and turning together.
It’s perfect!!
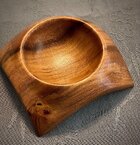
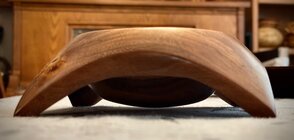
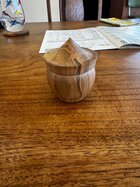
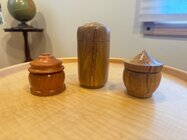
I figure I would start using up ‘all’ the odd bits around the shop to make a number of smaller items to have gift shop items ready for my first show (local Arts Alliance Gallery May 20th)… err, this might take a few years!!

