• April 2025 Turning Challenge: Turn an Egg! (click here for details)
  • Congratulations to Kelly Shaw winner of the March 2025 Turning Challenge (click here for details)
  • Congratulations to Ellen Starr for "Lotus Temple" being selected as Turning of the Week for 21 April, 2025 (click here for details)
  • Welcome new registering member. Your username must be your real First and Last name (for example: John Doe). "Screen names" and "handles" are not allowed and your registration will be deleted if you don't use your real name. Also, do not use all caps nor all lower case.

Vacuum chambers

Joined
Dec 19, 2021
Messages
62
Likes
23
Location
Irvona, PA
Website
originalrevolutions.com
Anyone using vacuum chambers to stabilize wood? I have wondered about this for some time but, never tried it as yet. I do have an old pressure cooker pot I could try this with but, I have a customer with some larger chunks of oak she would like made into bowls. The oak is punky on the outside and my proposed vacuum chamber is too small anyway. Can a steel drum be used a vacuum chamber? Or would it likely collapse in on itself? Just looking for answers before I talk to her about options. Also, the oak is wet about 25-30% moisture. Can it be stabilized as is or does it need to dry first?
Sorry if this is the wrong place for this question.
Thanks
 
Pressure cooker pot could work, but you'll need to modify the lid to remove the pressure valves and relief valve (and automatic latch on some) I made use of an old pressure cooker pot for the same purpose , and it holds 20 inches vacuum easily - I have seen folks make use of heavy barrels to do the same thing, so I'd say most any container you can seal airtight and draw a vacuum on would work , as long as you are able to pull the target vacuum and then some (say 10% to 15% more or so) without the sidewalls or lid flexing in (which could cause your resin to squeeze up and out the vacuum port and screw up your vacuum pump) - With an in-line shutoff you can pull vacuum and then shut off (and a vacuum gauge somewhere past it to monitor vacuum levels) to reduce the chance of pulling material into your vacuum pump (and also minimize the run time)
 
Pressure cooker pot could work, but you'll need to modify the lid to remove the pressure valves and relief valve (and automatic latch on some) I made use of an old pressure cooker pot for the same purpose , and it holds 20 inches vacuum easily - I have seen folks make use of heavy barrels to do the same thing, so I'd say most any container you can seal airtight and draw a vacuum on would work , as long as you are able to pull the target vacuum and then some (say 10% to 15% more or so) without the sidewalls or lid flexing in (which could cause your resin to squeeze up and out the vacuum port and screw up your vacuum pump) - With an in-line shutoff you can pull vacuum and then shut off (and a vacuum gauge somewhere past it to monitor vacuum levels) to reduce the chance of pulling material into your vacuum pump (and also minimize the run time)
I have been watching some videos where they are collapsing metal drums with vacuum. They do not show at how much vacuum the drums are collapsing. So, I still do not know if that is even possible.
 
There are 3 options to “stabilze” punky wood:

1. Vac chamber with cactus juice and very dry wood
2. Pressure pot with 2 part pourable epoxy
3. “Paint” a mixture onto the surface of a rough form

No experience with 1 or 2. I’ve had success with 3, so I haven’t pursued 1 or 2, both require capital that I just dont want to spend.

#3 probably takes more time. I’ve tried shellac, lacquer, and 2 part bar finish epoxy thinned ~1:1 with acetone. The epoxy worked best bar a significant margin. The downside is it needs to be done in a well ventilated space, preferably outdoors, with an organic vapor cartridge breathing system, which I had for spraying finishes (the acetone is extremely volatile).

I can give more details if interested.
 
Got to use Glass topped, Acrylic may implose, and the vacuum gage and connection as to be on the pot, never in the cover, it's the weakness if you have hole in the cover.
This is for the Vacuum pot, pressure pot is different.

 
I bought a 5 gallon BAECONG about a year ago. The prices have more than doubled since then. Works as expected. Yes, wood must be dry. With Cactus Juice you also have to bake after vacuum to cure. So, make sure you have an oven big enough, and don't use an oven you also use to cook your food.
 
Got to use Glass topped, Acrylic may implose, and the vacuum gage and connection as to be on the pot, never in the cover, it's the weakness if you have hole in the cover.
This is for the Vacuum pot, pressure pot is different.

I would never use glass on a vacuum chamber. Any little tiny nick on the side will cause a stress riser and instantly crack and implode into sharp shards. A hole in plastic will not make a weak point. Of course I would recommend polycarbonate instead of acrylic. There are no stress risers that can develop from a circle and they are can be used to stop a crack in many circumstances.
 
50 years of lab work with high vacuum systems. Most of them were made of glass; the ones with big flat surfaces used plastic, probably polycarbonate. Failure with either was extremely rare. If you're worried about implosion wrap the thing with some tape-- fiberglass embedded strapping tape is probably ideal, duct tape works fine, even masking tape will keep the pieces in place. Unlike with pressure the pieces won't go very far in a failure. Practically there's very little difference in the forces involved between a modest vacuum like you might use with a vacuum chuck and a "hard" vacuum-- you cannot exceed 14.696 psi at sea level.

With pressure vessels you really don't want to mess around with cobbled together solutions, get something designed for the purpose and for the pressures involved.

To the OP, trying to resin impregnate something the size of a large bowl blank is going to be a fraught and very expensive undertaking (cactus juice runs something like $75/gallon). Drying to bone dry without cracking before you start seems unlikely at best. I'd rough turn it and then do a surface application with something you brush on to stabilize the punkiness.
 
Denny, You might check with Charles at( conestoga works llc) . He makes a couple sizes of vacuum chambers but also sells a book authored by someone else that goes into great depth about drying wood in a vacuum chamber and how to build a hobby version. You have to have heat as well as vacuum to do it . From talking to Charles at the Swat show, boards are not a problem but bowl blanks are a problem or anything thick. He's a very knowledgeable guy.
 
A 5 gallon pressure pot base works great as a vacuum chamber - just make a flat lid with a rim seal and a q/r fitting for your vacuum pump hose. My vacuum top is 3 layers of scrap 3/4" ply glued together and some thin foam on the bottom for a seal, with a plexiglass view port in the center so I can see into the pot while drawing a vacuum - very important as it is easy to pull so many bubbles to the resin surface that it will bubble over the edge of your mold.

put your filled mold into the pot, draw max vacuum - wait till major bubbles stop as entrained air is removed (including inside the wood), release vacuum and top off mold if necessary - repeat a few times until no more big bubbles ~ 15 minutes total - then put on pressure top and leave pressurized over night.

using a vacuum to pull 100% of entrained air out of your resin encased project; then using a pressure pot to force resin back into voids that used to contain air results in some pretty amazing resin infusions - when I use scrap ply for a waste block I find resin in the center of the plys when I turn it out so penetration is pretty good

if you have a pressure pot & a vacuum pump I bet you have all you need in your scrap bin to give it a try

Erik, How are you pulling a vacuum using plywood which I would’ve thought is porous? Mind posting a pic of your lid top and bottom of your lid?
 
Karl
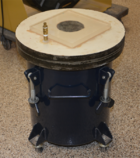
You are correct - you will pull air through the plywood end grain - I sealed edges & faces of the ply top with a coat of resin - here is the top on the pressure pot - no need to secure it, as soon as you hook up the pump air pressure seals down the top -
1677529332813.png
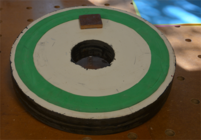
underside - uses hobby foam from wallmart - put wood baffle over vac connection because when removed hose in-rushing air would blow resin around the pot
1677529493885.png
 
Back
Top