• Beware of Counterfeit Woodturning Tools (click here for details)
  • Johnathan Silwones is starting a new AAW chapter, Southern Alleghenies Woodturners, in Johnstown, PA. (click here for details)
  • Congratulations to Jim Hills for "Journey II" being selected as Turning of the Week for May 6th, 2024 (click here for details)
  • Welcome new registering member. Your username must be your real First and Last name (for example: John Doe). "Screen names" and "handles" are not allowed and your registration will be deleted if you don't use your real name. Also, do not use all caps nor all lower case.

Making an Umbrella Swift as a birthday gift for my wife (shhh!)

Joined
Jul 18, 2018
Messages
1,076
Likes
1,793
Location
Baltimore, MD
202CA9BC-2CC6-43B4-9A4B-84600C4B7BF4.jpeg202CA9BC-2CC6-43B4-9A4B-84600C4B7BF4.jpegThis thread will document the process of making an umbrella swift which fiber artists (weavers, spinners, knitters, etc.) use to transition a skein of yarn to a ball of yarn which is less unwieldy for their final “making” process. My wife is a weaver and our daughter is a spinner and knitter, so this will be particularly useful, if I get all the nuances right. In a separate thread on the Woodturning Discussion Forum, I asked if anyone had plans or dimensions to share to help me get started. Several folks responded with pictures, and @Dave Bunge generously offered dimensions from his wife’s swift. That was enough information for me to use to get started a few days ago. So here goes…

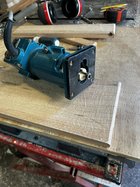
I imagine most of us keep the center slabs from sawing logs to remove the pith. I keep many of them anticipating small spindle work or short boards for flat work that can be made from these pieces, generally 15-18” long or shorter. In this case a piece of white oak wound up being perfect to get started making the 24 slats that form the umbrella portion of the swift. Here are a few pictures of my initial dressing of the board, jointing one edge and then cutting out three boards which I could run through my portable planer to make stock to take to the bandsaw for re-sawing. 1E923887-978C-4DA7-A8C0-6EDBE0B7B9A7.jpeg

EB42F428-EA8A-45E0-9726-17E937C72EDF.jpegEB42F428-EA8A-45E0-9726-17E937C72EDF.jpeg
 
Joined
Jul 18, 2018
Messages
1,076
Likes
1,793
Location
Baltimore, MD
(I’m on a learning curve for posting multiple images. Please bear with me!)
Moving to the bandsaw to take the boards down to a bit over 9/16”. The final slats will be 14 1/2” x 3/16” x 9/16”.
CAB6CA8F-B71C-4882-85B9-28F7F4218CFC.jpegCAB6CA8F-B71C-4882-85B9-28F7F4218CFC.jpeg0F2ECCF0-EF7A-4BE3-B8EC-A208F85CCA45.jpegCAB6CA8F-B71C-4882-85B9-28F7F4218CFC.jpeg0F2ECCF0-EF7A-4BE3-B8EC-A208F85CCA45.jpeg
 
Joined
Jul 18, 2018
Messages
1,076
Likes
1,793
Location
Baltimore, MD
So a bit out of order there, but you get the idea. I’ll post one picture per posting for the time being to try to keep things in order.
Routing the edges of the boards with a round over bit in a small trim router, prior to cutting out the slats on the bandsaw.
 

Attachments

  • 8233CDE0-51EA-4185-84A7-9579C3893BF7.jpeg
    8233CDE0-51EA-4185-84A7-9579C3893BF7.jpeg
    545 KB · Views: 5
Joined
Jul 18, 2018
Messages
1,076
Likes
1,793
Location
Baltimore, MD
I neglected to show, but for those who are not familiar with it, here’s an image of an umbrella swift taken from the web. Mine will look a bit different, but it’ll give you the idea. I should have posted this first. The special feature of the swift is that it opens and closes like an umbrella (duh!), and allows it to hold different size skeins without them becoming tangled messes. 39FD0C62-5B89-4D19-B026-9DADB9C1B495.jpeg
 
Joined
Jul 18, 2018
Messages
1,076
Likes
1,793
Location
Baltimore, MD
After the slats are cut to size and sanded, I had to make a simple fixture for the drill press to ensure that the holes were at identical locations. On twelve of the 24 slats, I needed to drill holes dead center in which rivets would go to make six pairs that are attached to the top and bottom hubs to create the scissoring action when the umbrella is opened and closed.
8ACB4B73-613B-4BC1-9D70-9F2744027C1F.jpeg
 
Joined
Jul 18, 2018
Messages
1,076
Likes
1,793
Location
Baltimore, MD
Then riveting the six pairs of slats with copper rivets and roves. This took me back to my junior high school metal shop class. BE77F8C1-2DBF-4E91-B9BB-32D8C6659548.jpeg
 
Joined
Jul 18, 2018
Messages
1,076
Likes
1,793
Location
Baltimore, MD
Finally I’m about to get to the lathe. But first, here are the six pairs of riveted slats and an additional 12 that will make up the outer ring.6CB8D691-FE67-4E0D-A9EA-3ED603D2B848.jpeg
 
Joined
Jul 18, 2018
Messages
1,076
Likes
1,793
Location
Baltimore, MD
Preparing the hub pieces. The lower one will be bored for the main vertical shaft. I’ve made it 1/2”, but can adjust it later if it is not big enough. The second hub has a smaller bore which will sit on a stepped down portion of the spindle at the top of the shaft.
 

Attachments

  • 3759D81F-8131-40AA-BF05-8F4A9391DE0D.jpeg
    3759D81F-8131-40AA-BF05-8F4A9391DE0D.jpeg
    635.9 KB · Views: 9
Joined
Jul 18, 2018
Messages
1,076
Likes
1,793
Location
Baltimore, MD
Once the hubs were turned, I made a fixture to allow the router to slide parallel to the lathe bed with no lateral movement. It will allow me to cut precise grooves in the hub. My lathe has an electronic indexing function but I’ve found that there is a bit of wiggle room (slop?) in each of the 48 index points, so I made a simple indexing wheel to mount behind the chuck, with lines scribed at 60° intervals. This gave me the ability to be sure I was getting the slots “dead on balls accurate” (as Lisa Vito said in My Cousin Vinnie). 5DF6FD1F-0EA3-4861-842A-D85E1A826CC6.jpeg
 
Joined
Jul 18, 2018
Messages
1,076
Likes
1,793
Location
Baltimore, MD
And here is the router above the jig. It is firmly held to the lathe bed with two large C clamps. I’m using an upcutting spiral bit which makes for a nice clean slot. 17267F58-FBC4-4D1D-B685-F6B4A9D31FA4.jpeg
 
Joined
Jul 18, 2018
Messages
1,076
Likes
1,793
Location
Baltimore, MD
Now to the center spindle on which the swift will rotate. I found after starting to turn a 20” long 3/4” square piece of white oak that there was enough flex to warrant using my shop-made steady rest. When I made the rest I used 4” rollerblade wheels. Problem: with the wheels as close together as they can get without touching, there is too much space between them to support a 9/16” round turning. I could have used just one wheel for support, or even just supported the piece with my hand wrapped around the work, but I saw an easy solution by remounting the wheel support arms so that the wheels are on three different planes. Not ideal, but it worked.
29FDDF00-EAAF-4EF7-BB58-62A4A4D45048.jpegF0F700E2-50C1-440A-9175-BE136BF50D53.jpeg
After rough turning the piece round but oversized, I used my parting tool and calipers to make reference marks every inch or two at just over my final diameter of 9/16”. It was then an easy matter to use the skew to turn down to this finished diameter.
 
Last edited:
Joined
Jul 18, 2018
Messages
1,076
Likes
1,793
Location
Baltimore, MD
And here’s the finished spindle. The small v groove near the right hand end marks the depth of the spindle that will be mounted into the clamping base which will allow the swift to be clamped to a table. The reduced diameter tenon at the left end is the top of the shaft and will provide a shoulder on which the upper hub will rotate. I’m imagining some kind of low friction washer will help prevent wear on the mating surfaces over time. 8ECCFC9E-3F30-4240-92EB-44ED8C9CF174.jpeg
 
Joined
Jul 18, 2018
Messages
1,076
Likes
1,793
Location
Baltimore, MD
With the spindle finished, I did a test fit of the top and bottom hubs. All good, so I installed the six pairs of riveted slats, attaching them to the spindles with cable ties. This seems to work well. 4AF3B547-673E-4F34-AB5F-1E5E36168C14.jpegAnd then progressed to tying on the remaining 12 slats that define the outer rim of the swift.
D8DA7501-E3F7-4626-9DCF-4AAE55D20ACC.jpeg
 
Last edited:
Joined
Jul 18, 2018
Messages
1,076
Likes
1,793
Location
Baltimore, MD
The “umbrella” mechanism seems to work smoothly, so on to the base that will hold the spindle and clamp to a table. I don’t have a tool to create a 1/2” internal thread, so my plan is to use a steel bolt and epoxy in a nut. We’ll see if that works and if it’s not too discordant with the rest of the assembly. I’m imagining making a wood knob to secure on the head of the bolt so the user will only be touching wood.
 
Joined
Nov 22, 2009
Messages
234
Likes
169
Location
Midland, MI
Impressive progress, it looks very familiar!

The one thing my wife disliked about the design is the base that clamps the swift on to the table. The throat is not very deep, so the screw engages near the edge of the table. If the edge of the table is curved or beveled or water fall, i.e. not square, the base doesn't clamp on securely. I had to clamp a square edged board on to the table top for her to attach the swift to.
1705535861391.png
So if you're still estimating dimensions from the Amazon pictures, I'd recommend making the throat deeper. Hers is only about 1/2" from the centerline of the screw to the back edge of the opening.
 
Joined
Jul 18, 2018
Messages
1,076
Likes
1,793
Location
Baltimore, MD
Impressive progress, it looks very familiar!

The one thing my wife disliked about the design is the base that clamps the swift on to the table. The throat is not very deep, so the screw engages near the edge of the table. If the edge of the table is curved or beveled or water fall, i.e. not square, the base doesn't clamp on securely. I had to clamp a square edged board on to the table top for her to attach the swift to.
View attachment 59431
So if you're still estimating dimensions from the Amazon pictures, I'd recommend making the throat deeper. Hers is only about 1/2" from the centerline of the screw to the back edge of the opening.
Thanks Dave! I’m not surprised that it looks familiar. I roughed out a base/clamping piece today and assuming it is not too cold to go to my shop tomorrow, I hope to make some progress. Your suggestion is noted and being acted upon. I’ll let you know when I post progress how far the screw is from the back of the opening. My recollection (it’s out in the shop) is about 1 1/2”.
 
Joined
Jul 18, 2018
Messages
1,076
Likes
1,793
Location
Baltimore, MD
Working on the base and clamp to mount the swift to a tabletop. Taking advice from @Dave Bunge (above) I was careful to mount the bolt 1 3/8” out from the inner edge of the opening, which will allow some leeway for tabletops with curved or otherwise irregular edges. I’m using a steel bolt and embedded a nut in the base, secured with epoxy. Similarly, I’ve made a knob of wood to attach to the bolt head. I scored both the nut and the bolt head with an angle grinder to ensure that the epoxy had an irregular surface to grab onto. 79291450-820B-4190-A3BB-500293C5F4D0.jpeg64527987-4CC7-4CCA-B439-FB48E0C5A404.jpeg
 
Joined
Jul 18, 2018
Messages
1,076
Likes
1,793
Location
Baltimore, MD
Thanks for the suggestion Gene. The piece is actually pretty stout. (It is hard maple.) I’m fairly confident it will stand up to the light stress it will receive. If I wind up being wrong down the road it won’t be difficult to make a replacement.
 
Joined
Dec 9, 2022
Messages
104
Likes
178
Location
Springfield, OH
Thanks for the suggestion Gene. The piece is actually pretty stout. (It is hard maple.) I’m fairly confident it will stand up to the light stress it will receive. If I wind up being wrong down the road it won’t be difficult to make a replacement.
Hope it works - the photo looked like soft pine. The hard maple should help
 
Joined
Jul 18, 2018
Messages
1,076
Likes
1,793
Location
Baltimore, MD
I’m in the home stretch. Just finished (except for finishing) the collar and thumb screw that will support the swift on the spindle. It’s made with a piece of ironwood, again with a nut imbedded in it with epoxy to accommodate the bolt. I’m hoping to glue a small disc of leather to the end of the bolt so it doesn’t mar the shaft. A232EA47-34C8-4B65-A9BC-68D3BD733B25.jpeg4FAD58C6-BC78-4881-BF00-4FA8A5ACED04.jpeg797D5179-0397-4A9C-B5F5-64FE50656BC3.jpeg
 
Joined
Jul 18, 2018
Messages
1,076
Likes
1,793
Location
Baltimore, MD
Last step will be to make some sort of cap or finial to fit over the top of the spindle. It is decorative, but also will keep the swift from accidentally being pushed off the spindle.
 
Joined
Jul 18, 2018
Messages
1,076
Likes
1,793
Location
Baltimore, MD
Once I was able to warm the shop up (started this morning at 18° F) I turned this little decorative cap for the swift. Now all that remains is final finishing. I’m planning on Danish Oil. I’ll post another picture of the swift in use, but that won’t be until a few days into February, once past my wife’s birthday. 4FA6ED9F-F647-4E6B-92E3-D31689AA4EBF.jpeg
 
Joined
Jul 18, 2018
Messages
1,076
Likes
1,793
Location
Baltimore, MD
Nice job Lou, I like the finial on top. Gives it a finished look.
Thanks Vincent! I’m happy with how it turned out. I’m trying to decide on the best way to attach it. It’s a friction fit, but not awfully tight. I want to leave the option open to remove it in the future if I have to make any repairs or changes. Perhaps hot melt glue? I’m open to suggestions.
 
Joined
Feb 28, 2021
Messages
1,238
Likes
1,097
Location
Roulette, PA
Website
www.reallyruralwoodworks.com
Thanks Vincent! I’m happy with how it turned out. I’m trying to decide on the best way to attach it. It’s a friction fit, but not awfully tight. I want to leave the option open to remove it in the future if I have to make any repairs or changes. Perhaps hot melt glue? I’m open to suggestions.
If I recall, it's 1/2" diameter? Perhaps a 1/2-16 tap & die might thread it for ya? Or, you can get one of those wood to metal anchor bolts - one end threaded for standard SAE coarse thread, other end in wood screw threads... (or make one if you have a suitable threading die) ... Or get a couple rare earth magnets and glue magnet in to the cap and other magnet into the rod?
 
Joined
Jul 18, 2018
Messages
1,076
Likes
1,793
Location
Baltimore, MD
If I recall, it's 1/2" diameter? Perhaps a 1/2-16 tap & die might thread it for ya? Or, you can get one of those wood to metal anchor bolts - one end threaded for standard SAE coarse thread, other end in wood screw threads... (or make one if you have a suitable threading die) ... Or get a couple rare earth magnets and glue magnet in to the cap and other magnet into the rod?
Brian, too late to tap it, at least without filling the hole and redrilling smaller, but your other ideas are great! I really like the magnet idea. Pretty elegant! I’ll do it tomorrow! Thanks!!
 
Back
Top