Well, thanks a lot folks. Now I burr envy. And possibly kangaroo envy. I can't look at my burrs straight in the eye now and have added the veritas burnisher to my Christmas list.
-
December 2025 Turning Challenge: Single Tree! (click here for details) -
Congratulations to Bob Henrickson, People's Choice in the November 2025 Turning Challenge (click here for details) -
Congratulations to Steven Gordon for "Dropped Ice Cream Cone" being selected as Turning of the Week for December 8, 2025 (click here for details) -
Welcome new registering member. Your username must be your real First and Last name (for example: John Doe). "Screen names" and "handles" are not allowed and your registration will be deleted if you don't use your real name. Also, do not use all caps nor all lower case.
You are using an out of date browser. It may not display this or other websites correctly.
You should upgrade or use an alternative browser.
You should upgrade or use an alternative browser.
Gouges - To Deburr or Not to Deburr, that IS the Question!
- Thread starter Jon Rista
- Start date
"Burr", the non-productive waste metal left on an edge after a bevel grinding process (this could be on a bench chisel, plane iron, meat knife, etc.) You can feel this ragged surface with your finger. It's deformed metal that is not completely ground off yet, or (possibly, as the internet once told me) sparks that travel back around and seize themselves to the tool surface. Either way, it's junk.
I might be misunderstanding you, but the burr is what does the cutting on many edges. I saw a guy from Montana Knife Company on a podcast talking about sharpening knives. He said that the very fine burr created by sharpening is what actually does the cutting. You can't feel the burr on a knife, but it's there. His words (paraphrased) not mine.
If someone missed it before, this picture shows a few of the curved hand scrapers I can't be without. I rough shape the curved card scrapers on a belt or disk sander, final shape and preliminary sharpening with a 600 grit CBN, then go through a few steps to prepare for and create the burnished burr. Note: while some recommend creating the curve edges with a grinder, in my experience a belt or disk sander creates MUCH less heat.
View attachment 69366
The two at the upper left are 1/8" thick hardened steel StewMac scrapers, often used by luthiers. These are sharpened in an entirely different way, used without any kind of a burr. The depression machined in the middle makes them very easy to grip.
StewMac Ultimate Scraper - StewMac
The best tool for smoothing and shaping archtops, and a great all-around scraper.www.stewmac.com
If you haven't tried card scrapers like this, you may be quite pleased. Just say "no" to power sanding! Here is one in use on one of my pieces. After scraping these curves smooth, the wood usually doesn't need sandpaper coarser then 400 or maybe 320. (This sanding is done by hand - no power sanding.)
I bought a set of these based on a previous post of yours. I have yet to try them out. Soon.
Here's the link to Lost Art Press/Crucible Tool, maker of that card scraper. All the tools Crucible makes are USA-built. At the bottom is Chris Schwarz's (company owner) video showing his scraper sharpening method, and his thoughts on his scraper profile. He admits, you should shape them to fit your purpose. There certainly are a hundred different ways to sharpen them.I threatened to report back about the Crucible hand scrapers I linked to earlier.
Gouges - To Deburr or Not to Deburr, that IS the Question!
I've been on a little journey to clean up and make usable an oldish rusted(ish) out hand plane. First hand plane, and its been a fun little project getting this thing ready to go so far. In my journey, I've been learning how to sharpen the iron, and deburring is a key part of the process (Paul...www.aawforum.org
I ordered a couple to evaluate and they came today. The steel seems good and the starting curved shape is reasonable. First thing I did was reshape one end of one to the way I prefer. I sharpened and burnished and it scraped well.
Here are those I got; the end of the one in the front is what I rounded. I shaped it with a coarse disk/belt sander followed by a 600-grit CBN wheel. (I'll probably reshape shape one or both sides later.)
View attachment 69586
These seem to be made with quality steel. The "bluing" is not quite perfect. I'm sure they will be fine. I'll probably reshape the other and give it to a friend.
For hand scraper fans, the little block on the right, combined with the diamond hone, is an idea I got from, I think, a Fine Woodworking magazine article. The diamond hone fits crosswise in the bit slot on the top, held firmly in place with my finger - the scraper slides in the narrow slot. The combination makes a nice, smooth 90-deg edge without resorting to hand filing as usually recommended for cabinet scrapers.
The Arno burnisher is at the upper left in the photo. It easily put the needed burr on the scraper.
From what I've seen so far, I'd recommend them to woodturners for bowls, platter, and more. Having the sides pre-rounded sure saves a bunch of work compared to what I'm used to: starting with a rectangular cabinet scraper.
JKJ
Crucible Card Scraper
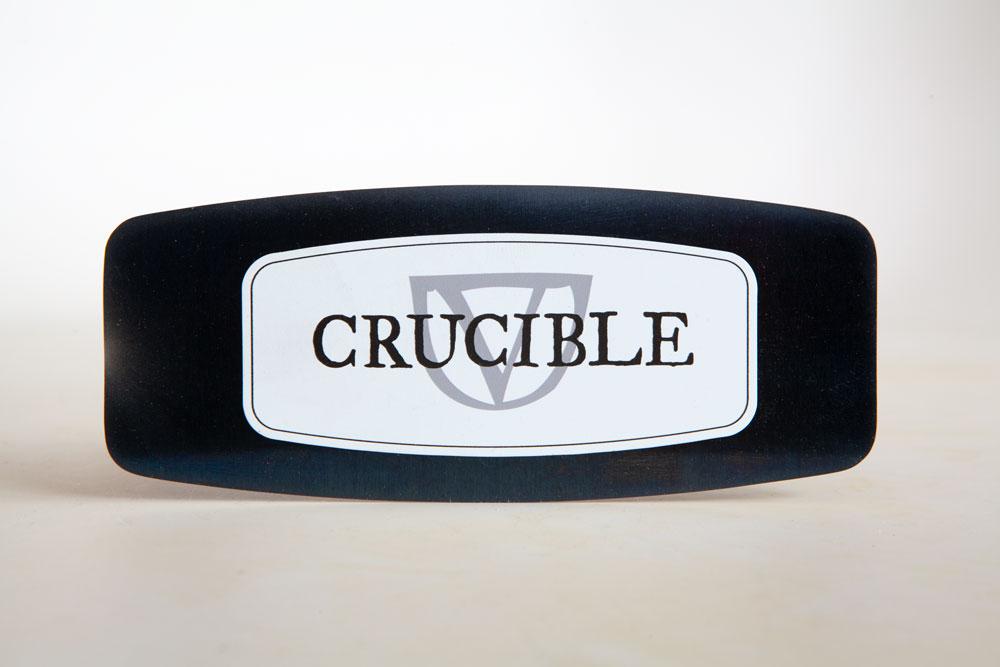
The gently curved Crucible card scraper is efficient and easy to use: 1095 spring steel hardened & tempered to a Rockwell (C) hardness of 48 to 51; the faces are polished & blued for rust-resistance; comes with a magnet, which acts as a heat sink while scraping, making the tool comfortable to...
 lostartpress.com
[Edit- whoops, I'm posting the same LAP scraper info that @John K Jordan posted on Nov 29. Well, call it a rerun...]
Along with being an author and publisher of books related to wood goodies, he is a furniture builder, mainly concentrating on chair construction nowadays. He is a former editor of Pop Woodworking, too. I own many of their books, all very good, worth your time to look at their collection.
Last edited:
I might be misunderstanding you, but the burr is what does the cutting on many edges. I saw a guy from Montana Knife Company on a podcast talking about sharpening knives. He said that the very fine burr created by sharpening is what actually does the cutting. You can't feel the burr on a knife, but it's there. His words (paraphrased) not mine.
I'm not knocking the Montana Knife guy but I'm inclined to disagree with that, based both on my observations and testing of knife edges after shrapening on my knife sharpening (belt based) machine. Skipping the final honing belt which removes any trace of a burr makes a difference, and not for the better.
We usually test by 1) how easily and cleanly the knife can be drawn through a consistent piece of paper held in the air between finger and thumb (paper is from a yellow sticky note pad - an uncalibrated subjective test but which has proven over the years to be relatively consistent), and 2), with the Edge On Up PT50 tester which measures the force needed to cut through a calibrated strand. They suggest testing with a razor blade. I like to compare my sharpened edges to a new #11 scalpel blade (which I buy 100 at a time - never know when you might need to do surgery on something on the farm).
A third test is seeing if it cuts arm hair as well as a razor blade, but that's also a subjective test best used after honing lathe tools at a demo. The edge under the microscope does show if there is a tiny burr or not.
However, the podcasting Montana Knife guy, like everyone, is certainly entitled to his opinion. But having worked on a variety of R&D projects, given the choice, I tend to respect opinions better when backed up something verifiable. Maybe one person's "sharp" is another person's "almost sharp."
Here's the sharpness tester I have, used by knife makers and industry all over.
If one really wants to experience sharp sharp sharp see the methods some chip carvers use.
The sharping system I got for my chip carving knives is amazing. I haven't tried but I suspect it would split hairs!
The sharpening kit I use has 4 abrasive strips, the finest 8000 grit, then the edge is stropped with a polishing compound.
When cutting deep chips and narrow curves you'll know immediately if it's sharp or not quite sharp.
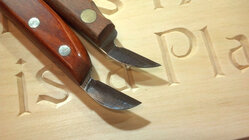
Microtomes for microscopy are another example of a knife that's not useful unless very sharp. They have to split plant and animal cells cleanly. The microtome knife I have had no detectable burr, even under a 400x objective lens.
JKJ
Here's the video cued up to that bit. He said, "fine serrated edge" not "burr". My bad.
View: https://youtu.be/SeSY2h6IoTs?t=5482
john lucas
AAW Forum Expert
a trick I learned to get knives really sharp is after you sharpen and strop drag the blade gently through wood with the blade vertical to remove any burr. then stop again.
No problem, that makes a difference. Thanks for running it down. Now I have something else to watch and learn from!Here's the video cued up to that bit. He said, "fine serrated edge" not "burr". My bad.
(But first gotta go feed the peacocks, llamas, and horses and change the cutoff solenoid on a diesel engine....)
No problem, that makes a difference. Thanks for running it down. Now I have something else to watch and learn from!
(But first gotta go feed the peacocks, llamas, and horses and change the cutoff solenoid on a diesel engine....)
The cost of freedom.
I strop my knives and skews. There are so many different compounds for doing this. My favorite one for my kitchen knives comes from Bernal Cutlery in San Francisco. It is about 1/4 inch thick cork with some "chromium oxide" compound on it. The burr on a kitchen knife is a weakness, which is why it is removed. The steel will not remove the burr. The steel is for straightening the teeth back up. So the edge of a knife is a razor saw, and with use, the teeth get out of line. The steel, either metal or ceramic, will put the teeth back in a line so the knife cuts better. Honing and stropping are two different actions. The honing still leaves a burr, and you are basically using a fine abrasive to refresh the edge. I have stones up to 30,000 grit, and diamond plates up to 8000. The 8000 grit stone still leaves a noticeable burr. At the 30,000 grit, it is difficult to feel, but it is still there.
robo hippy
robo hippy
I'm not knocking the Montana Knife guy but I'm inclined to disagree with that, based both on my observations and testing of knife edges after shrapening on my knife sharpening (belt based) machine. Skipping the final honing belt which removes any trace of a burr makes a difference, and not for the better.
We usually test by 1) how easily and cleanly the knife can be drawn through a consistent piece of paper held in the air between finger and thumb (paper is from a yellow sticky note pad - an uncalibrated subjective test but which has proven over the years to be relatively consistent), and 2), with the Edge On Up PT50 tester which measures the force needed to cut through a calibrated strand. They suggest testing with a razor blade. I like to compare my sharpened edges to a new #11 scalpel blade (which I buy 100 at a time - never know when you might need to do surgery on something on the farm).
A third test is seeing if it cuts arm hair as well as a razor blade, but that's also a subjective test best used after honing lathe tools at a demo. The edge under the microscope does show if there is a tiny burr or not.
However, the podcasting Montana Knife guy, like everyone, is certainly entitled to his opinion. But having worked on a variety of R&D projects, given the choice, I tend to respect opinions better when backed up something verifiable. Maybe one person's "sharp" is another person's "almost sharp."
There is no knife that I know of that benefits from a burr, but knives that are used to slice benefit from micro-serrations at the very cutting edge and honing and buffing that edge can reduce its performance as a slicing knife.
On the other hand, knives that are more typically used to chop do not benefit from micro-serrations and if they do have micro-serrations they will be more prone to premature edge failure. Knives used for chopping benefit from edges that have minimal or no serrations left on the cutting edge. Chisel and plane blades work in the same way. They can benefit from some very fine abrasive honing and buffing and I also do that on some of my turning tools, but for my best hand forged Japanese kitchen knives I finish the micro-bevel on the finest natural waterstone that I have (=/< #20,000). I don't hone or buff after that.
If your knife is used for both slicing and chopping you have to decide on where you want your advantage with that knife.
The only testing I do myself is the paper cutting test as described by JKJ above, but instead of yellow sticky note pad paper I use thin cigarette paper for that test. The edge has to be very sharp to cut those in that way...
There is no knife that I know of that benefits from a burr
And I just thought of this: by cutting food with the grinder burr left on a knife edge, how much steel does that add to your diet?
I’ll have to try the cigarette paper. Where do you get it? I used to know back in the ‘70s…
There is no knife that I know of that benefits from a burr, but knives that are used to slice benefit from micro-serrations at the very cutting edge and honing and buffing that edge can reduce its performance as a slicing knife.
The definition of a burr is the real problem. My definition is the thinnest leading edge of a blade which has been deflected from a straight line from the spine. Cooking knives we steel to push the burr back inline with the blade, or if it's thin enough, break it off leaving the remainder of the steel inline with the spine.
Generally 'cutting/slicing knives' can be sharp, but the burr is so extreme the edge is rounded over. Steeling the otherwise sharp knife brings it back to top performance in seconds.
For wood turning the attack angle is what matters. Scrapers with the burr rolled up are not slicing. I leave the burr pointing up on my scrapers.
For me, I absolutely notice better cutting if I knock off the burr from my gouges. I use a brass brush and then ghost the blade over the wheel again. I also strop my skew because I immediately notice cleaner cuts and longer time between sharpening touch up.
Ymmv, just my thoughts.
The definition of a burr is the real problem. My definition is the thinnest leading edge of a blade which has been deflected from a straight line from the spine. Cooking knives we steel to push the burr back inline with the blade, or if it's thin enough, break it off leaving the remainder of the steel inline with the spine.
The 'micro-serrations' on slicing knives that I'm referring to are not deflections from the edge, so according to your definitions these are neither a burr (metal deposit on or adjacent to the edge ) nor a raised burnished edge.
Testing using the CATRA edge retention tester has shown that going too fine with the abrasives on a slicing knife reduces the durability of its edge, with everything else being equal...
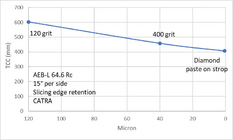

Testing the Edge Retention of 48 Knife Steels - Knife Steel Nerds
I tested the edge retention of 48 knife steels using the same knife design and sharpening. Which steels cut the longest? Which are the most balanced?
Cooking knives we steel to push the burr back inline with the blade, or if it's thin enough, break it off leaving the remainder of the steel inline with the spine...cooking knives we steel to push the burr back inline with the blade, or if it's thin enough, break it off leaving the remainder of the steel inline with the spine... Generally 'cutting/slicing knives' can be sharp, but the burr is so extreme the edge is rounded over. Steeling the otherwise sharp knife brings it back to top performance in seconds.
Steeling works that way with Western knives, which typically have a hardness that is less that HRc60. But, most Japanese knives with a HRc > 60 are too hard and brittle for steeling.
Last edited:
I’ll have to try the cigarette paper. Where do you get it? I used to know back in the ‘70s…
Like you, I haven't had a need to buy a packet of those for their original purpose since the early '70s, but still sold at tobacconist counters...
Yeah, I absolutely got the micro serrations, and agree. I think the challenge is still that the burr is good for high incident abrasive techniques, and not good for slicing/peeling cuts. I can also appreciate the lack of beliefs for steeling shallow and higher than 60 Rockwell edges... Like Japanese blades, but then again that's what ceramic whet stones are for... Which I would not bother using on a skew chisel.
I’ll have to try the cigarette paper. Where do you get it? I used to know back in the ‘70s…
Probably any smoke shop will have those.
I did a test some years ago with my bowl gouge. The first is straight from grinder with 180 gr CBN. Second is honed on the inside. Third is honed on both inside and outside. As I always power sand I settled for only honing inside.
Lennart
For me that is the crux of this question... what return on any additional effort with honing off burrs, etc., is each of us satisfied with.
I have also done my own extensive testing with different grades of grinding wheel grit sizes, honing methods and compounds, and raising hook edges with a burnisher, and found, as others have, that all of these measures improve the durability and performance of an edge, however, for me, some of these additional measures are not worth the additional investment of my time and effort for the additional benefits they give. We all find our own point on that continuum where we are satisfied with the return on our time and effort to get the result we are satisfied with.
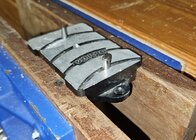
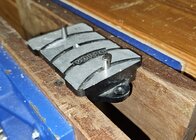
Talk about "Duh!" moments. I'm hacking up a little chunk of ash with a scraper, thinking it was time to dress it up with a fresh hook edge from the Veritas burnisher. Then I thought to myself, I should mount it to a block to set in the bed gap, like Bill did. I turn to my right to scrounge a lump of wood to make a block, only to find my bench vise staring at me 3' right of the lathe. Problem solved, no need to look for that block of wood now.I bought a Veritas Carbide rod and made the rest. It sits snuggly in the ways of my lathe for immediate use as needed. You can press a fairly large burr if needed with it mounted this way.
View attachment 69391
Underside.
View attachment 69392
Attachments
Last edited:
You don’t need to. The copies, like the Wen version, will do just as well when used with tormek jigs. Been using the tormek jigs on the Grizzly version for a dozen yrs.I don't think I could afford the Tormek system. Would LOVE one, but its just out of reach right now.
To build upon this visually, Tomislav Tomasic has a great piece of video where he uses his method of raising a hook edge on the scraper with a burnisher (he still calls it a burr...). His burnisher is hand-held (and I've not seen his method, I'll have to try it) vs jig mount like the Veritas. In the end, they both get you to the same spot. This u-toob link should get you within a few seconds of where he explains it (around the 25:30 mark)-"Burr", the non-productive waste metal left on an edge after a bevel grinding process (this could be on a bench chisel, plane iron, meat knife, etc.) You can feel this ragged surface with your finger. It's deformed metal that is not completely ground off yet, or (possibly, as the internet once told me) sparks that travel back around and seize themselves to the tool surface. Either way, it's junk.
"Hone", the process of removing said waste metal by alternately stroking an abrasive honing device flat across both bevels, which define the edge, until the waste is gone.
"Hook", sometimes mistakenly called a "burr edge", which is the result of using a hardened steel burnisher to deform (or "roll") an edge into a new micro bevel plane. You can feel this very uniform raised hook with your finger. Careful not to cut yourself.
When a scraper has no burnished hook on it, you are scraping (tearing) the wood fibers away from each other. When a scraper has the burnished hook at the line where the two bevels meet (the edge), you now have a new cutting edge and you are shearing (cutting) the fibers away from each other as the micro bevel rubs the wood and supports the cutting edge of the hook. A cabinetmaker's card scraper depends on this hook edge, resulting in surfaces that require no sandpaper.
Ground burr edge= sawdust.
Honed and burnished hook edge= whispy shavings that just float away.
Sure, you can "cut" with the grinding burr on a scraper, for a couple seconds until the wood breaks away that waste metal. Or, you can actually cut with the rolled/burnished hook edge for a much longer time (relatively speaking), and when that hook "dulls", or gets bent back down to the original edge shape, then your burnishing tool can quickly re-establish the hook with a few strokes.
None of this is new science, it's the way scrapers (in particlar, and skews just to remove the burr waste) have been properly sharpened... forever. Probably more typically done in the days of plain carbon steels vs. today's super steels. None of this is really necessary with today's super steel gouges. Most just take the gouge from the wheel to the wood, because that tool has an "adequately strong and sharp" edge for gouge cutting the wood, even if the burr waste is momentarily present. Scrapers and skews benefit from burr removal.
Burnishing historic carbon steel (and even M2 HSS) is quite easy for the Veritas burnisher, and others, to accomplish. But a burnisher shall be harder than the steel being burnished, or it can't work. If you have a scraper made from super hard space age steel, any burnishing tool will have limited to no effect on reshaping that edge into a hook.
(Ring goes the bell...) Okay, Class, there will be a quiz on Monday covering this material. Ha!
The shavings coming off the tool are really the same as how a card scraper works on flat board.
The overall video is about 40 minutes, all about scraper use (flat and shear scraping) and sharpening. It opens where he's talking about his new signature-style M42 scraper from Crown. Looks like a good tool. He does a nice job with the video, it's worth reviewing. (Turn the video speed up to 1.25 or 1.5 in the video setting function if you'd like.)
After experimenting with various methods, for years now I’ve always burnished a burr by hand: conventional turning scrapers, NRS, and (mostly curved) hand-held scrapers. For me they work well and hold up longer than either the grinder or honed burrs.His burnisher is hand-held (and I've not seen his method,
JKJ
John when you are burnishing, are you using a jig device like the Veritas plate burnisher, or holding a burnishing rod freehand like Tomislav demonstrates?After experimenting with various methods, for years now I’ve always burnished a burr by hand: conventional turning scrapers, NRS, and (mostly curved) hand-held scrapers. For me they work well and hold up longer than either the grinder or honed burrs.
JKJ
I usually go for my Veritas plate-held burnishing rod, but I have a couple different hand-held/free-hand burnishing rods where I've used it similarly to Tomislav.
As I mentioned, I burnish only by hand now, although years ago I used the Veritas burnisher. I don’t use it any more because I feel I have more control by hand. It’s easy to be too aggressive with the Veritas.
I have carbide rods of various diameters. What I use the most these days is the french-made Arno. (I like it so much I bought a spare in case the first one walked away some day.)
In a pinch, the round shaft of a HSS steel gouge or something works. The important thing is preparing the steel.
JKJ
I have carbide rods of various diameters. What I use the most these days is the french-made Arno. (I like it so much I bought a spare in case the first one walked away some day.)
In a pinch, the round shaft of a HSS steel gouge or something works. The important thing is preparing the steel.
JKJ
Arno, got it. Thanks. (There's another purchase to Lost Art Press!)
Speaking of Lost Art Press, if general woodworking books strike your fancy, they publish lots of the very best (60 or so titles). But here is an offer from them that will provide a lot of quality reading time to you this winter when not in your shop. Christopher Schwarz's goal is to eventually offer free pdf downloads to every book he's written, and several are are available now.

 blog.lostartpress.com
For those nervous about seeing the word "anarchist" is 3 of those titles, fear not, here is the explanation, and it has nothing to do with civil unrest and violence.
 blog.lostartpress.com
Speaking of Lost Art Press, if general woodworking books strike your fancy, they publish lots of the very best (60 or so titles). But here is an offer from them that will provide a lot of quality reading time to you this winter when not in your shop. Christopher Schwarz's goal is to eventually offer free pdf downloads to every book he's written, and several are are available now.

Download ‘Ingenious Mechanicks’ For Free – Today and Always - Lost Art Press
My book on Roman workbenches and early workholding is now a free download for everyone. You don’t have to register, or give up your email, or sign up for
 blog.lostartpress.com
For those nervous about seeing the word "anarchist" is 3 of those titles, fear not, here is the explanation, and it has nothing to do with civil unrest and violence.

I am an American Anarchist - Lost Art Press
And so she asks: “What does it mean? ‘The Anarchist’s Tool Chest?’”
 blog.lostartpress.com

