• December Turning Challenge: Tree! (click here for details)
  • Congratulations to José Esteban Cruz"Rocking Horse" being selected as Turning of the Week for December 16, 2024 (click here for details)
  • Welcome new registering member. Your username must be your real First and Last name (for example: John Doe). "Screen names" and "handles" are not allowed and your registration will be deleted if you don't use your real name. Also, do not use all caps nor all lower case.

Gouges - To Deburr or Not to Deburr, that IS the Question!

Joined
Jul 30, 2021
Messages
293
Likes
92
Location
Aurora, CO
I've been on a little journey to clean up and make usable an oldish rusted(ish) out hand plane. First hand plane, and its been a fun little project getting this thing ready to go so far. In my journey, I've been learning how to sharpen the iron, and deburring is a key part of the process (Paul Sellers has an excellent video where he even shows the entire burr coming off like a little wire when he starts stropping.)

This made me start thinking about how I sharpen my various gouges. I sharpen with CBN wheels, although my finest grit is 350, and I've been wanting to pick up a 600 grit for a finer edge. The notion of deburring the iron of a plane got me thinking about deburring my gouges. I greatly appreciate a very sharp gouge, but at the same time, I also find them slightly frustrating as they leave tiny scratches or grooves in the wood at first, before the edge is worn just a bit. Then they start cutting better, although not perfectly.

I'm curious what you guys think of deburring your gouges. Keep the burr? Remove the burr? Is it better for cutting during turning? I know that a burr is a fairly important aspect of scrapers, especially when cleaning out the inside of a bowl, and when the burr is gone the scraper will barely do the job at all. But with gouges, or maybe only with specific gouges (i.e. for a finishing cut?) is a burr preferred, or problematic?
 
Joined
Aug 14, 2007
Messages
5,781
Likes
3,090
Location
Eugene, OR
I do strop my skew chisels. The burr that is left from my sharpening doesn't come right off as soon as the tool meets the wood. It does make a big difference for me. For my bowl gouges and spindle gouges, I do not remove the burr. I have wondered about some attempted stropping of the gouge profiles for some woods that always seem to end up fuzzy no matter how fine of an edge you have, like big leaf maple. I haven't gotten around to it yet.

robo hippy
 

hockenbery

Forum MVP
Beta Tester
TOTW Team
Joined
Apr 27, 2004
Messages
9,052
Likes
5,583
Location
Lakeland, Florida
Website
www.hockenberywoodturning.com
I'm curious what you guys think of deburring your gouges.

I polish the flute of my bowl gouge with gouge slip when it looks like it needs it every 4 th or 5 th sharpening.
I sharpen on an 80 grit CBN. And use it right off the grinding wheel

Spindle gouge I polish the flute as above and sharpen on a 180 grit CBN. I use it off the grinding wheel

Like @robo hippy i hone and strop skews because they won’t cut well burr down and I use it bothe directions


From experiments others have posted, I dough you will see a better surface using the higher grit wheel.
If you start sanding with grit x using an 80 grit wheel you will most likely start sanding with the same grit x with the 600 grit wheel.

A better surface is achieved through feed rate, floating the bevel, holding the tool lightly, turning with the body, letting the wood come to the tool.
 
Last edited:
Joined
Feb 2, 2016
Messages
687
Likes
555
Location
Clinton, TN
I think it might depend on what you turn and how critical you are. Turn big bowls from green wood, won't matter much. Turn detailed things from fine-grained wood, the burr makes the edge less sharp, leaves a wire edge, (just look at it under a microscope), and can leave scratches on the wood until the grinder burr is worn away.

Me, I want razor, shaving-sharp edges. I use 600 grit for skews, scrapers, and bowl gouges, and always remove the burrs with the leather wheel on the Tormek and polish the edge without rounding it over. I'm even more particular about my spindle gouges: sharpen them on a 1200 grit Tormek wheel and still remove burrs and polish the edge, inside and out. It can make a world of difference in some cases.

For example, I show this at demos:
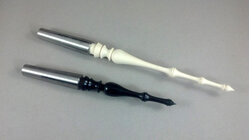
The white finial made from holly was left so smooth from the polished spindle gouge the wood needed NO sanding - it's straight off the tool. Not a single visible scratch.

I did sand the black ebony finial with 800 or 1000 grit sandpaper and rubbed a bit of Renaissance wax on the surface.

collet_finials_larger_flipped.jpg

(I use these to demonstrate an alternate holding method of holding certain spindles with 2MT collet chucks. These have several advantages over a scroll chuck for holding small work. And huge advantages over holding between centers.

Contrary to the advice of many, I even remove the grinder burrs on scrapers and negative rake scrapers, hone the edges with extra-fine diamond paddle hones, and turn a smooth burr with a burnisher. This works well and lasts a lot longer than a grinder burr.

That's my opinion and I'm sticking too it. 'Cause it works. For me.

JKJ
 
Joined
Oct 25, 2020
Messages
442
Likes
399
Location
Minneapolis, MN
Gouges- I go from the grinder to the wood. Skew chisels and scrapers get handwork with hones and such.
 
Joined
Oct 21, 2011
Messages
93
Likes
122
Location
Leicester, UK
I use a 180 CBN for all of my turning tools, I don’t hone or strop. I’ve tried and didn’t find enough advantage to make it worthwhile. I find 80 grit wheels rather coarse although they seem popular in the US. I know most of the production turners here in the UK and, as far as I know, none of us remove the burr from our tools. For NRS I use a HSS rod to burnish or roll the burr and make it stronger and longer lasting.

I don’t think there’s any question as to whether honing your tools makes them sharper, and I guess a tool can never be too sharp, the question is whether you need it any sharper to cut the wood cleanly?

It’s one of those things in turning that everyone will have an opinion on so you need to try out different methods for yourself to see what works for you.

Richard
 
Joined
Jul 30, 2021
Messages
293
Likes
92
Location
Aurora, CO
I don’t think there’s any question as to whether honing your tools makes them sharper, and I guess a tool can never be too sharp, the question is whether you need it any sharper to cut the wood cleanly?

Aye, this is indeed the question!

=====

John seems to be a lot like me. I'm a first-born perfectionist, so I am probably quibbling about details that don't matter to most people. The more time I spend here, though, the more I think John and I would be two peas in a pod if we were in the same workshop. ;)

I DO see the little scratches that the...burr, or maybe its just a less than ideal edge to my gouges...leaves in the wood. I don't think I ever use 80 grit sandpaper anymore. When I first started turning, I used 60, 80, 100, 120, 150, 180, 240, 320 and sometimes 400 and 600. These days, I don't even buy anything less than 180 grit, and I don't even use that all that often. I find that 220/240 is where I start at the low end. For smaller turned items like finials and the like, I am often starting at 320. When I first started turning (which was just 2020, FWIW, I'm a toddler really! :p) I had a HARD time getting all the sanding scratches out. I was starting at 60 grit! I slowly started with finer and finer grits, until I stopped having problems getting rid of scratches.

I then had problems with tearout, as the lower grits did seem to correct that a bit more "naturally"...but instead of going back to lower grits, I started trying to learn how to use scrapers. The scrapers, I think, do a better job cleaning up tearout, but I am now on a journey to avoid it as much as possible in the first place, which is a much taller order. Getting there, but... I've tried to progress to the point where my turnings off the gouge or scraper are as clean as I can get them, but, I'm never quite satisfied with them regardless. In any case, I don't often start sanding lower than 220. Maybe that's why I'm in pursuit of a cleaner cutting edge. But again, I'm a perfectionist, and maybe I'm seeing and worrying about things most people wouldn't even notice or glance at.
 
Joined
Jan 10, 2024
Messages
485
Likes
233
Location
Bournemouth, UK
I think it might depend on what you turn and how critical you are. Turn big bowls from green wood, won't matter much. Turn detailed things from fine-grained wood, the burr makes the edge less sharp, leaves a wire edge, (just look at it under a microscope), and can leave scratches on the wood until the grinder burr is worn away.

Me, I want razor, shaving-sharp edges. I use 600 grit for skews, scrapers, and bowl gouges, and always remove the burrs with the leather wheel on the Tormek and polish the edge without rounding it over. I'm even more particular about my spindle gouges: sharpen them on a 1200 grit Tormek wheel and still remove burrs and polish the edge, inside and out. It can make a world of difference in some cases.

For example, I show this at demos:
The white finial made from holly was left so smooth from the polished spindle gouge the wood needed NO sanding - it's straight off the tool. Not a single visible scratch.

I did sand the black ebony finial with 800 or 1000 grit sandpaper and rubbed a bit of Renaissance wax on the surface.

View attachment 69352

(I use these to demonstrate an alternate holding method of holding certain spindles with 2MT collet chucks. These have several advantages over a scroll chuck for holding small work. And huge advantages over holding between centers.

Contrary to the advice of many, I even remove the grinder burrs on scrapers and negative rake scrapers, hone the edges with extra-fine diamond paddle hones, and turn a smooth burr with a burnisher. This works well and lasts a lot longer than a grinder burr.

That's my opinion and I'm sticking too it. 'Cause it works. For me.

JKJ
I agree with you 100%.
 
Joined
Jan 10, 2024
Messages
485
Likes
233
Location
Bournemouth, UK
I use a 180 CBN for all of my turning tools, I don’t hone or strop. I’ve tried and didn’t find enough advantage to make it worthwhile. I find 80 grit wheels rather coarse although they seem popular in the US. I know most of the production turners here in the UK and, as far as I know, none of us remove the burr from our tools. For NRS I use a HSS rod to burnish or roll the burr and make it stronger and longer lasting.

I don’t think there’s any question as to whether honing your tools makes them sharper, and I guess a tool can never be too sharp, the question is whether you need it any sharper to cut the wood cleanly?

It’s one of those things in turning that everyone will have an opinion on so you need to try out different methods for yourself to see what works for you.

Richard
I think a honed edge will require less pressure to cut the wood but I’m not sure it’s enough for some to notice it. Another point though is that if you’re sharpening on say a 600 grit wheel you’re removing less metal so the tool will last longer.

Many if not most get set in their ways and can be reluctant to try new ideas. Especially when it comes to something like sharpening. Why bother if you’re getting the results you expect?

I read about the Veritas Scraper Burnisher some time ago and read some reviews. Probably 80% said it was a waste of time. The other 20% said it was a game changer. I think the point that the 80% missed when they tried it was they were sharpening on too coarse a grit to get a decent result. I now sharpen my scrapers on an 800g belt before pressing the burr on with the carbide Burnisher.
Once again, sharper tool and less material removed. The burr can be pressed back on two or three more times as well before it needs to go back to the grinder.
 
Joined
Feb 2, 2016
Messages
687
Likes
555
Location
Clinton, TN
I read about the Veritas Scraper Burnisher some time ago and read some reviews. Probably 80% said it was a waste of time. The other 20% said it was a game changer. I think the point that the 80% missed when they tried it was they were sharpening on too coarse a grit to get a decent result. I now sharpen my scrapers on an 800g belt before pressing the burr on with the carbide Burnisher.

I've had the Veritas Burnisher for many years and haven't used it in almost as many. I found it worked well if, as you said, the tool was well sharpened and especially if the scraper was long and strong. I quit using that type of scraper of favor of more "delicate" and controllable options.

For all of my scrapers, including the NRS with my special grind, my many small detail scrapers, and the custom curved card hand scrapers I use instead of sandpaper on almost all face work, after using several burnishers I now use ONLY the French-made Arno burnisher. It's amazing, easier to put a good burr on a tool that most everything else.

It seems to be unavailable now on Amazon, but maybe it will come back or maybe it's available elsewhere:

I bought a spare one a couple of months ago from since I would REALLY hate to be without it.

I think I mentioned I sharpen all scrapers on a 600 grit CBN wheel then remove the grinder burr before burnishing.

JKJ
 
Joined
Jan 22, 2009
Messages
487
Likes
817
Location
Crossville, TN
I sharpen gouges on a 600grit CBN, and scrapers (including neg rake) on my 180grit CBN. I use the tools right off of the grinder. Sometimes if I’m concerned about the burr on a fine detail I stick the sharp end into a nearby 2x4 to break the burr off before using, not often though other than the skew. I suspect I might get a slightly better edge with honing etc but not sure if it would result in a better cut (see @john lucas recent posts) and probably most importantly I’m lazy and impatient :)
 
Joined
Feb 3, 2010
Messages
503
Likes
597
Location
Adelaide Hills, Australia
I polish the flute of my bowl gouge with gouge slip when it looks like it needs it every 4th or 5th sharpening.

I find that polishing the flutes on my gouges delivers the best return on effort and time. As the edge is formed where two surfaces come together that edge will only ever be as 'sharp' as the the roughest surface of the two. Little value in taking a bevel down to a very fine grit if the flute retains coarse milling/grinding tracks.

On gouges flutes that comes with deep milling/grinding tracks I start with whatever grinding method/medium will be fastest to eliminate those, which normally means starting with diamond or CBN points/burrs in a rotary tool like a Dremel. New sintered diamond points are the most aggressive followed by resin bonded CBN points to leave a smoother surface. I only bother going in from the gouge tip as far as the points will reach because CBN wheels remove so little metal from the bevel each time the edge is refreshed that depth is going to be adequate for a very great number of re-sharpenings.

As the diamond or CBN points still leave their own grinding tracks across the flute these then need to be refined with whatever you have available using longitudinal strokes along the flute. We all have fine grit sanding paper that can be wrapped around a stick that has been shaped to fit the flute profile that can be used for that. I also happen to have a profiled #600 diamond hone that works in larger gouges...

D-steel profile - end view.jpg

I then take the finish down to a polish on profiled hard hones....

20230409_115050.jpg

20240122_173257.jpg

I rarely have to go back and go through that initial process again as my maintenance routine from there extends the fine surface as I'm polishing the end of the flute, which, like hokenbery, I do every 4 to 5 re-sharpening. For polishing the flute I use power strops/buffs. To maintain the level of polish that I prefer I use green
chromium oxide on a rag wheel for HSS. It only requires 5 secs (no more) each time with a narrow 8" rag wheel. A 6" rag wheel on a 6" grinder works equally as well.

I'm more about the longevity of a sharp edge than the surface it leaves.

For some purposes I also use the rag wheel to remove/refresh the burr on scrapers... 1 sec on burr side followed by 3 secs on bevel side.


.
 
Last edited:
Joined
Oct 25, 2020
Messages
442
Likes
399
Location
Minneapolis, MN
"Burr", the non-productive waste metal left on an edge after a bevel grinding process (this could be on a bench chisel, plane iron, meat knife, etc.) You can feel this ragged surface with your finger. It's deformed metal that is not completely ground off yet, or (possibly, as the internet once told me) sparks that travel back around and seize themselves to the tool surface. Either way, it's junk.

"Hone", the process of removing said waste metal by alternately stroking an abrasive honing device flat across both bevels, which define the edge, until the waste is gone.

"Hook", sometimes mistakenly called a "burr edge", which is the result of using a hardened steel burnisher to deform (or "roll") an edge into a new micro bevel plane. You can feel this very uniform raised hook with your finger. Careful not to cut yourself.

When a scraper has no burnished hook on it, you are scraping (tearing) the wood fibers away from each other. When a scraper has the burnished hook at the line where the two bevels meet (the edge), you now have a new cutting edge and you are shearing (cutting) the fibers away from each other as the micro bevel rubs the wood and supports the cutting edge of the hook. A cabinetmaker's card scraper depends on this hook edge, resulting in surfaces that require no sandpaper.

Ground burr edge= sawdust.
Honed and burnished hook edge= whispy shavings that just float away.

Sure, you can "cut" with the grinding burr on a scraper, for a couple seconds until the wood breaks away that waste metal. Or, you can actually cut with the rolled/burnished hook edge for a much longer time (relatively speaking), and when that hook "dulls", or gets bent back down to the original edge shape, then your burnishing tool can quickly re-establish the hook with a few strokes.

None of this is new science, it's the way scrapers (in particlar, and skews just to remove the burr waste) have been properly sharpened... forever. Probably more typically done in the days of plain carbon steels vs. today's super steels. None of this is really necessary with today's super steel gouges. Most just take the gouge from the wheel to the wood, because that tool has an "adequately strong and sharp" edge for gouge cutting the wood, even if the burr waste is momentarily present. Scrapers and skews benefit from burr removal.

Burnishing historic carbon steel (and even M2 HSS) is quite easy for the Veritas burnisher, and others, to accomplish. But a burnisher shall be harder than the steel being burnished, or it can't work. If you have a scraper made from super hard space age steel, any burnishing tool will have limited to no effect on reshaping that edge into a hook.

(Ring goes the bell...) Okay, Class, there will be a quiz on Monday covering this material. Ha!
 
Last edited:
Joined
Feb 3, 2010
Messages
503
Likes
597
Location
Adelaide Hills, Australia
I think it might depend on what you turn and how critical you are. Turn big bowls from green wood, won't matter much. Turn detailed things from fine-grained wood, the burr makes the edge less sharp, leaves a wire edge, (just look at it under a microscope), and can leave scratches on the wood until the grinder burr is worn away.

JKJ

Agreed, a cheap 10X magnification loupe will tell you a lot more about a tool edge that your fingers can. Mobile phone cameras now also have magnifications on them that are useful for this as are economy USB digital microscopes.

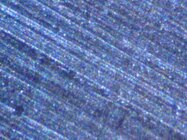
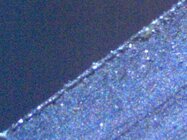
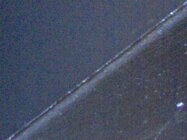
Here are some images all at X200 mag of a scraper edge...

Scraper - 200 X - before polishing.jpg
Upper surface of scraper
before polishing

Scraper - 200 X - polished to #12000 - before burr.jpg
Upper surface of scraper
after polishing &
no burr

Scraper - 200 X - 45 micron diamond hone - burr.jpg
Burr raised with 45 micron
diamond plate

Scraper - 200 X -  burnisher raised hook.jpg
Burr removed and
burnished edge
raised
You find your own sweet spot with the trade-off between the effort and time required and the results you are satisfied with. If I can't see any unwanted surface finish at arms length then I'm satisfied with that, as have been my gallery customers over many decades. Form and figure, if there is any of that, always wins out over faultless finish for me. I'm working with wood and not polished silver... ;)
 
Joined
Feb 3, 2010
Messages
503
Likes
597
Location
Adelaide Hills, Australia
When a scraper has the burnished hook at the line where the two bevels meet (the edge), you now have a new cutting edge and you are shearing (cutting) the fibers away from each other as the micro bevel rubs the wood and supports the cutting edge of the hook.

Steve

Well put!

This 'cutting' action with the micro bevel rubbing has not always been understood.

I've talked about it for many years but because it is happening at the micro level it has seemingly been met with non-comprehension... :confused:
 
Joined
Feb 2, 2016
Messages
687
Likes
555
Location
Clinton, TN
For all of my scrapers, including the NRS with my special grind, my many small detail scrapers, and the custom curved card hand scrapers I use instead of sandpaper on almost all face work, after using several burnishers I now use ONLY the French-made Arno burnisher. It's amazing, easier to put a good burr on a tool that most everything else.

The Arno burnisher:
burnisher-arno.jpg
I looked around a bit and found this. (I've bought books from Lost Art Press before - good folks.)
Just read their write-up on the Arno!

One thing I'd like to clarify: When they write "The pointed rod is used when the round rod won’t turn a hook because of the hardness of the steel. The pointed rod focuses your downward pressure on a single point and can turn a hook on the hardest scrapers." The "pointed" rod is not a sharp edge but a very small and smooth radius. I generally use that side for NRS and other scrapers I've ground from Thompson steel.

And this is one of the best descriptions I've seen on how to prepare a hand/card scraper. From my experience, this type of scraper is a genuine game-changer in smoothing bowls, platters, etc. The little hump or depression defect in middle that makes all too many turnings look bad? Never again with a few strokes from a gently curved hand scraper!
I sharpen somewhat like they describe but use use a shortcut.

And anyone interested in a shortcut to perfect surfaces might read this:

I like what they wrote : "Card scrapers are usually sold as rectangles or squares. What has been lost to time is that the woodworker is supposed to shape the tool to his or her needs" I've been shaping scrapers much like this for years but never saw their Crucible scraper until just now. I do like to curve the ends a little more than they do to better work in on both curves and the bottom inside of bowls and such. I just ordered a couple of theirs to experiment with. I'll report back.

If someone missed it before, this picture shows a few of the curved hand scrapers I can't be without. I rough shape the curved card scrapers on a belt or disk sander, final shape and preliminary sharpening with a 600 grit CBN, then go through a few steps to prepare for and create the burnished burr. Note: while some recommend creating the curve edges with a grinder, in my experience a belt or disk sander creates MUCH less heat.

scrapers_favorite_IMG_7870.jpg

The two at the upper left are 1/8" thick hardened steel StewMac scrapers, often used by luthiers. These are sharpened in an entirely different way, used without any kind of a burr. The depression machined in the middle makes them very easy to grip.

If you haven't tried card scrapers like this, you may be quite pleased. Just say "no" to power sanding! Here is one in use on one of my pieces. After scraping these curves smooth, the wood usually doesn't need sandpaper coarser then 400 or maybe 320. (This sanding is done by hand - no power sanding.)

scraper-shavings-IMG_7864.jpg _scrapers_IMG_7818.jpg

Sorry, I've been on my hand scraper soapbox for a long time! It's incredible how easy it makes smoothing some surfaces.

JKJ
 
Joined
Feb 2, 2016
Messages
687
Likes
555
Location
Clinton, TN
Agreed, a cheap 10X magnification loupe will tell you a lot more about a tool edge that your fingers can. Mobile phone cameras now also have magnifications on them that are useful for this as are economy USB digital microscopes.
It was eye-opening to see the difference between a ground and honed edge. After that, I never failed to hone/polish.

For something better than the eye, how about a sharpness measuring device? I bought one of these a few years back. It measures the force needed to cut through calibrated strands to put a number on the sharpness. I have a knife sharpening machine and the difference between a knife that "feels" sharp and one that is professionally sharpened is distinctive. Might be useful for someone who wanted to test sharpening methods with numbers instead of impressions.


And it is amazing how good inexpensive digital microscopes are now. I had one but gave it to a friend. (lately he's been using it to study how tiny ants fight!) But I use two optical microscopes in the shop. For tool edges, wood identification, and removing deep splinters in my fingers with a scalpel I use a low power true stereo microscope, has 15 and 30 power. For higher powers I have a lab/medical microscope, dual oculars but not stereo, with 40x, 100x, 400x, and 1000x. Not as handy as the low power one but still use it occasionally.

Here's a little photo "magic" for any who don't know: You can easily take a photo through any optical device that has an eyepiece, using either your phone or a PHD camera (push here dummy) with a small lens. Just zoom in a tiny bit and hold the lens steady where the eye would normally go.

This is some of my blood cells I put on a slide. The lab microscope was set on 400x. (To get the blood I took a small vial and asked the guy at the Bloodmobile to give me a little for research purposes - he had no problem with that!
blood_cells_2012-01-19_15-31-45_346_small.jpg

How about a picture of the sun with sun spots, through a telescope eyepiece , at the beginning of an eclipse. (Pro solar filter in place)
eclipse_IMG_6613.jpg

And for more for fun, here's a comparison of a photo I took with a little digital Canon camera to one I took with the camera held up to my small Leica roof-prism binoculars. The first picture of a moose (Glacier Nat Park) was with just the camera, zoomed in as far as it would go. The second picture was from exactly the same spot but taken through the binocular. I zoomed the camera in a bit to get rid of the vingetting and held it up to the binocular eyepiece. The biggest problem with this method is holding the camera steady! For the second picture I was on the ground using a log to steady the binocs! (Could be easy to make a little bracket)

moose_long.jpg moose_binoc.jpg

Besides binoculars, telescopes, and microscopes, I've used the method on my night vision scope and a rifle scopes. One year we got a reasonable photos of the Great Nebula in Orion and the Andromeda Galaxy with an iPhone. Good clean fun!

JKJ
 
Last edited:
Joined
Feb 3, 2010
Messages
503
Likes
597
Location
Adelaide Hills, Australia
I use two optical microscopes in the shop. For tool edges, wood identification, and removing deep splinters in my fingers with a scalpel I use a low power true stereo microscope, has 15 and 30 power. For higher powers I have a lab/medical microscope, dual oculars but not stereo, with 40x, 100x, 400x, and 1000x. Not as handy as the low power one but still use it occasionally.

like you JKJ, I also have an optical specimen microscope (a Zeiss that goes up to 63X), which is more useful because of its depth of field, and also one that is only useful for medical slides (an Olympus up to 400X).

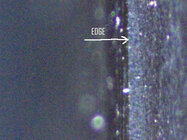
The challenge with any microscope with any degree of magnification is their depth of field and holding the target area in focus. Here is one with a handheld digital microscopes looking at a tool edge, edge on...

Scraper - 200 X  - burr honed off - edge view - arrow.JPG
Scraper - burr honed off - edge view at 200X
Width of view 1mm​

They say if you can see any light reflected off the edge when viewed straight on in this way it is not sharp. That one passes!

Here's a little photo "magic" for any who don't know: You can easily take a photo through any optical device that has an eyepiece, using either your phone or a PHD camera (push here dummy) with a small lens. Just zoom in a tiny bit and hold the lens steady where the eye would normally go.

JKJ

That is something I haven't mastered yet, John. I have had a go at it, but would need at least one more pair of hands to stop my shakes. The telescopic lens for my Canon has an inbuilt stabiliser and that has been invaluable, plus a mono-pod, for outdoor photography... :)

IMG_8740 - to Trondheim.JPG
IMG_8745.JPG
IMG_8751.JPG
 
Last edited:

Roger Wiegand

Beta Tester
Joined
Nov 27, 2018
Messages
846
Likes
1,007
Location
Wayland, MA
Website
www.carouselorgan.com
I hone most all of my tools 20-30 times with a diamond slipstone between trips to the grinder so seldom have a big burr to worry about. Works well and is faster and easier than using the grinder.
 
Joined
Oct 25, 2020
Messages
442
Likes
399
Location
Minneapolis, MN
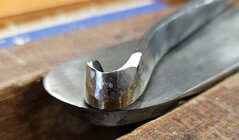
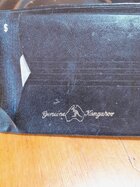
@Neil S and @John K Jordan I will see your fancy-schmancy microscope pics and raise you one poor-man's artificial (or rather no...) intelligence 1x macro-wannabee image of an almost proper burnished, raised hook scraper edge, through the use of my quasi-Hollywood imagination:
1000007927.jpg

Here is one of my 2 my homemade hook tools (made 20 years ago in an Alan Lacer class, but never [obviously] fully sharpened and put into service, must rectify that situation) resting on top of a no-name big ol' scraper. Dramatic? Indeed! But if you squint your eyes just right, tilt your head just a couple degrees, and think warm thoughts of puppies and kittens, you'll suddenly get the idea of what a proper burnished hook edge would be like on a scraper. I hope this helps without causing too much insult or injury to the medical and general scientific photography community.
 
Joined
Feb 2, 2016
Messages
687
Likes
555
Location
Clinton, TN
The telescopic lens for my Canon has an inbuilt stabiliser

Those stabilizing lenses are amazing! I use some on my Canon. But even more exciting to me is the stabilized Canon binoculars I got a few years back. They are a bit heavy but nothing short of amazing for those who haven’t tried them. Hand hold up to the eyes, push the stabilizing button, and image instantly looks like it’s locked on a tripod, an easily moveable one! Trying to read a small sign from a moving car, wildlife from a boat bobbing on the water, reading license plates of suspicious vehicles out on the road, birdwatching, is that llama 1000 ft away acting ok, and especially, looking at things in the sky - helicopters, comets, stars. Not cheap, but if something ever happened to mine I'd order a replacement today!

Another thing that impresses me these days is the image stabilization built in to camera drones. Even in gusty winds the video looks like it's taken from a tripod 50' in the air! The drone and the camera gimbol are working together. As a test, I shot this short clip on a windy day.

Look at the trees blowing in the wind. Don't look at the mess on the side of the shop!

View: https://youtu.be/XXtid4aVAbk


My videographer son uses some hand-held device to stabilizes even heavy video cameras.

JKJ
 
Joined
Jul 30, 2021
Messages
293
Likes
92
Location
Aurora, CO
I think a honed edge will require less pressure to cut the wood but I’m not sure it’s enough for some to notice it. Another point though is that if you’re sharpening on say a 600 grit wheel you’re removing less metal so the tool will last longer.

Many if not most get set in their ways and can be reluctant to try new ideas. Especially when it comes to something like sharpening. Why bother if you’re getting the results you expect?

I read about the Veritas Scraper Burnisher some time ago and read some reviews. Probably 80% said it was a waste of time. The other 20% said it was a game changer. I think the point that the 80% missed when they tried it was they were sharpening on too coarse a grit to get a decent result. I now sharpen my scrapers on an 800g belt before pressing the burr on with the carbide Burnisher.
Once again, sharper tool and less material removed. The burr can be pressed back on two or three more times as well before it needs to go back to the grinder.

I suspect this is why I haven't had the greatest results with the burnishign approach John described. I try it, but it doesn't work as well as I thought it would. But, I also only sharpen on a 350g CBN wheel, and I know my edge is not as sharp as it could be. I will have to try and pick up a 600g wheel. I don't think I could afford the Tormek system. Would LOVE one, but its just out of reach right now.
 
Joined
Jul 30, 2021
Messages
293
Likes
92
Location
Aurora, CO
"Burr", the non-productive waste metal left on an edge after a bevel grinding process (this could be on a bench chisel, plane iron, meat knife, etc.) You can feel this ragged surface with your finger. It's deformed metal that is not completely ground off yet, or (possibly, as the internet once told me) sparks that travel back around and seize themselves to the tool surface. Either way, it's junk.

"Hone", the process of removing said waste metal by alternately stroking an abrasive honing device flat across both bevels, which define the edge, until the waste is gone.

"Hook", sometimes mistakenly called a "burr edge", which is the result of using a hardened steel burnisher to deform (or "roll") an edge into a new micro bevel plane. You can feel this very uniform raised hook with your finger. Careful not to cut yourself.

When a scraper has no burnished hook on it, you are scraping (tearing) the wood fibers away from each other. When a scraper has the burnished hook at the line where the two bevels meet (the edge), you now have a new cutting edge and you are shearing (cutting) the fibers away from each other as the micro bevel rubs the wood and supports the cutting edge of the hook. A cabinetmaker's card scraper depends on this hook edge, resulting in surfaces that require no sandpaper.

Ground burr edge= sawdust.
Honed and burnished hook edge= whispy shavings that just float away.

Sure, you can "cut" with the grinding burr on a scraper, for a couple seconds until the wood breaks away that waste metal. Or, you can actually cut with the rolled/burnished hook edge for a much longer time (relatively speaking), and when that hook "dulls", or gets bent back down to the original edge shape, then your burnishing tool can quickly re-establish the hook with a few strokes.

None of this is new science, it's the way scrapers (in particlar, and skews just to remove the burr waste) have been properly sharpened... forever. Probably more typically done in the days of plain carbon steels vs. today's super steels. None of this is really necessary with today's super steel gouges. Most just take the gouge from the wheel to the wood, because that tool has an "adequately strong and sharp" edge for gouge cutting the wood, even if the burr waste is momentarily present. Scrapers and skews benefit from burr removal.

Burnishing historic carbon steel (and even M2 HSS) is quite easy for the Veritas burnisher, and others, to accomplish. But a burnisher shall be harder than the steel being burnished, or it can't work. If you have a scraper made from super hard space age steel, any burnishing tool will have limited to no effect on reshaping that edge into a hook.

(Ring goes the bell...) Okay, Class, there will be a quiz on Monday covering this material. Ha!

Thank you for the terminology. I'd heard "hook edge" before, but its so rarely used.

Most of my tools are M42 steel. Would that be what you consider "space age steel"?
 
Joined
Feb 3, 2010
Messages
503
Likes
597
Location
Adelaide Hills, Australia
@Neil S and @John K Jordan I will see your fancy-schmancy microscope pics and raise you one poor-man's artificial (or rather no...) intelligence 1x macro-wannabee image of an almost proper burnished, raised hook scraper edge, through the use of my quasi-Hollywood imagination:
View attachment 69381

Here is one of my 2 my homemade hook tools (made 20 years ago in an Alan Lacer class, but never [obviously] fully sharpened and put into service, must rectify that situation) resting on top of a no-name big ol' scraper. Dramatic? Indeed! But if you squint your eyes just right, tilt your head just a couple degrees, and think warm thoughts of puppies and kittens, you'll suddenly get the idea of what a proper burnished hook edge would be like on a scraper. I hope this helps without causing too much insult or injury to the medical and general scientific photography community.

...LOL there, Steve

And, you have illustrated the concept very well there indeed!
 
Joined
Oct 25, 2020
Messages
442
Likes
399
Location
Minneapolis, MN
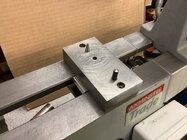
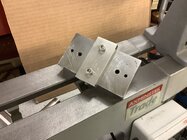
Bill's Veritas mount is brilliant. I have the entire Veritas plate. I'm going to mount it onto some wood and key it into the bed gap snugly, where it can live until I need to scoot it out of the way.
 
Joined
Feb 2, 2016
Messages
687
Likes
555
Location
Clinton, TN
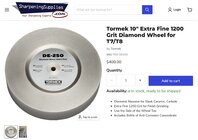
I wonder why they don’t use CBN?

Diamond will cut better than CBN, and at the low Tormek speeds, doesn’t degrade when grinding steel containing carbon.

I’ve used a 1200 grit CBN wheel on one Tormek for years. Ken from Woodturners Wonders ordered it for me and I had to wait a few weeks. At the time he told me only one other person had wanted such a fine grit, apparently to test it for sharpening scalpels. I had a 600 grit wheel on it for a while but like the 1200 better for my spindle gouges. (These wheels are used without water).

I ordered the wheel with square edges and about 1” of flat grit down each side.

I have a spare Tormek gathering dust and still have the 600 grit wheel. I’m torn between installing that, going back to the water wheel, trying a diamond wheel, trading the thing for something, or let it accumulate more dust.

BTW, diamond is great for ceramic. I’ve used diamond plates to sharpen ceramic alpaca shears although they said it couldn’t be done. Never tried sharpening carbide although a friend touches up carbide bits for his metal lathes with an 8” CBN wheel.

JKJ
 
Last edited:
Joined
Dec 9, 2018
Messages
61
Likes
63
Location
Ottawa, Ontario
Bill Alston's idea of mounting a burnisher plate is so clever that the Veritas folks would be crazy not to incorporate it for their burnisher plate. I have the Vertias burnisher plate but don't use if much because it is not at hand. I am heading out to my shop now, to do as Steve Tiedman suggested: mount the burnisher plate on a board that is keyed to the ways in the fashion of Bill's plate.
 
Joined
Jan 10, 2024
Messages
485
Likes
233
Location
Bournemouth, UK
I’m glad the idea has been of interest. As I say the Burnisher sits there ready for use. I’ve found so far that the hook can be refreshed several times before it needs to go back to the grinder.
 
Joined
Feb 2, 2016
Messages
687
Likes
555
Location
Clinton, TN
Bill Alston's idea of mounting a burnisher plate is so clever that the Veritas folks would be crazy not to incorporate it for their burnisher plate.

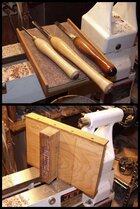
That different lathes have different gap widths might prevent them from making a quick change.

For example, I make these little tool trays for my lathes. For the two lathes in my shop, I have to use different sized wood blocks:

tool_tray.jpg

When I've done a demo where the lathe is unknown, I would take both sizes and hope one would fit. I guess I should break down and design one with an adjustable width block.

Fortunately, it would be trivial to add my wooden block method to the burnisher.

JKJ
 
Joined
Aug 14, 2007
Messages
5,781
Likes
3,090
Location
Eugene, OR
There are a couple of videos on You Tube where people resharpen the ceramic knives. It can be done, but it is not simple. While I have not attempted it, one guy does his on a Tormek with the standard wheels (ISharpen). His favorite strop is kangaroo tail with no compounds on it. I am still trying to find some.... The other, Outdoors55 it takes him a couple of tries. He does like his micro photography.

robo hippy
 
Last edited:
Joined
Feb 3, 2010
Messages
503
Likes
597
Location
Adelaide Hills, Australia
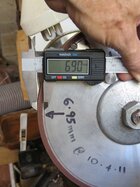
Diamond will cut better than CBN, and at the low Tormek speeds, doesn’t degrade when grinding steel containing carbon.

...

That is an important point to make, JKJ. The diamond needs to get to at least 400C (abt 800F) for the degradation to begin and that increases further above 700C (1300F), if I remember correctly. At those temperatures the steel will have changed colour to between dark grey and mid-red. They might get to those colours with heavy grinding in industry, but I don't get to see those colours when I'm re-sharpening HSS gouges with diamond. From my experience the degradation of diamond on HSS is overstated for our purposes...

Diamond remeasure Jan 2016.jpg

IMG_0432.JPG
5yrs later​

I think that most of that wheel diameter loss over 5rs of constant use is from the resin matrix breaking down and not the diamond 'melting' away. Anyway a moot point now as diamond wheels that are suitable for our use on bench grinders are hard to find and CBN wheels are more economical and a better option for HSS.

Never tried sharpening carbide although a friend touches up carbide bits for his metal lathes with an 8” CBN wheel.

JKJ

CBN will grind 66% as well as diamond, but if grinding a lot of TC it will knock the CBN wheel about.
 
Joined
Feb 3, 2010
Messages
503
Likes
597
Location
Adelaide Hills, Australia
. His favorite strop is kangaroo tail with no compounds on it. I am still trying to find some....

If I can catch one of these I'll send it to you...

IMG_3935.JPG
Taken through our
back window​
 
Joined
Aug 14, 2007
Messages
5,781
Likes
3,090
Location
Eugene, OR
Apparently there are all sorts of regulations about shipping roo out of Australia. Probably the same with live ones. I do have a source for roo leather over here, and they are supposed to be getting me some. Still waiting. Having things going through customs is a pain. When I used to ship things to Australia, some times they would get there fine, and some times after 6 months I would be contacted and asked where is it. So, I would send another one, and of course, both would arrive within a week of each other....

robo hippy
 
Joined
Jan 10, 2024
Messages
485
Likes
233
Location
Bournemouth, UK
My Ten Pin Bowling shoes are made of Kangaroo Leather. Not sure why the manufacturers made that choice but I’ve had them many years.
 
Joined
Aug 14, 2007
Messages
5,781
Likes
3,090
Location
Eugene, OR
Kangaroo leather is extremely tough. It can be made supple, and the tooling leather is very strong. I made custom footbags/Hacky Sacks for many years. The roo leather was the most durable, even better than goat which was pretty tough. Now, most "freestyle" bags are made from synthetics, same with the net bags with the vynals keeping colors better and stretch to a minimum.

robo hippy
 
Joined
Feb 3, 2010
Messages
503
Likes
597
Location
Adelaide Hills, Australia
My grandfather's stock whips were all made from roohide and my wallets are still made from from it. Wallets made from it do last a very long time, but then they don't carry much cash in them nowadays....

20241205_121430.jpg

There is no shortage of kangaroos that have to be culled here, but the tanning process is the key to the quality of the leather and that isn't done so much nowadays, which makes it less available and relatively expensive for premium quality. The time consuming handcraft required to make items from it also adds considerably to the cost...

 
Last edited:
Joined
Feb 2, 2016
Messages
687
Likes
555
Location
Clinton, TN
I like what they wrote : "Card scrapers are usually sold as rectangles or squares. What has been lost to time is that the woodworker is supposed to shape the tool to his or her needs" I've been shaping scrapers much like this for years but never saw their Crucible scraper until just now. I do like to curve the ends a little more than they do to better work in on both curves and the bottom inside of bowls and such. I just ordered a couple of theirs to experiment with. I'll report back.

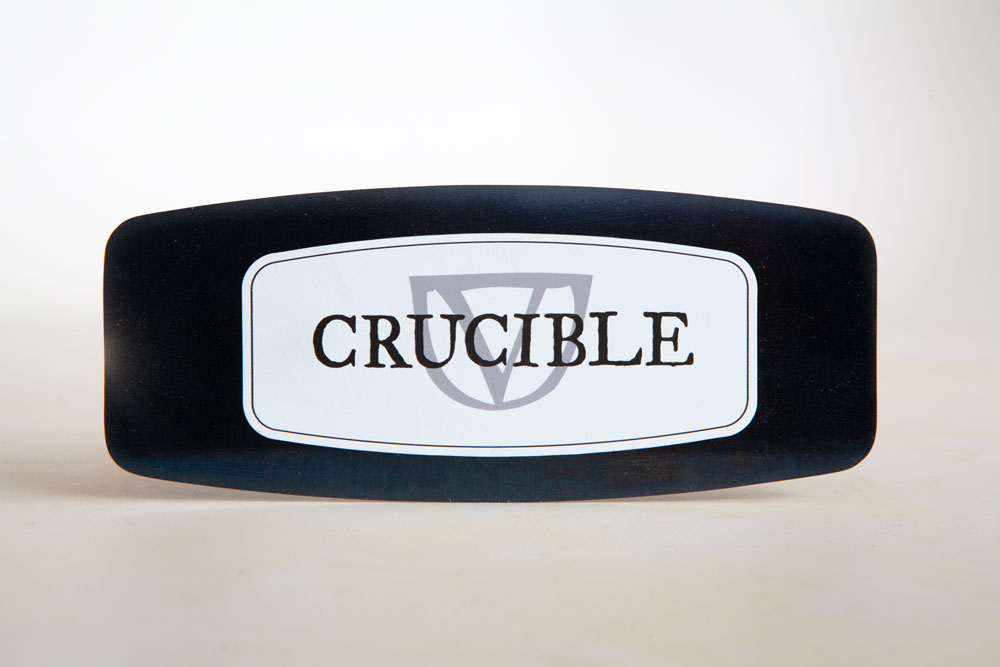
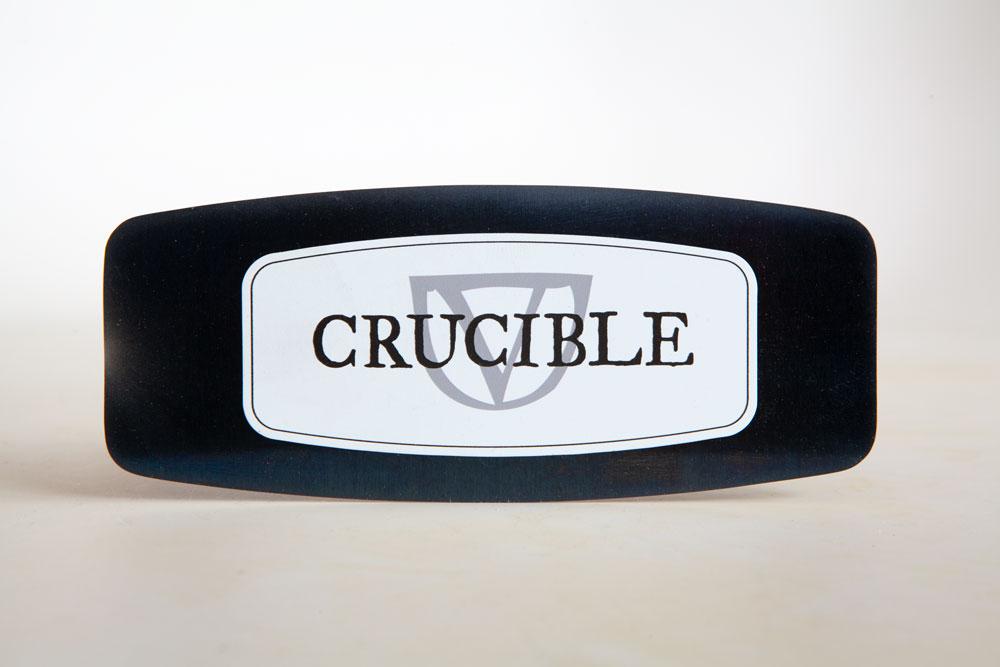
I threatened to report back about the Crucible hand scrapers I linked to earlier.

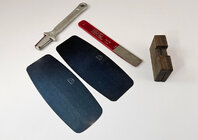
I ordered a couple to evaluate and they came today. The steel seems good and the starting curved shape is reasonable. First thing I did was reshape one end of one to the way I prefer. I sharpened and burnished and it scraped well.

Here are those I got; the end of the one in the front is what I rounded. I shaped it with a coarse disk/belt sander followed by a 600-grit CBN wheel. (I'll probably reshape shape one or both sides later.)
crucible_20241205_121139.jpg
These seem to be made with quality steel. The "bluing" is not quite perfect. I'm sure they will be fine. I'll probably reshape the other and give it to a friend.

For hand scraper fans, the little block on the right, combined with the diamond hone, is an idea I got from, I think, a Fine Woodworking magazine article. The diamond hone fits crosswise in the bit slot on the top, held firmly in place with my finger - the scraper slides in the narrow slot. The combination makes a nice, smooth 90-deg edge without resorting to hand filing as usually recommended for cabinet scrapers.

The Arno burnisher is at the upper left in the photo. It easily put the needed burr on the scraper.

From what I've seen so far, I'd recommend them to woodturners for bowls, platter, and more. Having the sides pre-rounded sure saves a bunch of work compared to what I'm used to: starting with a rectangular cabinet scraper.

JKJ
 
Back
Top