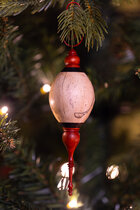
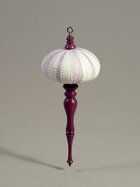
I like your introduction of a third wood regardless of the circumstance that lead to it, especially on the first one with a more subtle color difference. (Is that dogwood? Has a kind of pinkish cast, at least in the photo.) Edit: I read again and saw you said it's hard maple, not dogwood.
I do like the contrasts you get with three colors of wood. I've watched a lot of videos of people turning these, and thus far, I've not seen anyone do this. So, I kind of like that too...sets me apart a bit! Its not easy to do, though. I had to get clever with those pieces of wood. I don't like waste, so, instead of sticking a big block of wood in the chuck and wasting wood to turn down discs of the size I needed, I cut up various cutoffs to smaller squares. I then held those squares directly in the jaws of my chuck, turned part of the end sticking out round and down to the tenon size I needed. I then swapped chucks to one with a pin vise jaws, clamped onto the tenon, and turned the outward shapes.
For the second one, I got a little too ambitious, I wanted the three woods to blend together seamlessly. The result isn't quite what I originally envisioned, but it still came out ok. Except that I lost one of the pieces of ebony (a piece chipped out...I think there was a crack), and had to turn another. I actually had to assemble the ebony disc and the turned finials together (I just had a tight friction fit). The finials also had a tenon, one I turned longer than the disc was thick, and I used a collet chuck to hold onto the part of the finial tenon that protruded through (IIRC, 3/8" diameter). I was then able to turn a smooth curve across the seam of both woods. During the first try, trying to clean up that seam, was when the first piece of ebony chipped out along a hidden crack. Almost ruined the finial, but I managed to take off just the bit that was damaged and clean it all up with the second attempt. Took a lot more time than I anticipated...but in the end I think it turned out pretty interesting.
I think the sideway hole for the string on the first one is interesting, I’ve never seen one hung like that, with a point on the top. Now I want to try some like that! I think holding clamping the wood and using a drill press might make it easier.
I usually drill straight down and insert a little brass screw eye. BTW, I usually shape and finish the top while holding it in in pin jaws so it’s easy to get a centered hole with a tiny drill bit in the headstock (put the drill bit in a pin vise, hold the pin vise in a jacob’s chuck in the tail stock.
I saw some other people doing it in YT vids. I can't say I'm a fan, but, I think if you had some kind of sturdy support on the other side, then you should be able to drill without blowing out the back side like I did. I also thought, it might work if you drilled the hole first, before you turned...assuming you were skilled enough to turn to EXACTLY the anticipated shape and size (I'm not!

)
Pin vise with an eyelet screw is what I did for the second one. I guess you can't really see it in the photo. I picked up some packages of eyelet screws for ornaments last year, and I probably have enough for years to come (unless I get particularly prolific in creating these!) So eyelets is probably how it will be.
I would be very interested in hearing about what you do, though, if you try to drill through the top finial. If you figure out a way to do it well, with the hole dead centered (all of mine were actually slightly off center, and I do think a drill press could help there), let me know. I have a Jet free standing drill press, and a number of vises and clamps and jigs I've either bought or built for it. I just wasn;t quite sure how to create a jig that could sufficiently hold unique finials for drilling.....
I usually like to use Myland’s Friction polish if I want a kind of glossy finish (sometimes looks good when it reflects tree lights), quick and easy to apply.
I've used mylands in the past. I didn't think that most friction polishes really held up over the long run, as most are DNA, shellac and an oil...and the shellac doesn't really provide much of a long lasting, durable finish, right? I know that a wax finish over shellac can help. To that end, I've used Dr.s Woodshop Pens Plus, which is a friction polish with a bit of a twist: On top of the three standard ingredients, it ALSO has Cosmolloid 80H microcrystalline wax in it. This is the same stuff in Renaissance Wax (that really expensive restorative stuff.) For pens, it can create a phenomenal finish:

The problem I had with it in the long run, is it doesn't last. The shellac breaks down or something, and even with a stop loss bag, after about 8 months or so it no longer polishes out properly, and you can never get a glossy finish again. I don't know why, but at ~$30 a bottle, and losing about half or more of two bottles, I stopped using it. Maybe if I was making enough things where I could go through a bottle faster, before it stopped shining up properly, then maybe I'd use it again. You can see, though, just how shiny the Cosmolloid 80H wax can get!
Glassy!
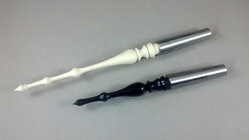
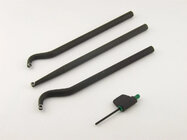
Do you have a set of three “micro” hollowing tools? They help a lot for hollowing small globes. With those I can drill a hole with a 1/2” bit almost to the bottom (after shaping the outside first), use a parting tool to thin the wood holding the ornament to less than the drill bit, hollow, apply finish while the other end is still in the chuck, then drill the rest of the way through the globe which frees it from the shaft.
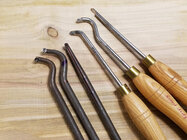
I have a full set of Easy Wood Tools. The three primaries: roughing, finishing and detail (red, orange and yellow) in the full size, as well as three of the hollowing tools: strait with the Ci5 tips, then two of the curved ones with different amounts of curvature. Even with the ~3/4" hole I ended up with, I was still having a bit of trouble with the angles getting all of these hollowed. The spalted tamarind is really hard, too...its ultra dry. So that increased the challenge a good deal. Probably won't use spalted tamarind anymore for these. The khaya was reasonably soft, so it was an easier hollow, but, the hole did get enlarged a bit, not on purpose, but because a small part of the EWT hollowing tool was toughing the rim of the hole. I didn't notice that at first, then when I did I realized the hole edge had been pretty well shredded, so I cleaned it up which enlarged the hole a bit more. Same thing happened with the tamarind, but I was so focused on dealing with how hard the wood was, and not hollowing through the sides, that I had the same problem there too.
Well, its a skill, so with practice I should learn. I do have hollowing tools. There is one you have, though, where the tip is at an angle. That would be really nice. The non-negative rake tips for the EWT tools are pretty darned aggressive, while the NR tips are much less aggressive and take far too long to hollow with. It would be nice to have a sharp-edged tip at a negative angle like that...should fall somewhere between the two tips I have.
I like to put glue in the hole, not on the tenon of the finial and top. That way, any extra glue gets pushed inside instead of squeezing out. I’d have to think about how I’d glue a 5-part ornament.
I put glue on both surfaces, but, having done that and had squeezeout, I would probably do the same as you in the future. In my case, I assembled the discs/caps to the finials first, let those dry. Then I assembled those to the globes. It probably doesn't matter which way, really...but, I did allow the first sets of glueups to dry a bit before gluing those parts to the globes. I just didn't want to have the grain alignments shifting around on me trying to glue all five pieces together at once.
Oh, there’s alternative to hollowing - use a very light wood which doesn’t need hollowing! I sometimes use basswood and don’t hollow. I started using it when I wanted to chip carve around the outside of the globe but even a smooth basswood can look good, perhaps with a bit of coloring. I have she some friends who have much more ornament creativity than I and some of there designs are incredible.
Even with basswood, wouldn't it still be a bit heavy on a christmass tree frond without hollowing? The Khaya wasn't really that heavy to start, but it still seemed heavy enough that it would drag a tree frond down a good way. Hollowing it out made it quite light...
One good way to get ideas of proportions is to look at a lot of ornaments and see what you like. Often, the finials are a little thinner which is attractive (and saves a little weight). For finials, I like fine-grained wood like ebony, holly, dogwood, bloodwood, etc.
Oh, I know a turner who turns wonderfully attractive finials. Problem is, they ALL look the same, or very close to the same. I personally like some variations! When I find myself falling into a design rut I make myself do less usual things to see how they com out. I think the variations on your finials look good and the turning is great, the finials could be thinned a bit more.
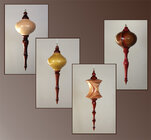
I don’t know if there is an ornament depository where you can view other ornaments to get idea. Maybe some others could post some in this thread. If you wantI could show a few when I’m at one of my computers instead of this iPad! I sometimes like to make a variety of globe shapes that are not spheres or ovoids, but sometimes have shape transitions at the ends.
Yeah, I actually have a lot of antique christmas ornaments. Was kind of a thing growing up, my parents had a bunch from their grandparents, so when I ventured out on my own, it was a thing: I bought a few antique ornaments every year. I have quite a collection now.

Most are glass, some are finial types. A couple are wood. This was an experiment to see how far I could push myself, but also, I really like ornaments. So I'll be making some for myself, some to sell.
I agree about having thinner finials. The first one was the hard maple. I like how it turned out and its size, but, I did want to try to go thinner, which is what drove me with the second one (which is redheart). I think it got about as thin as I was comfortable with. I don't know if I would try to go thinner than that... I do turn from the finer end up, to avoid vibration problems. So I always have a bulk of wood stabilizing things right around the area I'm actually turning, when I turn a finial. But...even doing that, once I got down to as thin as it is, there was still some vibration. I am honestly not even sure how good thinner would look, fwiw... I'll probably do a mix, some like the hard maple and some like the redheard, diameter wise. The maple, I guess I could have gone a bit thinner towards the bottom...
I also agree about variation. I would never want my finials to all look the same. I've turned some others. I have an "egg box" (will share in another thread, was one of my more ambitious projects earlier in the year) that I turned an ebony finial for, and that finial has eggs in it. I also turned an ebony pedestal, which also has an egg in it. So I like putting egg shapes in finials.

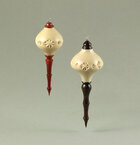
My very first finial from years ago (which I may have lost) was ebony, and I turned it with these vase-like shapes. Which were then kind of stacked on top of each other in a couple places. I thought it looked quite elegant in the end. Then I have these two, which were again just arbitrary, different designs that I just sort of came up with as I turned them. I couldn't imagine turning two finials the same....

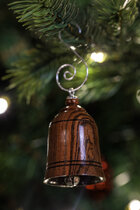
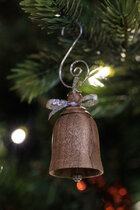
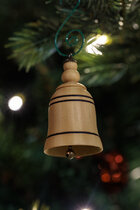
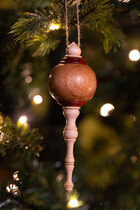
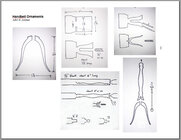
Hey, maybe you’d like to try one of the handbell ornaments I like to make, complete with clappers. (They don’t ring like a bell but at least have make sounds.) I could show some photos and have a drawing that shows the process.
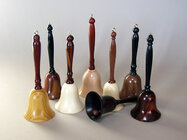
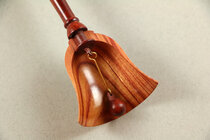
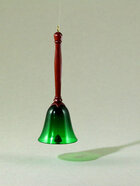
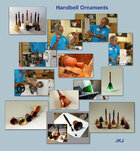
When you say handbell, do you mean something like these? I started turning these last year about this time. Turned some more, to see if I still could. I plan to make more. I have a few things I do to kind of spice them up a bit...like on the cap, and with the jingle bells or other things for the "clappers". I turn these small ones out of bottle stopper blanks.
