Greetings.
I'm a recently retired doc and, after a lifetime of doing procedures, now learning new ones on a lathe. Nothing big yet. A King 12x18 1 HP, variable speed reversible with bed extension, carbide tips of varying sizes after rough gouging branches.
I have developed a deep respect for an 89 year old widowered country doctor friend who is a turner and has created beautiful masterpieces. Every time I drive out to this friend's home in his town, I learn something. Because of him, I have developed a similar admiration for forum members who are experienced and have a wealth of wisdom that they freely share.
When we were in medical training, there used to be a well-worn phrase "See one, do one, teach one." Actually, it was more refined than that, but there is something uplifting about that concept of mentoring.
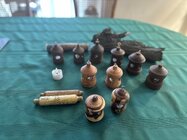
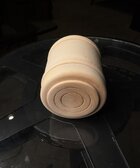
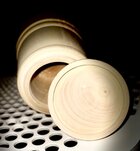
Almost all of my output is for our kinds and grandkids, from Harry Potter wands to small hanging Christmas tree lanterns with timed LED candles, to rolling pins, to Christmas trees. Hardly any cracking with these smaller diameters. But now I am happily stuck in the world of lidded boxes. I watched many Youtube videos before my first try, among them several Mike Pence clips. And that first was from a still green Linden limb about 3 inches in diameter. I can't believe the gratifying soft crunch as the lid is pushed down into place.
So I have been collecting wet birch, elm, mountain ash, and some dried Russian olive limbs, 3 inches in diameter, donated by friends. I've cut them into 9 inch lengths.
Here is my biggest challenge. Southern Alberta is fairly dry. I am concerned about cracks. As soon as I turn these larger pieces smooth, within 24 hours, the curse begins. I do not want to wait 2 years to dry before roughing them, because at this age I could croak anytime. So I followed the principles from a detailed scientific article on the topic to quickly dry the blanks.
It is NOT a good idea to nuke for 4 minutes, weigh, cool, nuke for another 4, weigh, then think I could try it the third time and go off to do something else. Don't ask me why. But I can tell you that it resulted in my buying a used microwave and limiting episodes to 1-2 minutes, spread out over a couple of days. High temps boil the interior fluid, widening pores, even creating new pathways via ruptures.
This does work well, especially in some species. Bit I still experience cracks, and even applying CA glue to them doesn't seem great.
This brings up the question. I have about 30 nice chunks ready to rough turn. With each one, should I immediately tenonize, part and core with a good-sized Forstner right after turning, then put in a Ziplock with shavings for a couple of weeks, then second turn?
You can say that I should have patiently let longer portions dry after painting the ends, and you would likely be right. I would be grateful for your opinions on this, especially for green wood being used for lidded boxes.
Thanks very much in advance.
Dave


