• We just finished moving the forums to a new hosting server. It looks like everything is functioning correctly but if you find a problem please report it in the Forum Technical Support Forum (click here) or email us at forum_moderator AT aawforum.org. Thanks!
  • Beware of Counterfeit Woodturning Tools (click here for details)
  • Johnathan Silwones is starting a new AAW chapter, Southern Alleghenies Woodturners, in Johnstown, PA. (click here for details)
  • Congratulations to Peter Jacobson for "Red Winged Burl Bowl" being selected as Turning of the Week for April 29, 2024 (click here for details)
  • Welcome new registering member. Your username must be your real First and Last name (for example: John Doe). "Screen names" and "handles" are not allowed and your registration will be deleted if you don't use your real name. Also, do not use all caps nor all lower case.

Box Turning - Must Haves?

Joined
Jul 5, 2022
Messages
194
Likes
39
Location
Lima, Peru
I’m sure the dway tool works well and would be easier to sharpen, but I would never pay $55+ shipping for something so easily made in the shop and not used a great deal. While a piece of m2 rod would be better, a dull drill bit could be used - put the twist end in the handle, and dont blue it while grinding, it will loose its temper. I use 2 - one at 30 deg per side, and one at 20deg per side.

I like to make my box bottoms with a round corner, sometimes the bottom is fully curved like a bowl. Easier to sand if needed and stuff comes out of the box easier. Just how I like ‘em, either way works.

As for scrapers, I use hi value ones (low price, good enough steel) from psi, benjamins best. They are thick and my hardness files say they are over 65 Rc. Buy the cheapest of the size desired, and grind the wanted shape, flat top or nrs.
Thank you so much I really appreciate all the recommendation.
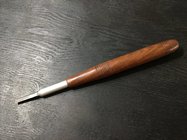
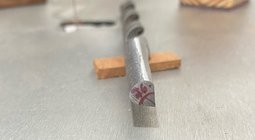
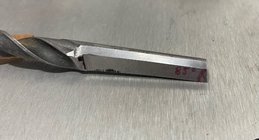
i couldn’t go to sleep after I read your answer and found an old bit draw some shape in the bit and went to the grinder i ground it at 75° for the tip, do you think it’s maybe to high? And for the sides both angles give me 76° if it’s simetric each one is 38°.
Next box I turn I’ll try to do with round corner and bottom fully curved could it be done with the bowl gouge and skew or need a special scraper?
im attaching picture of my old bit now new diamond point, this week I’ll be making its handle.
thank you again have a great day
 

Attachments

  • IMG_0861.jpeg
    IMG_0861.jpeg
    270.3 KB · Views: 47
  • IMG_0860.jpeg
    IMG_0860.jpeg
    312.8 KB · Views: 47
Joined
Jun 6, 2018
Messages
1,961
Likes
1,004
Location
La Grange, IL
What are the other benefits of using a box rest besides doing boxes?

A lot of the tools I use are intended to be held level (scrapers for example). The large flat surface of the box rest provides a solid reference surface to keep them flat. I find a lot of applications for this even though I don't make boxes.

I can also treat this tool rest like a tiny table. I've clamped a block of wood to the "table" and used that to guide a detail tool.

I use a branding iron to mark my pieces. I can line the tool rest up where I want the mark placed, then use the rest to line up the branding iron so the mark is straight.
 
Joined
Jul 5, 2022
Messages
194
Likes
39
Location
Lima, Peru
I tried that years ago when I first learned about using dremel bits. Too much rotational drag on the tool bit, and its difficult to support the dremel tool on the tool rest properly. It kinda works, but the tools that have less drag and have a shaft to place on the tool rest (like the elf and the kit I linked to) are far superior.
Thank you I’ll leave it,for now I prefer working with beads and mixing woods and maybe I’ll try burning wires?
do they need to be special wire like the ones that sells Easywood or just any wire?
 
Joined
Feb 7, 2020
Messages
234
Likes
172
Location
Sykesville, Maryland
Hello, thank you so much for all the valuable recommendation and I also think that a box scraper will be better than the radiuses skew im using. The box rests are totally new to me, do you think that for boxes around 3" and 3 1/2 " do I also need box rest? from how deep will be a must?
"Must" is subjective. Some say a box rest is never necessary. It's a personal preference and skill level. The diameter of the box isn't so important. It's the depth. At 3 1/2" deep, it starts to get more sketchy. For small boxes, under 4" I use the small box rest. It fits the smaller diameter boxes better. I only have the large rest from Robust. My small one is from bestwoodtools and is part of a modular rest system. It's the perfect size for small boxes. I also like the offset arms that you can get for the modular system. Many don't like round rests. I haven't found them to be any better or worse than my robusts. The modular is cheaper and easier to store because they all use the same post. Again a personal preference. I like all my rests, robust, cast iron, and modular.
 
Joined
Feb 26, 2019
Messages
1,825
Likes
1,425
Location
Lebanon, Missouri
maybe I’ll try burning wires?
do they need to be special wire like the ones that sells Easywood or just any wire?

No special wire needed. I think this is the multi gauge pkg I bought quite a few years ago. I wanted to experiment with different wire dia. Some use guitar strings.

The most important thing DO NOT HOLD THE BARE WIRE WITH YOUR HANDS. I made handles out of dowel pieces, ~2” long, cut a groove in the center, wrapped the wire around and tied it off by wrapping it around itself.

Hi rpm to build friction. Don’t have to apply much force . I try to get ~70-90 deg wrap around the work. Wire needs a groove to ride in. A 2” dia ~1500-2000 rpm. Just practice with some roughed out pieces or scrap, you’ll figure it out.

Mixed 550 Feet of Stainless Steel 316L Wire 22,24,26,28,30,32,34,36 Gauge Pack https://a.co/d/4T3SQGB
 
Joined
Mar 19, 2016
Messages
1,190
Likes
1,283
Location
Haubstadt, Indiana
Thank you , I’m preparing blocks of wood with different colors for adding accents, I’m also about to buy a 1/16 beading and the diamond point tool from D-way, I don’t have tool for textures but I‘be read that it also could be done with a dremel bit that has similar texture.the Sorby
Michael, you can make your own “Elf” tool that would use burs to create texture (I made one) and possibly ha handle for the Sorby tool. However I would buy the Sorby tool with the handle as you can’t make the wheels IMO.
Thanks, I have some dremel bits that are similar shape could I just put it in my dremel and try or it wouldnt be appropriate ?
Won’t work that way. They need to freely rotate without power.
 
Joined
Jul 5, 2022
Messages
194
Likes
39
Location
Lima, Peru
Michael, you can make your own “Elf” tool that would use burs to create texture (I made one) and possibly ha handle for the Sorby tool. However I would buy the Sorby tool with the handle as you can’t make the wheels IMO.

Won’t work that way. They need to freely rotate without power.
Thank you so much for now I’ll be working with beads, lines and combination of woods.
have a nice rest of the day
 

Tom Gall

TOTW Team
Joined
Feb 20, 2013
Messages
967
Likes
1,800
Location
Hillsborough, NJ
Hello thank you, im lucky that I have almost everything you mentioned except the scraper for flattening the bottom of the boxes, I was doing it with my skew but maybe it’s better with a dedicated scraper.
for the scraper I’m between Jimmy clewes 3/8 thick and 3/4 wide or Robust 9/32 thick and 3/4 wide.
I just made one box and just start a second one I’ll attach a picture.
if you have any advise I’ll thank a lot
Just throwing this out there - I used to make a lot of boxes, both endgrain and side grain. I don't think I ever made one with a flat bottom. They all had continuous curved sides and bottom like a small bowl - no corners! Easier to turn, sand, and retrieve stuff from the box. :) Also gives you more options for form rather than a cylinder.
 
Joined
Jul 5, 2022
Messages
194
Likes
39
Location
Lima, Peru
Just throwing this out there - I used to make a lot of boxes, both endgrain and side grain. I don't think I ever made one with a flat bottom. They all had continuous curved sides and bottom like a small bowl - no corners! Easier to turn, sand, and retrieve stuff from the box. :) Also gives you more options for form rather than a cylinder.
Hello thank you so much I really appreciate all of your recommendations and help me to improve and save time in many mistakes.
please could you tell me what tool did you use for the bottom and continuous side of your boxes.
greetings
 
Joined
Jul 5, 2022
Messages
194
Likes
39
Location
Lima, Peru
What are the other benefits of using a box rest besides doing boxes?

A lot of the tools I use are intended to be held level (scrapers for example). The large flat surface of the box rest provides a solid reference surface to keep them flat. I find a lot of applications for this even though I don't make boxes.

I can also treat this tool rest like a tiny table. I've clamped a block of wood to the "table" and used that to guide a detail tool.

I use a branding iron to mark my pieces. I can line the tool rest up where I want the mark placed, then use the rest to line up the branding iron so the mark is straight.
Thank you so much,I just checked some videos and it’s a very interesting tool that gives many possibilities
as you mentioned.
greetings
 
Joined
Jul 5, 2022
Messages
194
Likes
39
Location
Lima, Peru
No special wire needed. I think this is the multi gauge pkg I bought quite a few years ago. I wanted to experiment with different wire dia. Some use guitar strings.

The most important thing DO NOT HOLD THE BARE WIRE WITH YOUR HANDS. I made handles out of dowel pieces, ~2” long, cut a groove in the center, wrapped the wire around and tied it off by wrapping it around itself.

Hi rpm to build friction. Don’t have to apply much force . I try to get ~70-90 deg wrap around the work. Wire needs a groove to ride in. A 2” dia ~1500-2000 rpm. Just practice with some roughed out pieces or scrap, you’ll figure it out.

Mixed 550 Feet of Stainless Steel 316L Wire 22,24,26,28,30,32,34,36 Gauge Pack https://a.co/d/4T3SQGB
Thank so much I’ll try with different wires.
 

Tom Gall

TOTW Team
Joined
Feb 20, 2013
Messages
967
Likes
1,800
Location
Hillsborough, NJ
Hello thank you so much I really appreciate all of your recommendations and help me to improve and save time in many mistakes.
please could you tell me what tool did you use for the bottom and continuous side of your boxes.
greetings
Mostly a 3/8" (1/2"ø steel) bowl gouge (sometimes a 1/4") and the occasional use of a small round nose scraper if needed ... mostly for the undercut rims.
 
Joined
Jul 5, 2022
Messages
194
Likes
39
Location
Lima, Peru
Hello, sincerely I’d like to thank everybody for your help, recommendations and time in giving me the best advices for my woodturning. Finally after all I bought from Taytools :
1" square scraper(I’ll shape it as skew)
3/4" square scraper (I’ll shape it as a round shallow scraper for inside boxes)
3/8" beading and parting tool
All are Robert sorby Unhandled price arround $ 100
And thanks to Doug Freeman, I was very motivated to make my own tool I’ll be attaching a picture of the daimond point tool.

best wishes and a great week for all.
 

Attachments

  • IMG_6135.jpeg
    IMG_6135.jpeg
    617.9 KB · Views: 42
Joined
May 4, 2010
Messages
2,449
Likes
1,877
Location
Bozeman, MT
Since boxes are typically end grain in orientation, removing wood on the inside is not the same process as making a face grain bowl. In order to cut the wood cleanly, 'downhill', you need to cut from the center outward. Regular gouges are not perfect for doing this, as their edge is designed for cutting in the other direction. There are lots of different strategies for getting this task done, some are suggested above, but the most elegant is to use a tool with the edge oriented perpendicular to the lathe axis. A hook tool, ring tool, or Hunter carbide tool has such an edge and can cut the end grain most cleanly.

I would not necessarily recommend a beginner invest in one of these tools, but if you develop an affection for making end grain boxes, down the road you should give one of them a try.

In my experience, the Hunter tool is the best available solution, for a variety of reasons. I use the Badger type of Hunter tool for this job. With it, I can get a clean flat bottom with an almost square corner at the edge, or I can get a curved bottom, if that's what I want. The surface off the tool is clean enough that it will require very little sanding.

Also in my experience, a square end scraper is more valuable for box making than a skew, even though I love my skew. The square end scraper, with an '89 degree' angle at the left corner of the end, can be used to make a clean, square recess for the tenon part of the join, can cut a nice flat inside sidewall (which needs some sanding to get really smooth), and can make a truly square corner between side and base when that's what I want.

As you've learned from the responses, there are many ways to accomplish the tasks of making a box, just as there are for doing anything in woodturning, so in time, you will develop your own preferred methods, just like the rest of us. Good luck and post pictures of your projects!
 
Joined
Jul 5, 2022
Messages
194
Likes
39
Location
Lima, Peru
Since boxes are typically end grain in orientation, removing wood on the inside is not the same process as making a face grain bowl. In order to cut the wood cleanly, 'downhill', you need to cut from the center outward. Regular gouges are not perfect for doing this, as their edge is designed for cutting in the other direction. There are lots of different strategies for getting this task done, some are suggested above, but the most elegant is to use a tool with the edge oriented perpendicular to the lathe axis. A hook tool, ring tool, or Hunter carbide tool has such an edge and can cut the end grain most cleanly.

I would not necessarily recommend a beginner invest in one of these tools, but if you develop an affection for making end grain boxes, down the road you should give one of them a try.

In my experience, the Hunter tool is the best available solution, for a variety of reasons. I use the Badger type of Hunter tool for this job. With it, I can get a clean flat bottom with an almost square corner at the edge, or I can get a curved bottom, if that's what I want. The surface off the tool is clean enough that it will require very little sanding.

Also in my experience, a square end scraper is more valuable for box making than a skew, even though I love my skew. The square end scraper, with an '89 degree' angle at the left corner of the end, can be used to make a clean, square recess for the tenon part of the join, can cut a nice flat inside sidewall (which needs some sanding to get really smooth), and can make a truly square corner between side and base when that's what I want.

As you've learned from the responses, there are many ways to accomplish the tasks of making a box, just as there are for doing anything in woodturning, so in time, you will develop your own preferred methods, just like the rest of us. Good luck and post pictures of your projects!
Dean, thank you so much I really appreciate all your words and i just have made one box and it was face grain and when thinking in doing one end grain I knew it was a different escenario but didn't have any idea about everything you’ve mentioned, now I’m watching videos and studying it before I start one, there are msny things to learn it’s amazing . I’ll take your advice, thank you again for taking the time and the valuable recommendations.
have a nice Sunday
 
Joined
May 4, 2010
Messages
2,449
Likes
1,877
Location
Bozeman, MT
Dean, thank you so much I really appreciate all your words and i just have made one box and it was face grain and when thinking in doing one end grain I knew it was a different escenario but didn't have any idea about everything you’ve mentioned, now I’m watching videos and studying it before I start one, there are msny things to learn it’s amazing . I’ll take your advice, thank you again for taking the time and the valuable recommendations.
have a nice Sunday
De nada.

You can make a covered vessel in face grain orientation, but you can't get a reliably snug fitting lid, which is one of the challenges we embrace with true boxes. To me, a covered vessel turned face grain is a covered bowl, and a very nice, useful piece. However, the lid needs to be 'loose' to allow for the inevitable, and often changing, movement of the wood toward an oval shape. As many of the experienced turners on this forum have commented, our customers or family members may actually prefer a box with a looser lid, but we keep trying to make that perfect, piston/friction/suction fitting join.

I'm pleased that you found my comments helpful.
 
Last edited:
Joined
Jul 5, 2022
Messages
194
Likes
39
Location
Lima, Peru
De nada.

You can make a covered vessel in face grain orientation, but you can't get a reliably snug fitting lid, which is one of the challenges we embrace with true boxes. To me, a covered vessel turned face grain is a covered bowl, and a very nice, useful piece. However, the lid needs to be 'loose' to allow for the inevitable, and often changing, movement of the wood toward an oval shape. As many of the experienced turners on this forum have commented, our customers or family members may actually prefer a box with a looser lid, but we keep trying to make that perfect, piston/friction/suction fitting join.

I'm pleased that you found my comments helpful.
Thanks, indeed very helpful. I’ve been over thinking about it, just checked a video where they made the rim of the base with a little hill mmm it just lets in the middle of the rim more diameter so it will be like a pyramid for better lock. I don’t know how it will work but I’ll try it.
My wife always tell me "if i can‘t open it easily it’s to tighten" and we are trying to get the most comfortable fit but I know wood move and more dramatic when working with face grain.
Muchas gracias.
 
Joined
Aug 14, 2007
Messages
5,493
Likes
2,844
Location
Eugene, OR
About the only box that 'works' with a snap/pop off type lid is the clam shell type, which is very shallow, and a very short tenon on it, and I think both sides of the tenon/mortice will taper a tiny bit. I found out long ago, that if the lid is too tight, people will pick them up, try to lift the lid off, and then put it back down because the fit is too tight. The edges of the clam shell box are concave so you can get your fingers in and use them to pry it apart, and it does come off with a slight pop. Soren Berger had a 'flutter lid' box with about a 1 inch tenon, the tenon and mortice have to be dead on parallel, and the lid would kind of flutter down when you put it on. Some what similar to the Eric Lofstrom boxes. His lid recess is dead on straight, and the tenon on the bottom of the box is very slightly convex. Pick up the box by the lid, and it will take several seconds for the bottom to fall off. I like that type of fit. I do like the 3 second box lid fit. With boxes like this, you want the grain to be dead on straight. I suppose you could form a tenon out of some other wood if you have some cross grain wood, or burl. With a 1/2 inch tenon, this is a bit simpler. With Eric's boxes, he turns them several times over about 6 months, just to make sure the wood has time to adjust to having bulk removed.

robo hippy
 
Joined
Jul 5, 2022
Messages
194
Likes
39
Location
Lima, Peru
About the only box that 'works' with a snap/pop off type lid is the clam shell type, which is very shallow, and a very short tenon on it, and I think both sides of the tenon/mortice will taper a tiny bit. I found out long ago, that if the lid is too tight, people will pick them up, try to lift the lid off, and then put it back down because the fit is too tight. The edges of the clam shell box are concave so you can get your fingers in and use them to pry it apart, and it does come off with a slight pop. Soren Berger had a 'flutter lid' box with about a 1 inch tenon, the tenon and mortice have to be dead on parallel, and the lid would kind of flutter down when you put it on. Some what similar to the Eric Lofstrom boxes. His lid recess is dead on straight, and the tenon on the bottom of the box is very slightly convex. Pick up the box by the lid, and it will take several seconds for the bottom to fall off. I like that type of fit. I do like the 3 second box lid fit. With boxes like this, you want the grain to be dead on straight. I suppose you could form a tenon out of some other wood if you have some cross grain wood, or burl. With a 1/2 inch tenon, this is a bit simpler. With Eric's boxes, he turns them several times over about 6 months, just to make sure the wood has time to adjust to having bulk removed.

robo hippy
Hello Robo hippy it sounds amazing and for sure I’ll try 3 seconds box lid fit, if Im not mistake it’s like a slow motion close?. There are many things to learn, practice and enjoy thanks for taking the time to explain me about lid systems with so many details.
next week I’ll be trying some boxes I really appreciate all the information and experience from you it’s very valuable.
have a great wee.
 
Joined
Oct 13, 2016
Messages
1,073
Likes
1,566
Location
Rainy River District Ontario Canada
Just don't forget that no matter how many times you turn a piece of wood, it will still expand and contract depending the humidity changes that do occur where the piece is sitting.

I have made quite a few boxes and used sleeves in them to help keep them stable, plus to get the grain line up as there is only a very narrow parting cut I used to cut the blanks.

Maple with sleeve.jpg
spalted Maple.jpg Maple box.jpg
Maple grain lineup.jpg
 
Last edited:
Joined
Jul 5, 2022
Messages
194
Likes
39
Location
Lima, Peru
Just don't forget that no matter how many times you turn a piece of wood, it will still expand and contract depending the humidity changes that do occur where the piece is sitting.

I have made quite a few boxes and used sleeves in them to help keep them stable, plus to get the grain line up as there is only a very narrow parting cut I used to cut the blanks.

View attachment 54078
View attachment 54079 View attachment 54080
View attachment 54081
Hello Leo, nice work. Wood movement is definitely a constant variable to consider and accept it and learn to deal with It. Thank you very much for sharing your work and experience, What are the sleeves made of and how are they made?
Is an interesting way to deal with movement.
greetings
 
Joined
Aug 6, 2009
Messages
710
Likes
509
Location
Lummi Island, WA
I‘ve found people seem to prefer a loose fitting lid - at least the people I deal with. If you’re going to use the box for things you access often, one handed operation becomes important. I often use Leo’s sleeve idea, letting it show on the outside sometimes, but still wanting to see the grain line up. After finding myself lining up the grain every time I visited a friend that has several of my boxes in their bathroom, I decided to force the issue by making it impossible to put the lid back on unless the grain is aligned. The button keys the lid into position. No one seems to find it an inconvenience and my OC is soothed by seeing the grain lined up when I visit…
BDC40CAE-44EB-4335-BFA0-085BB7FB883C.jpegD9C40A97-8BE0-4896-9BF4-ECAA89206486.jpeg
 
Joined
Jul 5, 2022
Messages
194
Likes
39
Location
Lima, Peru
impossible to put the lid back on unless the grain is aligned. The button keys the lid into position. No one seems to find it an inconvenience and my OC is soothed by seeing the grain lined up when I visit
I‘ve found people seem to prefer a loose fitting lid - at least the people I deal with. If you’re going to use the box for things you access often, one handed operation becomes important. I often use Leo’s sleeve idea, letting it show on the outside sometimes, but still wanting to see the grain line up. After finding myself lining up the grain every time I visited a friend that has several of my boxes in their bathroom, I decided to force the issue by making it impossible to put the lid back on unless the grain is aligned. The button keys the lid into position. No one seems to find it an inconvenience and my OC is soothed by seeing the grain lined up when I visit…
View attachment 54100View attachment 54102
Hello Jeff, I can’t agree more with you. It’s coincidence, just yesterday night I was talking with my wife how we interact with a jewelry box and when thinking on it we got to the conclusion that we prefer to open the box easily with one hand operation, looks like loose fit is the way to go, but in the other hand the 3 second close an perfect lid its always a challenge that I imagine that it will be perfect for something more artistic or decorative that the act of closing is also the product itself.
thank you for your comments, don’t know how to thank all the help, very nice box and with the notch you are sure that now it’s perfect alignment always.
greetings
 
Joined
Aug 14, 2007
Messages
5,493
Likes
2,844
Location
Eugene, OR
With the boxes Eric Lofstrom turns, it takes him 5 or so turnings over about 6 months. The reasoning is that wood will move or 'adjust' when you remove bulk. With his boxes, the lid/recess is 1 inch deep, and dead on parallel to the lathe bed. The tenon is very slightly convex, with the middle of it being exactly the same diameter or a tiny bit less than the recess. At his demo at the Oregon Woodturning Symposium, one box he had he did not pass around because just handling it would cause the wood to move. With my threaded boxes, I rough turn them first, and tape the top and bottom together and then forget about them for a while. Then I will glue them onto waste blocks for final turning and threading. I do have a couple of boxes I haven't totally finished yet, which are about 5 inch diameter. They have the 3 second lids. One has moved very slightly which means I can still spin the lid, but there are tight and loose areas. The other seems to be spot on after sitting for a couple of years. I need to get my box turning videos shot and done..... I do use a 6 inch ruler to lay against the recess and tenon to make sure they are spot on parallel. You eyeball against the lathe bed to check for alignment. I am still trying to figure out how to get a X/Y set up with cutters on it so I don't have to measure so often. Eric has a specialized NRS where the cutting edge is parallel to the length of the tool and he can eyeball as he makes the cut. I might have to do that one as well.... Always some thing else to discover.

robo hippy
 
Joined
Jul 5, 2022
Messages
194
Likes
39
Location
Lima, Peru
With the boxes Eric Lofstrom turns, it takes him 5 or so turnings over about 6 months. The reasoning is that wood will move or 'adjust' when you remove bulk. With his boxes, the lid/recess is 1 inch deep, and dead on parallel to the lathe bed. The tenon is very slightly convex, with the middle of it being exactly the same diameter or a tiny bit less than the recess. At his demo at the Oregon Woodturning Symposium, one box he had he did not pass around because just handling it would cause the wood to move. With my threaded boxes, I rough turn them first, and tape the top and bottom together and then forget about them for a while. Then I will glue them onto waste blocks for final turning and threading. I do have a couple of boxes I haven't totally finished yet, which are about 5 inch diameter. They have the 3 second lids. One has moved very slightly which means I can still spin the lid, but there are tight and loose areas. The other seems to be spot on after sitting for a couple of years. I need to get my box turning videos shot and done..... I do use a 6 inch ruler to lay against the recess and tenon to make sure they are spot on parallel. You eyeball against the lathe bed to check for alignment. I am still trying to figure out how to get a X/Y set up with cutters on it so I don't have to measure so often. Eric has a specialized NRS where the cutting edge is parallel to the length of the tool and he can eyeball as he makes the cut. I might have to do that one as well.... Always some thing else to discover.

robo hippy
Hello, definitely learning never stops, there is always something new and a closer look to any detail opens many possibilities and knowledge; everytime I try to understand something else, let’s say for example finishes, at first look seems to be simple but then when I start researching it’s a whole new universe: abrasive compound, sanding sealer, wet sanding with water, with mesh, walnut oil, mineral oil, curing time, CA glue, odorless ca glue, compatibility, durability. But as everybody says it’s a learning curve and everyone find it’s own way.

First I was very enthusiastic with threading boxes but for now I think I’ll try to get practice and experience with the more basic. Thank you so much for all the input and information that make me be conscious of all variables, time and work involved in making the perfect fit.

Have a nice rest of the week
 
Joined
Nov 7, 2021
Messages
32
Likes
14
Location
Bellevue, WA
I love the Hunter #4 for box interiors. I used to hate sanding box interiors. Using the Hunter tool I often dont even sand the bottom and just lightly on the sides. Here is my video on that tool. About 5 minutes in I show turning the bottom of a box.
View: https://www.youtube.com/watch?v=nfp2kvhH6Mo&t=343s
I know this is an old post, but I just saw it this morning. Your video is excellent! You are a good teacher, John.

never looked at the Hunter tools because I thought they were just regular carbide scrapers, but with a higher quality carbide. After seeing your video, I understand they are used more like a gouge with a bevel. They really do leave an amazing finish on end grain. Thanks to you I am going to buy a #4 to use on boxes
 

john lucas

AAW Forum Expert
Joined
Apr 26, 2004
Messages
8,337
Likes
3,595
Location
Cookeville, TN
One interesting thing about the Hunter cutters that I don't understand. The smallest cutter leaves a cleaner surface than the larger ones. This is especially true on woods that tend to tear out. I have also found that I can get a cleaner cut with the Small Hercules than I can with my skew on woods like Curly maple and Birdseye maple. Not sure why this is because I try to take exactly the same size shaving with each tool. I can understand why I get a cleaner cut with the small round cutter vs the larger cutter. The shaving is smaller.
 

hockenbery

Forum MVP
Beta Tester
TOTW Team
Joined
Apr 27, 2004
Messages
8,645
Likes
4,993
Location
Lakeland, Florida
Website
www.hockenberywoodturning.com
my skew on woods like Curly maple and Birdseye maple

I know you know the issue of tear outs vs clean cuts on figured wood is that some grain points up and others point down.

The skew edge gets under an up pointing grain so it slides over the cutting edge and instead of cutting cleanly it pulls out.
I often get a cleaner cut on curly maple with a small spindle gouge than I do with a skew. The slight curve on the cutting edge of the gouge can cut the up pointing grains better.

Maybe the better cut from the smaller carbide is from both the tighter radius and the smaller cut.
In any event the Hunter carbides are a great addition to the toolkit for troubled woods.

A thin shellac of thin lacquer can sometimes tame wild grain a bit too.
 
Back
Top