• January Turning Challenge: Thin-Stemmed Something! (click here for details)
  • Conversations are now Direct Messages (click here for details)
  • Congratulations to Scott Gordon for "Orb Ligneus" being selected as Turning of the Week for January 20, 2025 (click here for details)
  • Welcome new registering member. Your username must be your real First and Last name (for example: John Doe). "Screen names" and "handles" are not allowed and your registration will be deleted if you don't use your real name. Also, do not use all caps nor all lower case.

A question about industrial tape........is there such a thing?

Status
Not open for further replies.
Isn't it interesting how those who have found no benefit to using a bowl steady, feel nobody else can either!

Must be a figment of our imaginations that a bowl steady actually works! 🙂

(off to work!....still training my replacement.)

ko
 
Isn't it interesting how those who have found no benefit to using a bowl steady, feel nobody else can either! Must be a figment of our imaginations that a bowl steady actually works! 🙂 (off to work!....still training my replacement.) ko

I am most interested in seeing how you use it. Post a video.

The steadies are extremely useful in deep hollowing. Most deep hollowers leave a ring of wood a 1/16 to an 1/8" high for the wheels to ride on.

You are right that for me, I see no benefit to using a bowl steady.
That could change once I see how you use it and what benefits you get from it.
However I'm exceedingly skeptical that it would improve my bowls at all.

I don't get chatter when I hollow bowls without a steady.
The walls are even thickness.

The bowl steady is a tool that compensates for bowl hollowing skill. That is not a negative.
If it helps getting nicer bowls use it.
For anyone having difficulty hollowing bowls a bowl steady could be of value until their skills develop further.
Sort of like training wheels on a bike.
Anyone with range of motion issues might find a bowl steady to be an super tool.
Anyone hollowing with scrapers might find it to be beneficial.

I have limitations on hand hollowing hollow forms well on anything deeper than 4-5 inches so I use the jamieson system.
With it I have much better control, much better posture, better results. It's a tool that compensates for hand hollowing skill. I no longer see any advantage to hand hollowing other than it is a little bit faster. I always hand hollow ornament balls, I'm good at that.

Post a video so we can all learn how you turn with a bowl steady and what benefits you get from using one.

I think most turners are better off spending money on bowl turning lessons rather than buying a bowl steady.
But your video might change that opinion.

Al
 
Last edited:
Odie, I would compare the burnishing to what happens to the arm of a rocking chair over the years. It gets a nice glow from all the hands on it. In order not to get any burnishing effect, there would have to be no physical contact at all, which would mean that the steady would not be in actual use.

I don't think any one has criticized you for using a bowl steady. Some use them, some don't. If it works for you, fine.

robo hippy
 
I would think any wheel pressure will dent the wood. Consider thousands of revolutions with minimal pressure.... That is pretty much burnishing.


Howdy Robo......

Actually, that's a negative. If set up properly, there is no deformation of the wood at all. Very light pressure is all that's needed....

So did you really read what Robo was saying? Almost no pressure (same as what you said) and then multiplied by thousands of revolutions ... his point being that is not much different than heavy pressure times just a few revolutions other than taking longer. It makes sense to me. Now, if you are just intending to use the steady rest for a very light and brief touch-up final detail work that is a different matter. But, you might not be able to completely avoid some surface burnishing despite the stretch wrap. Someething that has me curious about the stretch wrap ...while it is thin, it still somewhat comparable to the thickness of a sheet of paper (maybe 50%). Will there be a bump at the beginning and end? Can you avoid folds and other wrinkles? Can it help with something resembling false brinelling? Sorry, but I like to be a worry wart.

I have a steady rest for turning hollowforms and when I set it up after getting the exterior running as true as possible, I set the wheels so that they barely touch the wood ... just enough feather light contact so that they will turn without slipping. The thing that you apparently haven't even thought about is that any turning that you do, no matter how light creates vibration. It might be so light that you can't even feel it, but it is impossible to cut wood without some vibration. So, this very slight vibration between the wood and wheels for thousands of revolutions is going to result in at least some burnishing of the surface. Think about it ... if there were no vibrations ... then why are you even using a bowl steady?
 
Last edited:
So you didn't really read what Robo said, did you? Almost no pressure multiplied by thousands of revolutions is no different than heavy pressure times just a few revolutions.

I have a steady rest for turning hollowforms and when I set it up after getting the exterior running as true as possible, I set the wheels so that they barely touch the wood ... just enough feather light contact so that they will turn without slipping. The thing that you apparently haven't even thought about is that any turning that you do, no matter how light creates vibration. It might be so light that you can't even feel it, but it is impossible to cut wood without some vibration. So, this very slight vibration between the wood and wheels for thousands of revolutions is going to result in at least some burnishing of the surface. Think about it ... if there were no vibrations ... then why are you even using a bowl steady?

Sure I read it, Bill.......🙂

My idea of burnishing and patina is a bit different......probably just a misconception of what the definitions are.

Yes, without slip......that's the proper way to set up a bowl steady. You may find that spring assisted wheels will help your bowl steady use when there is some amount of warp. I've been using this method for a number of years, and it does help on a limited basis. If the warp is too much, it's better to not use the bowl steady at all. This may be why you're getting dents in your wood.......?

I've used several kinds of tape in between the wheels and wood. There is no visible effect on the surface of the wood, because the wheels don't actually touch the wood. As I stated previously, I've been experiencing some intermittent problems with this technique, because some of the adhesive has been left in the pores of the wood when the tape is removed. When not using the tape, there are times when some wood dust is being pressed into the pores, which is also a problem.....without using tape between wheels and wood, it's imperative that there is no slip of the wheels on the wood.

This whole thread is an attempt to get some experienced, or well thought out input from others on how best to resolve the issues I've been having......and, and there has been some input I feel is good advice from someone who has experienced the same things I've been experiencing.....and seems to have resolved the issues.

It seems the thread has taken a side track, because we're getting some feedback from those who feel that the bowl steady isn't a worthwhile tool to have. That's fine, they are welcome to their opinion on that......and, I also have my own opinion that if used properly, and in conjunction with other proper practices, the bowl steady can make the best unassisted tool surface even better! 😛

ko
 
Last edited:
I edited my post to add some questions of things that I like to worry about. I probably should have started a new post, but if you will read what I have added, I don't know if it is useful, but as a recovering engineer (retired, but can't break the habit) I always keep thinking of all the "what if's" that I can come up with.
 
..... You may find that spring assisted wheels will help your bowl steady use when there is some amount of warp. I've been using this method for a number of years, and it does help on a limited basis.....

I usually try to have a raised path for the wheels that will be removed as the final step. Sometimes I remember to do that after it is too late (that's not the same as forgetting). 🙄

Your suggestion leads me to a thought that could be applicable to hollowforms, but maybe not for not bowls. The issue with hollowforms is that the wood may be cantilevered out quite a distance from the chuck or faceplate so the main purpose of the steady rest in that case is to help support the piece when hollowing. But, I can see the possibility of adding some light spring force so that the wheels have a more constant force against the wood in combination with the hard stop that limits the deflection. Rather than a steel spring, I'm thinking of an elastic material such as a bungee cord or heavy duty rubber band to provide some tension along with damping to avoid setting up a spring resonance (think of a steel spring being comparable to a guitar string -- there is some frequency where it wants to vibrate -- when wood thickness, lathe speed, tool pressure, and other conditions are just right, the spring will want to behave like the guitar string ... maybe not as pleasant sounding though). A bungee cord guitar on the other hand may never get legs. 🙄
 
I agree pretty much with Al. I started off many years ago building steady rests and using them because I got chatter on my bowls and hollow forms and thought that was how you cured it. Later on my skills got to the level I just don't need them for 99% of my bowls. Hollow forms still do on occcasions especially longer ones. The only bowls that I thought a steady would help were large very thin tapered bowls and you couldn't possible use a steady. I used my hands on the outside which worked fine until one blew up and cut my hand. Then I came up with the idea of adding temporary flying Buttress's. I hot glued some 1/4" luan buttress's to the bowl and to the chuck to act as stabilizers. man did that work good. Scary because it sounds like a big fan or propeller but was very safe (as long as you kept your hands off the outside of the bowl). I was able to turn 12" diameter segmented pieces to less than 1/4" with ease.
One thing about using tape or stretch wrap is to wrap it so it won't unwind if the wind gets under it. Don't ask me how I learned that. You want each revolution of the wheels of the steady to push the end of the tape back down. 🙂
 
... I used my hands on the outside which worked fine until one blew up and cut my hand. Then I came up with the idea of adding temporary flying Buttress's....

I can only imagine how scary something like that might be. Do you have any pictures?

I turned a large fairly thin piece that was going to simulate a coiled Native American style basket. The beading on the front side went OK, but there was some flexing. The beading on the back side was making the wood really thin and it was flexing out of control so I put a leather glove on my right hand and grabbed the basket between my thumb and fingers. I had to grip it rather firmly while I did the beading. Your story makes me feel like I wasn't being really smart. Even though I had the speed turned way down, I suspect that hurt can pass right through a leather glove like it isn't even there.
 
Bill I had done this for years as my skills improved. It started with smaller bowls and goblets. Just a gently touch with your fingers to match an equally gently touch with the bevel was all it took to eliminate the chatter. Learned that from turning long thin spindles. If it burns your fingers your putting too much pressure on the bevel or the wood is spinning too fast or both. Anyway I'm learning new cuts to try and reduce that bevel pressure. One is with the flute of the bowl gouge straight up. Your cutting with the left side of the tip at about 10:30 and the side grind of the wings is your bevel. This is not for the timid since all it takes is a tiny bit more twist to the left and you can get a pretty good catch. A traditional grind works better for this because the cutting edge is more angled and it's easier to stay away from that upper lip. This cut allows you to push more straight into the cut (think Parallel to the side of the bowl in this motion) with very gently pressure on the bevel. With a traditional cut with the flute at about 2 oclock the gouge is more perpendicular to the bowl wall and so your pushing against the wall. Hope that makes sense.
I did start using a glove when I support the outside of the bowl now but I'm not wearing it. I fold it in half and gently push on the outside. Mostly however I try to cut my thin bowls an inch at a time down to final thickness. That keeps the chatter down so I don't have to use the glove or bowl steady's. The bowls I'm talking about are Bowls from a Board and they often start out to thin and get thinner as I turn them.
 
John,
Those are real close to the shear cut techniques I learned from Liam oneil an David Ellsworth.
After 20 years I'm not too bad with it. I think it is really hard to learn without hands- on instruction.
As you point out they are for advanced turners.. A slight twist and a terrible catch can occur.
It is extremely important not to hold the gouge tightly as it must turn a bit going down the side of the bowl.

On the outside of the convex bowl curve a traditional gouge can be used flute up for a finish cut since the edge is out if the wood.
On the inside a swept back gouge must be used for the flute up finish cut.
On a cut rim bowl the inside cut needs to be rolled into almost impossible to start at the edge of the rim.
Amazing to me the the flute up cut can be started on the edge of a natural edge bowl.
I can usually sand the insides of bowls with 220 using this cut.

I also stair step down the side Of the bowl. This insures an even wall. It is important not to leave a transition line.

Emphasis g what john said, The shear cut with the side ground gouge cuts with the leading edge of the wing so pressure on the wood is toward the cut and not toward the wall of the bowl.

Also the shear cut works best for me with the Ellsworth grind. The leading edge of the flute has a nice curve to engage the cut. Also I like a gouge with a parabolic flute for this. The jamieson gouge by Thompson works really well for this as does the Henry Taylor. The narrow flute just don't give the nice wing.
 
Last edited:
I use mostly a Thompson V gouge for this cut with the wings ground back pretty far. That leaves a slight round just off the center of the nose that works well with this cut. Almost as good is a Henry Taylor U shaped gouge that I've ground to a Stewart Batty 40/40 grind. Cuts cleaner but I think it puts a little more pressure against the bowl.
 
I use mostly a Thompson V gouge for this cut with the wings ground back pretty far. That leaves a slight round just off the center of the nose that works well with this cut. Almost as good is a Henry Taylor U shaped gouge that I've ground to a Stewart Batty 40/40 grind. Cuts cleaner but I think it puts a little more pressure against the bowl.
John,

I see you are demonstrating at the Georgia symposium in Dalton in September. Kudos to you!

I have a Thompson vee and I don't like it for the flute up cuts.
It lacks the shoulder that I get with Thompson gouge made for jamieson or the Henry Taylor which have the wider flute hence the shoulder
a bit more off the tip and more in line with the handle. M(I won't rule out psychological) but it seems to me that while the Thompson vee will
work it just isn't as comfortable as the other flutes and I have to bring the handle out a bit more. Which changes the sight line along the outside of the bowl.

I use my Thompson vee on convex shapes.

I'm glad Thompson makes the jamieson tool.

I use the shear cut I'm talking about in the NE CROTCH BOWL demo for tri- county Jan Carl gets some great shots of the tool working close up.
http://www.youtube.com/watch?v=8jVoI12Kfug
Just fast forward to about 27-28 minutes for the hollowing.
I have taken out some inside wood to relieve tension, then returned the outside so it is round. You can see the clean cut.
There is a tiny bit of fibers from the bark but the tool does a super job. This is a pretty thick bowl maybe 3/8" and small maybe 11" diameter
so there wouldn't be flexing with a bevel riding cut anyway but it shows the technique.

Al
 
Last edited:
John Lucas Demo... count me in

John,

I'm definitely looking forward to attending your demo in Atlanta!

And Al, if you happen to be doing any youth room instruction this year I'd like to volunteer (I will be anyway, and I think this year is Joe Ruminski's last one).


Mark
 
Odie, if tape residue is a problem, then the only cure for that I can think of would be the blue painter's tape. It does have a bit of stretch to it. Other than that, the stretch film should work, and it has more stretch than the blue tape.

A round table show and tell would be interesting for all of our different grinds. I am going back and forth on the parabolic flute thing. I have one of Lyle's gouges and like it, and have an old Oneway that also has a parabolic flute. Some times they work great. I have several of Doug's V flutes, and use them a lot too, along with his U flutes. Doug commented that if you grind the wings with a slight arc rather than flat all the way to the nose, it works like a parabolic flute. I still don't know. I don't use the swept back at all any more. Mostly because I do all of my shear scraping with my swept back scrapers. You don't have to roll over so far to get it to cut, and can watch the cutting edge in action because it isn't covered. I do push cut with my tools held level, and rolled over to almost 90 degrees. This also eliminates the need for the swept back wings, and makes Doug's U flute a better tool for my style because the round nose had a bigger sweet spot. All of my gouges are about a 45 degree sweep, with nose angles from 45 to 60. My 70 degree bevels have maybe 10 degrees of sweep.

robo hippy
 
Odie if the only problem you have with tape is the residue , you can use Goo Gone or a similar product to remove the left over adhesive and no stain on the wood. I have used this to remove stickers from the lumberyard and it works well. Sawdust I have never had a problem with that on my steady rest, but I do get burnishing. This has been and interesting thread with some very interesting comments.
 
Odie if the only problem you have with tape is the residue , you can use Goo Gone or a similar product to remove the left over adhesive and no stain on the wood. I have used this to remove stickers from the lumberyard and it works well. Sawdust I have never had a problem with that on my steady rest, but I do get burnishing. This has been and interesting thread with some very interesting comments.

Hi Gerald, and thanks!......

The problem I'm having with tape between the wheels and wood surface, is when the wheels of the bowl steady roll on the tape, It actually pushes the adhesive into the pores of the wood. If the adhesive were simply on the surface, that, as you might guess, isn't too difficult to get rid of. As it is, when this happens, I'm left with no other alternative, but to go back several sanding grits to get rid of the imbedded adhesive.

I haven't received the stretch wrap yet, but I'm planning to find out if is can provide a base between cloth tape, and the wood surface. If this idea works out for me, that would be my preference, as the cloth tape provides an additional dimension of stability during the tool work phase of the surface.

ko
 
Odie, if tape residue is a problem, then the only cure for that I can think of would be the blue painter's tape. It does have a bit of stretch to it. Other than that, the stretch film should work, and it has more stretch than the blue tape.
robo hippy

Robo......

I haven't used the blue masking tape, but have used the white/light tan standard masking tape.......is there a performance difference between the two? I guess I was assuming the blue color was so it stood out against the paper they use for masking off a surface.......?

ko
 
Last edited:
Bill I had done this for years as my skills improved. It started with smaller bowls and goblets. Just a gently touch with your fingers to match an equally gently touch with the bevel was all it took to eliminate the chatter.....

John, I didn't explain why I was grabbing the turning the way that I did with a gloved hand and apply pressure from both sides rather firmly. I have used the technique that you and Al describe, however, this case was different. It is a large (slightly over 12 inches diameter) and thin shallow bowl shape that is typical of the shape of basket illusion pieces that you have seen by Jim Adkins, David Nittmann, et al.

This piece was flexing too much to do the beading on the bottom side using the normal technique of light tool pressure and finger pressure on the opposite side because it started warping out of round during the front side beading. The warping wasn't the shrinkage type warping that you get during drying, but just a wavy edge type warping that was probably a result of how thin the piece is. The rim and foot both have some "meat", but the rest of the wood doesn't.

One would think that the beading could be done while turning the basic form and working in stages so that there is plenty of supporting wood. Well, that is what I did when turning the basic form, but ... (<-- a big but) the beading has to be started a the center to get a perfect point there. Then you work towards the rim. The exact final diameter isn't determined until you decide where to stop beading and then create the rim. The back side beading begins at the rim and then continues towards the chuck. You normally finish the bottom beading after reversing the piece and then stop beading where you want to have the foot.

You can't cheat by freehand turning the width of the beads because the woodburning beading tip is a fixed size and shape that matches the beading tool size and shape. With over thirty thousand burned segments, only a fool would think of freehand burning them (if not a fool beforehand, one would be afterwards 🙄). BTW, I did freehand burn the beads on my first basket illusion piece. Draw your own conclusions. 😉
 
. Well, that is what I did when turning the basic form, but ... (<-- a big but) the beading has to be started a the center to get a perfect point there. Then you work towards the rim. The exact final diameter isn't determined until you decide where to stop beading and then create the rim. The back side beading begins at the rim and then continues towards the chuck. You normally finish the bottom beading after reversing the piece and then stop beading where you want to have the foot. You can't cheat by freehand turning the width of the beads because the woodburning beading tip is a fixed size and shape that matches the beading tool size and shape. With over thirty thousand burned segments, only a fool would think of freehand burning them (if not a fool beforehand, one would be afterwards 🙄). BTW, I did freehand burn the beads on my first basket illusion piece. Draw your own conclusions. 😉

Bill,
I have never done such a piece. But a couple of thoughts come to mind It seems that you could turn the form with a 1/2 or 3/4" wall, bead the inside, turn the rim, bead the rim, and the turn the first inch or so on the outside to thickness, bead most of it, turn another inch to thickness, bead it and so on I till you reverse it. I Just don't cut off any beads.

I have turned a few end grain natural edge vases sort of like big goblets. Those are hollowed first then the outside is turned to match the inside. I usually use light wood and light going for bright yellow as a wall thickness avoiding white which means air and no wall. Also if drying is causing any movement I would use my plant mister and keep the wood drenched,

Another thought that probably would not work would be to make a mold of the inside from something like bondo.
Mount the bondo on the lathe and reverse turn all the beads.
This I like having a backing board on a thin platter.

At the AAW Symposium Michael Brolly described making a mold to fit a curved surface. He uses "Smooth-On" a silicon material used in making face casts etc. This make a thin layer that doesn't stick to anything it dries in 10 minutes or so bondo can fill the mold the the work piece cab be held against the smooth on material as a backing. He was using this to sandblast through wood a bout a 1/16 " thick. Without the backing the air pressure alone would blow a hole.

Al
 
Last edited:
Odie,
Big difference in the two tapes. You can put the blue tape on any fine finished surface and when you peel it off there is NO residue left. If you leave it on for a few months though there might be some. I used it all the time when I did flat work. You can put it on glass with the same results, but if you use the brown tape, it tears apart and leaves half of the adhesive on the glass. Just about any hardware store will carry it. I also found my stretch tape at my local Ace store, and am sure other big box stores will carry it, or any office supply or shipping supply place will carry it too.

robo hippy

OK, thanks Robo........

I saw some of that the other day at Home Depot, and was not aware of this difference. Whether I can use it for the purpose being discussed, or not.....it will be handy to have a roll of it on hand in my shop. 🙂

ko
 
OK, thanks Robo........

I saw some of that the other day at Home Depot, and was not aware of this difference. Whether I can use it for the purpose being discussed, or not.....it will be handy to have a roll of it on hand in my shop. 🙂

ko

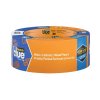
Odie, 3M makes a wide variety of painters tapes. The one that I use has a smooth surface (not the crepe surface) and has orange printing on the blue tape. It is rated for delicate surfaces, but has great adhesion and no residue. I use it all the time for masking when shooting lacquer or when doing inlays. It is fairly expensive, but you get what you pay for.

d4124356-efea-43fc-8630-9f563d0a9756_1000.jpg
 
Odie, 3M makes a wide variety of painters tapes. The one that I use has a smooth surface (not the crepe surface) and has orange printing on the blue tape. It is rated for delicate surfaces, but has great adhesion and no residue. I use it all the time for masking when shooting lacquer or when doing inlays. It is fairly expensive, but you get what you pay for.

View attachment 8660

Thanks, as well, Bill........

I do need to do a little investigation of these masking tapes. Since they are all paper based (I think), I assume they won't conform very well to a curved surface two directional (around the circumference and profile shape of a bowl) without wrinkling. I've got the 2" stretch wrap on the way, and want to see if that works for me.....if not, these hybrid masking tapes may be useful in finding the best solution to my problems.

Waiting on the mailman! 🙂

ko

The one that I suggested is very thin. I am not sure if it has any stretch, but it seems like it might have just a tiny amount. Anyway, for the purposes that I have used it any creases are not like those that you get with regular masking tape. On a hollow form the steady always runs at the greatest diameter so creases would not be an issue. On a bowl, the situation is different. I need to refresh my memory so I will play around with it and report back.
 
There is a 'little' stretch to them. Great for pulling two veneers together. Not so good for wrapping a 3 D shape though. On the rim of a bowl maybe. On the big part of the hollow form, maybe. On the curved part of the form, not so good, it will wrinkle.

robo hippy
 
I promised a report back and here is what I found. The tape has a very slight stretch, but trying to pull it over a curved surface without any creases would be a challenge. The first picture is a mesquite hollow form where I have wrapped the tape around the greatest diameter. I have a slightly raised path there about ¾" wide and maybe a thirty-second inch proud of the surrounding wood. If you look carefully you might be able to detect the raised path where the wheels run. With a lot of effort I think that you might be able to keep any creases from the "race track", but it wouldn't be easy.

tapeonhf.jpg

As Robo said, there is no chance of stretching the tape on the angled side of a bowl ... maybe it could be done on a calabash style bowl. The picture below shows what I did on a large elm bowl, applying the tape in segments and then using an X-acto knife to make a cut through the tape where two pieces overlap. In the picture below you can see that I missed a small piece of tape that is beneath the larger piece on the left. Lifting the tape to remove the cutoff and then laying it back down takes some effort and I didn't get a perfect match when I tried it here.

tapeonbowl.jpg
 
I promised a report back and here is what I found. The tape has a very slight stretch, but trying to pull it over a curved surface without any creases would be a challenge. The first picture is a mesquite hollow form where I have wrapped the tape around the greatest diameter. I have a slightly raised path there about ¾" wide and maybe a thirty-second inch proud of the surrounding wood. If you look carefully you might be able to detect the raised path where the wheels run. With a lot of effort I think that you might be able to keep any creases from the "race track", but it wouldn't be easy.

View attachment 8661

As Robo said, there is no chance of stretching the tape on the angled side of a bowl ... maybe it could be done on a calabash style bowl. The picture below shows what I did on a large elm bowl, applying the tape in segments and then using an X-acto knife to make a cut through the tape where two pieces overlap. In the picture below you can see that I missed a small piece of tape that is beneath the larger piece on the left. Lifting the tape to remove the cutoff and then laying it back down takes some effort and I didn't get a perfect match when I tried it here.

View attachment 8662

I certainly do appreciate your extra effort here, Bill.......🙂

Still waiting on the mailman, and am anxious to do the experiments with the stretch wrap. You have confirmed that I need to get some of the blue masking tape, and check it out. Not sure what brand was at HD, but I don't think it had any writing on it, like this Scotch brand of yours does.......

I did a couple of bowls this weekend, and didn't use the bowl steady for either of them. The ash bowl is intended to be a salad bowl, and the walls are about 1/2" thick for durability with heavy use. Since the walls are so thick, the bowl steady wasn't necessary, but I normally would have used it anyway. Even on thick walls, sometimes the bowl steady is beneficial for producing the finest of finish cuts for the tool surface. The Satine bowl is a thin wall, and I had some difficulty getting the cleanest cuts for the final tool finish prior to sanding.....although, the cuts I did get were probably very satisfactory to many other turners. I know the bowl steady would have helped, but I didn't want to use any of the tapes I have on hand between the wheels and wood. If I had used the bowl steady, it might have worked fine, or maybe not......the problem with the tape is intermittent, and I didn't want to take the chance with this particular bowl. This Satine piece of wood was very stable, and very little warp. It was kiln dried. I don't have my notes here, but I think it was about 10% MC.

Overall, it was a productive and satisfying weekend for me.......😎

I'm headed back out to the shop in a few minutes......love this retirement thing! 😉

ko
 

Attachments

  • IMG_1612.jpg
    IMG_1612.jpg
    201 KB · Views: 22
Kelly,

The outsides of the bowls look fine.
Can't see the inside surface.

The trick for a clean inside surface is light cuts with sharp tools and no bevel drag.

On cut rim bowls I use a quarter inch gouge for the first 1/2-1" inside the rim - a Jimmy Clewes trick to which I added the Michelson grind.
With this tool there is near zero bevel drag and it peels away wisps of wood leaving a great surface.

From a 1/2 inch below the rim, I can roll the Ellsworth gouge into a flute up shear cut. Which peels always wisps of wood with almost no bevel drag.

Glad you are experimenting without the the steady.
If you were to master the Ellsworth shear cut that would give you another level of clean cutting.
The Michelson grind also gives a clean cut.

Without a video I can't see your actual technique with or without the steady.
Be nice to see what you are doing.

Al
 
... On cut rim bowls I use a quarter inch gouge for the first 1/2-1" inside the rim - a Jimmy Clewes trick to which I added the Michelson grind.
With this tool there is near zero bevel drag and it peels away wisps of wood leaving a great surface....

When I talked to Johannes last year, he said that he is now turning his hats between 1/16" and 3/32" thick. The bevel on his tools is not much more than 1/16". It is fascinating to watch him work. I turned a small hat, but we don't have large enough trees here to make a full size hat.
 
When I talked to Johannes last year, he said that he is now turning his hats between 1/16" and 3/32" thick. The bevel on his tools is not much more than 1/16". It is fascinating to watch him work. I turned a small hat, but we don't have large enough trees here to make a full size hat.

Johannes is one of the great turners for sure.
He is among the best five I've ever seen turn.

His grind is a micro bevel all around.
If you want to learn how to turn thin, Johannes is the guy to take a class from.
 
Kelly,

The outsides of the bowls look fine.
Can't see the inside surface.

The trick for a clean inside surface is light cuts with sharp tools and no bevel drag.

On cut rim bowls I use a quarter inch gouge for the first 1/2-1" inside the rim - a Jimmy Clewes trick to which I added the Michelson grind.
With this tool there is near zero bevel drag and it peels away wisps of wood leaving a great surface.

From a 1/2 inch below the rim, I can roll the Ellsworth gouge into a flute up shear cut. Which peels always wisps of wood with almost no bevel drag.

Glad you are experimenting without the the steady.
If you were to master the Ellsworth shear cut that would give you another level of clean cutting.
The Michelson grind also gives a clean cut.

Without a video I can't see your actual technique with or without the steady.
Be nice to see what you are doing.

Al

Al......When I took that photo this morning, I was thinking more about how adaptable the surface would have been, if I had used a bowl steady. It's not experimenting.....been there and done that, and I've found the answers I was looking for. Whether a bowl steady is a worthwhile turning jig to have, or not, is not something I question. I already know using a bowl steady will make the best tool surface better. You are welcome to your opinions and beliefs, but I'm not interested in changing mine.

These two bowls haven't been waxed yet.....just straight Danish oil natural applied.......

ko
 

Attachments

  • IMG_1613.jpg
    IMG_1613.jpg
    236.8 KB · Views: 22
  • IMG_1612.jpg
    IMG_1612.jpg
    201 KB · Views: 22
Al......When I took that photo this morning, I was thinking more about how adaptable the surface would have been, if I had used a bowl steady. It's not experimenting.....been there and done that, and I've found the answers I was looking for. Whether a bowl steady is a worthwhile turning jig to have, or not, is not something I question. I already know using a bowl steady will make the best tool surface better. You are welcome to your opinions and beliefs, but I'm not interested in changing mine. These two bowls haven't been waxed yet.....just straight Danish oil natural applied....... ko

Sure like to see a video of you using the bowl steady.

Al
 
Sure like to see a video of you using the bowl steady.

Al

I'd sure like to see you start an AAW gallery, or some place online where we can see your current works, and keep it up to date.

....but, I know that won't happen, because in the past, you've made it plain you intend to be secretive.

My recent, and most current works are available for anyone to see, and I don't make up phony titles like "AAW advisor" to try and impress anyone.

ko
 
Al-you have mentioned several times for Odie (kelly) to send a video. Many of us don't have that easy an option, Gretch
Gretch,

It isn't too hard. I assume anyone in the forum has a PC with web access, most digital cameras and cell phone take videos, you tube is free.
Kelly keeps saying has a superior technique. I'd like an opportunity to see it.
 
I'd sure like to see you start an AAW gallery, or some place online where we can see your current works, and keep it up to date. ....but, I know that won't happen, because in the past, you've made it plain you intend to be secretive. My recent, and most current works are available for anyone to see, and I don't make up phony titles like "AAW advisor" to try and impress anyone. ko
Kelly,

I have been fortunate in my woodturning life. AAW was instrumental in much of the good fortune.
So it is with great satisfaction that I was able to serve my local chapter, serve the AAW as a board member, work for the AAW as a volunteer and be an advisor to the board.

I was asked to serve as an advisor to the AAW board after serving as an elected board member.
I continue to be an advisor mostly working with the symposium Comittee and with the board in planning future symposiums.
I think I make a difference. AAW keeps asking me back.
I don't expect anyone to be impressed it's just something I do along with 100s of other volunteers that run the AAW.

The FWS is FEB 2016 they put up some pictures you can see them at
http://floridawoodturningsymposium.com

Al
 
Last edited:
I'd sure like to see you start an AAW gallery, or some place online where we can see your current works, and keep it up to date.

....but, I know that won't happen, because in the past, you've made it plain you intend to be secretive.

My recent, and most current works are available for anyone to see, and I don't make up phony titles like "AAW advisor" to try and impress anyone.

ko

Gretch,

It isn't too hard. I assume anyone in the forum has a PC with web access, most digital cameras and cell phone take videos, you tube is free.
Kelly keeps saying has a superior technique. I'd like an opportunity to see it.

How about it Al?

You show us a gallery you keep stocked with your current works, over a time frame of say.....a year, and I'll assume you're putting in the dues time, and not just an internet lathe jocky. Otherwise, you and your title both have equal levels of substance.

Personally, I don't care whether you believe I have discovered some methods that work for me. You and anyone else can make up your own mind about that by observing the results I'm getting.....and, I have always freely, and frequently showed my results. From you, we don't get that chance to evaluate your words as compared to the results you are getting, because for years now, you've been very reluctant to show us......except for a rare example now and then. A person might consider your resistance to showing us your results may be related to the quality and quantity of what you do....or don't do.

ko
 
In my opinion both Al and Kelly need to back off. I do agree with both: Kelly just wants a question answered not for someone to change his technique. Al just wants to help by looking at Kelly's technique and see if there is a problem.
I say that these questions have been asked and answered as best they ever will so just get off of it and get on with life.
 
Status
Not open for further replies.
Back
Top