How to set up the Oneway bowl steady so it works with maximum ease and effenciency.
The Oneway bowl steady is a wonderful invention for lathe turning of bowls......particularly thin wall bowls, where the slightest harmonic vibration will ruin an otherwise finely executed cut on both interior and exterior walls. This is not a jig for the newbie, who is still struggling with the basics.....everything must be in order for it to work to it's potential. If the right tool isn't sharpened to perfection, and applied to the wood with the best possible presentation and rpm.....the bowl steady will seem to that turner like it doesn't work as advertised. It does, and IMHO, those who have trouble with it, need to hone some of their other skills first.....

As good as the OBS is, there are some things that a turner can do to fine tune it's potential.
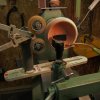
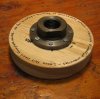
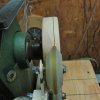
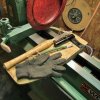
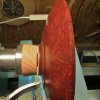
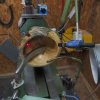
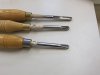
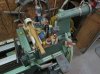
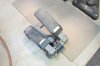
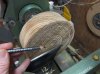
The inline skate wheels are good for what they are designed for, but they do have a few thousandths of out-of-round to deal with. For a lathe turner, they need to be perfectly round, or they will be a contributing vibration factor.....for inline skates, it doesn't matter as much. This is easy to fix with the wheels spinning on a perfectly round surface. I used a premium faceplate by Precision Machine for this. Use a coarse grit sanding disc very lightly applied at 90° to the very outward surface of the wheel, and the wheel is trued up in short order.
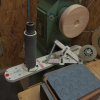
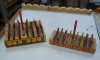
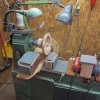
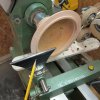
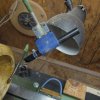
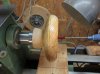
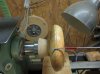
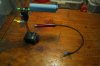
Because we are not all turning cylinders, but bowls, the wheels need to be running in the exact same orbit on the bowl. There are two things to do, in order to accomplish this. First, use longer bolts for the wheel axles. you can add washers to get the two wheels very close to tracking together. Next, the shape of the wheel can be altered to a "V" shape on both wheels, so as to pinpoint both wheels to a very small tracking width at the desired point on the bowl. (This also helps you align the wheels to a very small track on the bowl, because the V shape gives you a better view of what you are doing.) A "balloon" tire might be all right for skate wheels, but isn't easy to deal with for thin wall bowls. I use the same coarse disc to grind the wheel into the "V" configuration. It's done while the wheels are spinning on a specially made circular block of wood that has a small groove cut into the outside surface with a spear point scraper. This small detail groove is what you're matching the tip of both wheels to. I've colored the interior of this groove black with a sharpie, so that it's very visible when spinning on the lathe. With the lathe running, and you're grinding the "V" shape on the wheel, it's very easy to shape the V on both wheels to about 3/32" width with the points of the V on both wheels in perfect coordination. This, because the dust being created will show the point of contact on the surface of the wheel while the grinding is taking place.
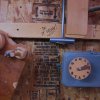
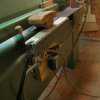
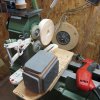
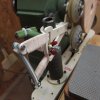
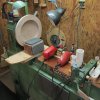
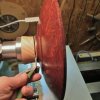
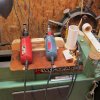
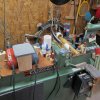
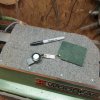
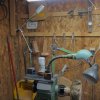
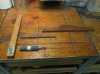
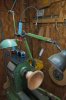
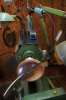
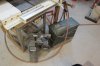
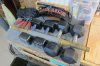
You may also want to do the setup of the OBS without the use of tools.....well, except for the bolt the secures it to the bedways of your lathe. The center of the distance between the two wheel axles should match the centerline of your lathe spindle. This height is the same every time you mount the OBS, so a simple PVC pipe of the correct length can be slipped down onto the vertical bar of the OBS base. The height adjustment becomes automatic every time you make the setup. Swivel adjustments of the wheel apparatus is easy, without needing to tend to the height adjustment. I've made my own "T" handle for securing the wheel apparatus to the vertical post, so that adjustment is quick and easy. I've added a wing nut to the adjustment of the scissor arms.....no tools there either.
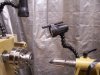
You will see that I've added a spring to the ends of the scissor arms. When I first did this several years ago, I thought it may help at high speeds, but it didn't work out as I had envisioned. I did discover, however, that using spring pressure only (no scissor clamp used), that it helps with warped bowls turning at slower speeds.....would have never known this, if not for my failed attempt at something else!
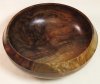
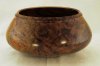
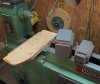
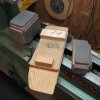
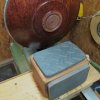
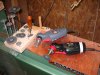
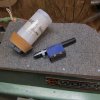
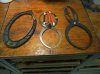
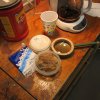
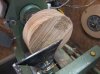
edit: Another thing that might be of interest to a few of you, is that block of wood and sanding platform shown in the second photo. This serves as support for power and hand sanding of my bowls. The block has three usable heights, and can be positioned on the supporting platform to the front, rear and side of a bowl being sanded. I only recently added the three pieces of foam rubber to the block......and, OMG what a difference to rest your hand on it while sanding bowls! Wish I had thought of adding the foam rubber years ago. Matter of fact, I think the platform and rest blocks (there are two of them) might make a good subject for a future addition to my thread here......stay tuned!
I've tried to make all of this simple to understand.....hope so!
ko