• Beware of Counterfeit Woodturning Tools (click here for details)
  • Johnathan Silwones is starting a new AAW chapter, Southern Alleghenies Woodturners, in Johnstown, PA. (click here for details)
  • Congratulations to Jim Hills for "Journey II" being selected as Turning of the Week for May 6th, 2024 (click here for details)
  • Welcome new registering member. Your username must be your real First and Last name (for example: John Doe). "Screen names" and "handles" are not allowed and your registration will be deleted if you don't use your real name. Also, do not use all caps nor all lower case.
Bottleneck Basket
David Bartell

Bottleneck Basket

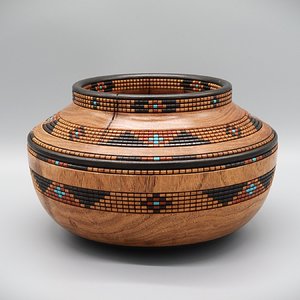
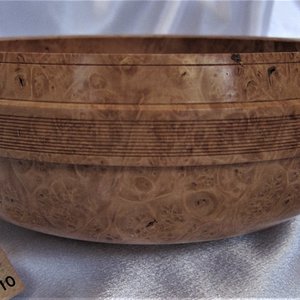
A Mesquite turning meant as a tribute to a Native American basket style called "Bottleneck". It was a functional style that also became popular for collectors in the 1900 time frame. 5" tall and 8" wide. A single piece with faux beading features inside and outside.
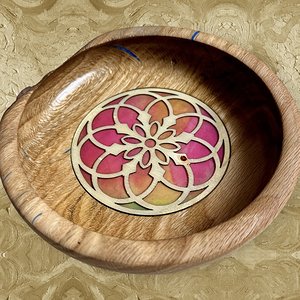
This is a look into the opening showing the basket illusion on the inside.
Bottleneck-Basket-1.jpg
 
Wow David! I was impressed by the outside, then blown away with your pic of the inside! May I ask how you accomplished the basket design on the bottom of the inside?
 
Wow David! I was impressed by the outside, then blown away with your pic of the inside! May I ask how you accomplished the basket design on the bottom of the inside?
Will, thanks for asking. In my studies of basket illusion I have seen some spectacular examples of the illusion being applied to the inside of a sizable vessel. What I saw was done on a segmented vessel and I imagine it was added as each one or two rings were added. I wanted to find a way to partially apply the technique to a non-segmented piece. Beading, burning, inking and painting can’t be done, to my knowledge, once the walls start closing in. Even doing it within an open sided bowl has limitations because the concave sides restrict some angles that aren’t an issue on the outside.

What I did was initially hollow the piece in a traditional way then separate the top from the bottom just below the widest part. Then I could finish the inside of the bottom as if it were a bowl and get it clean and smooth for basket illusion. What you see is all that I did inside (except for the three beads on the inside of the rim). I did the embellishment to completion then glued the top back on. After drying it was back to traditional hollowing to thin the joint area and clean the inside of the top area. Suspicious fingers might find the inside seam but I hope not. The bottom of the black bead on the outside hides that side of the seam.

The beading on the inside of the rim was cut with the lathe in reverse. The burning, inking and painting is constrained somewhat because of rim interference but it is manageable.

For a first attempt I am pleased with the outcome. The process wasn’t overwhelming or unreliable so it is worth applying again.

Thank you for your interest and compliments.
 

Media information

Category
Member Galleries
Added by
David Bartell
Date added
View count
556
Comment count
6
Rating
0.00 star(s) 0 ratings

Image metadata

Device
Canon Canon EOS Rebel T8i
Aperture
ƒ/18
Focal length
25.0 mm
Exposure time
1/8 second(s)
ISO
400
Filename
Bottleneck Basket 2.JPG
File size
1.4 MB
Date taken
Sun, 26 November 2023 5:09 PM
Dimensions
4063px x 2855px

Share this media

Back
Top