I spent a few hours hollowing out some large end-grain bowls - Manitoba Maple.


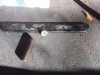
Due to the size, I dug out the Woodcut Pro-Form. Its set for a pretty aggressive cut.

Hollowing with this is incredible. It makes the longest curls I've ever seen.

However, when doing a long cut, it starts to "bounce" after a while, so I'm cutting ovals not circles.
The only solution I've found is to change angles and start again.
Does anyone have experience with these tools and how to hold a nice smooth cut?
Thanks
Due to the size, I dug out the Woodcut Pro-Form. Its set for a pretty aggressive cut.
Hollowing with this is incredible. It makes the longest curls I've ever seen.
However, when doing a long cut, it starts to "bounce" after a while, so I'm cutting ovals not circles.
The only solution I've found is to change angles and start again.
Does anyone have experience with these tools and how to hold a nice smooth cut?
Thanks
")