• April 2025 Turning Challenge: Turn an Egg! (click here for details)
  • Congratulations to Kelly Shaw winner of the March 2025 Turning Challenge (click here for details)
  • Congratulations to Ellen Starr for "Lotus Temple" being selected as Turning of the Week for 21 April, 2025 (click here for details)
  • Welcome new registering member. Your username must be your real First and Last name (for example: John Doe). "Screen names" and "handles" are not allowed and your registration will be deleted if you don't use your real name. Also, do not use all caps nor all lower case.

thickness of blank for Oneway coring

Joined
Jan 18, 2020
Messages
141
Likes
129
Location
Bath, Maine
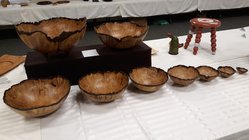
Having a lot of fun with my new Oneway coring system, and starting to plan ahead for the next tree to come down. I just realized that I don't know how thick to cut the blanks for efficient coring. Obviously the larger the diameter the deeper I can go so the thicker the blank needs to be. For the 13-14" blanks I started with and got three bowls out of, it looks like I started with a blank about 4 1/2 - 5" thick. To go one bowl bigger, up to 16" with a #3 knife I should probably have a blank an inch and a half thicker so probably about 6" thick? What about 18" using a #4 knife?

Has anyone worked up a chart for this?
 
Not sure I understand what you mean by blank thickness, but here are my thoughts. If you start with a log that has a 14" diameter and split it in half lengthwise, you will have two blanks to core, each of which is approximately 7" deep ( make sure the pith has been removed). Once the blank is roughed into round it will probably be somewhat less than 14" in diameter; let's use 13" for this example. If you then apply the 10% "rule" (for twice turned bowls), you can layout the wall thickness for each core. The largest core, at a 13" diameter, should have a wall thickness of 1.3" (1.25" would be close enough), and mark that on the face of the blank, measuring 1.25" from the outer edge of the blank. You would do the same to mark the depth of the core to be 1.25" from the bottom of the blank (where the bottom meets the face of the chuck jaws (or face plate if that's how you're mounting the blank). Then mark out each successive core in the same fashion. You will now have the entry point for each core on the face of the blank, and the depth of cut along the outer wall for each core. Move the Oneway base toward or away from the face of the blank to get the proper depth of cut. Then move the base perpendicular to the bed ways in order to get the proper entry point. Hope that makes sense and answers your question. There are a number of YouTubes which show how to set it up. Good luck, and let the shavings fly.
 
Yeah, I've got all that. Roughly a 16" diameter blank would need to be about 6". Does an 18" need to be 8" thick? Has anyone worked out the exact numbers?
 
According to the Craft Supply catalog page the #2 knife can cut a bowl 4-3/4” deep. So if you add 3/8” for the knife thickness, 1” for the outer bowl thickness ply 1/2” for the tenon and truing of the blank it seems that 6.5” would be about where to shoot. Then it looks like you add/remove an inch for the other knives. I have only used the #1 and #2 knives and have cut my blanks in the 6 to 7 inch thick range Which seems to work.
 
Don't know if any one has done a chart.... Not some thing I ever calculated. For me, I only core blanks less than 3 inch thick if the wood is very special in figure or rarity. Other than that, blanks 3 inch thick will leave you with a lot of shallow blanks that you may not 'get a round 2 it' turnings. By using bigger arced blades, you can make shallower cuts/cores. The Oneway can also be off set from dead on center for deeper or more shallow arcs. The only problem can be that since the blades are made for pretty specific arcs, you can run into some binding in the kerf. Simple to fix, you just have to come back to the top and open up the kerf/move the set up to one side or the other.

robo hippy
 
There is a guy who seems to have done all of the calculations for the Oneway system, he has a website called "theturningshed.com" where he sells a pdf book with settings / markings for coring in all of the permutations of sizes and shapes (https://theturningshed.com/products/essentials-bundle).

I haven't tried his product yet because my coring has been very simple so far, but I will probably get it sooner or later, as I face more complicated coring tasks. It looks like he has done all of the work to show you how to maximize a blank or get the shapes you want. I suppose this can all be learned, but it would be nice to have the head start.
 
The base stays in almost the same spot/orientation. You just slide it to the side, either right or left. To the right/turner would make for a shallower blank, to the left would be for a deeper core. I never experimented with it a lot since I prefer the McNaughton. I would say to hold the blade you are going to use up over the top of the blank you are going to core. Note where the pivot post is, and position the base there. The same technique can be used with the Woodcut coring system, but they actually have a laser you can use to track the path of the cutter. I would guess that the same could be done with the Oneway system, drill a hole in the center of each blade on the pivot point, and get a vertical laser holder. It should work, though I haven't heard of any one doing it, yet.... With the Oneway system, and woodcut as well, you need to have the cutter at or very slightly above center, like not more than 1/8 inch. Years of habit using scrapers, I want them slightly above center when removing bulk from the inside of a bowl.

robo hippy
 
For me Chris Ramsey has been the leader when it comes to the Oneway coring system. I specificly visited with Chris to see him core (picture included). Here is what he posted on using the system:

Chris Ramsey: Assuming that you had established the size and shape of the largest bowl and the blank was solid, it was possible to get al least five bowls from the one large blank. I have had an Easycore system since they came out with them and it took me many nested sets to figure out how to increase the amount of bowls from one blank. The video that is supplied with the system, and for the lack of a better word, sucks. They do it exactly backwards from the way it should be done. They establish a tenon then core the largest bowl then have to establish another tenon on the cored blank and repeat the process on each cored blank. That is backwards. Get a tenon established on the large blank and put it in the no.4 profiled jaws, (I use the no.6 profiled jaws on large nested sets) The tenon only needs to be 1/4 inch deep and 5 or 6" in diameter. Using a 5" or 6" diameter tenon is a lot of surface area so it is safe to keep the tenon short. Lay out your cores with a pencil on the face of the blank and start with the smallest bowl--I will core a 2" to 3" diameter by 1" deep core first. Use a pencil and draw a line on the bedways on the right side of your base plate then advance the base plate 1/2" in front of the line toward the blank and 1/2" to the outside of the previously cored blank (or toward you). This insures that the next core will be 1/2" wall thickness and 1/2" deep when cored. Core the next bowl using the same method and so on. With a 5" blank you should be able to get a minimum of 5 bowls with a wall thickness in the bottom of the bowl at 1" thick. I go much thinner on wall and bottom thickness to maximize yield. If you are ever in KY come by the studio and I'll show you how I core--it might save you a lot of wasted wood, increase your yield and save you a lot of guess work. I'll post a picture of a nested set of 9 NE bowls from a burl that was 10" high. I could have got three more out of it but chose to turn a pedestal bowl on the largest blank. If you want to pick my brain give me a call or email--I'd be glad to answer any questions that would help you with the Easycore system.
 

Attachments

  • 9Cores.jpg
    9Cores.jpg
    328.1 KB · Views: 43
  • ChrisRamsey.jpg
    ChrisRamsey.jpg
    237.9 KB · Views: 43
Back
Top