• Congratulations to Alex Bradley winner of the December 2024 Turning Challenge (click here for details)
  • Conversations are now Direct Messages (click here for details)
  • Congratulations to Gabriel Hoff for "Spalted Beech Round Bottom Box" being selected as Turning of the Week for January 6, 2024 (click here for details)
  • Welcome new registering member. Your username must be your real First and Last name (for example: John Doe). "Screen names" and "handles" are not allowed and your registration will be deleted if you don't use your real name. Also, do not use all caps nor all lower case.

Taming end-grain

Joined
Sep 28, 2005
Messages
16
Likes
0
Location
La Crosse, WI
I've been having some problems with face-plate on my end-grain bowls--can't seem to keep the areas of end-grain from tearing out or looking frayed, whether I use a bowl gouge, sheer scraper, etc. Happens inside and out. I'm working mainly with green birch--leftovers from cutting down a large tree in my front yard--which may be a more problematic wood than some. I try to make sure my tools are sharp, technique good, etc. It's a pain to sand out, as well.

I roughcut the bowl down to size and dry it in the microwave, then turn it to finished dimensions.

Any hints or tips? Would it help to spray a little water on the surface?
 
Last edited:
Birch is a rather problematic wood, but the same tool usage would apply to birch as end grain on any other wood.

First, a sharp tool.
Second, I am assuming you are talking about a faceplate type turning, as opposed to a spindle type.
Thirdly, how aggressive you take the previous cuts will greatly determine the amount of tear out you have. The rotational speed as well as how quickly you traverse through the cut, also effect the tearout.

The technique is going to be different with a traditional ground gouge than a fingernail grind.
With a fingernail grind, you would use a finishing cut. My pal D. Ellsworth describes it well in his videos, but essentially you would have the gouge level to the ground, flute upright (the U faces open top as opposed to the side). You want to progress slowly, but you will be using a very small portion of the gouge, just left of the tip at the bottom and the bevel you are rubbing is actually the front and left side. It takes a bit of practice, and can be intimidating at first, but it will give you a very clean shear cut.
The other technique would be to use a negative rake scraper. with the bur up.

Another idea that might help is to wet the fibers a bit to perk them up, or sometimes a thinned lacquer or similar wipe on to stiffen the fibers help.
 
Says you're a cheesehead, so I'll assume that you're not talking about a tree whose common name is green birch, rather one of the common "yellow" birches like B nigra, lenta or alleghaniensis (leutea), or "white" B papyrifera in an unseasoned state. White birch is lower in density, less prone to grain reversals and lacks the dark heartwood of the commercial yellows. It's the stuff of golf tees and wooden thread spools, and behaves pretty well under the tool because of its straighter grain. It looks, smells and tastes like Popsicle sticks and tongue depressors, because they were traditional uses for the wood.

The yellows go a lot to grain reversals, making them fun to split as firewood, and providing surprise areas where your tool is prone to pick up some fibers if you tool isn't in perfect peeling position. Doesn't scrape worth squat, either, for the same reason, and if you're using it in flat work, gives blotchy results with stains. They can get really wild, producing "flame" figure, which is especially difficult to cut.

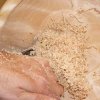
I don't approach them as Steve does, with an edge up into the rotation, because it will pull those reversed places. I take a broad forged gouge, tilt it up on its edge and move across the general direction of the fiber, allowing the rotation of the piece to slide it down the edge of the gouge. When the wood is green, I broaden the face of the cut, producing wide shavings. For dry wood, broader-faced cuts would make pickup of wild grain more likely, so I keep it very narrow. You can see by this closeup of the outside of a bowl that it leaves closely-spaced concentric lines rather than a smooth surface, but there is minimum pickup in the climb cutting zone near the top of the picture. For the inside, the gouge position is pretty much the same as the outside, making for narrow shavings.

It's great wood to look at, but you have to be pretty careful to cut rather than pick up or scrape, because it's less forgiving then something with shorter, more uniform grain like cherry or maple.
 

Attachments

  • Outside-Pickup-Surface.jpg
    Outside-Pickup-Surface.jpg
    12.8 KB · Views: 156
  • Inside-Trim-Small.jpg
    Inside-Trim-Small.jpg
    14.6 KB · Views: 157
I didn't see anyone mention cutting uphill or downhill so I figure I'll throw that in. If you picture the wood as a big bundle of fibers, you want to cut in the direction that is pushing the fibers into longer fibers, not into open space. On end grain turning, this will be center to outside on the concave and outside to center on the convex. Opposite for side grain turning.

Another fun trick is to rub a whole gob of paste wax into the torn grain before making your final cut or sand. This will lubricate the fibers so that they either cut or slide, rather than catching and pulling. Helps alot.

Have fun,
Dietrich
 
Back
Top