• April 2025 Turning Challenge: Turn an Egg! (click here for details)
  • Congratulations to Kelly Shaw winner of the March 2025 Turning Challenge (click here for details)
  • Congratulations to Ellen Starr for "Lotus Temple" being selected as Turning of the Week for 21 April, 2025 (click here for details)
  • Welcome new registering member. Your username must be your real First and Last name (for example: John Doe). "Screen names" and "handles" are not allowed and your registration will be deleted if you don't use your real name. Also, do not use all caps nor all lower case.

Stabilizing cracks with CA and finishing

Roger Wiegand

Beta Tester
Joined
Nov 27, 2018
Messages
875
Likes
1,044
Location
Wayland, MA
Website
www.carouselorgan.com
So I have had a couple of occasions now where I notice a developing crack well into turning a once-turned NE bowl in green wood. I've has actually good success in stabilizing the crack by soaking in some thin CA glue; the pieces have moved and warped but not continued to crack.

I know the right answer is to throw it in the firewood pile for the oven, but sometimes the bowls look pretty nice and the cracks aren't very obvious, so I keep them around for a while before sacrificing them to the pizza gods.

The most glaring problem comes at finishing, where the area around where the CA has been applied takes the finish differently than the rest of the bowl, leaving a very obvious signature. Especially in softer wood, like the box elder I've been turning lately, the CA soaks deep into the end grain and can't be removed by any sensible amount of sanding. I've also tried using CA to stabilize punky areas in spalting wood, with the same issues.

Is there a way around this without soaking the whole piece in glue? Or is, as I suspect, the answer to pitch the piece when the crack is first noticed and not invest any more time and effort in it?
 
I have a hard time giving up on pieces, and a lot of folks like bowls with character. I’ve been putting pewas (bowties, butterflies) across the cracks and dressing them up.

A few options- my favorite option is to sand across the crack filling it with sawdust. Carefully apply CA glue with a fine tip applicator, and before it dries, sand across the crack again. I don’t know if it keeps the CA from soaking in as much or fills the pores with dust but either way I don’t get those stains. The cracks basically disappear.

Another idea is apply a coat of finish to the bowl first. That will help keep the surrounding wood from soaking up the CA as much.

Another option is to outline the crack with painters tape first and use medium CA. It doesn’t wick into the surrounding wood as much. I’ve been using starbond black medium CA for small cracks lately.

The other option is to finish it with CA glue. Mark Sillay has videos on YouTube describing his process for using Parfix CA glue. The set time is about a minute. I’ve used it with good results- but I only use it for display type pieces. The Parfix doesn’t hold up well to washing- like on a salad bowl. But I use it a lot of NE bowls that will be mainly decorative.
 
If there is ~1/8 or so that needs turned off the in or outside, I use thin ca sometimes followed by medium ca. If the crack is through the wall I spray activator on one side, fill from the other side. I find if ~1/8” is turned off usually the ca is only in the crack. If I cant turn more off, sometimes I let it go - I usually finish with thinned poly and it stabilizes the smaller cracks. If I need to fill a crack or defect and cant turn the outside off, I use medium ca after a coat of finish and use a card scraper to level. All of this is with dry wood. Could be done after you let the green bowl dry.
 
I'm not a CA fan. Anything above a hairline crack goes to the garbage. I repair a hairline by apply Titebond on the inside, and pulling it through the wood with my shop vac. I usually follow that up with a band clamp. At this point of my life, I have about 2 lifetimes of wood still to turn and turning less all the time. So I dislike spending the time to repair a bowl that will always look like a cracked bowl. Maybe easier for my kids to throw it away after I'm gone would be the only benefit.
 
I like the titebond idea-- that I know how to deal with and I have confidence in its longevity.

I guess I need to work on wood sources, at the moment I hate to lose a nice blank because I've already invested too much effort in scrounging it. You'd think by this age I'd finally understand the concept of sunk cost and get over it.
 
I'm happy you think that is an opportunity Richard, but to me it draws all the attention away from the wood and form. All I see is a crack repair until I force myself to look somewhere else. To each their own. How do you describe it to customers? Do you tell them you had to repair a crack? Just curious.
 
Last edited:
I happy you think that is an opportunity Richard, but to me it draws all the attention away from the wood and form. All I see is a crack repair until I force myself to look somewhere else. To each their own. How do you describe it to customers? Do you tell them you had to repair a crack? Just curious.

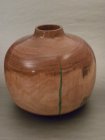
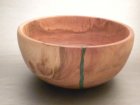
Yes, I tell them that it was a crack. I let the wood dry for at least a year. So far (knock on wood) these "repairs" have held. These are usually the first to sell. For sure, I burn some, especially if they fly apart on the lathe. Some of these cracks can be 1/2" or more, then I ususlly use sawdust, which is a less expensive alternative to chrysocolla or turquoise.1936.JPG
 
I'm all in on the "opportunity to embellish" concept. Crushed stone and glitter, with thin CA are my favorites.
f902a38f0f1e2a14634e3b23cf6c9c5e.jpg
 
I've certainly see some nice examples of embellishments around cracks that look very nice, including these. I will probably get to doing some that are laced or held with butterfly keys. I wasn't thinking about macro cracks when I started this thread, I would generally notice those before I start and make a plan for them. I was working more with hairline cracks that don't become evident until the bowl is turned fairly thin and starts to chatter; I had used the CA when trying for a quick fix on the lathe.
 
It seems the gnarlier the wood ( which is going to have cracks and other defects) the more folks like it - “Oh, I like the character this piece has”. I need to try the titebond/shop vac method.
 
Roger I've found that you can still use Thin CA glue for those hairline to tiny cracks without worrying about the discoloration you normally get when the wet CA glue soaks into the wood around the cracks and dries. Like it has already been mentioned if you are quick to spray activator immediately after using the glue it hardens before it has time to soak in to any degree, a light sanding and you won't have any problem. This works for me 98% of the time.
 
While I generally favor epoxy on any crack above hairline, CA does have its place.
You might try injecting with a syringe - you can go #25 or even smaller with thin CA.
Last time I bought a bunch of #23 which is as small as I can shoot with thin epoxy, they cost about $0.25 ea at CVS. And, for what it's worth, I generally clean with acetone and use multiple times.
SUGGESTION: Buy at a drugstore out of you neighborhood - you don't want a neighbor overhearing as you explain you're just a little-ol woodturner working on a bowl - the "sure you are" look from the pharmacist speaks volumes.
 
I have not worried about the discolouration that people talk about, first off, I have rarely any splits in my turnings, but sometimes there are imperfections already in the wood, and I take care of them with CA, also if there are knots in the wood I try to prevent them from splitting by soaking CA into the endgrain of the knots.
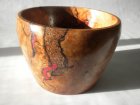
Now I have some pictures here that show that there is no discoloration where I used the CA, first there is the Applewood bowl that I turned from the graft area of a Apple fruit tree, the graft was only partially grown together, there were openings is the wood, I filled these with coffee grind and flooded that with CA carefully.

Of course I do this before final turning and finishing, as these defect exist when I rough turn the wood, and I normally will take care of it right then and there.

Apple tree graft area.jpg

However I had a Large Willow burl rough turned and that one I let sit for at least a year if I remember right, in that time the burl whirls as I will call them did dry and open up.

So after the whole bowl had dried, I then filled all the splits with again coffee grind and CA, I did not return this bowl but just sanded and finished it with my regular finish (Polymerized Tung Oil), first picture is when I just did this, second picture is from several years later.

Willow burl.jpg Willow burl now.jpg

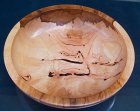
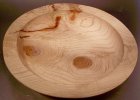
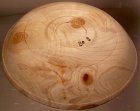
Got these pictures from a White Ash bowl I turned, it came from a area of the top of the trunk where it split into several limbs, and it caused a internal split though not all the way to the rim of the bowl, though it went right through in a small area, so when I filled that with CA I did nearly glue my finger to the bowl ;-)), used some tape to stop that after it happened.

The knots I soaked with CA and they did not split but for one that already had a small split in it, but is did not enlarge after having been filled with CA.

So as you can see there is some darker area where the wood was split while the tree was still growing, but there are no stains in any of these bowls from the CA, I find that the Polymerized Tung Oil gives the wood the same coloration as any coloration that could be there from the CA, it just does not show as you can see.

White Ash roughout.jpg Ash bottom side.jpg White Ash finihed.jpg Ash bottom finished.jpgAsh finished.jpg
 
Last edited:
I am surprised that only on mention was made of using shellac to seal the area being filled. I still have the handout book from the 2011 Symposium in St.Paul and I keep it opened to "Stephen Hatcher". Stephen's presentation is all about inlay-ed designs rather then crack filling, but his method is easily applied to crack filling. The paragraph "Sealing The Wood" he recommends "a dilute mixture of de-waxed shellac" applied over the area. I have used that successfully by making my own mixture from flakes and DNA the I keep in a glass cleaner spray bottle. If the cracks are big enough to accept crushed mineral I will piece such that the crack is as level as possible then carefully drip the thin CA on. The various minerals are listed with all of their characteristics in a chart on the 4th page of the article. The presentation explains how to undercut a design into the wood using a Drermal Tool so following that procedure I have filled large voids with epoxy putty, then evened to the surrounding surfaces then undercut and filled. The void in the base of the bowl was filled with epoxy putty returned then under cut and filled with Turquoise.8016Bowl.JPG
 
If you use shellac or another finish to protect the area around a hairline crack, how do you keep it from wicking into the crack and interfering with the glue bond? Does CA stick well to shellac? (never tested it) Some glues, like tightbond, won't stick to it at all-- very useful for assembling casework.
 
I spray the thinned shellac on the raw surface and it does not seam to wick into the cracks in fact if you look close you can see that it does not bridge the crack. The excess CA that sits on the shellac surface surrounding the crack bonds to the shellac almost as much as it would to the bare wood.
Practice - Practice and more Practice!
 
Back
Top