• January Turning Challenge: Thin-Stemmed Something! (click here for details)
  • Conversations are now Direct Messages (click here for details)
  • Congratulations to Scott Gordon for "Orb Ligneus" being selected as Turning of the Week for January 20, 2025 (click here for details)
  • Welcome new registering member. Your username must be your real First and Last name (for example: John Doe). "Screen names" and "handles" are not allowed and your registration will be deleted if you don't use your real name. Also, do not use all caps nor all lower case.

Reverse chucking options

Joined
May 28, 2015
Messages
1,607
Likes
217
Location
Bainbridge Island, WA
Need to decide how to start with reverse chucking. I have a half-dozen bowls started green years ago, and I want to finish them, the biggest might be 10" OD, probably less, and it's fairly shallow. Others are much smaller. In the near future, I doubt I'd be turning anything bigger than 10", most smaller. Am wondering:
  • Does this "chucker pad" work well? The price is right.
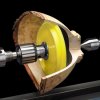
  • Bowl Chucker Pad.jpg
  • For items the chucker pad won't work with, do you have a favorite shop-made option? I don't have the chops to make a Longworth chuck, but something simpler should be within my reach. Just would like to know the plan has worked for others before launching into it. 🙂
 
Even cheaper is a four jaw scroll chuck. Put a piece of scrap wood in the chuck and turn a profile that matches the bottom of your bowl or if it is small and not warped you can make it match the rim. Use a piece of an old mouse pad or jar opening pad or Funny Foam, or anything that has a bit of give" to conform to the bowl/platter/whatever and also has some "grip" so that it won't slip. Bring up the tailstock point and that's all there is to it. For smaller items or when gripping the rim, a paper towel folded a couple times is generally enough to provide good holding friction without scuffing. Be gentle while finishing the bottom. Otherwise, you will learn why the hard way. 🙄
 
For reverse chucking bowls I use about 3" diameter block of wood in the chuck turned round and hollowed out slightly with a paper towel pad. The idea is to have a rounded contact point along the edge of the jamb chuck close to the center of the bowl.

I use the same blocks over and over again. I check to see if it is running true and true it up if it needs it.

You can see how I measure the bottom and use the reverse chuck on a natural edge bowl on this video.
Fast forward to about 52 minutes for the bottom measure and to about 53:30 for the revers chuck
http://www.youtube.com/watch?v=8jVoI12Kfug
I do the exact same process for cut rim bowls.

Working with a dried bowl you will use the reverse chuck twice.
First to get the outside turned round: true the rim, true the outside, true the tenon.

Then again after you have worked the inside of the bowl to finish the bottom.
I try to keep the center point in the dried bowl and use that for the remounting.
If I don't have center point I find the center point in the tenon using the grain axes.

A long worth chuck or Cole jaws work only with a limited number of bowl designs.
The jamb chuck works well with thin bowls and those with in even rims that the Cole jaws don't hold.
I used Cole jaws a long long time ago but the jamb chuck works so much better.

Al
 
Last edited:
When I am first remounting a dried bowl,
I skip the jamb chuck block and just jamb the bowl onto the chuck with the jaws open just a bit.
You're going to turn out the inside also any marks will be gone.
Al
 
Plywood

For bowls with an even rim, I've used a plywood disk mounted on a faceplate. Turn a groove to mate with the rim. Set the bowl rim in the groove, and wrap several pieces of tape (preferably filament tape) from the back of the disk, across the side of the bowl near the bottom, and around to the back. Staple the tape ends for insurance if desired. Use very light cuts to shape the bottom, and leave the sides alone - they probably aren't concentric enough. From an FWW item by Betty Scarpino.

Turn new grooves for different size/shape bowls, and replace when necessary.
 
chucker pad

Need to decide how to start with reverse chucking. I have a half-dozen bowls started green years ago, and I want to finish them, the biggest might be 10" OD, probably less, and it's fairly shallow. Others are much smaller. In the near future, I doubt I'd be turning anything bigger than 10", most smaller. Am wondering:
  • Does this "chucker pad" work well? The price is right.
  • View attachment 8756
  • For items the chucker pad won't work with, do you have a favorite shop-made option? I don't have the chops to make a Longworth chuck, but something simpler should be within my reach. Just would like to know the plan has worked for others before launching into it. 🙂


Jamie,

I bought a pad I believe was the chucker pad in with an order I was already putting together. It is amazingly like a Dual Action(DA) sander pad. The replacement pads can be found in the automotive section of walmart for under ten bucks. They have a threaded stem but so does the pad I bought for reverse chucking. Works fine, I stick it in a drill chuck on a #2 morse taper and jam it in the headstock.

I do like jam chucks too. I usually turn one about twelve inches long and the nose of it gets customized as needed until it gets pretty short then I make another.

Hu
 
I have used almost all of the methods mentioned so far. I thought the longworth was the cats meow, until I got a vacum chuck. http://www.frugalvacuumchuck.com/details.html is the place to look. I know you are not quite ready to make the finiancial commitment, but do consider for the future as it is much faster and easy to use as long as you start with the tailstock up. The Frugal Vacum is the cheapest premade (some assembly required) I have seen. Or you could make your own if you find cheap parts.
 
Great article, will use all of them!

Jamie Here is an article I wrote for our club a long time ago, but it's still current in most of the options. You should be able to find something that will work for your style of turning.
http://nebula.wsimg.com/7bf500f3fd5...EC0DC707F1FE36FCB&disposition=0&alloworigin=1

John, such an concise yet very educational and useful article! I can see using all methods, have to find a piece of flatstock the right size today. There is a mystery, though: How is the object in the very last picture held on? From the text, it apparently has something to do with "...a hole in the middle so that I could add other jigs to help hold natural edge and other bowls with odd shaped lips."

JohnsChuck.jpg
 
Yea that's a jig a use only occasionally. I don't use the cherry hold downs that are on the outside. The big fat dowel in the middle is for holding ( or driving) deep natural edge bowls that you can't clamp on because the bark would be damaged. I use that dowel as a sort of stand off from the chuck and usually have my live center in the center mark on the bottom of the bowl. I have on rare occasions used tape to hold the bowl onto that down when I was turning feet on bowls. I use strapping tape. If the bowl is finished I use blue masking tape first and then the strapping tape.
 
I didn't know stretch wrap was available in small quantities when I did the article. It is wonderful stuff for holding almost anything. I just moved my entire house and shop and used about 5 rolls of the stuff. I would use it in a heartbeat. The stretch allows you to really pull things snug.
 
I didn't know stretch wrap was available in small quantities when I did the article. It is wonderful stuff for holding almost anything. I just moved my entire house and shop and used about 5 rolls of the stuff. I would use it in a heartbeat. The stretch allows you to really pull things snug.

Cool, I'll give it a try. I have a roll that about 2.5-3" wide, and then a wide roll (24"??) that I wrap green wood in sometimes.
 
I've been using it to wrap the ends of fresh cut green wood so I can take more time cutting it up and sealing the ends. The stretch wrap works great. It really helps keep the logs from cracking. It's also very handy once you've cut the bowl blank. If I don't have time to heat up the wax skillet or paint it with end grain I just wrap the end grain with the stretch wrap and it's good to go.
 
I've been using it to wrap the ends of fresh cut green wood so I can take more time cutting it up and sealing the ends. The stretch wrap works great. It really helps keep the logs from cracking. It's also very handy once you've cut the bowl blank. If I don't have time to heat up the wax skillet or paint it with end grain I just wrap the end grain with the stretch wrap and it's good to go.

I have been doing that a lot too, especially for going to demos. Nothing messy when you open it up, the blanks can for in a travel bag.

Another use is in packing finished pieces for travel especially hollow forms. Tissue paper around the pieces bubble wrap the stretch wrap to hold the bubble wrap.
These make big spherical or egg shaped things that fit together in a box or crate.
The sketch wrap can sometimes be reused for this once or twice if the pieces are doing home from an instant gallery or demo.

Al
 
A few years ago, I bought a 4X4 cedar fence post on sale at a local ranch supply store. Working around the knots, I've gotten about 20 jam chucks out of it, and still have about 18" left. The wood is softer than almost all the wood I turn, which decreases the chance of marring, and I have no reluctance to recut one of the pieces to fit whatever I'm working on. Now I mostly use them for working on boxes, but before I got a vacuum set up, they were my mainstay for reverse chucking most things.

BTW, if paper towel isn't up to the job, the foamy type of drawer/shelf liner makes for a nice interface to protect the surface of a nearly finished work piece and a lifetime supply is about $3 at Wally World.

I love the rubber shelf liner, use it in the shop regularly. Costco will have it soon, and I'm almost out of the last roll I bought (10 years ago). Good idea about using cedar. Actually, we have some old cedar logs laying around, I'll bet I could get some (many, many) out of those [and that'd be good practice -- make friends with the wood as it were]. Thanks for the idea!
 
Back
Top