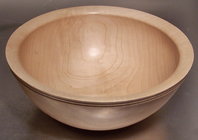
On large logs I cut the pith out entirely. That gives a couple of nice quarter-saw blanks. On smaller logs, though, I was wondering whether to cut the pith out or just cut the log down the middle. The pith will end up being the tenon in those cases. How do you do it?
-
April 2025 Turning Challenge: Turn an Egg! (click here for details) -
Congratulations to Kelly Shaw winner of the March 2025 Turning Challenge (click here for details) -
Congratulations to Ellen Starr for "Lotus Temple" being selected as Turning of the Week for 21 April, 2025 (click here for details) -
Welcome new registering member. Your username must be your real First and Last name (for example: John Doe). "Screen names" and "handles" are not allowed and your registration will be deleted if you don't use your real name. Also, do not use all caps nor all lower case.
Removing the Pith
- Thread starter Kent Reisdorph
- Start date
Something I've been pondering as I have processed wood lately is, "How big is the pith?" In other words, what indicates or determines what size or how many rings constitute a pith?
More responsive to your question, yes, for smaller blanks, just rip it down the middle, as long as you are pretty good at hitting it through the whole length of the log.
More responsive to your question, yes, for smaller blanks, just rip it down the middle, as long as you are pretty good at hitting it through the whole length of the log.
I'll cut down the middle and then just turn off the pith when roughing. Some people don't like that orientation but I call it "x's" and "O's" in the inside bottom of the bowl. X when the pith is towards the rim and O when other way. Here's an example of "X".On large logs I cut the pith out entirely. That gives a couple of nice quarter-saw blanks. On smaller logs, though, I was wondering whether to cut the pith out or just cut the log down the middle. The pith will end up being the tenon in those cases. How do you do it?
Attachments
Good question! I have recently been given some small logs- aka branches from a local tree feller. It soon became apparent that trying to rip the pith.....(sorry English joke!) on my new bandsaw was not feasible. (All my turning kit is mid- sized as I work in a very small space). So I bought a small chain saw, battery operated (Milwaukee ,as I have a number of their mechanic tools /batteries. ) I made the attached Sawbuck, a scaled down version of those shown on the forum, and cut my first log centrally down the middle to remove the pith.
I learned a lot- cutting longways produces long thin shavings-not sawdust and made a lot of mess- complaints from the wife as it's all stuck to things in the garden!
I took the quarter saw blanks and completed tidying up on the band saw, but I'd realised that the pith was wider in some cases than the kerf of my (narrow kerf) bandsaw. So maybe a second cut is needed to remove it? So far the cutting has been to convert the log to something approximating a useful shape and then let it continue to dry. I shall discover whether this works or results in splits!
I was pondering whether it would be safe to put the two "halves" together in the sawbuck and attempt a second cut. The alternative is a third "upright to the right of the current pair, that accepts the newly cut "flat" face and the original curved face. The saw buck is 4 x 8 rescued from a skip after a neighbour had his garden fitted with "Raised beds"!
As you can guess, I am very new to this chainsaw business: we live in domestic suburbia-not a forest in sight! "Logs" are about max 12" diameter and 12-18"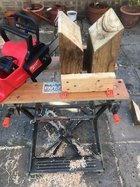 in length.
I learned a lot- cutting longways produces long thin shavings-not sawdust and made a lot of mess- complaints from the wife as it's all stuck to things in the garden!
I took the quarter saw blanks and completed tidying up on the band saw, but I'd realised that the pith was wider in some cases than the kerf of my (narrow kerf) bandsaw. So maybe a second cut is needed to remove it? So far the cutting has been to convert the log to something approximating a useful shape and then let it continue to dry. I shall discover whether this works or results in splits!
I was pondering whether it would be safe to put the two "halves" together in the sawbuck and attempt a second cut. The alternative is a third "upright to the right of the current pair, that accepts the newly cut "flat" face and the original curved face. The saw buck is 4 x 8 rescued from a skip after a neighbour had his garden fitted with "Raised beds"!
As you can guess, I am very new to this chainsaw business: we live in domestic suburbia-not a forest in sight! "Logs" are about max 12" diameter and 12-18"
 in length.
The issue of the pith is that it is the center point of shrinkage. Being a point, it doesn’t compress, no where to go. That stress is relived by cutting through it. I don’t think it necessary to take out growth rings.
My usual is to simply cut through it when milling for bowl blanks. Split the log down the middle. I use that area around the pith for my working tenon, or trim it back when rough turning to eliminate any scary cracks.
My usual is to simply cut through it when milling for bowl blanks. Split the log down the middle. I use that area around the pith for my working tenon, or trim it back when rough turning to eliminate any scary cracks.
- Joined
- Apr 27, 2004
- Messages
- 9,156
- Likes
- 5,760
- Location
- Lakeland, Florida
- Website
- www.hockenberywoodturning.com
cut the pith out or just cut the log down the middle. The pith will end up being the tenon in those cases. How do you do it?
I usually cut through the pith as closely as I can. Sometimes it isn’t straight. So I try to come close.
In lining up the cut I fiddle with each end of the round to get the best grain alignment I can. Oftentimes trying for the pith close to center along the cut.
One of my rules when lining up the grain is to get one good blank versus getting 2 mediocre ones
On some crotches I will cut a 1/2 to an 1 inch on the side of the piths. That lets me get the most flame in the bottom of a bowl, I
Use the pith plane in the tenon or faceplate mount, and maybe turn away the piths.
The issue of the pith is that it is the center point of shrinkage. Being a point, it doesn’t compress, no where to go. That stress is relived by cutting through it. I don’t think it necessary to take out growth rings.
Good info. I would not have thought that was the case.
On some crotches I will cut a 1/2 to an 1 inch on the side of the piths. That lets me get the most flame in the bottom of a bowl, I
Use the pith plane in the tenon or faceplate mount, and maybe turn away the piths.
I'll have to remember that.
The pith can be a big problem if not taken care of properly, most logs are fine with a chainsaw cut that takes out the pith centre, I will use a straight edge and mark the log, so that I cut trough the pith over the whole length.
On larger logs I often cut one or two slabs out that I can use for platters or even spindle stock (Not often though, as I do turn very few spindles)
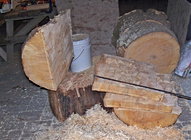
With all the cut pieces I will always check every one of them and use CA to try small problems on them from getting worse, also the pith area will get some CA on it, it does help preventing the start of splits also any knots or small defects can be dealt with at that time.
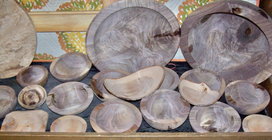
Did I say "Start off with wood that has no checks or splits in them ?" fresh cut logs are usually with very few splitting problems, however some people try to dry logs before turning them, it does not work, especially not with thicker wood, and this is where we find splits, like this one, were I had too many logs to process timely and tried to seal and wrap the logs in plastic bags so that they would not split
Lucky splits let me still use most of that Black Walnut.
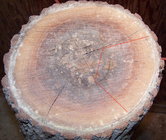
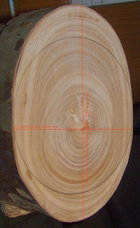
Taking the pith out of an oval log does force one to cut the log trough the pith but only in the direction that gives you balanced wood, like this oval Sycamore log.
IF you would cut it to give you the largest pieces, then you will end up with two halves that will severely distort and probably will have the pieces split on you.
On larger logs I often cut one or two slabs out that I can use for platters or even spindle stock (Not often though, as I do turn very few spindles)

With all the cut pieces I will always check every one of them and use CA to try small problems on them from getting worse, also the pith area will get some CA on it, it does help preventing the start of splits also any knots or small defects can be dealt with at that time.

Did I say "Start off with wood that has no checks or splits in them ?" fresh cut logs are usually with very few splitting problems, however some people try to dry logs before turning them, it does not work, especially not with thicker wood, and this is where we find splits, like this one, were I had too many logs to process timely and tried to seal and wrap the logs in plastic bags so that they would not split
Lucky splits let me still use most of that Black Walnut.

Taking the pith out of an oval log does force one to cut the log trough the pith but only in the direction that gives you balanced wood, like this oval Sycamore log.
IF you would cut it to give you the largest pieces, then you will end up with two halves that will severely distort and probably will have the pieces split on you.

Last edited:
Great description on removing pith Leo. I found that when removing pith I remove at least a 2 inch wide piece with the pith running thru the middle.
Then cut pith out of this section and seal and keep the cutoffs for spindle turning. Found when cutting too close to centre of the pith and turning later that those tight rings near pith always crack. Also learned the hard way, rough turn your blanks ASAP!
Again I tend to turn large bowls 14 to 17 inch diameters and also depends on wood species as always. Wish I would have purchased a larger chainsaw got a 14 inch blade Still, should have bought the 20 inch model, still looking for one on sale.
Great info, Leo.
When dealing with the pith, I will cut off a log section. Then look to see how the cracks that are almost always coming off of the pith line up on both ends of the log. Next step is to generally cut straight down the pith and cracks. Most of the time they kind of line up. I almost never take a section out of the middle. If the log is 24 inch diameter, rather than cut out a 2 inch section centered on the pith, I will usually cut straight down the pith line/crack. Not every time, because every log section is different....
robo hippy
robo hippy
Thanks NormGreat description on removing pith Leo. I found that when removing pith I remove at least a 2 inch wide piece with the pith running thru the middle.
Then cut pith out of this section and seal and keep the cutoffs for spindle turning. Found when cutting too close to centre of the pith and turning later that those tight rings near pith always crack. Also learned the hard way, rough turn your blanks ASAP!
Again I tend to turn large bowls 14 to 17 inch diameters and also depends on wood species as always. Wish I would have purchased a larger chainsaw got a 14 inch blade Still, should have bought the 20 inch model, still looking for one on sale.
I will normally just chainsaw through the pit and no more is needed, unless there are already splits there, though I very seldom have problems like that.
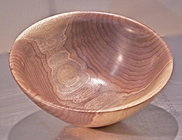
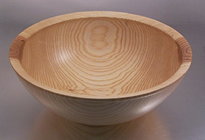
Then using the CA right away and having it dry SLOWLY there is no splitting, then when returning the rough-outs you cut some of that pith area away, because the drying has the side go down, so levelling will have you turn the higher pith area away.
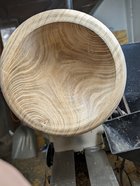
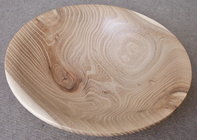
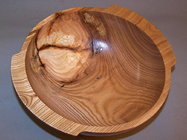
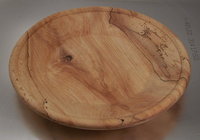
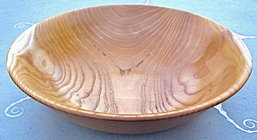
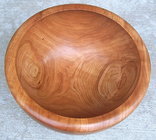
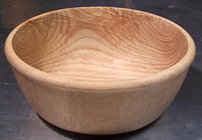
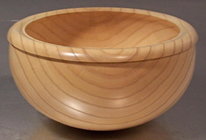
I pulled a dozen pictures that show turnings with the pith barely cut away and no splitting, because of the 4 picture limit per post, I will do three so as everyone can see the results I get.
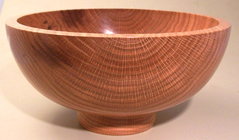
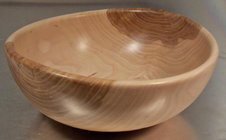
Great photos, thanks Leo. So you would CA the pith area after roughing out the bowl? This will help with that area splitting during drying? Then when finish turning for the second time around, cutting the pith area will be removed and mission accomplished? Again thanks for the info!
I love how the butternut rings form scallops. I had some once.... Some one commented that it looked like spider webs.
robo hippy
robo hippy
I always cut the pith completely out. That way if I can’t get to it right away I don’t have to worry about a big crack.
My usual is to simply cut through it when milling for bowl blanks. Split the log down the middle. I use that area around the pith for my working tenon, or trim it back when rough turning to eliminate any scary cracks.
... most logs are fine with a chainsaw cut that takes out the pith centre, I will use a straight edge and mark the log, so that I cut trough the pith over the whole length.
On larger logs I often cut one or two slabs out that I can use for platters
Ditto for Marc and Leo
- Joined
- Apr 27, 2004
- Messages
- 9,156
- Likes
- 5,760
- Location
- Lakeland, Florida
- Website
- www.hockenberywoodturning.com
The reason I cut logs in half is to prevent the big radial cracks. I can’t store whole logs so I have log sections as long as 3-4
These make multiple blanks. Tangential shrinkage is always more than radial shrinkage.
Missing a little bit of the center growth ring will almost never cause a major crack
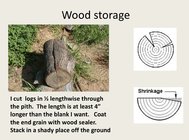
These make multiple blanks. Tangential shrinkage is always more than radial shrinkage.
Missing a little bit of the center growth ring will almost never cause a major crack


