• January Turning Challenge: Thin-Stemmed Something! (click here for details)
  • Conversations are now Direct Messages (click here for details)
  • Congratulations to Scott Gordon for "Orb Ligneus" being selected as Turning of the Week for January 20, 2025 (click here for details)
  • Welcome new registering member. Your username must be your real First and Last name (for example: John Doe). "Screen names" and "handles" are not allowed and your registration will be deleted if you don't use your real name. Also, do not use all caps nor all lower case.

Newbie Photo Questions (continued from Gretch's Fluorescent Light post)

Mark Hepburn

Artist & Chef
Joined
Mar 26, 2014
Messages
1,622
Likes
580
Location
Houma, Louisiana
Okay,

So I'm trying to learn to take good photos and have invested in some low-end equipment for the sole purpose of photographing my work (which, at some point to be good enough to warrant the investment in camera, lights, etc. ) 🙂

Having hijacked Gretch's post about fluorescent lighting, this is a continuation:


I'm using the following:

-Cowboy Studios 6 x 9 matte white vinyl background
-Softbox lights (18 x 24) on stands, with 550k CFL
-24" Etekcity reflector (white) with boom arm reflector stand
-Sony a3000 camera with the 18-55 lens it shipped with
-2 aluminum shop reflector lights (that I painted white with appliance epoxy) with 5000k CFL


Last from Bill:

Since you are shooting in raw, all that you need to do is to shoot a white balance target such as a Whi-Bal card to set the white balance for that particular shooting session and then use Adobe Camera Raw to set the white balance of all the images to match the setting of the reference shot1. All lighting changes continuously whether it is tungsten, fluorescent, LED, or flash. I have some 500 watt bulbs (4800K) that have a life of about six hours and I shoot a white balance reference shot every few minutes because the white balance actually changes that fast. It isn't necessary to create an in-camera custom white balance unless you want to get JPG images out of the camera. Certainly don't count on finding lighting that is going to precisely match any of the built-in white balance settings -- they are just ball park settings for those who want JPG out of the camera and don't want to mess with post processing.

Even better than shooting a white balance reference card is shooting a 24-patch Gretag-Macbeth target and creating a custom color profile if you want absolutely perfect color. X-rite sells a product called Color Checker Passport that includes the target plus software for automatically creating the profile. I think that it is pretty expensive, but I got it as part of a package that came with an i1 Display Pro calibrator.


I am using Adobe CC (man, I HATE subscription software and all the changes they've made to it) with the Raw input. So if I understand, I can set the camera for manual white balance each session (usually I'm only taking multiple shots of one item) by using a reference card?

I found several on Amazon that are highly rated and I assume that I'd go with a larger card rather than the pocket ones? I have a white vinyl photographer's backdrop for now, but there's a 3 card set (white, black, 18% gray). I was assuming that I'd use the white, but it seems that from the feedback (and some of it clearly from professionals also) that they use the grey card?

I also found the color checkers but is this something within the grasp of someone with ZERO photography training (which is something I plan on addressing with a class or clinic).

So to ask a bunch of questions about workflow, is this how I would proceed?

- set camera to manual white balance
- shoot the card (whichever one I should use?)
- take photos as usual
- bring in to Photoshop using Raw, adjust (using Auto?)
- open the image and tweak, crop, etc as normal

And as to shooting the card, assuming I want to fill the frame, do i put the card in the lit area and shoot it with the camera at the same distance as the subject would be, or closer?

I'm Googling some of this so I'm not expecting to be spoon fed, but it just isn't clicking for me.

Thanks, and especially to Bill (and John Lucas too).

And Bill, by the way, I went to look at your photos and they're so good. I really liked the cypress bowl in particular (bowl and photo). And the mesquite too.

Mark
 
you don't need a special card if your only using it as a reference. You can bring the image up on the screen and hold the card in your hand and then simply match the color by eye. If you have custom white balance on your camera you may be able to simply select the custom white balance and shoot what ever card you have (usually white or 18% gray) and then the colors should be correct. The card only needs to be in the same light as the piece. In front of it will usually work unless the piece is totally side lit.
I do use some of the color checker type cards sometimes. Ideally you shoot the card (color checker, Kodak color charts or 18% gray card) and then if you don't move any of the lighting you can shoot your work. When you download the work you can use the color checker as a reference to balance everything. Lets say you have to adjust the color by 10 points red and 5 points blue to really nail the color using the photo of the color chart. Then you can now add those settings to every photo and they should be color accurate.


John,

I think I understand. Put the card (I'm going to order the card set and the colorchecker) in the lit area, shoot it with manual white balance and then take the photos. Open in Raw. Then when I manually tweak the photos, I can simply save all the parameters (for that session) and use them for the same result for each photo?


So I put up a couple of photos. First shows how the image comes into the Raw converter "as shot". Second shows after I choose "auto". If my understanding is correct, you're saying that I can apply the same values as shown (in the orange box I highlighted) to replicate this for each photo? The last photo is that same image, after Raw processing, opened in Photoshop and "auto-contrast" applied.

Raw-001.jpgRaw-002.jpgauto-contrast-cropped.jpg


I would imagine that I could adjust the contrast in the Raw converter before opening the image in PS, and jot down those values as well to apply to subsequent photos?


I know this is probably getting out there for a woodturning forum, and if you think there might be a good forum for me to look into for getting better at photography, I'd be more than willing to give it a try.

Don't want to wear out my welcome here with a bunch of non-turning topics 🙂

And thanks again. I hope your move is going well!

Mark
 
Well I think I understand you correctly and that sounds like one way to do it. Ideally with that much white background I would have purposely overexposed it from what the meter suggests. I was going to say about a stop and half but it looks like you did 1.6 over in the correction which would have been about right.
I think your lights are too balanced or too even on both sides. The left appears to be just a hair brighter. I would move one of the lights further away to give contrast from side to side. This will give it more shape. The highlights do look very nice coming up the finial although in some cases on a finial like that I might move one light up high enough that the highlight on the finial dissappears on one side. Not always because sometimes it's needed but I try it anyway to see what I like best.
Ideally for the final photo zoom in more so you don't have to crop as much afterwords. You lose a lot of sharpeness when you have to crop a lot to make the piece fill the frame. If you do that in camera you get a much better image.


So I can adjust in camera to 1.5 in camera rather than in PS? And I'll move one of the lights back a bit and experiment with that also and see what works for me (but I don't have the best eye at this point, that's for sure).

I keep thinking that any shadow under the object is not desirable, but actually, having just looked at a bunch of gallery photos, the shadow - properly done - certainly adds depth and drama.


And I'll zoom more too. That's something that I didn't even think about. Thanks again!

Mark
 
That used to be a common thought that shadows are a no no. And yes ugly shadows are. But to get an object to look 3 dimensional you need shadows and highlights. We are converting a 3D object into 2D so you have to fool the eye into thinking it's 3D by creating a 3 dimensional look using shadows and highlights. Look at your finial for example and imagine it without those long highlights. It would just look like a flat stick and not a round object. No you don't necessarily want dark shadows for most objects. Go to the various galleries and look at pieces that are similar to what you want to make. Really look close at the photos after you pick the ones you like. You can usually tell where the light is by where the highlight and shadows are and if you know how to look you can tell what kind of light they were using (softbox, or smaller reflector) The soft box creates a very broad non harsh highlight and a much softer shadow. The smaller reflector light will produce hard shadows and smaller harsh highlights. The small light is good for highly textured work or work where you need shadows to define the piece. Soft boxes or larger lights are good usually better for things like smooth hollow vessels and bowls.
Most of the time now for my work I use one soft box and one reflector. When I first started shooting craft work I would often use 3 or 4 or 5 lights. Each light was added to try and solve some shadow problem which it usually did but then it would cause another shadow or hightlight that I had to deal with. Then I tried the photo booth concept which is supposed to resemble a cloudy day with no shadows. However that made everything look flat without the 3 dimension. Going back to fewer lights and actually having some softer shadows and maybe a highlight on one side created a much more 3 dimensional look.
If I haven't sent you the handout on simple lighting techniques send me an e-mail at johnclucas45@gmail.com and I'll send it.
 
Mark,
Camera meters are calibrated to produce an 18% gray tonal value across all scenes. You can see this in your first unadjusted photo - the white appears 18% grayish. Photographers use the 18% gray card to meter off of (using manual mode) to set the exposure and then shoot the scene at that setting regardless of what the actual metered scene indicates. In your setup, the metered gray card would have indicated an exposure ~1.5 to 2 stops over what the metered scene showed (and was photographed at).

When you set up the card/checker in your set, you want to place the card under the same lighting that strikes your subject. The card needs to be positioned so that the flat of the card is perpendicular to the lens view. Let ——> be the line from the camera through the center of the lens toward the set. Let | be the card. You want to place the card so that it is positioned like this: ——> |
Adjust the angle of the card so that it matches, reasonably closely, to being parallel to the camera’s back. In other words, you don’t want the card tilted back or forward or side-to-side too far from perpendicular to the lens’s view.

For white balance, the card does not need to fill the frame but you could move the camera in fill the frame if you want (don’t move the card since you will likely not maintain the same lighting your subject is under). If you merely include it after you’ve composed your image, you can easily zoom in to take an eyedropper sample when you set the exposure and white balance in Photoshop. Using a card/checker is not a 100% guarantee, you’ll likely need to tweak the image a bit here or there in processing.

By the way, if you have a Creative Cloud subscription, I find processing in Lightroom to be much more straightforward and more easily maneuvered for doing 95% of the adjusting than in Photoshop. Lightroom’s RAW processing “engine” is the same as that in Photoshop, so you won’t be sacrificing anything; plus Lightroom is a powerful database-cataloging app. Photoshop shines when you want to get in to more specialized manipulations.

(p.s. - I was an advertising photog for 20 years or so.)
 
Last edited:
I have inserted my comments in red inside the quote of your post.

.... I am using Adobe CC (man, I HATE subscription software and all the changes they've made to it) with the Raw input. So if I understand, I can set the camera for manual white balance each session (usually I'm only taking multiple shots of one item) by using a reference card?
I decided to go with CS6 rather than CC although in the long run I most likely will have paid more. There is just something about paying a monthly ransom to continue using software just sticks in my craw. I also went with the Master Collection of CS6 so I have everything. I was interested in Premiere Pro since the idea of professional video editing is something that I want to learn. I have used Acrobat Pro, Illustrator, and InDesign far more than I originally thought that I would. I haven't touched some of the other applications like Flash, Dreamweaver, and Fireworks.

I found several on Amazon that are highly rated and I assume that I'd go with a larger card rather than the pocket ones? I have a white vinyl photographer's backdrop for now, but there's a 3 card set (white, black, 18% gray). I was assuming that I'd use the white, but it seems that from the feedback (and some of it clearly from professionals also) that they use the grey card?

My opinion about backgrounds is that middle to dark gray works the best for me. White is going to reflect in the object that is being photographed, especially if it has any gloss at all which means that contrast will be washed out. When it come to glossy subjects, it can be challenging. You do need reflections to show that the subject is glossy, but you don't want your soft boxes, umbrellas, and photographer to be too prominent.

The gray card is for exposure setting and may not be a true neutral gray. I have seen some cheap ones that definitely looked blue-gray and others that were brown-gray. A good quality gray card that is truly neutral (no color bias) could be used to set white balance, but it isn't the best thing to use. Actually, you can do a very good job of setting white balance by shooting a sheet of plain cheap copier paper -- cheap is the important word here. Definitely do not use the more expensive bright white ink jet paper because it contains UV sensitive optical brighteners that will royally screw up a white balance setting. If you want to buy a white balance card, X-rite makes several different versions, but they tend to be a bit expensive. I like to use a
WhiBal G7 card and have several sizes from pocket size to large card (click the link for more information).


I also found the color checkers but is this something within the grasp of someone with ZERO photography training (which is something I plan on addressing with a class or clinic). It depends on how immersed you want to become in photography. It is a pastime that as fully addictive and more expensive than woodturning. I have a couple color checkers, but then I have more invested in photography than I do in woodturning. I would say the same thing that I say about woodturning: don't buy anything until you are convinced that you need it and understand the reason why (money burning a hole in your pocket doesn't count as a good enough reason).

So to ask a bunch of questions about workflow, is this how I would proceed?

- set camera to manual white balance No, when saving the raw files, the white balance settings have absolutely no meaning. The various in-camera settings only apply when you want to get JPG images out of the camera. However, each raw file contains an imbedded JPG image that serves several purposes such as the preview of the shot on the camera's screen and also thumbnails to display on your computer -- Adobe Bridge, since you are using Adobe Creative Suite. Sometimes it is useful to look at the camera preview to make a quick assessment of the shot so it is helpful if the JPG has a reasonably good white balance -- either a custom white balance or one of the built-in settings for the type of lighting that you are using. Often AWB works quite well. But just to be clear -- raw is like cookie dough and you add your own white balance flavoring when you process the files in Camera Raw while JPG is like dried out cookies from the grocery store where the camera decided on the white balance flavoring. The camera has a brain half the size of a pea -- you can do far better than the camera.
- shoot the card (whichever one I should use?) See my recommendations above.
- take photos as usual
- bring in to Photoshop using Raw, adjust (using Auto?) Go from Adobe Bridge to Camera Raw and then to Photoshop. It is sort of mind boggling to me that Adobe decided that they no longer need to provide documentation on using their software and that you are supposed to somehow just pick this up by osmosis. If you can still find the book Real World Adobe Camera Raw by Bruce Fraser, Peachpit Press, I think that it is still worth the read. He methodically goes through how everything works in Camera Raw and how to get the best results. The book is based on a much older version of Camera Raw so a lot of things have changed since then. There is an updated version by Jeff Schewe and it is useful for the latest version of Camera Raw if you can tolerate the author expending most of his effort talking about himself and occasionally some words about Camera Raw.

The real key is learning to use Camera Raw fluently. Once you master that, everything else is a piece of cake. You can try Auto tonal adjustments and sometimes it produces good results, but I prefer to do my own thing with tonal adjustments.

- open the image and tweak, crop, etc as normal -- Once you finish editing in Camera Raw and open it in Photoshop, the only tweaking or adjustments should be sharpening and cropping. You won't need to do any noise reduction because you shot the images at ISO 100 -- I don't want to hear about it if you didn't.

And as to shooting the card, assuming I want to fill the frame, do i put the card in the lit area and shoot it with the camera at the same distance as the subject would be, or closer? If you are creating an in-camera custom white balance shot, then make the shot of the card fill at least half of the frame (verify what your camera owners manual says about this). For simply creating something to click on in Camera Raw to get a white balance, it can be much smaller -- frame your shot on one of your turnings and then set the white balance card in front of the turning to get the white balance shot.

I'm Googling some of this so I'm not expecting to be spoon fed, but it just isn't clicking for me. Learning to use Camera Raw and Photoshop is not a trivial thing. Even after about 20 years, I am still learning.

Thanks, and especially to Bill (and John Lucas too).

And Bill, by the way, I went to look at your photos and they're so good. I really liked the cypress bowl in particular (bowl and photo). And the mesquite too. I really need to update my PBase Gallery. I spend all of my time shooting other unimportant stuff like birds and landscapes and ignore the important stuff -- woodturnings.

Mark
 
BTW, I learned photo processing using Bridge, Camera Raw, and the extended version of Photoshop long before there was Lightroom. Early versions of Lightroom were rather limited, but now it probably makes sense to stay within a single application. Bridge, Camera Raw, and Photoshop are so tightly integrated that it is essentially like staying in a single application. And Lightroom still isn't as powerful as Photoshop, especially the extended version of Photoshop which enables some very complex functions. But, it would be worth taking a look at and you might prefer it to Photoshop.
 
That used to be a common thought that shadows are a no no. And yes ugly shadows are. But to get an object to look 3 dimensional you need shadows and highlights. We are converting a 3D object into 2D so you have to fool the eye into thinking it's 3D by creating a 3 dimensional look using shadows and highlights. Look at your finial for example and imagine it without those long highlights. It would just look like a flat stick and not a round object. No you don't necessarily want dark shadows for most objects. Go to the various galleries and look at pieces that are similar to what you want to make. Really look close at the photos after you pick the ones you like. You can usually tell where the light is by where the highlight and shadows are and if you know how to look you can tell what kind of light they were using (softbox, or smaller reflector) The soft box creates a very broad non harsh highlight and a much softer shadow. The smaller reflector light will produce hard shadows and smaller harsh highlights. The small light is good for highly textured work or work where you need shadows to define the piece. Soft boxes or larger lights are good usually better for things like smooth hollow vessels and bowls.
Most of the time now for my work I use one soft box and one reflector. When I first started shooting craft work I would often use 3 or 4 or 5 lights. Each light was added to try and solve some shadow problem which it usually did but then it would cause another shadow or hightlight that I had to deal with. Then I tried the photo booth concept which is supposed to resemble a cloudy day with no shadows. However that made everything look flat without the 3 dimension. Going back to fewer lights and actually having some softer shadows and maybe a highlight on one side created a much more 3 dimensional look.
If I haven't sent you the handout on simple lighting techniques send me an e-mail at johnclucas45@gmail.com and I'll send it.


John,

I got both of the handouts you sent. Thanks! I printed and plan on posting in the spare room where I have my photo table set up. I see what you mean about the adding of the lights. Every one that I have added HAS created a new issue, but mostly because I've been trying to completely eliminate shadows. Which, now that I think about it is crazy. As a painter, especially as a young student, learning to use shadow was a basic skill I had to acquire for exactly the reasons you point out - to give form and dimension to a 2D object.

As to looking at galleries, I'm doing exactly that. Speaking of which, I looked at a ton of Bill's photos and also saw what John Beaver just put in the gallery yesterday. Lots to learn!
 
Mark,
Camera meters are calibrated to produce an 18% gray tonal value across all scenes. You can see this in your first unadjusted photo - the white appears 18% grayish. Photographers use the 18% gray card to meter off of (using manual mode) to set the exposure and then shoot the scene at that setting regardless of what the actual metered scene indicates. In your setup, the metered gray card would have indicated an exposure ~1.5 to 2 stops over what the metered scene showed (and was photographed at).

When you set up the card/checker in your set, you want to place the card under the same lighting that strikes your subject. The card needs to be positioned so that the flat of the card is perpendicular to the lens view. Let ——> be the line from the camera through the center of the lens toward the set. Let | be the card. You want to place the card so that it is positioned like this: ——> |
Adjust the angle of the card so that it matches, reasonably closely, to being parallel to the camera’s back. In other words, you don’t want the card tilted back or forward or side-to-side too far from perpendicular to the lens’s view.

For white balance, the card does not need to fill the frame but you could move the camera in fill the frame if you want (don’t move the card since you will likely not maintain the same lighting your subject is under). If you merely include it after you’ve composed your image, you can easily zoom in to take an eyedropper sample when you set the exposure and white balance in Photoshop. Using a card/checker is not a 100% guarantee, you’ll likely need to tweak the image a bit here or there in processing.

By the way, if you have a Creative Cloud subscription, I find processing in Lightroom to be much more straightforward and more easily maneuvered for doing 95% of the adjusting than in Photoshop. Lightroom’s RAW processing “engine†is the same as that in Photoshop, so you won’t be sacrificing anything; plus Lightroom is a powerful database-cataloging app. Photoshop shines when you want to get in to more specialized manipulations.

(p.s. - I was an advertising photog for 20 years or so.)


Hey Owen, I didn't realize you had a background in it also, and thanks very much for helping.

So I understand what you're saying about the gray card and didn't realize that this is how camera meters are calibrated, but that all now makes sense. It's a benchmark that allows standardization in the industry, correct?

So I've ordered a Whi-Bal G7 card that Bill recommended and I understand your explanation in placing it. Just needs to be parallel in relation to the back of the camera. My tripod has a level on it and I can drop it, level and shoot the card in the scene. In fact, I'll probably just make a little stand for the card so i know its vertical every time. And I'll include it after composing the shot.

I do have a CC subscription and am currently downloading Lightroom as I type so I'm going to give it a go. I wasn't too happy about the subscription model Adobe moved to, but it's a secondary app for me here at work and because I'd been a v 5.5 user sort of had to make a decision - it was easier to justify to the boss an annual subscription than the up-front cost and here it turns out to be a benefit. Go figure.

And thanks again.

Mark
 
I have inserted my comments in red inside the quote of your post.

Hey Bill,

So first thing, I need to be shooting at ISO 800...


Kidding. I just learned a bit about ISO and wanted to show off a bit.

Seriously, thanks for taking the time with your detailed reply. I'm literally printing yours, John's and Owen's out so I can have them as reference on my wall for the foreseeable future.

I would have stayed with what I had but had to move on because of the new Windows upgrades and PS 5x wouldn't run in 64 bit Windows. Hence, the change and because my employer pays the freight for my graphics toys, we went subscription. I was telling Owen in my post that maybe the curse is a blessing - at least for a moment - because I'm going to try Lightroom. I mostly use Corel instead of AI because I started in a Windows environment and back then you had Corel, Quark and a couple others. Photoshop has been a mainstay but mainly for web graphics and content creation - not photo editing so it's new to me.

I ordered the G7 card you suggested. Amazon. $36 so that's not too bad considering. I know about the paper with the whiteners (I use a bunch of it for handouts at presentations and sometimes have to color correct for printer output just because of the paper).

I looked at Adobe Bridge and plan on downloading it as soon as Lightroom finishes. God, it's huge and I'm on a reasonably fast dedicated line. I'm assuming it will be compatible across the Adobe product family (meaning Bridge>Raw>PS or Bridge>Raw>Lightroom.

I did find the book you recommend. Amazon, $45.

I'm going to learn Camera Raw and become fluent. And do it without Adobe's help, that's for sure. You're right, they really don't have a good user support system in place for one of the most complex products out there. It's probably a steeper learning curve than AutoCad. C'est la vie.

As to background, I see that you like that gray gradient and it's beautiful, but for now I'm gonna stick with the matte white background I have. Once I have that somewhat in hand, I'd like to try that too. But I'm sticking to the KISS plan (emphasis on that second "S").

And one final thing: MORE expensive than woodturning? Sheesh!!

And thanks again. Mucho

Mark
 
..... I would have stayed with what I had but had to move on because of the new Windows upgrades and PS 5x wouldn't run in 64 bit Windows......

I ordered the G7 card you suggested. Amazon. $36 so that's not too bad considering. I know about the paper with the whiteners (I use a bunch of it for handouts at presentations and sometimes have to color correct for printer output just because of the paper).

I looked at Adobe Bridge and plan on downloading it as soon as Lightroom finishes. God, it's huge and I'm on a reasonably fast dedicated line. I'm assuming it will be compatible across the Adobe product family (meaning Bridge>Raw>PS or Bridge>Raw>Lightroom.

I did find the book you recommend. Amazon, $45.....

I am running the 64 bit version of Windows 7 and installed the old 32 bit versions of CS3 and CS5 because I like the way that some of the features work on the older versions. I built this 64 bit machine specifically to run CS6 and later versions because Adobe said that Photoshop had gotten too sophisticated to run well on 32 bit computers. I have a lot of other 32 bit applications running on this computer -- in fact, most of the things that I am running are 32 bit. There are some older programs that won't work on this 64 bit Windows 7 OS, but it is only because the applications are obsolete and can't work without updated drivers. There is a version of XP that can be installed to run inside of Windows 7, but I haven't felt a real need to install it.

Lightroom has everything self contained so it doesn't need Bridge if my understanding is correct. But, when running Photoshop and Camera Raw and any of the other Adobe applications, you really should be using Bridge as the central hub for making all of these applications work together seamlessly. If you run earlier versions of CS before CC, you will need the version of Bridge that goes with that particular version for best results.

The old version of Real World Camera Raw makes more sense if you are using CS3 or the older version of Camera Raw that came with CS5. With CC much of the tools have changed considerably. But, I think that the main benefit from the older version of the book is basically understanding what raw files are all about and developing an understanding of what you are doing when making various adjustments. I know of many users on photography forums who just blindly twiddle various controls until things "look good". It's sad because they could do so much better if they knew how to take the best advantage of the tools. I would also recommend that you get the latest version of the book by Jeff Schewe so that you can better understand the latest tools. Even though he loves to waste time telling you how wonderful he is, he does have a thorough understanding of Camera Raw.

I forgot to mention this earlier, but it appears that you didn't apply the white balance correction to the example that you posted. I say this because I see that the color temperature and bias values are the same in the "before" and "after" screen shots.

Bill, I'm sure I'm too good a photographer to not applied the white balance


😀

Since I'm on the CC treadmill I want to at least be conversant with more of the tools. I was running 5.5 - not CS5 - and happy there on Win XP. But we had to upgrade our OS platform to support new iterations of some of our business system software. Database, inventory, and so on.

I've had a Linux box I built a while back and have GIMP installed but decided that staying in windows was best for work and therefore my overall use.

Regarding Bridge, I watched a short Adobe video and I get the impression that it is a media manager/organizer primarily? Not that there's anything wrong with that. 🙂

Found jeff schewe's book. Amazon also and $11 cheaper.

I also am using CS5.5 even though I called it CS5. Running it on my old XP machine was a real drag. Running anything on that machine was like slogging through a muddy field. Not really sure why it had gotten so sluggish, but it was a really old machine and that seems to be typical behavior of old computers ... maybe too many background processes. Things happen instantly on my new PC -- overclocking at 4.8 GHz, 32 Gigs of RAM, two SS drives, gaming case, and a bunch of cool looking lights. 🙄

I think of Bridge as being sort of like the Finder on a Mac. I do my own organizing, but I like the graphical presentation of files that help me find things quickly without the need to read through a list ... maybe a good description would be Windows Explorer on steroids.... not that there's anything wrong with that. 😀
 
Lightroom has everything self contained so it doesn't need Bridge if my understanding is correct. But, when running Photoshop and Camera Raw and any of the other Adobe applications, you really should be using Bridge as the central hub for making all of these applications work together seamlessly. If you run earlier versions of CS before CC, you will need the version of Bridge that goes with that particular version for best results.

Lightroom integrates very well with Photoshop. You can do all of the color, exposure, shadow, highlight, saturation, etc. adjustments in Lightroom and then open the adjusted (or unadjusted) image in Photoshop to manipulate further and then save the changes back to Lightroom. The cool thing for me is that these adjustments are non-destructive in that I can always revert back to the RAW image as imported, create virtual copies, stacks, open images in 3rd party apps, like NIK, and have everything contained in Lightroom.

Here is a very informative video from Julieanne Kost, Adobe bigwig, on Lightroom v. Bridge:
http://tv.adobe.com/watch/the-complete-picture-with-julieanne-kost/should-i-use-lightroom-or-bridge/
 
I also am using CS5.5 even though I called it CS5. Running it on my old XP machine was a real drag. Running anything on that machine was like slogging through a muddy field. Not really sure why it had gotten so sluggish, but it was a really old machine and that seems to be typical behavior of old computers ... maybe too many background processes. Things happen instantly on my new PC -- overclocking at 4.8 GHz, 32 Gigs of RAM, two SS drives, gaming case, and a bunch of cool looking lights. 🙄

I think of Bridge as being sort of like the Finder on a Mac. I do my own organizing, but I like the graphical presentation of files that help me find things quickly without the need to read through a list ... maybe a good description would be Windows Explorer on steroids.... not that there's anything wrong with that. 😀

Hey Bill,

I mean the ooooold Photoshop - before the CS series began. I think they went to version 6 or 7 and then Adobe went to CS. So my version was strictly old school, 32 bit (and maybe even some 16 bit code in a sandbox, who knows?).


You have a serious PC (except for the gamer case lights - unless they're neon?). 🙂 My son-in-law is a heavy gamer and builds his boxes and since he has a good job, they're loaded up. But my needs are pretty basic and although what I have at work is about half the capability of yours, I do have two very nice monitors and would never go back to a single monitor unless they pried it out of my cold, dead hands. 32 gigs of RAM. I remember back when I upgraded my Pentium 90 PC from 4 to 8 megs of memory. It was $80 per meg. Unbelievable how memory has become dirt cheap isn't it?

I'm looking at Owen's suggested video now and it compares Lightroom and Bridge. As you do, I have my own file organization heirarchy, but of course it's in Windows and therefore I can't preview Raw files and have to keep the .jpg files so I don't have to hunt. Waste of space and so it looks like I'll be migrating to a new method.
 
Lightroom integrates very well with Photoshop. You can do all of the color, exposure, shadow, highlight, saturation, etc. adjustments in Lightroom and then open the adjusted (or unadjusted) image in Photoshop to manipulate further and then save the changes back to Lightroom. The cool thing for me is that these adjustments are non-destructive in that I can always revert back to the RAW image as imported, create virtual copies, stacks, open images in 3rd party apps, like NIK, and have everything contained in Lightroom.

Here is a very informative video from Julieanne Kost, Adobe bigwig, on Lightroom v. Bridge:
http://tv.adobe.com/watch/the-complete-picture-with-julieanne-kost/should-i-use-lightroom-or-bridge/


Owen,

Thanks so much for the suggestion on Lightroom. I watched that video for the first 15 minutes and realized I need to try it. Downloaded it (and Bridge too, thanks to Bill). I really like the way the workflow is set up. Very straightforward, and really geared for a novice. It's sort of like backgammon; easy to learn but very deep and can take a long time to master. But the main thing is, I was able to import 4 raw shots, tweak a little and export. Brought into photoshop just to do it but didn't do anything other than crop and size.

So I also set the camera to ISO 100 instead of letting it decide. Set the stop up 1.3 (had to choose 1.3 or 1.7 in this camera) which is what John suggested in his earlier post. There's so much information to absorb that it's bewildering right now, but using Lightroom lets me focus on the photo rather than the tools / process, as in Photoshop.

But I like what the video said about the Lightrooom>Photoshop workflow, and Bridge integrates into that nicely for other work I'm doing. So Bill's suggestion on Bridge is a good one and I"m going to add that to my "to dos" but sort of back burner for now. I work in a lot of vector that I export to various formats for hard copies and web so Bridge looks like a winner.

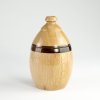
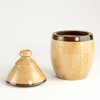
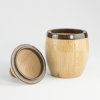
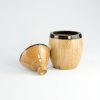
But Lightroom is definitely an easier learning curve for the pure photography aspect. Here are some photos that I shot at ISO 100, +1.5 on exposure, auto white balance (dont' have a card yet). And they look overexposed to my eye and waay to shiny. But I'm still working through John's worksheets on lighting and am probably going to reduce the number of lights I'm using.

Still, the photos came in without me having to tweak, lighten and so on. In other words, more in-camera work is being done and I know that's where I want to be.

(and I see that I have a problem with the finish on the top edge of the box :-(

Thanks!

Mark

Egg Box-1-5.jpgEgg Box-1-2.jpgEgg Box-1-3.jpgEgg Box-1-4.jpg
 
Last edited:
I think that I started with Photoshop 3 and then later got version 7. I used it until I got back into DSLR photography and had to get CS3 and learn what all this digital stuff was about. What a change. I had two old dinosaur SLR cameras so I was used to manually setting everything. The flexibility that is now available with digital is amazing. Ten years ago it was just beginning to displace film. It is amazing how things have evolved in just a decade.

BTW, here is a screen shot Bridge in the directory where I have downloaded the PDF files of American Woodturner. Seeing a thumbnail of the cover is often more useful than seeing a list of issue numbers.

bridge.jpg
 
I think that I started with Photoshop 3 and then later got version 7. I used it until I got back into DSLR photography and had to get CS3 and learn what all this digital stuff was about. What a change. I had two old dinosaur SLR cameras so I was used to manually setting everything. The flexibility that is now available with digital is amazing. Ten years ago it was just beginning to displace film. It is amazing how things have evolved in just a decade.

BTW, here is a screen shot Bridge in the directory where I have downloaded the PDF files of American Woodturner. Seeing a thumbnail of the cover is often more useful than seeing a list of issue numbers.

View attachment 8436

The flexibility is amazing but the craft is no less bewildering I'll bet for a novice. The Bridge shot is pretty slick. I do like having that capability. Watching the video Owen linked to, Adobe does say that Bridge is the tool for a multi-format file user, where Lightroom is focused on the photographer (pardon the pun). I think that, once I have the basics sort of where I'm comfortable, I'm going to fool with Bridge.
 
Mark I'm certainly not an expert on any of the photo software so I'll leave that up to others. Your photos are looking pretty good. You obviously see the very large soft boxes in the glossy finish. You know you can change the appearance of the reflection by putting black paper or material in front of the soft box to affectively change it's shape. For example now it's about 14x24 or something like that. You can easily change it to 6x24 by taping black paper to the front and turning it into more of a strip light. Much better for glossy subjects like you have. Ideally you should be able to rotate the softbox (mine won't but I'm going to remedy that somehow shortly). By rotating it you also change how the reflection appears on the piece. there are just so many things you can play with when shooting artwork if you have an open mind to allow you to play.
 
Mark I'm certainly not an expert on any of the photo software so I'll leave that up to others. Your photos are looking pretty good. You obviously see the very large soft boxes in the glossy finish. You know you can change the appearance of the reflection by putting black paper or material in front of the soft box to affectively change it's shape. For example now it's about 14x24 or something like that. You can easily change it to 6x24 by taping black paper to the front and turning it into more of a strip light. Much better for glossy subjects like you have. Ideally you should be able to rotate the softbox (mine won't but I'm going to remedy that somehow shortly). By rotating it you also change how the reflection appears on the piece. there are just so many things you can play with when shooting artwork if you have an open mind to allow you to play.

John,

I do have an open mind. In fact, lots of the people I work with will tell you that it's chock full of holes and a wind will blow right through it 😀

I can't believe you can tell the lights I'm using by the reflections but you did. I find that astounding but then I'm not a pro. I did see the large reflections but not during composition. I can rotate the box on its stand by 90, so it's basically a landscape orientation.

I'm going to get some black felt at WalMart (if I can get someone to wait on me there) tomorrow and stick some velcro on it so I can do as you advise. I'll play around with it so I can knock down some of the reflection but still get the nice highlight.

For me, I really am open to experimenting and seeing what happens. The problem is that there are just so many variables that I can't keep track, and so by working in the one area - lighting - I'm going to at least have that aspect somewhat in my grasp, and then move to the next.

So you're a darkroom and film guy? My dad was. Strictly amateur but the whole darkroom in a closet thing. Shot thousands and thousands of images over the years. I have maybe twenty carousels of his slides that he passed on to me and keep swearing I'm going to digitize them one day.

Thanks again. Now I'm back to shooting practice !
 
Mark, I took a look at your latest shots of the egg box and even though they were overexposed a bit, there was essentially no highlight clipping. You didn't say if these shots were JPGs straight out of the camera or if they were processed raw shots, but one benefit of using the raw images is called exposing to the right. What this means is that you overexpose as far as you can without causing the highlights to be clipped. Then in post processing the image, you can knock down the exposure to give you a more normal looking exposure. A logical question at this point would be, "Why?" The short answer is noise reduction. The long answer has been the subject of more than one book so I won't digress into that subject. For the kind of shots that you are doing here at low ISO, there really isn't much noise anyway, but if you were to badly underexpose the shot (expose to the left) and then try to fix it in Camera Raw, it would become apparent that noise has reared its ugly head.

Since you feel that the shots were exposed too far to the right, here is what can be done in Camera Raw/Lightroom to normalize the exposure. I'm not saying that my edit is better since I don't know what your goal was nor do I know exactly what the egg box looks like. In fact, it's very possible that my edit has made things look worse, but I am just showing what you can do in post processing.

First, the original:
Egg Box-1-4.jpg

And, the image after editing in Camera Raw:
Egg Box-1-4b.jpg

There is one other thing that I need to mention. The images that you posted have AdobeRGB as the embedded color profile. For web display, you need to convert the profile to sRGB. The reason is that most people do not have wide gamut monitors that are capable of displaying the full gamut of that very large color space. Additionally, most web browsers are not color aware so they ignore embedded color profiles and assume that everything is sRGB. Also, at this point, I think that you would be better served by keeping your workflow entirely in the sRGB color space. When you feel the need for a high-end printer and a wide gamut monitor and spending lots more money then using AdobeRGB as your working color space would be the thing to do. However, it will still be necessary to convert the profile of web bound images to sRGB.
 
Mark, I took a look at your latest shots of the egg box and even though they were overexposed a bit, there was essentially no highlight clipping. You didn't say if these shots were JPGs straight out of the camera or if they were processed raw shots, but one benefit of using the raw images is called exposing to the right. What this means is that you overexpose as far as you can without causing the highlights to be clipped. Then in post processing the image, you can knock down the exposure to give you a more normal looking exposure. A logical question at this point would be, "Why?" The short answer is noise reduction. The long answer has been the subject of more than one book so I won't digress into that subject. For the kind of shots that you are doing here at low ISO, there really isn't much noise anyway, but if you were to badly underexpose the shot (expose to the left) and then try to fix it in Camera Raw, it would become apparent that noise has reared its ugly head.

Since you feel that the shots were exposed too far to the right, here is what can be done in Camera Raw/Lightroom to normalize the exposure. I'm not saying that my edit is better since I don't know what your goal was nor do I know exactly what the egg box looks like. In fact, it's very possible that my edit has made things look worse, but I am just showing what you can do in post processing.

First, the original:
View attachment 8437

And, the image after editing in Camera Raw:
View attachment 8438

There is one other thing that I need to mention. The images that you posted have AdobeRGB as the embedded color profile. For web display, you need to convert the profile to sRGB. The reason is that most people do not have wide gamut monitors that are capable of displaying the full gamut of that very large color space. Additionally, most web browsers are not color aware so they ignore embedded color profiles and assume that everything is sRGB. Also, at this point, I think that you would be better served by keeping your workflow entirely in the sRGB color space. When you feel the need for a high-end printer and a wide gamut monitor and spending lots more money then using AdobeRGB as your working color space would be the thing to do. However, it will still be necessary to convert the profile of web bound images to sRGB.


Bill, for starters, let me be clear: Your edit is EXACTLY the shot I'm wanting to achieve. The background is soft and what it should be - in the background. The grain and color of the wood pop, and the reflections and shadows give it form. My image looks washed out by comparison.

The images were from the Raw files, not the .jpg files. Regarding clipping, is this the same principle as you would think of in audio, or is it something else? I'm only familiar with clipping in terms of audio.

So how was that done in software? I know you use PS, so what specific changes did you make and does Lightroom have the equivalent do you know? I went into PS and in Image>Adjustments>Exposure and knocked it back a bit. Then went to Image>Adjustments>Levels... and chose darker midtones. Why did I do this? I have no idea. But the image is better. Not as good as yours but better.

Egg Box-1-4.jpg

As to the color space, I went into the color settings and changed the color policy to auto convert to the working profile (which by default in Photoshop CC is sRGB). Apparently it will use the embedded profile unless otherwise specified. And if I feel the need for a high end printer or an IPS monitor, I'm going right out and buying a Carter steady rest and their floor standing hollowing system!

😀
 

Attachments

  • Egg Box-1-3.jpg
    Egg Box-1-3.jpg
    456 KB · Views: 11
Rather than answering your question about color settings, I think that the book Real World Camera Raw goes into that subject in depth and it is not something that can be answered easily especially not in a few paragraphs. There are both advantages and disadvantages to using the larger AdobeRGB color space. The more important thing in Camera Raw/Lightroom (which BTW are identical in processing raw files) is to make sure that you are working in 16 bits rather than the default 8 bits. My hunch from looking at the histogram of egg box is that your CC version of Camera Raw might be set to 8 bits.

About clipping: yes we are talking about electronic signals in both instances -- audio and light -- when the input signal exceeds a certain value, the output has reached its saturation limit so the highlights brighter than that threshold all look the same ... no detail can be rendered. Sometimes this is referred to as blown out highlights. Film is far more forgiving than electronic sensors because film responds to light in much the same way that our eyes respond to light ... in a logarithmic fashion. Film is often exposed for the dark areas to make sure that details in the shadows are discernible while digital is often exposed for the lights to ensure that they aren't clipped.

I do essentially all of my image processing within Camera Raw. I have Camera Raw defaults set to work in 16 bits and I use ProPhotoRGB color space which is a huge color space that covers most of the gamut of color that the human eye can see. Bruce Fraser discusses some of the reasons that this would make sense even though most ink jet printers and most monitors can't even display all of the much smaller sRGB color space.

After exporting the image from Camera Raw to Photoshop, I only do a few additional things -- input sharpening, noise reduction, resizing, converting the image profile from ProPhotoRGB to either AdobeRGB or sRGB depending on destination, and conversion of bit depth from 16 to 8 bits, and finally output sharpening. Then the file is usually saved as a JPG file, but if it will be printed, I sometimes save it as a 16 bit PSD file. I generally do not make brightness and contrast adjustments inside of Photoshop. My output sharpening is a somewhat complex edge sharpening technique that I got from another book by Fraser, "Real World Image Sharpening" (I'll bet you didn't expect that somebody could write an entire book on that subject).
 
Rather than answering your question about color settings, I think that the book Real World Camera Raw goes into that subject in depth and it is not something that can be answered easily especially not in a few paragraphs. There are both advantages and disadvantages to using the larger AdobeRGB color space. The more important thing in Camera Raw/Lightroom (which BTW are identical in processing raw files) is to make sure that you are working in 16 bits rather than the default 8 bits. My hunch from looking at the histogram of egg box is that your CC version of Camera Raw might be set to 8 bits.

About clipping: yes we are talking about electronic signals in both instances -- audio and light -- when the input signal exceeds a certain value, the output has reached its saturation limit so the highlights brighter than that threshold all look the same ... no detail can be rendered. Sometimes this is referred to as blown out highlights. Film is far more forgiving than electronic sensors because film responds to light in much the same way that our eyes respond to light ... in a logarithmic fashion. Film is often exposed for the dark areas to make sure that details in the shadows are discernible while digital is often exposed for the lights to ensure that they aren't clipped.

I do essentially all of my image processing within Camera Raw. I have Camera Raw defaults set to work in 16 bits and I use ProPhotoRGB color space which is a huge color space that covers most of the gamut of color that the human eye can see. Bruce Fraser discusses some of the reasons that this would make sense even though most ink jet printers and most monitors can't even display all of the much smaller sRGB color space.

After exporting the image from Camera Raw to Photoshop, I only do a few additional things -- input sharpening, noise reduction, resizing, converting the image profile from ProPhotoRGB to either AdobeRGB or sRGB depending on destination, and conversion of bit depth from 16 to 8 bits, and finally output sharpening. Then the file is usually saved as a JPG file, but if it will be printed, I sometimes save it as a 16 bit PSD file. I generally do not make brightness and contrast adjustments inside of Photoshop. My output sharpening is a somewhat complex edge sharpening technique that I got from another book by
Fraser, "Real World Image Sharpening" (I'll bet you didn't expect that somebody could write an entire book on that subject).

I ordered the book. And also noted that Schewe is coauthor with Fraser on other books as well.

I never even looked at color depth. To tell the truth, I assumed it was 24 bit if anything. Don't know why
 
So how was that done in software? I know you use PS, so what specific changes did you make and does Lightroom have the equivalent do you know? I went into PS and in Image>Adjustments>Exposure and knocked it back a bit. Then went to Image>Adjustments>Levels... and chose darker midtones. Why did I do this? I have no idea. But the image is better. Not as good as yours but better.

View attachment 8441

Mark,
I pulled one of your other images into Lightroom and adjusted it so you can see that Ps and Lr are capable of doing very similar adjustments. The pics won’t be exactly alike given the way I see color and tones compared to someone else, but I think it looks pretty close to what Bill did on the other image. I’m really not trying to sell you on Lightroom, I just think that for the majority of basic adjustments it is more than capable of matching Ps through a simpler workflow with cataloging to boot. You can always open into Ps from within Lr if you need more advanced manipulation options.

My process: I pulled back the overall exposure a bit, tweaked the highlights and shadows, set the white and black points, then set the white balance with the eyedropper. After that I made smaller adjustments to all of the same controls to fine-tune it to what I thought looked good. Lastly, I adjusted it in the sharpening panel to define the woodgrain a bit more crisply.

Another wrench in this whole processing discussion - my laptop monitor is not calibrated to anything other than what I think looks good in Apple’s calibration utility, so there will be variance there too when viewed on any other device. For my purposes this works fine. If you become concerned about seriously representing the real piece in an image, then calibration rears it’s head.

The bottom line in all of this photography discussion is that there is no simple, one-size-fits-all answer. Shoot, read, ask questions, experiment, and in the end, go with what you think looks good for your own needs.
 

Attachments

  • Egg Box-1-3.jpg
    Egg Box-1-3.jpg
    95.8 KB · Views: 10
Mark,
I pulled one of your other images into Lightroom and adjusted it so you can see that Ps and Lr are capable of doing very similar adjustments. The pics won’t be exactly alike given the way I see color and tones compared to someone else, but I think it looks pretty close to what Bill did on the other image. I’m really not trying to sell you on Lightroom, I just think that for the majority of basic adjustments it is more than capable of matching Ps through a simpler workflow with cataloging to boot. You can always open into Ps from within Lr if you need more advanced manipulation options.

My process: I pulled back the overall exposure a bit, tweaked the highlights and shadows, set the white and black points, then set the white balance with the eyedropper. After that I made smaller adjustments to all of the same controls to fine-tune it to what I thought looked good. Lastly, I adjusted it in the sharpening panel to define the woodgrain a bit more crisply.

Another wrench in this whole processing discussion - my laptop monitor is not calibrated to anything other than what I think looks good in Apple’s calibration utility, so there will be variance there too when viewed on any other device. For my purposes this works fine. If you become concerned about seriously representing the real piece in an image, then calibration rears it’s head.

The bottom line in all of this photography discussion is that there is no simple, one-size-fits-all answer. Shoot, read, ask questions, experiment, and in the end, go with what you think looks good for your own needs.


Hi Owen,

I'm already sold on Lightroom. No question about it. It's far more accessible for a novice, and as you point out, I can pull it into PS, which I am for cropping. Bill made a lot of suggestions about color space and I've gone in and made the changes (sRGB, 16 bit and so on), and I found that my camera has a built in sRGB setting too.

I'm going to pull in one of my shots and go through the steps you mentioned here and see how I do. Just a bit of practice so I can commit some of this to "muscle memory".


I'm using flat panel displays here too and realize that the color accuracy is an issue (although I did run a color calibration utility on them for printer output. And even though I'm usually outputting CYMK color, it's fairly close to my pantone sample deck). And I wear trifocals and my vision isn't the greatest either... 🙂 Back in the day I had a nice high-end CRT (don't recall but Eizo may have been it or something like it) and then a ViewSonic that was great. TFTs are, well, meh...

I ordered a book that Bill recommended and will be going through that too. I hope I'm not wearing out my welcome on this thread but if it's okay I'll continue to post. Perhaps others reading will benefit.

You, John and Bill are truly a wealth of information that I probably couldn't afford to pay for if I had to take classes. Thanks again!

Mark
 
Last edited:
Hi Owen,

I'm already sold on Lightroom. No question about it. It's far more accessible for a novice, and as you point out, I can pull it into PS, which I am for cropping. Bill made a lot of suggestions about color space and I've gone in and made the changes (sRGB, 16 bit and so on), and I found that my camera has a built in sRGB setting too.

I'm going to pull in one of my shots and go through the steps you mentioned here and see how I do. Just a bit of practice so I can commit some of this to "muscle memory".


I'm using flat panel displays here too and realize that the color accuracy is an issue (although I did run a color calibration utility on them for printer output. And even though I'm usually outputting CYMK color, it's fairly close to my pantone sample deck). And I wear trifocals and my vision isn't the greatest either... 🙂 Back in the day I had a nice high-end CRT (don't recall but Eizo may have been it or something like it) and then a ViewSonic that was great. TFTs are, well, meh...

I ordered a book that Bill recommended and will be going through that too. I hope I'm not wearing out my welcome on this thread but if it's okay I'll continue to post. Perhaps others reading will benefit.

You, John and Bill are truly a wealth of information that I probably couldn't afford to pay for if I had to take classes. Thanks again!

Mark

I agree completely with Owen and I also agree that Lightroom is the ideal tool for photographers. I use what I use because there was no Lightroom when I started editing digital images.

There are some camera settings that are applicable only to JPG images. Image color profile and image style are two such settings on Canon and Nikon cameras. I am not familiar with your Sony camera options, but I can tell you that raw files are just that ... raw. The native color space is actually huge, but not something that can be easily quantified because there isn't a a calibrated reference light source -- your light can be anything from candle light to moonlight to all sorts of artificial lighting to sunlight. And, sunlight isn't even consistent -- clear blue sky, haze, clouds, trees, buildings, water, sand, time of day, and everything else that you see all do their part in changing the color of daylight. So, what I am saying is that the camera captures all the light within the limits of the sensor and having the camera set to sRGB or AdobeRGB has no effect whatsoever when we are talking about raw. Same thing goes for white balance. The sensor records the light as it sees it.

My old Samsung monitor is exactly identical to the wide gamut Eizo monitors because Samsung made the Eizo panels. The only difference was the buttons and on screen display. It was an incredibly good monitor, but it is starting to get a little tired and there is some slight tinting in parts of the screen. My new monitor is really nice, but it isn't as good as the Samsung. For some reason, Samsung is no longer making high end monitors.

Something interesting about CMYK -- despite the fact that printers use CMYK inks, the computer output to the printer is RGB ... even if you convert an RGB image to CMYK before sending it to the printer, the computer converts it back to RGB before sending it to the printer and then the printer processor converts it to the necessary signals that tell the printer how much of each cyan, magenta, yellow, and black color inks to apply at each given point on the paper.

Here is a screen shot from Bridge showing the Camera Raw adjustments that I made to your image. I also did some output sharpening in Photoshop in addition to the capture sharpening that I did in Camera Raw.

Egg Box-1-4_ACR.jpg
 
I'm already sold on Lightroom. No question about it. It's far more accessible for a novice, and as you point out, I can pull it into PS, which I am for cropping.

What is it about Ps cropping that you can’t do in Lr? Just curious…

Check out these shortcut features of Lr> Develop module:
* you can switch the vertical or horizontal cropping frame by tapping the x key;
* click and drag inside the histogram to alter any of the 5 primary exposure ranges of an image.
* also in the histogram, click on the triangles in the upper left and right. With these activated, it will show any areas of black or white that are 100% blocked/clipped. Most photogs have a few small areas of 100% black but no 100% white areas as they contain no detail or tone whatsoever. (dragging in the histogram is a quick way to pull down the exposure to eliminate these clipped whites)
* holding down the Mac option key (not sure of Windows - alt key maybe?) and sliding the white or black slider will show you very clearly where the 100% black or white areas are. Try it and you’ll see how easy it is to set or eliminate.
* double-clicking on the slider’s identity word will reset it to -0-.

That’s enough for now, but there are a whole host of other nifty shortcuts and hidden gems in Lr. The Adobe Lr channel on YouTube is pretty invaluable for this type of info. The Ps channel too!
 
I agree completely with Owen and I also agree that Lightroom is the ideal tool for photographers. I use what I use because there was no Lightroom when I started editing digital images.

There are some camera settings that are applicable only to JPG images. Image color profile and image style are two such settings on Canon and Nikon cameras. I am not familiar with your Sony camera options, but I can tell you that raw files are just that ... raw. The native color space is actually huge, but not something that can be easily quantified because there isn't a a calibrated reference light source -- your light can be anything from candle light to moonlight to all sorts of artificial lighting to sunlight. And, sunlight isn't even consistent -- clear blue sky, haze, clouds, trees, buildings, water, sand, time of day, and everything else that you see all do their part in changing the color of daylight. So, what I am saying is that the camera captures all the light within the limits of the sensor and having the camera set to sRGB or AdobeRGB has no effect whatsoever when we are talking about raw. Same thing goes for white balance. The sensor records the light as it sees it.

My old Samsung monitor is exactly identical to the wide gamut Eizo monitors because Samsung made the Eizo panels. The only difference was the buttons and on screen display. It was an incredibly good monitor, but it is starting to get a little tired and there is some slight tinting in parts of the screen. My new monitor is really nice, but it isn't as good as the Samsung. For some reason, Samsung is no longer making high end monitors.

Something interesting about CMYK -- despite the fact that printers use CMYK inks, the computer output to the printer is RGB ... even if you convert an RGB image to CMYK before sending it to the printer, the computer converts it back to RGB before sending it to the printer and then the printer processor converts it to the necessary signals that tell the printer how much of each cyan, magenta, yellow, and black color inks to apply at each given point on the paper.

Here is a screen shot from Bridge showing the Camera Raw adjustments that I made to your image. I also did some output sharpening in Photoshop in addition to the capture sharpening that I did in Camera Raw.

View attachment 8445


Bill, thanks for the shot of the image adjustments you made. Can you send me that image over in Raw format? 🙄😀

Seriously, thank you. I printed it out so I can have sort of a shorthand reference.

So my moving the camera settings (this is a low end "compact DSLR") to sRGB is meaningless as is the white balance, so the G7 card I got today is part of my solution.

I had no idea on the RGB>CYMK conversion. Is this a function of how the Windows driver API handles color, or do you know? Just curious.

I do miss having a nice reference monitor but it is nice having the real estate on my desk. I would imagine Samsung, being the behemoth that it is, decided that the high end monitor is too small a market.

As I said to Owen, you guys are really, really amazing with the depth of knowledge you have and the fact that you're all willing to share is very appreciated.

Mark
 
What is it about Ps cropping that you can’t do in Lr? Just curious…

Check out these shortcut features of Lr> Develop module:
* you can switch the vertical or horizontal cropping frame by tapping the x key;
* click and drag inside the histogram to alter any of the 5 primary exposure ranges of an image.
* also in the histogram, click on the triangles in the upper left and right. With these activated, it will show any areas of black or white that are 100% blocked/clipped. Most photogs have a few small areas of 100% black but no 100% white areas as they contain no detail or tone whatsoever. (dragging in the histogram is a quick way to pull down the exposure to eliminate these clipped whites)
* holding down the Mac option key (not sure of Windows - alt key maybe?) and sliding the white or black slider will show you very clearly where the 100% black or white areas are. Try it and you’ll see how easy it is to set or eliminate.
* double-clicking on the slider’s identity word will reset it to -0-.

That’s enough for now, but there are a whole host of other nifty shortcuts and hidden gems in Lr. The Adobe Lr channel on YouTube is pretty invaluable for this type of info. The Ps channel too!


Owen,

Well, NOW I can crop in Lightroom a bit more easily. In PS, I can select a square area for example using the shift key, dragging a basic shape and then moving it over the image. I'm learning that LR gives me all the capabilities I'm looking for, but as an old PS user, it is a crutch (no matter how much I despise the new interface!).

Thanks for all the info. Printing it out so I can refer in my next editing session.

🙂

Mark
 
Bill, thanks for the shot of the image adjustments you made. Can you send me that image over in Raw format? 🙄😀

Seriously, thank you. I printed it out so I can have sort of a shorthand reference....

OK, you are kidding.

.... So my moving the camera settings (this is a low end "compact DSLR") to sRGB is meaningless as is the white balance, so the G7 card I got today is part of my solution....

Well, there is a caveat. While the settings for white balance and color profile have no effect on the raw file, every raw file has an embedded JPG file so it is helpful to have the JPG look good.

.... I had no idea on the RGB>CYMK conversion. Is this a function of how the Windows driver API handles color, or do you know? Just curious....

It's probably because image color profiles are defined in terms of RGB values. There is nothing to be gained by specifying CMYK values because each printer is unique in determining the right mix of CMYK inks to apply based on the paper being used.

.... I do miss having a nice reference monitor but it is nice having the real estate on my desk. I would imagine Samsung, being the behemoth that it is, decided that the high end monitor is too small a market ...

I think that you are right. And, graphics artists and photographers being the whiny lot that they are, they required high maintenance from tech support. 🙄
 
OK, you are kidding.


Well, there is a caveat. While the settings for white balance and color profile have no effect on the raw file, every raw file has an embedded JPG file so it is helpful to have the JPG look good.


It's probably because image color profiles are defined in terms of RGB values. There is nothing to be gained by specifying CMYK values because each printer is unique in determining the right mix of CMYK inks to apply based on the paper being used.


I think that you are right. And, graphics artists and photographers being the whiny lot that they are, they required high maintenance from tech support. 🙄

A little "whine" and fruit, you're saying? Maybe an Apple? Cheez!

I wasn't kidding. I printed the screen shot you did of the settings so I'd have a bit to go on. I realize it won't translate to other images, but it helps me think about aspects of the process I wouldn't have considered.
 
... I wasn't kidding. I printed the screen shot you did of the settings so I'd have a bit to go on. I realize it won't translate to other images, but it helps me think about aspects of the process I wouldn't have considered.

I would except that I don't have a raw of the image ... Just your JPG.

Camera Raw originally only processed raw files and converted them into a standard image format. That capability was later expanded to allow Camera Raw to also processing of JPG and TIF images. In all cases the output file (before being saved) is essentially a TIF with the default bit depth and profile that you have set.

So, for starters, edit your JPG with my settings. Then try the same thing on your original raw file to see if the results look the same.

Hey Bill. I WAS kidding about sending me the Raw file. 🙂

I wasn't kidding that I printed it out as a sort of guide given the current camera settings. Still fooling with settings and learning. My book should be in today. woo hoo!
 
Which book is that?

I am sort of a techno-dweeb because I have all of the Real World books by Fraser and/or Schewe. For some reason Peachpit publishing decided to discontinue the Real World series -- something about being too technical for their audience. At least Jeff Schewe was able to get his latest book on Camera Raw published, but it isn't in the Real World series. It covers both the Photoshop and Lightroom versions. The raw conversion engine is the same in both, but the UI is slightly different for some things.

There are books on Color Management and on Sharpening by Fraser. They are good if and when you decide to go all geeky about photography and do things like getting a wide gamut monitor and a printer with ten or more different ink colors. Mine has ten, but I feel outdated because there is one that has twelve ink tanks. They should just give you the printer because they stick it to you on the ink.

I don't know about Lightroom, but there are third party plug-ins for Photoshop for noise reduction. The one that I like is called Neat Image. I have tried a couple others, but I think that Neat Image has the best Noise Reduction algorithms for reducing noise with minimal impact on detail and sharpness.


Bill, this is the book. Just came in today.

IMG_1468.JPG

Gonna dig in as soon as my day ends here at the office. 🙂

Sorry your printer is so obselete. You're a tool / toy junkie, right? (my name is Mark, and I am addicted to tools).
 
Back
Top