• January Turning Challenge: Thin-Stemmed Something! (click here for details)
  • Conversations are now Direct Messages (click here for details)
  • Congratulations to John Lucas for "Lost and Found" being selected as Turning of the Week for January 13, 2025 (click here for details)
  • Welcome new registering member. Your username must be your real First and Last name (for example: John Doe). "Screen names" and "handles" are not allowed and your registration will be deleted if you don't use your real name. Also, do not use all caps nor all lower case.

Need a bright idea......sanding tips

Odie

Panning for Montana gold, with Betsy, the mule!
TOTW Team
Joined
Dec 22, 2006
Messages
7,270
Likes
11,443
Location
Misssoula, MT
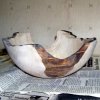
I have a Madrone burl bowl with a large void on the outside of the bowl. This void is about 25 percent of the circumference. The wood takes to tool work nicely, and sanding from about 220gt on up is necessary.

My problem is........I'd like to maintain a nice crisp edge between the void and the tooled surface with no rounding over. The edge between the two surfaces is very irregular, making any use of discs a little too "catchy".

Using hand held sandpaper on the spinning surface won't work. Using a flat sandpaper backer with a single point contact almost works with higher rpm and very light contact.....but, still not good enough.

What I'd like to have is some kind of flexible, but fairly stiff and flat sandpaper backer. It must be flexible while still stiff enough to maintain it's shape for the sanding. That way I can match the profile shape and diameter of the bowl......AND giving me the multiple point contact needed to avoid any rounding over of the edge. What I'm thinking of is something like a flexible lamp neck, only with a flat surface, not round. Any ideas on finding something that would suit this need?

I'm sorry, can't post a photo of the actual bowl at this time......Since my change over of new computer, I am unable to add new photos to my online posts.....only have capability to include previously existing photos.

If worse comes to worse.....I suppose I could completely hand sand the exterior of this bowl......but, if that can be avoided, it would be preferable.

Any ideas out there?

ooc
 
Last edited:
If you keep part of the disk on sound wood and sand so it rotates off sound into the void, you can use power sanding with no problem. Just don't let anything from 12:00 to 6:00 touch the wood as you sand from 7:00 to 11:00. It will be a bit more difficult for you if you're a drill man than for me with the flex shaft, because of the weight of the drill. If your chuck is a 1"8TPI you can leave the piece mounted on the chuck, cut the head off a soft bolt and put it in your banjo to hold it if the hole locations require.

Same power technique you use for sanding irregular-edged pieces, really. Think these are two seperate pieces, but the problem is the one you're addressing?
 

Attachments

  • 2Nine-From-Eight-Profile.jpg
    2Nine-From-Eight-Profile.jpg
    24.1 KB · Views: 68
  • P3170052.jpg
    P3170052.jpg
    422 KB · Views: 90
Last edited:
If you keep part of the disk on sound wood and sand so it rotates off sound into the void, you can use power sanding with no problem. Just don't let anything from 12:00 to 6:00 touch the wood as you sand from 7:00 to 11:00. It will be a bit more difficult for you if you're a drill man than for me with the flex shaft, because of the weight of the drill. If your chuck is a 1"8TPI you can leave the piece mounted on the chuck, cut the head off a soft bolt and put it in your banjo to hold it if the hole locations require.

Same power technique you use for sanding irregular-edged pieces, really.

Thanks MM.....but, for this particular application, what's needed is something similar to that which is described in my post........hoping to connect with someone who has dealt with the issue using the application asked for........

......or, can come up with a bright idea! 😉

ooc
 
I guess there must be only one way to do the job, eh? Maybe if someone figures it out, we can all benefit.

For the benefit of some who may just want to solve the problem of rounddover into and out of a void, might I suggest that you want to sand on the lathe, use the merit stiff back disks and support the sander on the toolrest with the lathe running. That way what you get is the same as what comes off any tool, because you're using what is for practical purposes a rotary gouge. You have to let the wood come to you for removal, just as you would with any other tool. That way things don't round, because the paper doesn't dive as you go after the surface.

Once you take the piece off the lathe you can do as above to finish the finer points. I always do 220 plus on pieces turned green that way after they've had some time to dry.
 
Odie
You may want to look at your local parts store in the body work section for a rubber sanding block.
Body shops use this to wet sand areas of work.
To discribe it the top is contured to fit your hand the bottom is of course flat and each end has open so to slide paper ends in to hold in place.
This way you could spin work on lathe and gently hold sanding surface to your work, "I think this might give you the results you are looking for with out stressing"

good luck
 
I use a firm disc, and very slow speeds on my drill, like 100 rpm or less. and will lock the spindle in place. Makes the drill easier to control, and you don't remove as much at one time, but it still sands effectively. You could hand sand it. Madrone moves too much, even when dry to count on being able to hold your sander on the tool rest and rotate the bowl. I just don't even consider sanding the void areas with the lathe running, even with my slowest speeds of 15 rpm or so.

robo hippy
 
I guess there must be only one way to do the job, eh? Maybe if someone figures it out, we can all benefit.

For the benefit of some who may just want to solve the problem of rounddover into and out of a void, might I suggest that you want to sand on the lathe, use the merit stiff back disks and support the sander on the toolrest with the lathe running. That way what you get is the same as what comes off any tool, because you're using what is for practical purposes a rotary gouge. You have to let the wood come to you for removal, just as you would with any other tool. That way things don't round, because the paper doesn't dive as you go after the surface.

Once you take the piece off the lathe you can do as above to finish the finer points. I always do 220 plus on pieces turned green that way after they've had some time to dry.

Hello MM.......

Well, I don't know if it was the only way, or not......but, at this point, it's too late! The exterior of the bowl was finished this morning. I was able to muddle through, and do the 220 and 320 with a rubber backed piece of wood for a sanding backer. These grits were running high, at about 1000rpm with an extremely light touch. There was minimal "round over"......more than I had hoped for, but acceptable. 400 sanding was done entirely by hand.

I do like and appreciate your suggestion of trying the disc sanding with the sander braced on the toolrest. If I had seen this suggestion prior to now, I would have given that a shot! I'll remember that the next time a similar sanding need comes up......thanx!

ooc

Odie
You may want to look at your local parts store in the body work section for a rubber sanding block.
Body shops use this to wet sand areas of work.
To describe it the top is contoured to fit your hand the bottom is of course flat and each end has open so to slide paper ends in to hold in place.
This way you could spin work on lathe and gently hold sanding surface to your work, "I think this might give you the results you are looking for with out stressing"

good luck

Thanks for the suggestion, Bill.......

Actually, I have one of those palm sized sanding backers, and I'm including a picture of it at the bottom of this post.....it's red in color. In the end, it was a piece of rubber that was glued to a wooden slat that I used, but a smaller version.

ooc

I use a firm disc, and very slow speeds on my drill, like 100 rpm or less. and will lock the spindle in place. Makes the drill easier to control, and you don't remove as much at one time, but it still sands effectively. You could hand sand it. Madrone moves too much, even when dry to count on being able to hold your sander on the tool rest and rotate the bowl. I just don't even consider sanding the void areas with the lathe running, even with my slowest speeds of 15 rpm or so.

robo hippy

Good suggestion Robo Hippy........

I did try something similar to this, but the profile of the shape plus the void were obstacles that were just too much to overcome. Besides the rotary disc, I also tried the random orbital sander......same thing, just couldn't get over the complicating physical properties of this particular bowl.

Yes, in the end, I did have to do some hand sanding of all grits used, and the 400 grit was completely done by hand.

Even though I'm done sanding the exterior of this bowl. I still would be interested in hearing anyone's further input.......especially if some sort of flexible, but fairly stiff backer is used. I'm pretty certain something used for some other purpose exists.....but, I don't know what it could be......

Thanx to all.......


ooc
 

Attachments

  • sandpaper storage (2).JPG
    sandpaper storage (2).JPG
    93 KB · Views: 47
I would agree with robo hippy and michael, but I would try a 5-6" foam backed sanding pad, with a slow drill speed, and the piece stationary. You can have really good control over the pad, and with a soft-mid stiff pad, it won't dig in. Most of my bowls are natural edge these days, and that's what how i do it to keep the crispness of the thin bark. I sand clockwise on the left of the voids, so the disc goes from the wood towards the void, and then reverse it for the right side. that way it's kind of impossible to round the edge over unless you catch or something.

Hope that made sense, haha. Good luck!

Dave
 
Two things I have heard of:

One was to put abrasives on one of the electric vibrating tooth brushes (why isn't it a teeth brush?????).

The other was to put the abrasives on some thing similar to a credit card, which would hold shape, but not dig in.

robo hippy
 
One was to put abrasives on one of the electric vibrating tooth brushes (why isn't it a teeth brush?????).

The other was to put the abrasives on some thing similar to a credit card, which would hold shape, but not dig in.


Detail sanders work nearly as you describe them. Everything from the humble B&D "Mouse" through the Fein "Multimaster" as advertised on TV.

They don't do the job as effectively as the disk used properly, but if you need something less aggressive for static sanding, they more or less work.
 
Random Thought

As I was reading your original post, I flashed back to high school when I was dabbling in violin making. One way to bend the sides of violins is to use a lead "strap" as a supportive backer while wrapping the 0.9 mm thick wood around the bending iron. The violin maker I was learning from got this 2" wide sheet lead from roof vents that had a lead flange.

I am wondering if you could conform a piece of lead to the outside of the vessel, then use it as a pattern to trace the shape on a thick piece of wood, cut the curve on a bandsaw, and then glue/apply the lead to the block of wood (unless you drum sanded the curve on the wood, in which case the lead would no longer be necessary). It could *fingers crossed* conform perfectly to your turning and provide a supportive backer for the sandpaper. It would span the voids with no problems of roundover.

Dunno, but it's a thought. 🙂

Hutch
 
I have used dense polystyrene foam.

Without paper on it, put it against the revolving work to get the rough shape you want.

Put paper on and work away.

You mean the same styrofoam used in packaging goods? You can take that and shape it by pressing against revolving wood?

There is an interesting idea........

ooc
 
We use the stuff used for insulation, it is thicker and denser.

You can get a rough shape if you do it after the initial chisel work before finishing cuts.

Sometimes it needs a little shaping by hand with sandpaper.
 
Foam

Also could be interesting for making a template to match a prototype. Let the spinning unsanded prototype shape the foam, if it doesn't melt. More precise, and as large as needed, than a contour gage. My largest contour gage is only 10" long, with ~1 mm fingers and ~1" stroke. Probably need to attach a piece of wood for stiffening a long piece of foam.

Thanks, Ian
 
It might get you close, but recall that if the rate of curvature is greater on one part (N) than another (S), you're tied to E-W movement only and you'll want an inch or so on either side for stabilization as well as room to move, unless you're sanding on the lathe. Would work fine on that perfect sphere, of course.

I have fitted stickyback sandpaper around cups to sand and fit the female part of the handle, and it does a reasonable job, but the lathe does the E-W while I hold steady N-S.

Watch your pressure, some of that stuff has low melting points.
 
Back
Top