• January Turning Challenge: Thin-Stemmed Something! (click here for details)
  • Conversations are now Direct Messages (click here for details)
  • Congratulations to Gabriel Hoff for "Spalted Beech Round Bottom Box" being selected as Turning of the Week for January 6, 2024 (click here for details)
  • Welcome new registering member. Your username must be your real First and Last name (for example: John Doe). "Screen names" and "handles" are not allowed and your registration will be deleted if you don't use your real name. Also, do not use all caps nor all lower case.

natural edge

Joined
Mar 4, 2007
Messages
56
Likes
8
Location
Lakewood, Colorado
I'm having some fun experimenting with different shapes and embellishment on natural edge bowls. Recently I've been turning some 6-7 inch bowls with a wall thickness of under 1/8 inch. I've noticed that the wall thickness at the high side of the rim is thicker than the thickness of the low side. I'm turning them at 1000 rpm. I'm assuming this is because of centrifugal force. Do y'all think this is the case?
Herb
 
More likely that the wings squirm away from the tool before you can register the bevel. It's a real challenge to cut that much air without getting eager and pushing the tool. Concentrate on swinging around your pivot point on the rest and going ahead slowly.
 
I'm having some fun experimenting with different shapes and embellishment on natural edge bowls. Recently I've been turning some 6-7 inch bowls with a wall thickness of under 1/8 inch. I've noticed that the wall thickness at the high side of the rim is thicker than the thickness of the low side. I'm turning them at 1000 rpm. I'm assuming this is because of centrifugal force. Do y'all think this is the case?
Herb

You like the speed to reduce your "air time" but you have to be more careful with your cut to get an even wall thickness. The problem is most usually with the hollowing cuts, so I'd suggest you form the habit of setting your wall thickness as you begin hollowing the bowl. Others may do it differently, but I hollow a NE bowl in two stages.

Stage one is from the high rim to just below the low rim and allows me to hold more wood to support the "wings". This is especially useful for me where cutting thin as you describe.

Then, when I've got the wall thickness and inside curve working, I go back to center and, Stage 2, finish the bowl following the inside curve I established in Stage 1 and the exterior profile.

Were I doing a cut rim bowl, I'd be taking continuous cuts from rim to center.

YMMV
mm
 
I'm assuming this is because of centrifugal force. Do y'all think this is the case?

Either that,or just the wood flexing in from the pressure of the tool. Finish turn the inside completely before starting on the exterior, and do the exterior in progressive steps so you always have enough wood below where you are cutting to minimize flexing.
 
I agree with both. Higher speed. Light touch on the bevel and hollow in stages checking the thickness. What I have trouble with on "winged" vessels is the lead edge of the wing is slightly thinner than the trailing edge. I'm pretty sure this is due to flex in the wood. By taking really light passes and trying my best to not push on the bevel at all, I can reduce this to something that only a turner will notice.
I prefer to think of it as gliding the bevel rather than riding the bevel. In my feeble little mind riding the bevel sort of means pushing on the bevel. for these types of cuts you want the bevel touching so you have control of the cut, but you don't want any pressure on the bevel. consequently I think gliding the bevel gives a more visual sense of what should happen in this case.
 
nutural edge issues

Hi,

Thanks for your expertise. Michael, exactly what do you mean by the phrase below?

"Concentrate on swinging around your pivot point on the rest and going ahead slowly."

Also, any practical tips on how to "glide" vs. ride the bevel?

Herb
 
Hi,
Michael, exactly what do you mean by the phrase below?

"Concentrate on swinging around your pivot point on the rest and going ahead slowly."

Also, any practical tips on how to "glide" vs. ride the bevel?

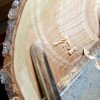
SOP as I cut, actually. Standard roughing cut that carries through to other interrupted surfaces. You want to take off the high spots first, so you set up on the rest behind the shadow point where you'll contact the wood and swing the tool in and through. No pushing along the rest until you have a place to rest the bevel. Nibble in short arcs instead. You can see the artifact on this picture, though I'm in where I can get a bevel to steady by the time it was taken.
 

Attachments

  • Wing-Cut.jpg
    Wing-Cut.jpg
    33.7 KB · Views: 537
Finish turn the inside completely before starting on the exterior, and do the exterior in progressive steps so you always have enough wood below where you are cutting to minimize flexing.
__________________
Ken Grunke
webmaster, Coulee Region Woodturners of Wisconsin

very interesting, 1st time i have come across that, how are you gripping the blank to 1st do interior, faceplate, chuck, jam chuck, ...????? 😕

very interesting
 
I can see how my response could be confusing, it was really meant to be a general guideline for turning any hollow form.
For the longest time, before I discovered reverse turning, I would turn a bowl mounted to a faceplate from start to finish--using a parting tool to form the bottom.
 
Hi,
Also, any practical tips on how to "glide" vs. ride the bevel?
Since you can't rely on the bevel-to-wood contact to guide your cut, the tool needs to be held more firmly, but not with a white-knuckle death grip. If you can, hold the handle end against your body, which guides the cut by movement of the hips with a wide leg stance. Not hard to do if your lathe has a sliding headstock and you can turn a bowl at the tail end--otherwise you straddle the lathe like David Ellsworth 🙂

The cutting edge should be at an angle, maybe 20 to 40 degrees from the vertical and as sharp as you can get it.
 
grip

For the longest time, before I discovered reverse turning

would 4 prong center and live center work for reverse turning, and somewhere after that turn tenon??????
 
would 4 prong center and live center work for reverse turning, and somewhere after that turn tenon??????
Sure. This is the common way of getting a bowl blank started, between centers to balance the blank out and turn the tenon or the flat that the faceplate will screw to.

"Reverse turning" generally refers to mounting the mostly-finished bowl with it's inside towards the headstock, for the final turning of the foot and maybe a little on the whole exterior.
 
Gliding vs riding. I think ken hit it when he talked about not using a "death grip". First of all you have to be confident in your tool usage. this allows you to relax so you aren't holding the tool tightly. Holding the tool against your body and using your body to control the tool movement is key to this. It gives you much finer control of the cutting edge.
On natural edge or square edge bowls it's helpful to adjust the tool so it won't cut and touch the bevel gently to the surface and kind of "practice" the cut moving your body to push the tool along the surface. I move the tool back and forth trying to be lighter on the bevel. You can tell by the noise how gently you are. The harder you ride the bevel the noisier it will be. When you are just barely causing any noise you are gliding the bevel. then move the tool handle very slightly until the tool starts to cut. You've already practiced the movement with your body so just do this same movement again but with the tool cutting.
Thin wood flexes and thin green wood flexes more. Learning to be light on the bevel really reduces this. Sharp tools lets you reduce the pressure some more. A really sharp tool lets you relax your grip on the tool. This by itself helps you reduce the pressure on the bevel.
 
One thing that I find useful is to sight down the outside wall.
then follow it with cut along the inside wall.

I cut about an inch at a time to the finished wall thickness

I check my first inch with calipers
If my wall is getting thicker I float the bevel on the inside wall an pick up the cut where it needs to be cut more.

Like everyone said light touch, sharp tool, fast lathe speed

happy turning,
Al
 
Last edited:
inside ridges with natural edge

One thing that I find useful is to sight down the outside wall.
then follow it with cut along the inside wall.

I cut about an inch at a time to the finished wall thickness

I check my first inch with calipers
If my wall is getting thicker I float the bevel on the inside wall an pick up the cut where it needs to be cut more.

Like everyone said light touch, sharp tool, fast lathe speed

happy turning,
Al

Any hints on how to prevent the undulations you get with this technique on the inside???? I am improving but is a PITA😱, Gretch
 
Gretch, I prefer to start cutting slightly before the ridge I left from the previous segment with a final very thin finishing cut. When I start I cannot see the cut at the edge of the gouge but I will see it on the other side of the bowl as a scratch line. I do not watch the gouge edge or I will go too deep and make a divot. I watch the shadow opposite the cut to determine the depth of cut I am taking. This is a body movement cut without arm movement. I am sliding the edge without much pressure on the bevel, just a hint of the touch of a bevel, like a butterfly landing on a flower. Many time I will create a micro bevel on the gouge to avoid any bruising and perhaps a tighter radius cut.
 
like George said you pick the cut up a bit ahead of where you need to cut.
If the bevel is riding it take just a whisper of wood away and does not leave a line.

I lock the tool handle to my side and turn my body to follow the curve.
With bevel following the outside wall contour on the inside I usually get a pretty clean surface.

If you try cutting right where you stopped last time with the bevel slightly off the wood the gouge will tend to take too deep of a cut which you correct sort of automatically then you look and have a bit of a washboard surface.

happy turning
Al
 
Last edited:
like George said you pick the cut up a bit ahead of where you need to cut.
If the bevel is riding it take just a whisper of wood away and does not leave a line.

I lock the tool handle to my side and turn my body to follow the curve.
With bevel following the outside wall contour on the inside I usually get a pretty clean surface.

If you try cutting right where you stopped last time with the bevel slightly off the wood the gouge will tend to take too deep of a cut which you correct sort of automatically then you look and have a bit of a washboard surface.

happy turning
Al
George/Al thanks for the tips. I tried yesterday to see what I was doing and I do look to the right side rather than the gouge.. I use the ellsworth gouge for everything (practically).. and make a micro bevel on the bottom of the gouge routinely. (My small bowls are often with steep sides, and I use the gouge away from my body. Not sure if I am using ellsworth gouge properly.) And no, I am not going to straddle the oneway!!!! Gretch
 
I used to do exactly as you do Gretch. Since going to a conventional grind, whatever bevel angle works, especially on steep wall bowls and vases it has been a lot easier to get my body in the proper position to make the cut. It is also important to look at the flute profile of the bowl gouge. I prefer the flute to be round and ground below center for a convention grind. A perfect example is Doug Thompson’s round flute gouge. The “V†flute creates too sharp of a point for this grind IMO. I have several of Doug’s round flutes ground at different angles for different slopes. Before final cuts I will use a fingernail grind also, I use a fingernail grind for most of my cuts. The forged gouge HSS or carbon that MM uses will also make this position easier than a fingernail gouge for final cuts and minimize the use of the arms.
 
Hi Gretch,

I use the Ellsworth gouge for all my bowls along with a spindle gouge to make the chuck tenon and for the final cuts on the bottom when reverse turning the almost finished bowl.

When I am starting my final wall cut. I sight down the left outside wall of the bowl. This is the line I follow on the inside of the bowl.
I do this early on in the roughing and try to rough turn a 1/2 wall maybe 2" deep. If I get an even 1/2 wall for 2 inches then cut an 1/8th inch off the wall thickness for an 1inch and a half then cut another 1/8th of the wall thickness for an inch. This should give a pretty even wall about 1/4 thick for the first inch. this wall I would check with calipers, refine and continue. I also try ti err on leaving it thicker further down.

Steep sided bowls are more difficult. A tall vase shaped natural edge bowl can look terrific and be worth the endeavor.

Try a few shallow bowls. My favorite demo size blank is a 6" diameter log cut 8" long. I round the edges. I usually turn a full inch off the bottom and the resulting bowl will be 8" long about 1.5 " high at the ends and maybe 4.5 " wide. I usually do these with out a foot.

Happy turning,
Al
 
Last edited:
Nat edge

Hi Gretch,

I use the Ellsworth gouge for all my bowls along with a spindle gouge to make the chuck tenon and for the final cuts on the bottom when reverse turning the almost finished bowl.

When I am starting my final wall cut. I sight down the left outside wall of the bowl. This is the line I follow on the inside of the bowl.
I do this early on in the roughing and try to rough turn a 1/2 wall maybe 2" deep. If I get an even 1/2 wall for 2 inches then cut an 1/8th inch off the wall thickness for an 1inch and a half then cut another 1/8th of the wall thickness for an inch. This should give a pretty even wall about 1/4 thick for the first inch. this wall I would check with calipers, refine and continue. I also try ti err on leaving it thicker further down.

Steep sided bowls are more difficult. A tall vase shaped natural edge bowl can look terrific and be worth the endeavor.

Try a few shallow bowls. My favorite demo size blank is a 6" diameter log cut 8" long. I round the edges. I usually turn a full inch off the bottom and the resulting bowl will be 8" long about 1.5 " high at the ends and maybe 4.5 " wide. I usually do these with out a foot.

Happy turning,
Al
Thanks Al-I do similar , but I'll try your formula. I have probably turned a 100 natural edge bowls (some "baby bowls"-3"x2"), up to 12"x5". in the last 2 years. I get frustrated that I am such a slow learner!!!! Thanks again, Gretch
 
Not much needs to be added to this. If the poster is fairly new to bowl turning, one suggestion is to experiment with the degree to which the gouge is rotated while making cuts. Very small rotations sometimes make a considerable difference and one sees turners who rotate the tool as they enter and simply make the cut at a point they always stop at.

After, again, some experimentation, learn to sharpen the tool consistently. Sharpening is a very important part of the skill needed to be a good turner. You don't want there to be differences in the tool after each sharpening.

Is the lathe hight correct? The way cuts are made is greatly affected by the lathe being too low or too high.

Malcolm Smith.
 
Back
Top