• Beware of Counterfeit Woodturning Tools (click here for details)
  • Johnathan Silwones is starting a new AAW chapter, Southern Alleghenies Woodturners, in Johnstown, PA. (click here for details)
  • Congratulations to William Rogers for "Ambrosia Maple Platter" being selected as Turning of the Week for September 16, 2024 (click here for details)
  • Welcome new registering member. Your username must be your real First and Last name (for example: John Doe). "Screen names" and "handles" are not allowed and your registration will be deleted if you don't use your real name. Also, do not use all caps nor all lower case.

Looking for some advice: Turning a potpourri bowl lid

Joined
Jul 30, 2021
Messages
118
Likes
38
Location
Aurora, CO
I've been trying to turn something I haven't turned before, and have broken two so far. The item is a bit challenging: A slightly curved lid for a small bowl, intended to contain potpourri. So the lid, ultimately, will be hand-carved with irregular holes to make kind of a webbed structure. The center top of the lid, I had hoped to drill a hole into, so there wouldn't be any finial, just a fairly simple lid with a webbed structure, ultimately around a "ring" of material in the middle, and inside a "ring" of material at the outside edge.

I've been having trouble drilling out the hole. I haven't even reached the hand carving part yet. I've been turning these out of 4x4x2 blanks. The whole idea is kind of a challenge. First, 've been using a small face place, drilling into the bottom of the lid. So ultimately I would be turning off the part of the wood that has the holes from the screws holding on the face plate. I turn a small tenon on the top, so I can eventually flip it around. I turn the outside shape. Then flip, and turn the inside shape. Finally, I pop the turned solid lid into my longworth, and attempt (and fail) to drill the hole.

Wondering if anyone has attempted anything like this before, and if there is a technique that could make this successful. I've thought about drilling the hole first, skipping the tenon, and trying to use my pin chuck to hold it...but, I am pretty sure that in the long run, that will result in the lid slipping once I start turning the inside, and it will still be a failure (and quite possibly a nastier little explosion of wood than what I'm running into with the current approach.)

Anyone have any ideas?
 

hockenbery

Forum MVP
Beta Tester
TOTW Team
Joined
Apr 27, 2004
Messages
8,875
Likes
5,319
Location
Lakeland, Florida
Website
www.hockenberywoodturning.com
I would suggest trying double sided tape.

I do a lot of 3” ornament and pendant disc using it.
if you are Familiar with Trent Bosch vessel of illusion rhos opening parts can be turned with double sided tape.

I pin the blank against the top of the chuck jaws and turn a tenon on one side.
Turn one face in a chuck. Finish the other face holding the turned face to the tape.
You can drill the hole before turning and center with a cone center. Or drill it while in the chuck
Using pull cuts, I can sand these starting with 320.

Remove with very slow pressure pulling on the long grain.

The tape residue will come off with naptha or Alchohol depending on the brand of tape
 
Last edited:
Joined
Jun 6, 2018
Messages
2,090
Likes
1,084
Location
La Grange, IL
Do you have any insight/observations as to why the hole drilling operation is failing? Sounds to me like you need to reduce the forces involved.

If you have a drill press you could take the operation there. Drill into the concave side (underside) of the lid. Light touch; go easy.

If you're using the lathe, consider keeping the motor switched off. Manually turn the workpiece and very gently advance the quill.

Try another drill bit, that one may be dull. If it's a large hole you're drilling you can start with a smaller bit and step up to final size.
 

Tom Gall

TOTW Team
Joined
Feb 20, 2013
Messages
1,055
Likes
2,065
Location
Hillsborough, NJ
@Jon Rista I think I understand what you're trying to do. I don't understand why you need to drill a hole. There are many ways to hold your work: DS tape (as Al mentioned), 4-jaw chuck, chuck with flat jaws, vacuum chuck, etc., or a combination of methods ... depending on what you have available.
I think you should be able to do it all with a 4-jaw chuck (w/appropriate size jaws for your work). To make your domed lid - 1) mount your round disk (however you get to that point) in the chuck(s) and turn the underside recess with a vertical cut (parting tool) and than turn a recess (like a shallow bowl) to be the underside of your dome. 2) Reverse and mount in chuck in expansion mode (don't over tighten) and turn the top of the dome with light cuts. 3) Remove (or not) from the chuck and carve/pierce your domed lid. I hope this all makes sense.

Here are some off-set lids I made about twenty years ago using a multi-center vacuum chuck and a 4-jaw chuck. Of course, yours will be carved or pierced so the underside of the Holly lid (2nd photo) is what I tried to explain above.
 

Attachments

  • 1- 6 Lids (above) P1050267.jpg
    1- 6 Lids (above) P1050267.jpg
    527.6 KB · Views: 13
  • 2- Underside (with Holly) P1050275.jpg
    2- Underside (with Holly) P1050275.jpg
    365.1 KB · Views: 14
  • 3- Side view - Dome - P1050276.jpg
    3- Side view - Dome - P1050276.jpg
    279 KB · Views: 12
  • 4- Box w-Lid - P1050277.jpg
    4- Box w-Lid - P1050277.jpg
    358.7 KB · Views: 10
Joined
Jul 30, 2021
Messages
118
Likes
38
Location
Aurora, CO
Do you have any insight/observations as to why the hole drilling operation is failing? Sounds to me like you need to reduce the forces involved.

If you have a drill press you could take the operation there. Drill into the concave side (underside) of the lid. Light touch; go easy.

If you're using the lathe, consider keeping the motor switched off. Manually turn the workpiece and very gently advance the quill.

Try another drill bit, that one may be dull. If it's a large hole you're drilling you can start with a smaller bit and step up to final size.

Well, I was using the lathe, mostly to keep the hole truly centered. I could try to use my drill press with the lid upside down...that would certainly provide the stability needed to avoid cracking it. Mostly, I guess I was drilling on the lathe to keep the hole centered. It was going to be about a 3/4" to 1" hole, and was really stylistic, not otherwise necessary.
 
Joined
Jul 30, 2021
Messages
118
Likes
38
Location
Aurora, CO
Here's a suggestion, not hand carved, but could be a solution:
Penn State Industries Lids
I have seen these before! I think I also saw something similar on CraftSupplyUSA and Etsy in the past.

I wanted to push my boundaries a bit, though, which is largely what this is. Exploring some new territory, the carving aspect, and making my lids by hand myself, rather than just buying one. ;)
 
Joined
Jul 30, 2021
Messages
118
Likes
38
Location
Aurora, CO
@Jon Rista I think I understand what you're trying to do. I don't understand why you need to drill a hole. There are many ways to hold your work: DS tape (as Al mentioned), 4-jaw chuck, chuck with flat jaws, vacuum chuck, etc., or a combination of methods ... depending on what you have available.
I think you should be able to do it all with a 4-jaw chuck (w/appropriate size jaws for your work). To make your domed lid - 1) mount your round disk (however you get to that point) in the chuck(s) and turn the underside recess with a vertical cut (parting tool) and than turn a recess (like a shallow bowl) to be the underside of your dome. 2) Reverse and mount in chuck in expansion mode (don't over tighten) and turn the top of the dome with light cuts. 3) Remove (or not) from the chuck and carve/pierce your domed lid. I hope this all makes sense.

Here are some off-set lids I made about twenty years ago using a multi-center vacuum chuck and a 4-jaw chuck. Of course, yours will be carved or pierced so the underside of the Holly lid (2nd photo) is what I tried to explain above.

The hole is really purely stylistic. I had a particular look in mind, and I've been trying to achieve it. The idea was to have this kind of webbed look between two rings. The hole is the center space in the upper ring on the top of the lid. Since its for a potpourri bowl, the hole would improve airflow too.

So I understand your approach. Instead of turning outside then inside, your saying turn inside, so that you can hold the piece in the chuck with the wood that would have otherwise been removed by turning the outside first. Once the inside is turned, flip it around in the chuck.

I think....the only bit that might not work here, is you are reverse chucking (expansion vs. compression)... The kind of lid I was originally trying to turn, was maybe 1/4" thick if that. I didn't want it to be bulky... And, there really wasn't much of a lip to expansion chuck with. The top of the lid was going to come down to and match the wood of the bowl, which would produce another ring around the lid. (The bowls already have inside lips turned into them.) I now wonder, though.....if maybe I could turn some kind of jamb chuck myself, so that I can perfectly re-center the flipped lid, and then use double-sided tape as was previously recommended, only to hold the lid into the jamb chuck. Well, actually, I guess if the lid isn't carved yet...I could probably literally friction fit the lid into the jamb chuck as normal...
 

Tom Gall

TOTW Team
Joined
Feb 20, 2013
Messages
1,055
Likes
2,065
Location
Hillsborough, NJ
Just a few random thoughts, Jon.
  • The expansion mode will work if you design the interior for it. Expand just enough to hold the lid without breaking it.
  • You can drill the hole (or use a parting tool depending on the size/diameter you want) in the first step while doing the interior. Any blow out on the back side will be removed when turning the curve when reversed.
  • After you do a bunch with a center hole (different sizes will give you different looks) ... do some without the hole with just random carving/piercing. Sometimes 'random' is more aesthetically pleasing.
  • 1/4" thickness won't give you much of a noticeable curve (dome) on your lid. AIRC, mine were about 3/8"-7/16" thick and about 3-1/4" in diameter.
  • Re: jam chuck & d-s tape - if the interior is curved to match the exterior curve there probably won't be enough flat surface area for the tape to hold.
  • If you drill a few random small diameter holes it makes it easier to determine an even even thickness of the lid - just make sure they will be removed with your carving/piercing.
Just my 2¢ .... hope you don't mind.
 
Joined
Jul 19, 2018
Messages
1,785
Likes
2,393
Location
Ponsford, MN
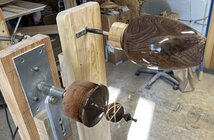
Just a thought if you have a threading jig you could cut a female thread on the cover then make a male thread on the box or on a scrap block, then finish the outside without danger of marking it or splitting it. The threaded chuck can also serve as a holder for finishing, the one shown has a 1/2" dowel that can adapt it to hold it into my rotator.IMG_0687.jpg
 

Dave Landers

Beta Tester
Joined
Dec 1, 2014
Messages
907
Likes
3,036
Location
Estes Park, CO
Website
dlwoodturning.com
My approach would be:
Hold a blank between centers and make a small tenon. Chuck it and turn the outside of the lid. Then make a scrap piece with a concave curve to match the lid shape. Flip the lid over into the scrap, center it. Me, I'd probably add about 6 dots of hot glue around the outer edge to hold it, but double-side tape would work too. Do as much of the inside of the lid as possible with live center, finish it trusting the glue or tape. Not sure if you'd drill the center hold before turning the inside or after, probably before because of how thin/fragile it would be after turning, but the concave scrap piece (if shaped right) should provide support. Denatured alcohol to soften the hot glue (or acetone/etc for tape).
Could flip this around and do the inside first, then attach to a convex (domed) scrap... basically the same process either way, just depends on which side you want to cut first.
 
Joined
Jun 6, 2018
Messages
2,090
Likes
1,084
Location
La Grange, IL
Mostly, I guess I was drilling on the lathe to keep the hole centered. It was going to be about a 3/4" to 1" hole,
Looking back at your sequence of turning, when you complete the concave underside you could bring back the tailstock with pointed live center and mark the center of the workpiece with a little dimple for aligning the drill press later.

Or you could also do as you have been, but start the drilling process with a smaller bit, say 3/16, and step up to your final diameter.
 
Joined
Jul 30, 2021
Messages
118
Likes
38
Location
Aurora, CO
Thank you all for your insights. I am rethinking my approach here. Originally, I was drilling the hole last, to make sure I could have tenons to hold the lid by while turning. I was turning the outside first, as I was worried if I turned the inside first then flipped, pressure from turning the outside might break the lid as well. I don't know why I did not think of turning a domed support out of a waste block of wood, though...as that would alleviate any such issue once I flipped. A matching domed shape piece of wood and some double sided tape or hot glue, would probably suffice to keep the piece stable and keep it from cracking while turning the outside.

I can then do what Mark recommended, bring up the tailstock, mark the true center, then use the drill press to drill the hole (which was ultimately going to be a forstner bit sized hole, larger than my largest jobber bit at 1/2"). I can probably do the same thing on the drill press...use a domed piece of wood to support the lid while I drill the hole. Although, once the piece is blued onto a waste block, I guess there is no reason I couldn't just drill on the lathe as well...
 
Back
Top